
Measure and Mark
Before you start hanging your mirror with D-rings, the first step is to measure and mark the desired location on the wall. This is crucial for ensuring that the mirror is appropriately positioned and will be level when hung. Follow these steps to accurately measure and mark the spot:
- Choose the placement: Decide where you want to hang your mirror. Consider factors such as room layout, furniture placement, and natural light sources for the best visual effect.
- Measure the mirror: Carefully measure the overall dimensions of the mirror, including its width and height. Use a tape measure or ruler, and jot down the measurements.
- Calculate the center point: With the measurements in hand, determine the center point of the mirror by dividing the width and height measurements in half. Mark this center point with a light pencil or tape.
- Mark the hanging height: Consider the height at which you want the bottom edge of the mirror to be. Measure this distance down from the desired spot on the wall and mark it.
- Position the marks: Use a level to ensure that the center point and hanging height marks are positioned correctly. Adjust if needed for perfect alignment.
- Double-check the position: Step back and visually assess the marked location. Make any adjustments if necessary to ensure the mirror will hang at the desired height and in the optimal position.
By accurately measuring and marking the hanging location, you can proceed with confidence to the next steps of attaching the D-rings and hanging your mirror securely and levelly.
Attach D-Rings to Mirror Frame
Once you have measured and marked the hanging location, the next step is to attach the D-rings to the mirror frame. D-rings are sturdy metal rings that provide a reliable anchor point for hanging the mirror. Follow these steps to securely attach the D-rings:
- Select the D-rings: Choose D-rings that are appropriate for the weight and size of your mirror. Ensure they are durable and will hold up well over time.
- Position the D-rings: Determine where you want the D-rings to be placed on the mirror frame. Ideally, they should be positioned near the top corners, allowing for even weight distribution when the mirror is hung.
- Mark the mounting holes: Place the D-rings against the frame in the desired position. Use a pencil or marker to mark the locations of the mounting holes on the frame.
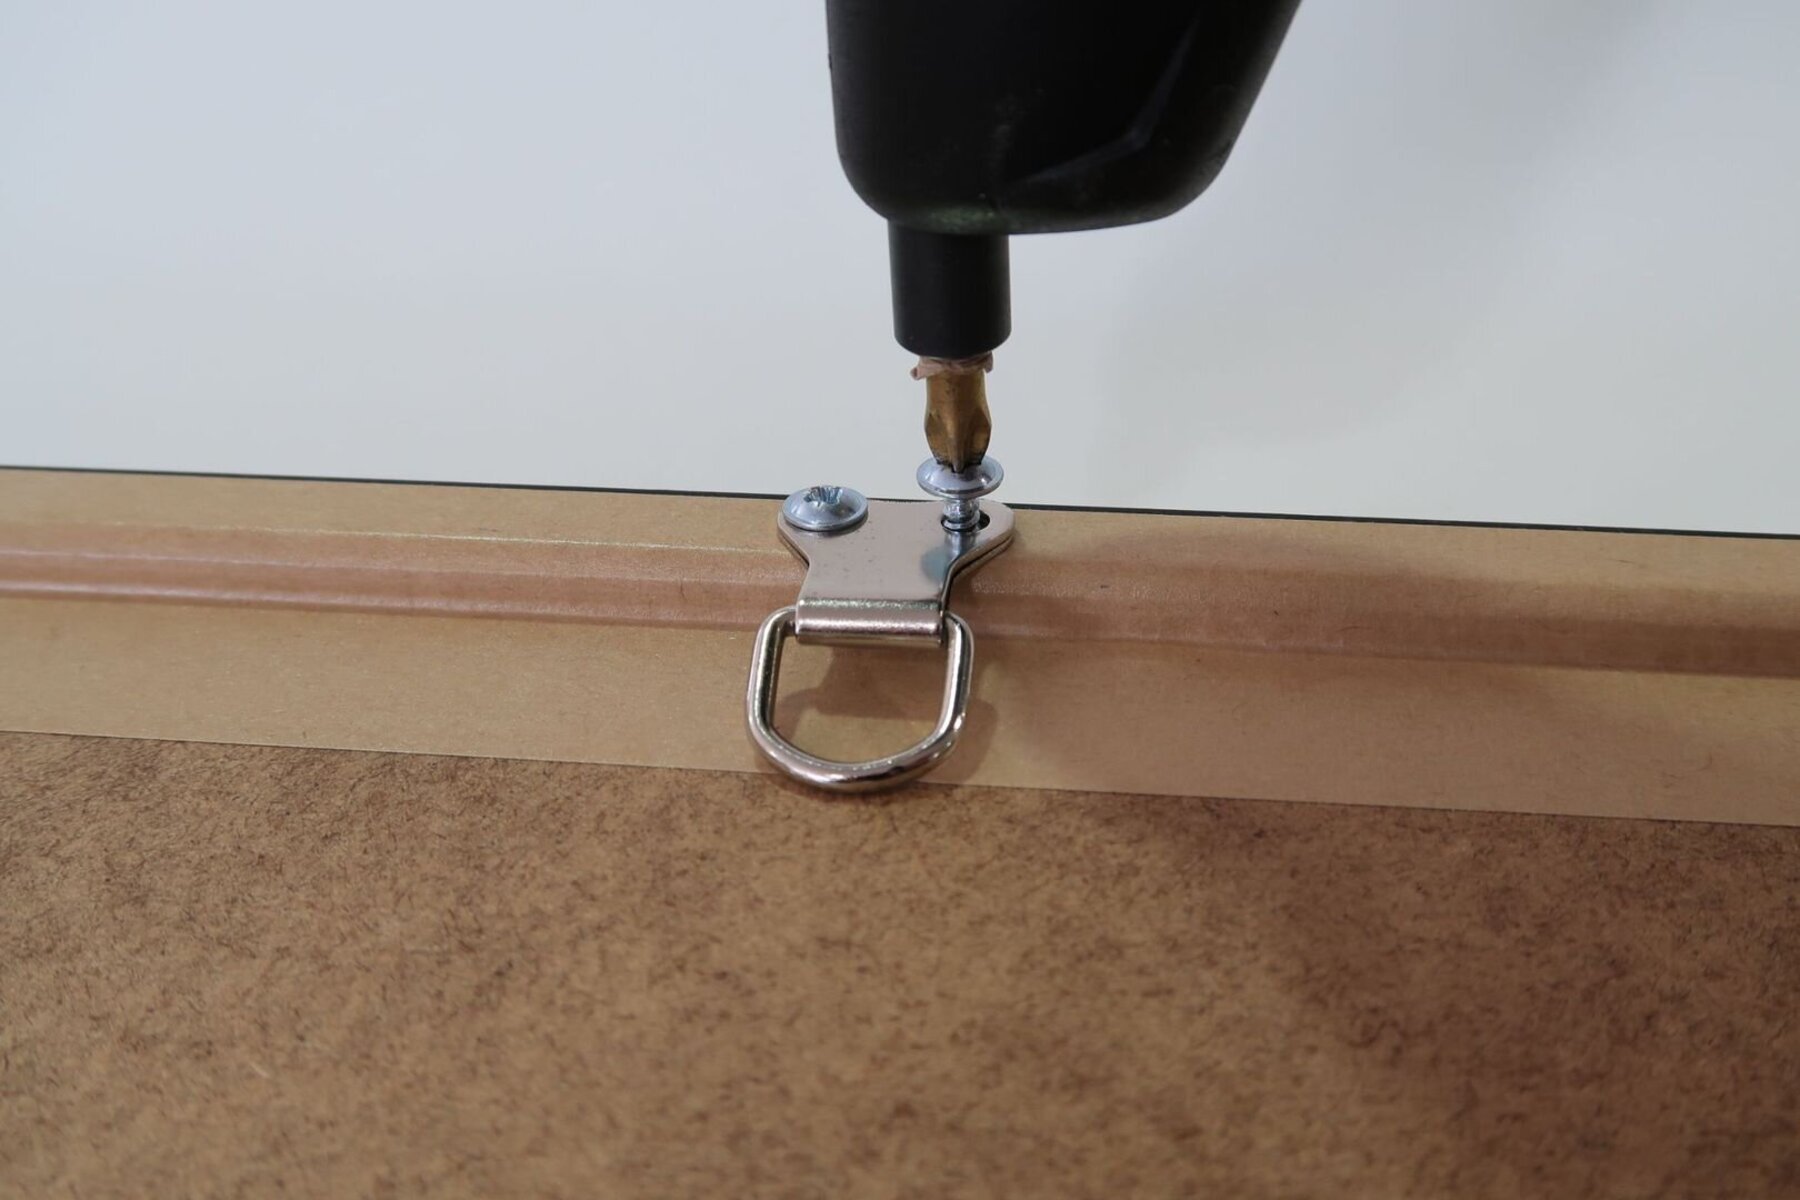
- Pre-drill pilot holes: Using an appropriate drill bit size, carefully pre-drill pilot holes on the marked spots. Take care not to drill too deep to avoid damaging the mirror or frame.
- Attach the D-rings: Align the D-rings with the pilot holes and attach them to the frame using screws or nails. Make sure they are securely fastened and flush against the frame.
- Double-check for stability: Gently tug on the D-rings to ensure they are firmly attached to the mirror frame. They should hold up without any wobbling or loosening.
Once the D-rings are properly attached, your mirror is ready for the next step of determining the hanging location on the wall.
Determine Hanging Location
After attaching the D-rings to the mirror frame, the next step is to determine the hanging location on the wall. This involves finding the most suitable spot where the mirror will be centered, level, and visually appealing. Follow these steps to determine the hanging location:
- Consider the wall space: Take a moment to assess the wall space where you plan to hang the mirror. Consider factors such as nearby furniture, artwork, and architectural features that may influence the placement.
- Eye-level placement: In most cases, hanging a mirror at eye level provides the best viewing experience. Stand in front of the wall and determine the approximate height at which you want the mirror to be placed.
- Measure the hanging height: Measure the distance from the floor to the desired hanging height. This will help ensure consistency if you have multiple mirrors or artwork in the same space.
- Mark the hanging spot: Using a pencil or painter’s tape, mark the center point of the hanging spot based on your desired height and position.
- Check for balance and symmetry: Step back and visually assess the marked hanging spot. Ensure it is centered and symmetrical in alignment with the surrounding space and any nearby objects.
- Make adjustments if necessary: If the marked hanging spot doesn’t appear visually balanced or aligned, adjust the position accordingly until you achieve the desired aesthetic appeal.
By taking the time to carefully determine the hanging location, you can ensure that your mirror will be positioned perfectly on the wall for maximum impact and functionality.
Find Studs or Use Wall Anchors
Before hanging your mirror with D-rings, it’s important to ensure that it is securely mounted to the wall. Depending on the weight of the mirror and the type of wall you have, you may need to find the studs or use wall anchors. Follow these steps to determine the best method for secure installation:
- Assess the wall type: Determine if you have a drywall or plaster wall. Drywall is common in most modern homes, while plaster is typically found in older buildings.
- Find the studs: If you have a drywall wall, use a stud finder to locate the wooden studs behind the wall surface. These provide the strongest support for hanging heavy objects.
- Mark the stud positions: Once you locate the studs, mark their positions with a pencil. This will guide you in placing the screws or nails for hanging the mirror.
- Measure in between studs: If the studs are not in an ideal location for hanging the mirror, measure the distance between them to determine if it aligns with your desired hanging spot.
- Consider wall anchors: If you cannot find studs in the right location, or if you have a plaster wall, you will need to use wall anchors. These provide additional support by distributing the weight across a larger area.
- Choose the appropriate wall anchors: Select wall anchors that are suitable for the weight of your mirror. There are various types, such as toggle bolts or plastic anchors, so choose the one that best suits your needs.
- Follow manufacturer’s instructions: Install the wall anchors according to the manufacturer’s instructions. This may involve drilling holes, inserting the anchors, and then securing them with screws.
Whether you find studs or use wall anchors, ensuring a secure installation will give you peace of mind knowing that your mirror is safely hung on the wall.
Install Hanging Wire
Installing hanging wire on your mirror is an essential step in preparing it for hanging. The hanging wire provides a stable support system and allows for easy adjustment of the mirror’s position. Follow these steps to properly install the hanging wire:
- Gather the necessary materials: You will need a sturdy and durable hanging wire suitable for the weight of your mirror, as well as two D-ring hangers that will attach to the wire.
- Measure the wire length: Measure and cut a length of hanging wire that is slightly longer than the width of the mirror. This will provide enough length for attaching it to the D-ring hangers later.
- Attach the D-ring hangers: Position the wire across the back of the mirror, about 1/3 of the way down from the top edge. Attach the D-ring hangers to the mirror frame, ensuring they are securely fastened and parallel to each other.
- Secure the wire ends: Take the ends of the hanging wire and thread them through the D-ring hangers, then twist the wire tightly around itself to secure it in place. Trim off any excess wire using wire cutters if necessary.
- Test the wire: Gently tug on the wire to check its stability and ensure it is securely fastened. It should hold the weight of the mirror without any signs of slipping or loosening.
- Adjust the wire length if needed: If the mirror hangs unevenly or doesn’t appear level, you may need to adjust the length of the hanging wire. Untwist the wire from the D-ring hangers, make the necessary adjustments, and resecure it in place.
By properly installing the hanging wire, you can ensure that your mirror will be securely supported and evenly balanced when it is hung on the wall.
Hang the Mirror
With the D-rings attached to the mirror frame and the hanging wire installed, it’s time to hang your mirror on the wall. This final step will complete the process and allow you to enjoy your mirror’s beauty and functionality. Follow these steps to hang the mirror securely:
- Position the mirror against the wall: Gently lift the mirror and position it against the wall, aligning the hanging wire with the marked hanging spot.
- Align the mirror: Use a level to ensure the mirror is straight and aligned both horizontally and vertically. Adjust if necessary to achieve the desired levelness.
- Mark the screw or nail positions: While holding the mirror in place, mark the locations of the hanging spots on the wall with a pencil or painter’s tape. This will guide you when inserting the screws or nails.
- Securely attach the fasteners: Depending on whether you found studs or used wall anchors, insert the appropriate screws or nails through the marked positions and into the wall. Make sure they are securely fastened to provide adequate support.
- Double-check the mirror’s stability: Once the mirror is hanging on the wall, give it a gentle shake to ensure it is stable. The mirror should not move or wobble excessively.
- Step back and admire: Stand back and take a moment to admire your newly hung mirror. Ensure it is level, centered, and visually appealing in its chosen location.
By following these steps, you can confidently hang your mirror with D-rings and enjoy the enhanced aesthetics and functionality it brings to your space.