
Understanding the Rear View Mirror Ball Joint
The rear view mirror ball joint is an essential component of your car’s interior, as it allows you to properly adjust and position the rear view mirror for optimal visibility while driving. The ball joint is a small mechanism that connects the rear view mirror to the windshield mount, enabling the mirror to be tilted and rotated to suit your individual viewing preferences.
Without a properly functioning ball joint, the rear view mirror may become loose, unstable, or difficult to adjust. This can greatly impair your ability to have a clear and accurate view of the road behind you, increasing the risk of accidents and hinder your overall driving experience.
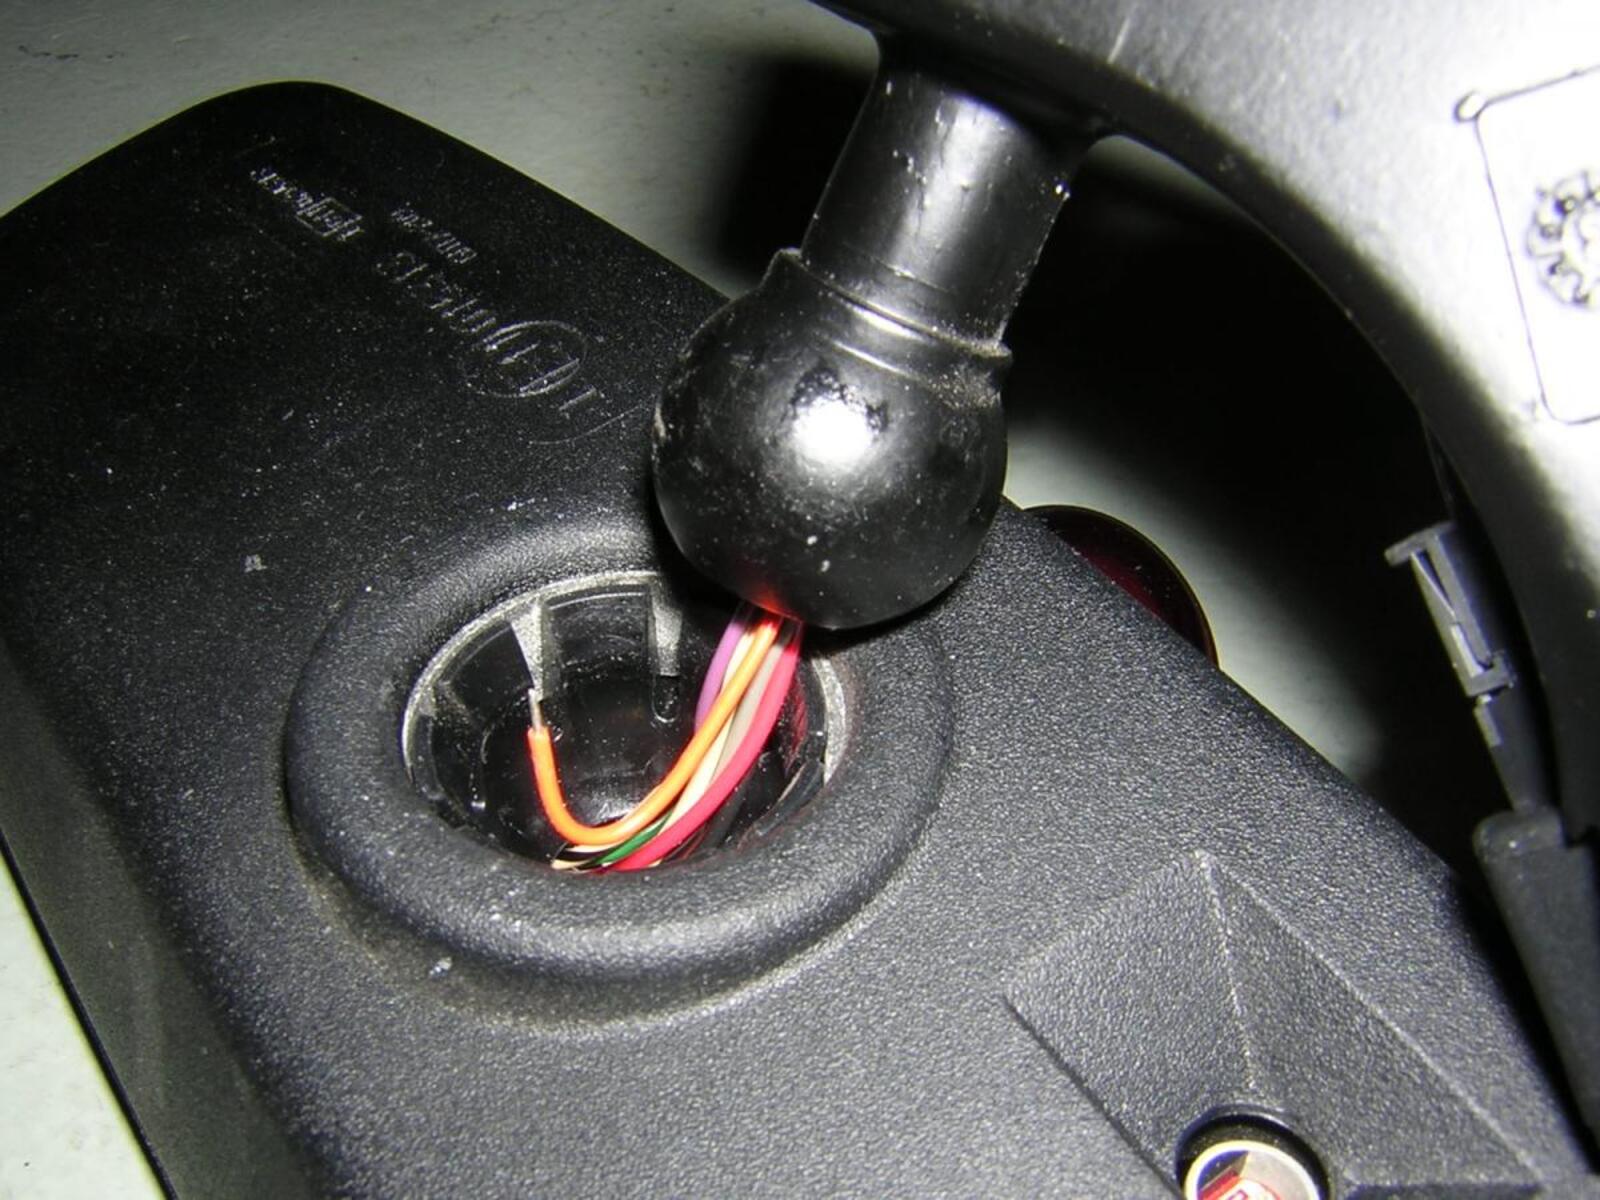
Understanding how the rear view mirror ball joint works is crucial when it comes to troubleshooting and fixing any issues that may arise. The ball joint consists of a socket and a ball stud, which allows for a wide range of movement. The socket is attached to the rear view mirror, while the ball stud is fastened to the windshield mount.
When you adjust the rear view mirror, the ball joint allows it to pivot and tilt, providing you with the ability to customize the mirror’s position. This allows you to have an unobstructed view of the road while minimizing blind spots, ensuring your safety and the safety of those around you.
Over time, the ball joint may wear out or become damaged due to continuous adjustments, exposure to sunlight and temperature changes, or general wear and tear. It is important to periodically inspect and maintain the rear view mirror ball joint to ensure its proper operation.
Next, we will discuss the tools and materials you will need to fix the rear view mirror ball joint.
Tools and Materials Required
In order to fix the rear view mirror ball joint, you will need the following tools and materials:
- Flathead screwdriver
- Torx screwdriver set
- Needle-nose pliers
- Clean cloth or microfiber towel
- Glass cleaner
- Rubber gloves
- Adhesive glue (if necessary)
The flathead screwdriver will be used to carefully remove any screws or clips holding the rear view mirror in place. The Torx screwdriver set will be needed to detach the ball joint from the windshield mount, as some vehicles may require specialized screws for this part.
Needle-nose pliers may come in handy to loosen or remove any stubborn connectors or fasteners. It’s important to use these pliers with caution to avoid damaging any fragile components of the mirror or ball joint.
A clean cloth or microfiber towel should be used to wipe and clean the mirror’s surface once it is detached. This will help ensure a clear and unobstructed view after the repair. Additionally, a quality glass cleaner can be used to remove any smudges or dirt from the mirror for optimal visibility.
Wearing rubber gloves during the repair process can help protect your hands from any sharp edges or chemicals that may be present, such as adhesive glue.
Lastly, adhesive glue may be necessary if the ball joint or any other component of the rear view mirror needs to be securely reattached. Make sure to use a high-quality adhesive specifically designed for automotive use, following the manufacturer’s instructions for best results.
With these tools and materials prepared, you’re now ready to proceed with removing the old rear view mirror ball joint.
Removing the Old Rear View Mirror Ball Joint
Before you can install a new rear view mirror ball joint, you will first need to remove the old one. Follow these steps to safely remove the old rear view mirror ball joint:
- Start by locating the screws or clips that hold the rear view mirror in place. These are typically located on the backside of the mirror or on the windshield mount. Use a flathead screwdriver to gently loosen and remove any screws or unclip the clips.
- Once the screws or clips are removed, carefully detach the rear view mirror from the windshield mount. Be mindful not to exert too much force, as this can cause damage to the mirror or other components.
- With the rear view mirror detached, inspect the ball joint and its connection to the windshield mount. Depending on the type of ball joint used, there may be Torx screws securing it in place. Use the appropriate size Torx screwdriver to remove these screws and release the ball joint.
- If the ball joint does not have visible screws, it may be held in place with a locking mechanism. In this case, use needle-nose pliers to carefully unlatch or unlock the ball joint from the windshield mount.
- Once the old ball joint is completely removed, take a moment to clean the area where the ball joint was attached. Use a clean cloth or microfiber towel and a glass cleaner to wipe away any dirt, residue, or adhesive that may have been left behind.
By following these steps, you will successfully remove the old rear view mirror ball joint. Now, it’s important to inspect and clean the area before installing the new ball joint.
Inspecting and Cleaning the Area
After removing the old rear view mirror ball joint, it is crucial to thoroughly inspect and clean the area before installing the new one. This ensures that the new ball joint will have a proper and secure attachment. Follow these steps to inspect and clean the area:
- Inspect the windshield mount for any signs of damage or wear. Look for any cracks, broken clips, or loose parts that may affect the installation of the new ball joint.
- If you notice any damage, it is important to address it before proceeding. Depending on the extent of the damage, you may need to consult a professional or consider replacing the windshield mount.
- Clean the area where the ball joint will be attached. Use a clean cloth or microfiber towel to remove any dirt, dust, or residue. Ensure that the surface is dry and free from any debris that may hinder the installation process.
- If there are any remnants of adhesive from the previous ball joint, use a suitable adhesive remover or alcohol-based solution to dissolve and remove it. Be cautious not to use any harsh chemicals that may damage the windshield or surrounding materials.
- Take the time to inspect the rear view mirror itself. Look for any damage, loose parts, or signs of wear. If necessary, clean the mirror’s surface using a glass cleaner and a lint-free cloth to ensure optimal visibility.
- Once everything has been inspected and cleaned, you can proceed with installing the new rear view mirror ball joint.
By carefully inspecting and cleaning the area, you are ensuring a proper foundation for the installation of the new ball joint. This will contribute to a secure and stable rear view mirror that allows for optimal visibility while driving.
Installing the New Rear View Mirror Ball Joint
Now that you have inspected and cleaned the area, you are ready to install the new rear view mirror ball joint. Follow these steps to ensure a successful installation:
- Position the new ball joint on the windshield mount, aligning it with the attachment point. If there are screws included with the new ball joint, insert them into the designated holes and tighten them using the appropriate Torx screwdriver.
- If the ball joint utilizes a locking mechanism, carefully position it into the attachment point on the windshield mount, ensuring a secure fit. Use needle-nose pliers if necessary to lock or latch it in place.
- With the ball joint securely attached to the windshield mount, attach the rear view mirror to the ball joint. Line up the mirror with the ball stud on the ball joint and press it firmly to connect the two.
- If the rear view mirror has screws or clips, insert them into the designated holes or attach them to secure the mirror to the ball joint. Use a flathead screwdriver to tighten any screws if needed.
- Ensure that the rear view mirror is adjusted to your desired position and offers a clear and unobstructed view of the road behind you.
If the new ball joint came with adhesive, follow the manufacturer’s instructions to apply it to the attachment points for added stability. Be sure to allow sufficient time for the adhesive to fully cure before adjusting the mirror’s position.
It is important to test the rear view mirror to ensure it is securely attached and properly adjusted. Gently tap or wiggle the mirror to check for any excessive movement or looseness. If everything appears stable, you can proceed to the next step.
With the new rear view mirror ball joint successfully installed, you can now adjust and test the mirror to ensure optimal visibility while driving.
Adjusting and Testing the Rear View Mirror
After installing the new rear view mirror ball joint, it’s time to adjust and test the mirror to ensure optimal visibility while driving. Follow these steps to properly adjust and test the rear view mirror:
- Sit in the driver’s seat and adjust your seating position to ensure a clear view of the rear view mirror and the road behind you.
- Gently adjust the mirror by tilting and rotating it to find the position that provides you with the best view. Keep in mind that the mirror should give you a wide-angle view of the road behind you while minimizing blind spots.
- Once you have found the desired position, tighten any screws or clips that secure the rear view mirror in place. Use a flathead screwdriver if necessary to ensure a tight fit.
- Take a moment to test the mirror from different angles and positions while sitting in the driver’s seat. Make sure you have a clear view of the road and any vehicles behind you.
- If needed, make further adjustments to achieve the best possible visibility. The mirror should provide a clear reflection without any distortions or obstructions.
- During the adjustment process, be aware of any driver’s side or passenger’s side blind spots that may require additional mirror adjustments or the use of auxiliary mirrors for improved visibility.
- Additionally, test the rear view mirror while driving to confirm that it remains stable and offers an unobstructed view. Pay close attention to any vibrations or movements that may indicate a loose or faulty installation.
It is essential to take the time to properly adjust and test the rear view mirror to ensure your safety and the safety of others on the road. A well-positioned and stable rear view mirror will greatly enhance your visibility while driving, contributing to a more confident and secure driving experience.
Tips for Maintaining the Rear View Mirror Ball Joint
To ensure the longevity and optimal performance of your rear view mirror ball joint, it is important to practice regular maintenance. Follow these tips to keep your rear view mirror ball joint in excellent condition:
- Inspect the ball joint and its attachment regularly for any signs of wear, damage, or looseness. Look for any cracks, rust, or excessive movement that may indicate that the ball joint needs repair or replacement.
- Keep the ball joint and the surrounding area clean from dust, dirt, and debris. Regularly wipe down the rear view mirror and the ball joint with a clean cloth or microfiber towel to ensure clear visibility and prevent any build-up that may affect the joint’s movement.
- Periodically lubricate the ball joint with a suitable lubricant to prevent it from becoming dry or stiff. Be sure to use a lubricant that is compatible with automotive applications and follow the manufacturer’s instructions for proper use.
- Avoid subjecting the rear view mirror to excessive force or impact. Slamming doors or hitting the mirror accidentally can cause damage to the ball joint and compromise its functionality.
- Be cautious when adjusting the rear view mirror. Over-tightening the screws or applying excessive force can weaken the ball joint or cause it to become loose.
- Protect the rear view mirror from prolonged exposure to direct sunlight. Extreme heat can impact the integrity of the ball joint and adhesive, leading to potential damage or failure. Consider using sunshades or parking in shaded areas whenever possible.
- If you notice any issues or abnormalities with the rear view mirror ball joint, address them promptly. Ignoring problems can lead to further damage and compromise your safety on the road.
- Refer to your vehicle’s owner’s manual for specific maintenance guidelines and recommendations for the rear view mirror and ball joint. Follow the manufacturer’s instructions for any maintenance or repair procedures to ensure proper care of the ball joint.
By following these maintenance tips, you can extend the lifespan of your rear view mirror ball joint and ensure that it functions smoothly and reliably for years to come.