
Choosing the Right Flowers
When it comes to creating a stunning floral arrangement, one of the most important aspects is choosing the right flowers. Each flower has its own unique beauty and characteristics, so it’s crucial to select blooms that complement each other and create a harmonious display. Whether you’re picking flowers from your garden or selecting them from a local florist, here are some tips to help you choose the perfect flowers for your vase.
First and foremost, consider the occasion or the purpose of the arrangement. Are you creating a centerpiece for a formal dinner or a cheerful bouquet for a casual setting? The type of occasion will determine the style and colors you should go for. For elegant arrangements, opt for classic flowers like roses, lilies, or orchids. If you’re aiming for a more rustic or relaxed look, wildflowers or sunflowers can bring a touch of charm and simplicity to your arrangement.
Next, consider the season. Different flowers bloom at different times of the year, and incorporating seasonal blooms can add a special touch to your arrangement. Spring is synonymous with tulips, daffodils, and peonies, while summer brings vibrant options like dahlias and zinnias. In autumn, you can find beautiful flowers such as chrysanthemums and sunflowers, and winter offers the elegance of amaryllis and evergreen branches.
Don’t forget to think about the size and shape of the flowers. Mixing different shapes can create a visually appealing arrangement. Choose a focal flower, such as a large rose or hydrangea, and pair it with smaller blooms like baby’s breath or daisies. This contrast in size adds depth and interest to the arrangement.
Lastly, consider the color palette. Harmonizing the colors of your flowers can create a cohesive and eye-catching display. You can achieve this by selecting flowers that are in the same color family or by using complementary colors to create contrast. Remember to take into account the color of the vase you will be using, as this can also impact the overall look of the arrangement.
Choosing the right flowers for your vase is an art in itself. By considering the occasion, season, size, shape, and color of the blooms, you can create a breathtaking floral arrangement that will brighten any space or event. Have fun experimenting with different combinations, and let your creativity blossom!
Selecting the Right Tools
When it comes to cutting flowers for a vase, having the right tools can make a significant difference in the longevity and overall appearance of your floral arrangement. Properly selected tools ensure clean cuts, minimal damage to the stems, and successful water absorption. Here are some essential tools for selecting and preparing your flowers:
1. Sharp Pruning Shears: Invest in a pair of high-quality pruning shears specifically designed for cutting flowers. Make sure they are sharp and clean to achieve clean cuts without crushing or damaging the stems. Dull blades can lead to bruising and wilting of the flowers.
2. Floral Snips: For delicate flowers with thin stems, use a pair of floral snips. These small, sharp scissors are perfect for precise and careful cutting. Floral snips are especially useful for trimming leaves and removing thorns from roses.
3. Clean Water Container: Keep a clean bucket or container filled with water nearby. This will allow you to place the cut flowers immediately in water, preventing dehydration and wilting. Choose a container large enough to accommodate both the stems and any excess foliage you may remove later.
4. Flower Frogs or Floral Foam: To hold your flowers in place and achieve a well-arranged display, consider using a flower frog or floral foam. Flower frogs are metal or ceramic devices with small spikes to hold the stems securely, while floral foam is a water-absorbing material that provides stability and hydration for your flowers.
5. Tape Measure: To ensure that your flowers are the perfect height for your vase, keep a tape measure handy. Measure the length of the stems against the height of the vase, and trim accordingly. This will help you achieve a balanced and visually pleasing arrangement.
These tools will aid you in selecting and preparing flowers for your vase, allowing you to create beautiful and long-lasting displays. Remember to clean and sanitize your tools after each use to prevent the spread of diseases or pests between plants. With the right tools at your disposal, you can easily bring the beauty of nature indoors and enjoy the vibrant colors and fragrances of freshly cut flowers.
Preparing the Vase
Preparing the vase properly is an essential step in ensuring that your flowers stay healthy and vibrant for as long as possible. Taking a few minutes to properly clean and prepare your vase will make a noticeable difference in the longevity of your floral arrangement. Here are some simple steps to follow:
1. Clean the Vase: Start by cleaning the vase thoroughly with warm soapy water. Rinse it well to remove any residue or dirt. This will help prevent the growth of bacteria and fungi that can shorten the lifespan of your flowers.
2. Add Floral Preservative: Many floral arrangements come with a small packet of floral preservative. If you have one, follow the instructions and add it to the water in the vase. Floral preservatives contain nutrients and antimicrobial agents that help extend the life of your flowers.
3. Fill with Fresh Water: Fill the vase with fresh, room temperature water. Make sure to fill it about two-thirds full to leave enough space for the stems of your flowers. Avoid using cold or hot water, as extreme temperatures can shock the flowers.
4. Remove Excess Foliage: Strip off any foliage that will be below the waterline in the vase. Leaves submerged in water can decompose and create a breeding ground for bacteria. Removing excess foliage also helps to maintain the cleanliness of the water.
5. Check for Leaks: Before placing your flowers in the vase, ensure that it is watertight. Check for any cracks or leaks that could cause water to seep out. If you notice any leaks, transfer the flowers to a different vase to prevent water damage.
By taking the time to properly prepare your vase, you are creating a clean and nutrient-rich environment for your flowers. This will help them stay fresh and beautiful for a longer period of time, allowing you to enjoy their beauty to the fullest. Don’t underestimate the importance of vase preparation in prolonging the lifespan of your floral arrangements.
Determining the Stem Length
One of the key factors in creating a visually pleasing floral arrangement is determining the proper stem length for your flowers. Cutting the stems to the appropriate length ensures that your flowers fit nicely in the vase and can absorb water effectively. Here’s how to determine the ideal stem length for your arrangement:
1. Consider the Vase Height: Take into account the height of your vase when determining the stem length. You want your flowers to be tall enough to make a statement but not so tall that they overshadow the vase. As a general rule, the stems should be about 1.5 to 2 times the height of the vase.
2. Account for Foliage: Account for any additional foliage or greenery you plan to include in your arrangement. If you’re using long-stemmed flowers, you may need to leave space for leaves or branches to cascade elegantly from the vase. Trim the stems accordingly to accommodate the foliage.
3. Consider the Arrangement Style: The style of the arrangement will also impact the stem length. For a tight and compact arrangement, trim the stems slightly shorter to create a dense cluster of flowers. If you prefer a more loose and airy look, leave the stems slightly longer for a more natural and relaxed appearance.
4. Aim for Balance: Aim for balance in your arrangement by cutting the stems at slightly different lengths. This variation will add depth and visual interest to your display. Avoid having all the stems cut at the same length, as it can make the arrangement appear flat and monotonous.
5. Test the Length: Before making the final cuts, test the stem length by placing the flowers in the vase. Adjust the length as needed until you achieve the desired look. Remember that you can always trim the stems further if needed, but you can’t make them longer once they’ve been cut.
By carefully determining the stem length for your flowers, you can create an arrangement that is aesthetically pleasing and proportionate. Take your time to experiment and find the perfect stem length that enhances the beauty of your selected flowers and complements the overall design of your arrangement.
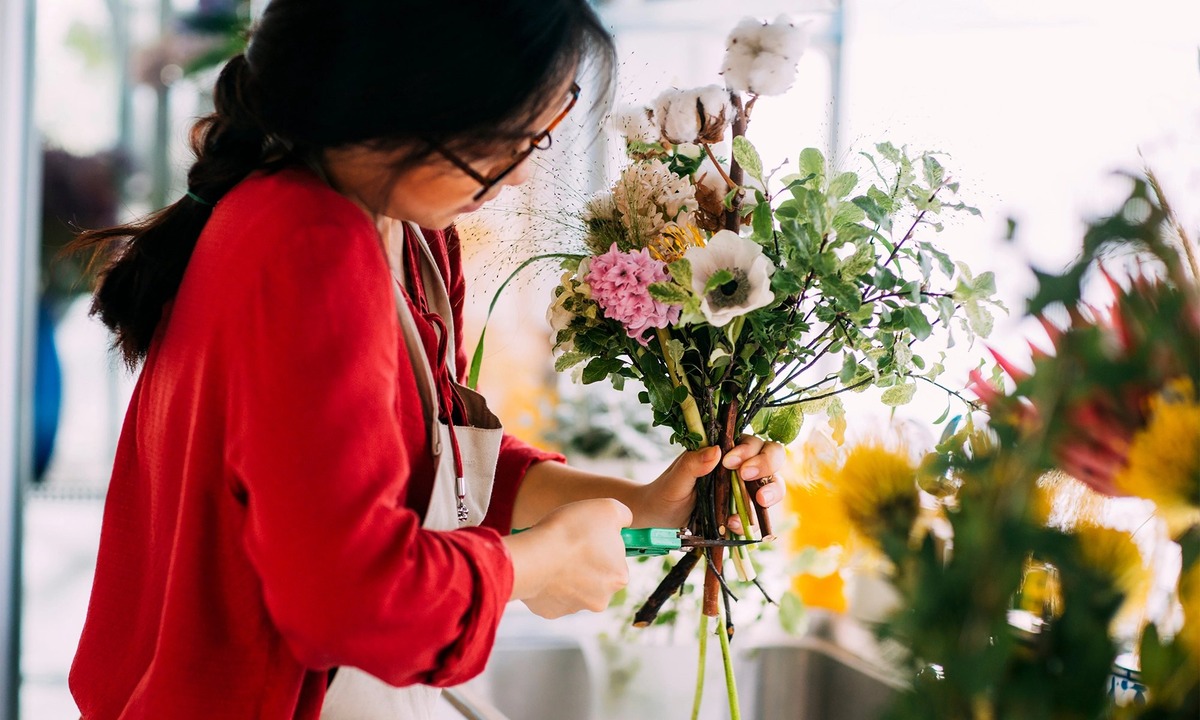
Making the Cut
Once you have determined the ideal stem length for your flowers, it’s time to make the cut. Cutting the stems properly is crucial for the overall health and longevity of your floral arrangement. Follow these steps to ensure a clean and effective cut:
1. Use Sharp, Clean Tools: Before making the cut, make sure your pruning shears or floral snips are sharp and clean. Dull blades can crush the stems, making it difficult for the flowers to absorb water. Clean tools prevent the transfer of diseases or pests between plants.
2. Cut at a 45-Degree Angle: Hold the stem securely near the bottom and make a clean cut at a 45-degree angle. A slanted cut minimizes the surface area exposed to the air, allowing for better water absorption. Cutting at an angle also prevents the stem from sitting flat at the bottom of the vase, which can hinder water flow.
3. Trim any Slanted or Crushed Ends: Inspect the stem after cutting and trim any slanted or crushed ends. A clean and straight cut ensures maximum water uptake and prevents the stem from getting blocked by the vase.
4. Cut Under Water: For certain flowers, such as roses or woody stems, it can be beneficial to cut them underwater. Fill a basin or sink with water and hold the stem underwater as you make the cut. This prevents air bubbles from entering the stem and obstructing water flow.
5. Trim Excess Foliage: Before placing the flowers in the vase, trim any excess foliage that will be below the waterline. Submerged leaves can decompose in the water, promoting bacterial growth. Removing extra foliage also keeps the water cleaner and prevents it from becoming cloudy.
Remember, making the cut is a critical step in ensuring the health and longevity of your flowers. By using sharp and clean tools, cutting at a 45-degree angle, trimming crushed or slanted ends, and removing excess foliage, you are setting your flowers up for success in their new vase environment.
Removing Extra Foliage
When preparing flowers for a vase, it’s important to remove any extra foliage that may be below the waterline. Removing excess foliage not only enhances the aesthetic appeal of your floral arrangement but also promotes better water circulation and reduces the risk of bacterial growth. Here’s how to remove extra foliage effectively:
1. Identify the Excess Foliage: Take a close look at the stems of your flowers and identify any leaves or branches that will be submerged in the water once placed in the vase. These submerged leaves can deteriorate and contaminate the water, reducing the lifespan of your blooms.
2. Trim the Leaves: Using sharp scissors or floral snips, carefully trim the excess foliage, ensuring that only the stems will be submerged in the water. Cut as close to the stem as possible without damaging it. If the leaves are particularly long, consider cutting them in half to prevent them from touching the water.
3. Remove Thorns: If you’re working with thorny flowers like roses, it’s essential to remove the thorns before placing them in the vase. Use a thorn stripper or carefully use a sharp knife to gently remove the thorns. This not only prevents injury but also allows for easier handling of the flowers.
4. Maintain Balance: While it’s important to remove excess foliage, be mindful of maintaining a balanced and visually appealing composition. Leave a few strategically placed leaves or branches on the stems to add texture and visual interest to your arrangement. Find the right balance that complements the flowers without overwhelming them.
5. Consider Using Foliage as Fillers: Instead of discarding all the trimmed foliage, consider using some of it as fillers in your arrangement. Smaller, more delicate leaves can be tucked between the flowers to add depth and create a natural-looking bouquet.
Removing extra foliage ensures that the water remains clear and clean, preventing the growth of bacteria that can harm your flowers. By carefully trimming and arranging the foliage, you can create a visually appealing and long-lasting floral arrangement that will brighten up any space.
Placing the Flowers in the Vase
Now that you have prepared your flowers and removed any excess foliage, it’s time to arrange them in the vase. Properly placing the flowers ensures a visually appealing and balanced arrangement. Follow these steps to create an eye-catching display:
1. Start with the Focal Flower: Begin by placing the focal flower or the largest bloom in the center of the vase. This flower will act as the centerpiece of your arrangement and set the tone for the rest of the flowers.
2. Create a Symmetrical Base: Build a symmetrical base around the focal flower by adding flowers of similar size and shape on either side. This provides a sturdy foundation for the rest of the arrangement and maintains balance.
3. Add Variety and Texture: Introduce different types of flowers to add variety and texture to your arrangement. Mix in blooms of different colors, shapes, and sizes. Alternate between tall and short flowers to create depth and visual interest.
4. Consider Stem Heights: Be mindful of the stem heights as you place the flowers. Cut some stems slightly shorter to create layers and dimension in the arrangement. Varying the heights adds movement and creates a dynamic display.
5. Fill in the Gaps: Fill any gaps in the arrangement with foliage, smaller flowers, or filler greens. These additional elements help create a cohesive and lush display. Tuck them strategically between the larger blooms to fill out the arrangement.
6. Step back and Assess: Step back and take a moment to assess your arrangement from different angles. Look for any imbalances or areas that need adjustment. Make any necessary tweaks until you are satisfied with the overall look.
Remember that arranging flowers is an art form, and there is no right or wrong way to do it. Allow your creativity to guide you and experiment with different combinations. The goal is to create an arrangement that brings joy and beauty into your space.
Adding Water and Preservatives
Once you have arranged your flowers in the vase, it’s crucial to provide them with the right amount of water and preservatives to ensure their longevity. Follow these steps to properly care for your flowers:
1. Fill the Vase: Fill the vase with fresh, room temperature water. Fill it to about two-thirds full, leaving enough space for the stems and future water additions. Using room temperature water helps prevent shocking the flowers and allows for better uptake.
2. Add Floral Preservatives: If you have floral preservatives, follow the manufacturer’s instructions and add them to the water in the vase. Floral preservatives contain nutrients that help nourish the flowers and inhibit bacterial growth. They can extend the life of your arrangement significantly.
3. Stir and Dissolve: Gently stir the water to help dissolve the preservatives and ensure even distribution. This will help maximize the benefits of the preservatives and ensure that all the flowers receive the necessary nutrients.
4. Check Water Levels: Monitor the water levels regularly and top up the vase as needed. Flowers can be thirsty, especially in the first few days, so maintaining proper hydration is essential. Whenever you add water, make sure it is room temperature to avoid shocking the flowers.
5. Remove Dying Flowers: As flowers wilt or die, promptly remove them from the arrangement. Decomposing flowers can release toxins into the water, affecting the health of the remaining blooms. Regularly inspect your arrangement and remove any fading flowers or foliage.
6. Change the Water: If the water becomes cloudy or develops a foul odor, it’s time to change it. Cloudy water can indicate bacterial growth, and bad odor may signal decay. Empty the vase, clean it thoroughly, and refill it with fresh water and preservatives.
Properly adding water and preservatives to your floral arrangement is vital for maintaining the beauty and freshness of the flowers. By following these steps and providing the necessary care, you can enjoy your beautiful arrangement for a longer period of time.
Displaying the Arrangement
Once you have created a stunning floral arrangement, it’s time to showcase it in a way that enhances its beauty and complements your space. Thoughtful placement and attention to detail can elevate the impact of your arrangement. Here are some tips for displaying your floral masterpiece:
1. Choose the Right Location: Consider the room and purpose of the arrangement when deciding where to display it. Place it in an area where it can be easily admired, such as a dining table, mantel, or entryway. Make sure the location provides adequate lighting and is away from direct heat sources or drafts.
2. Consider the Vase: Take into account the style and color of the vase when choosing the display location. The vase should harmonize with the surroundings and complement the flowers. A clear glass vase can work well in any setting, while a more decorative or colorful vase may be a focal point on its own.
3. Use Height and Levels: Create visual interest and depth by using varying heights and levels. Place the arrangement on a pedestal, add a stack of books, or use a decorative stand to elevate the vase. This adds dimension to the display and draws attention to the flowers.
4. Incorporate Decorative Elements: Enhance the arrangement by adding decorative elements that complement the flowers. Small votive candles, seashells, or decorative stones can be placed around the vase to create a cohesive theme or add a touch of elegance.
5. Consider the Background: Pay attention to the background against which the arrangement will be displayed. Choose a backdrop that contrasts with the colors of the flowers to make them stand out. For example, vibrant flowers can be showcased against a neutral or light-colored wall.
6. Rotate and Refresh: To ensure all sides of the arrangement are visible, periodically rotate the vase. This allows everyone to appreciate the full beauty of the flowers. Additionally, refresh the water regularly and remove any wilting blooms to maintain the freshness of the arrangement.
Displaying your floral arrangement is a chance to showcase your creativity and bring natural beauty into your surroundings. By carefully considering the location, incorporating decorative elements, and paying attention to detail, you can create a captivating display that adds charm and color to any space.
Maintaining the Freshness
After putting in the effort to create a beautiful floral arrangement, it’s important to take steps to maintain its freshness and maximize its lifespan. By implementing proper care and maintenance, you can enjoy the beauty of your flowers for as long as possible. Here are some tips for keeping your arrangement fresh:
1. Change the Water Regularly: Stagnant water can promote bacterial growth, leading to premature wilting and decay. Change the water in the vase every two to three days, or whenever it becomes cloudy or discolored. Rinse the vase thoroughly before refilling it with fresh water and preservatives.
2. Trim the Stems: Every time you change the water, trim a small portion off the bottom of each stem. This helps remove any blocked or damaged parts, allowing the flowers to absorb water more efficiently. Be sure to cut at an angle to maximize water uptake.
3. Remove Fading Blooms: As individual flowers start to wither, promptly remove them from the arrangement. Fading blooms release ethylene gas, which can accelerate the aging process of other flowers. Regularly inspect the arrangement and pluck out any wilting or discolored flowers.
4. Avoid Direct Sunlight: Display your arrangement away from direct sunlight, as it can cause the flowers to wilt more quickly. Sunlight also accelerates the growth of bacteria in the water. Instead, place the arrangement in a bright, indirect light location to prolong the freshness of the flowers.
5. Maintain a Cool Environment: Flowers tend to last longer in a cool environment. Keep your arrangement away from heating vents, appliances, or warm areas of the house. Avoid placing the flowers near drafts or air conditioning vents, as sudden temperature changes can hasten wilting.
6. Refresh the Preservatives: If you have additional floral preservative sachets, follow the instructions to refresh the water with a new packet. Floral preservatives contain essential nutrients and antimicrobial agents that can help extend the life of your flowers.
By following these maintenance tips, you can enjoy the beauty of your floral arrangement for an extended period. With proper care, your flowers will continue to brighten up your space and bring joy for as long as possible.