
Choosing the Right Lilies
When it comes to selecting lilies for a vase arrangement, there are a few key factors to consider. The right choice of lilies can greatly enhance the longevity and overall aesthetics of your floral display. Here are some important tips to keep in mind when choosing lilies:
- Variety: Lilies come in various species and varieties, each with its own unique characteristics. Popular options include Asiatic lilies, Oriental lilies, and hybrid lilies. Consider the size, color, and fragrance of the lilies you prefer.
- Condition: It is crucial to select lilies that are in optimal condition. Look for lilies with unopened buds or partially opened flowers. Avoid lilies with wilted or damaged petals, as they are more likely to perish quickly.
- Freshness: Always choose lilies that are freshly cut. Check the stems for firmness and the leaves for vibrant green coloration. Fresh lilies will have a more extended vase life and will look more visually appealing.
- Seasonality: Consider the season when choosing lilies. Some lily varieties are more readily available during specific times of the year. Opt for lily varieties that are in season to ensure availability and affordability.
- Personal Preference: Ultimately, the choice of lilies depends on your personal taste and the intended purpose for the arrangement. Consider the overall color scheme or theme of your floral arrangement to ensure that the lilies you choose complement the other flowers or decor elements.
By taking these factors into account, you can ensure that you are selecting the right lilies for your vase arrangement. Remember to handle the lilies with care once you have chosen them, as they are delicate flowers that require gentle treatment to maintain their freshness and beauty.
Preparing the Vase
Proper preparation of the vase is essential for maintaining the freshness and longevity of your lilies. Follow these steps to ensure that your vase is clean and ready for your beautiful floral arrangement:
- Cleanliness: Start by thoroughly cleaning the vase with warm water and mild dish soap. Rinse it well to remove any residue. This step is crucial, as any bacteria or dirt in the vase can lead to the premature wilting of your lilies.
- Size and Shape: Select a vase that is appropriate in size and shape for the lilies you have chosen. The vase should be tall enough to hold the lily stems entirely, allowing water to nourish them properly.
- Water Temperature: Fill the vase with lukewarm water. Lilies prefer water at room temperature to prevent shock to their delicate stems and blooms.
- Vase Solution: Optionally, you can add a commercially available flower preservative to the water. These solutions contain nutrients and antibacterial agents that help extend the life of cut flowers. Follow the instructions on the package for accurate measurements.
- Remove Excess Foliage: Carefully remove any foliage from the lower portion of the stems that would fall below the waterline in the vase. This prevents the foliage from decomposing in the water and causing bacterial growth.
- Placement: Choose a suitable location for your vase, away from direct sunlight or heat sources. Lilies prefer cool environments to ensure their freshness.
- Extra Care: If you have particularly long lily stems, you might consider placing a floral foam or a grid at the top of the vase. This helps support the stems and keeps them in place, preventing slumping or bending.
By taking the time to properly prepare your vase, you create an optimal environment for your lilies to thrive. Cleanliness and appropriate water temperature play a significant role in extending the life of your floral arrangement, allowing you to enjoy the beauty of your lilies for longer.
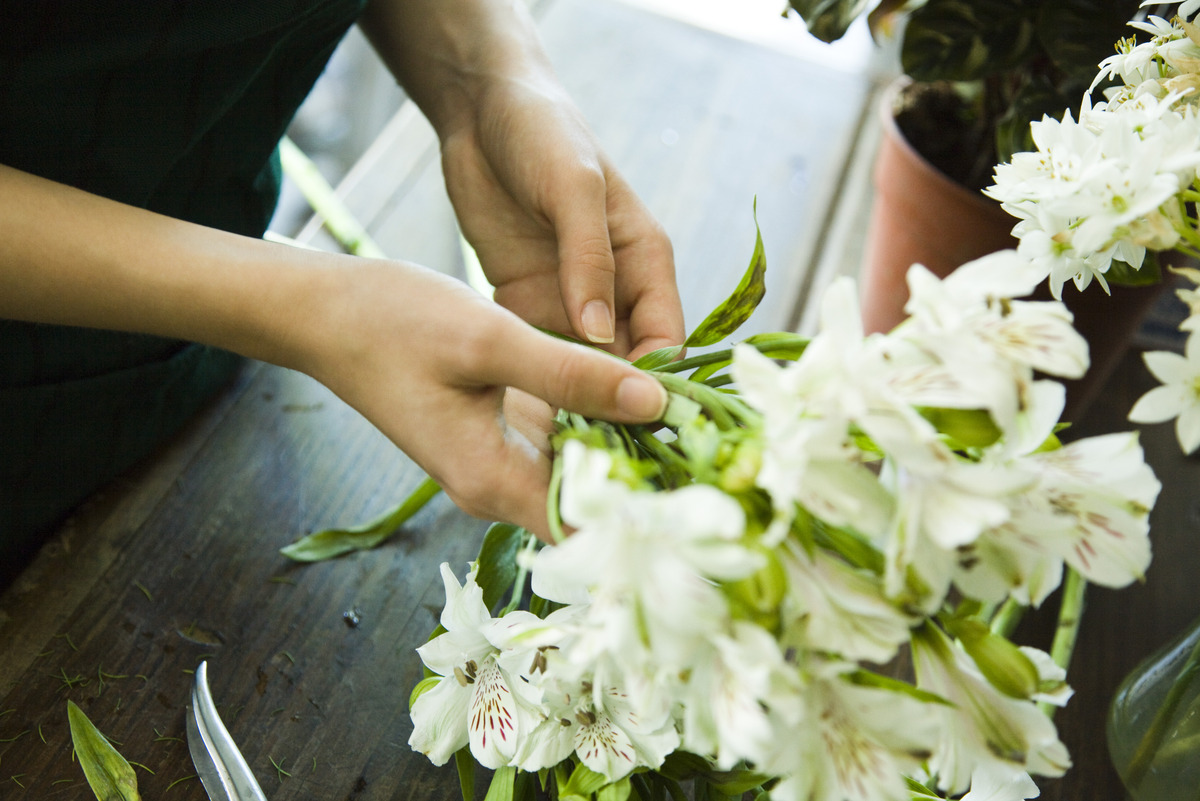
Trimming the Stems
Trimming the stems of your lilies is an important step to ensure their proper hydration and longevity. Follow these guidelines to trim the stems correctly:
- Tools: Start by gathering a pair of sharp, clean scissors or garden shears. Blunt or dirty tools can crush or introduce bacteria to the stems, which can hinder water uptake.
- Angle of Cut: Hold the lily stem under running water and make a diagonal cut. The angle of the cut provides a larger surface area for water absorption, allowing the lilies to drink in more water and nutrients.
- Length: Trim the stem at a length that suits your vase. Ideally, cut the stem at an angle so that it is approximately one to two inches shorter than the height of the vase. This ensures that the lilies are submerged in water without any leaves touching the water, which can lead to bacterial growth.
- Remove Extra Foliage: Strip off any foliage that would fall below the waterline. Leaves or buds submerged in water can promote bacterial growth and shorten the lifespan of your lilies.
- Timing: Trim the stems of your lilies just before placing them in the vase. Cutting the stems too far in advance can cause the ends to dry out, making it harder for the lilies to absorb water effectively.
- Re-trim if Needed: If your lilies start to droop or show signs of dehydration after a few days, it’s worth re-trimming the stems. Repeat the above steps to refresh the stem ends and promote better water uptake.
By carefully trimming the stems of your lilies, you provide them with a fresh start in the vase. This allows them to take in water more efficiently, keeping them hydrated and vibrant for an extended period.
Watering the Lilies
Proper watering is crucial to maintain the freshness and vitality of your lilies. Follow these guidelines to ensure that your lilies receive adequate hydration:
- Water Level: Check the water level in the vase daily and replenish it as needed. Lilies have a high water intake and can quickly deplete the water in the vase.
- Water Quality: Use clean, fresh water when watering your lilies. Avoid using water that has been heavily treated with chemicals like chlorine, as it can be detrimental to the flowers’ health.
- Temperature: Maintain the water at room temperature. Avoid using cold water, as it can shock the lilies and hinder their ability to absorb water.
- Top-Up Water: When adding water to the vase, do not pour it directly onto the lily blooms or foliage. Pour the water into the vase gently to prevent damaging the delicate petals.
- Avoid Overwatering: While it’s important to keep the vase watered, be cautious not to overfill the vase. Overwatering can lead to the stems becoming waterlogged, resulting in wilting and rotting lilies.
- Monitor Water Quality: Regularly check the water for any signs of contamination or bacterial growth. If the water becomes cloudy or emits an unpleasant odor, it’s time to change it and provide fresh water for your lilies.
- Remove Faded Flowers: As lilies bloom and fade, promptly remove any wilted or faded flowers. This prevents them from decomposing in the water and affecting the health of the remaining blooms.
By diligently monitoring and maintaining proper watering practices, you can ensure that your lilies remain hydrated and vibrant for an extended period. Providing them with the right amount and quality of water is essential for promoting their longevity and visual appeal.
Adding Flower Food
Adding flower food to your vase can significantly enhance the lifespan and beauty of your lilies. Flower food contains essential nutrients and additives that nourish the flowers and help prevent bacterial growth. Follow these guidelines when using flower food:
- Follow Package Instructions: Read the instructions on the flower food package carefully. Different brands may have varying instructions, so it’s important to use the recommended amount for optimal effectiveness.
- Dissolve Properly: Most flower food comes in powder or liquid form. Make sure to dissolve the powder or mix the liquid thoroughly in lukewarm water before adding the lilies to the vase. This ensures that the flower food is evenly distributed.
- Measure Accurately: Use the appropriate measurements as instructed on the package. Adding too little or too much flower food can potentially harm the lilies and impact their vase life.
- Replace Water and Food: If you notice the water becoming cloudy or the flower food losing its potency, it’s time to change the water and add fresh flower food. This will provide the lilies with a continuous supply of nutrients and keep the water clean.
- Alternative Options: If you don’t have access to commercial flower food, you can create a DIY solution. A homemade flower preservative can consist of water, sugar, and a few drops of bleach. However, be cautious with homemade mixtures, as incorrect ratios can be harmful to the flowers.
- Monitor Effectiveness: Observe how the lilies respond to the flower food. If you notice that the lilies are flourishing and staying fresh for an extended period, it indicates that the flower food is working effectively. If not, consider changing the brand or adjusting the measurements for better results.
Adding flower food to your vase can greatly enhance the health and longevity of your lilies. The nutrients and additives in the flower food help nourish the flowers and create an environment that is unfavorable for bacterial growth. By following the instructions and monitoring the effectiveness, you can ensure that your lilies thrive in their vase arrangement.
Placement and Lighting
The placement and lighting of your lilies can have a significant impact on their growth and longevity. Proper placement ensures that they receive the right amount of light and remain in an optimal environment. Consider these guidelines when positioning your lily vase:
- Indirect Light: Lilies generally prefer bright, indirect light. Place your vase in a location where the lilies are exposed to natural light, but keep them away from direct sunlight. Direct sunlight can cause the flowers to wilt and fade quickly.
- Avoid Heat Sources: Keep your lilies away from sources of heat, such as radiators or heating vents. High temperatures can cause the flowers to dehydrate and deteriorate faster. Find a spot in the room with a moderate, consistent temperature.
- Away from Drafts: Protect your lilies from drafts or strong air currents. Drafts can cause the lily blooms to dry out and can also lead to wilting. Keep them away from open windows, fans, or air-conditioning vents.
- Avoid Ethylene Sources: Lilies are sensitive to ethylene gas, which is naturally released by some fruits, such as bananas and apples. Keep your vase away from areas with ripening fruits or any other sources of ethylene, as it can cause the flowers to age prematurely.
- Stable Surface: Choose a stable surface for your vase to prevent accidental tipping or toppling. Placing it on a sturdy table or countertop ensures that the lilies remain secure and undisturbed.
- Visibility: Finally, consider the visibility of your lilies. Place them in an area where you and your guests can enjoy their beauty. A well-positioned floral arrangement can uplift the atmosphere of a room and add a touch of elegance.
By ensuring proper placement and lighting for your lilies, you can help them thrive and maintain their visual appeal. Determining the ideal location helps prevent wilting, fading, and other negative effects caused by excessive light, heat, drafts, or ethylene gas. Find the perfect spot where your lilies can shine and be admired.
Removing Faded Flowers
Regularly removing faded flowers from your lily vase is an essential task to maintain the overall appearance and health of the arrangement. Removing faded flowers helps redirect the plant’s energy towards newer blossoms and prevents the accumulation of wilted or decaying matter. Follow these steps to effectively remove faded flowers:
- Inspect the Arrangement: Regularly examine your lilies to identify any flowers that have started to fade or wilt. Look for blooms with drooping petals, browned edges, or signs of decay.
- Locate the Stem Base: Follow the stem down to its base, just above where it connects with the main stem or leaf. This is the point where you will make the cut to remove the faded flower.
- Hold the Stem: Gently hold the stem of the faded flower that you wish to remove with one hand. Be careful not to squeeze or damage the neighboring healthy blooms or buds.
- Make the Cut: Use sharp, clean scissors or gardening shears to make a clean diagonal cut just above the stem base. Aim to remove the faded flower completely, ensuring no part remains attached.
- Dispose of the Faded Flower: Place the removed faded flower in a compost bin or discard it in a proper manner. Avoid leaving it in the vase or around the arrangement, as decaying flowers can release bacteria and affect the remaining healthy blooms.
- Inspect Again: After removing the faded flower, inspect the arrangement once more to ensure you haven’t missed any other flowers that may be past their prime.
- Keep the Arrangement Clean: Regularly remove any fallen petals or debris from the vase to maintain a clean environment. This helps prevent the buildup of bacteria and prolongs the freshness of the remaining flowers.
By diligently removing faded flowers, you promote a neat and visually appealing lily arrangement. This process encourages the growth of new buds and maintains the overall health and longevity of the remaining blooms. With proper care and regular maintenance, your lilies will continue to impress with their vibrant colors and graceful appearance.
Changing the Water
Regularly changing the water in your lily vase is crucial for maintaining the freshness and health of the flowers. Over time, the water can become contaminated with bacteria, which can shorten the lifespan of your lilies. Follow these steps to effectively change the water in your vase:
- Frequency: Aim to change the water in your lily vase every two to three days. Fresh water provides the lilies with clean nourishment and helps prevent the growth of bacteria.
- Prepare Fresh Water: Start by filling a clean container with lukewarm water. If desired, add a new batch of flower preservative based on the instructions provided on the package.
- Remove the Lilies: Carefully remove the lilies from the current vase, taking care not to damage the stems or petals. Place the lilies in a separate container filled with fresh water.
- Clean the Vase: Empty the old water from the vase and rinse it thoroughly with warm water. Use mild dish soap and a brush if necessary to remove any residue or bacterial buildup. Rinse the vase again to ensure it is clean and free of soap.
- Add Fresh Water: Refill the vase with the prepared fresh water. Ensure that the water level is suitable for the length of the lily stems, allowing them to drink and stay hydrated.
- Place the Lilies Back: Carefully transfer the lilies from the separate container back into the vase with fresh water. Arrange them as desired for an aesthetically pleasing display.
- Dispose of Old Water: Dispose of the old water in a proper manner. Do not pour it down the drain, as it may contain harmful bacteria. Consider using it to water your plants or as a natural fertilizer for your garden.
By regularly changing the water in your lily vase, you provide your flowers with fresh hydration and prevent the growth of bacteria. This simple maintenance task prolongs the life and beauty of your lilies, allowing you to enjoy their splendor for a longer period of time.
Dealing with Droopy Lilies
Droopy lilies can happen due to various reasons, but fortunately, there are steps you can take to revive them and restore their grace and vitality. Here’s how to deal with droopy lilies:
- Rehydration: The first step in reviving droopy lilies is to provide them with proper hydration. Remove the lilies from the vase and place the stems in a container filled with lukewarm water. Allow them to soak for a couple of hours or overnight, giving the stems a chance to absorb the water they need.
- Stem Trim: Trim the stems of the droopy lilies at a 45-degree angle using clean, sharp scissors or garden shears. Cutting the stems exposes fresh tissue, allowing for better water uptake. Remove any leaves that would be submerged in the water, as they can promote bacterial growth.
- Vase Change: Change the water in the vase, ensuring it is clean and filled with fresh, lukewarm water. Clean the vase thoroughly to remove any bacteria or debris that may have contributed to the lilies’ drooping condition.
- Placement: Find a suitable location for the lilies where they can receive indirect light and moderate room temperature. Avoid placing them near drafts, direct sunlight, or heat sources, as these factors can cause lilies to wilt.
- Support: If the lilies are still drooping, you can provide support to help them stand upright. Insert a floral frog or grid into the vase to provide stability and support for the stems. This will prevent them from slumping and bending.
- Misting: Mist the lily blooms and foliage with a light spray of water to increase humidity around the flowers. This can help rejuvenate them and promote hydration.
- Preservation: If all else fails and the lilies continue to droop, you can try preserving the beauty of the wilting blooms by gently removing them from the arrangement and pressing them between the pages of a heavy book. This allows you to enjoy the lilies in a different form, such as dried petals for use in crafts or art projects.
By following these steps, you can often revive droopy lilies and restore their natural elegance and charm. However, it’s important to note that not all lilies may recover fully, as the condition of the flowers may have already deteriorated beyond repair. With proper care and intervention, you can increase the chances of reviving droopy lilies and enjoy their beauty for an extended period.
Preventing Bacterial Growth
Preventing bacterial growth is essential for maintaining the health and longevity of your lilies. Bacteria can quickly multiply in the water and affect the overall condition of the flowers. Here are some effective measures to prevent bacterial growth:
- Cleanliness: Start by ensuring that all containers, vases, and tools used for your lilies are clean. Wash them thoroughly with warm water and mild soap before every use. This removes potential sources of bacteria and keeps the environment hygienic.
- Water Quality: Use clean, fresh water when filling the vase. Tap water is generally safe, but you may consider using filtered or distilled water to further reduce the presence of impurities and potential bacteria.
- Remove Foliage: Any foliage that would fall below the waterline should be removed. Submerged leaves can decompose, creating an ideal environment for bacterial growth. Only keep leaves that stay above the water surface.
- Change Water Regularly: Regularly change the water in the vase every two to three days, even if it appears clear. This prevents any bacterial buildup and provides fresh hydration for the lilies.
- Clean Vase: Before refilling the vase with fresh water, clean it thoroughly to remove any bacteria or debris. Use mild dish soap and a brush to scrub the inside surface, rinse it well, and sanitize it if necessary.
- Avoid Fruits and Ethylene: Keep your lilies away from ripening fruits and ethylene-producing substances. Ethylene can accelerate the aging process of flowers and make them more susceptible to bacterial infections.
- Trim Stems: Trim the stems of your lilies regularly. Use clean cutting tools to make diagonal cuts, which expose fresh tissue for better water absorption. This reduces the chances of bacteria entering the stems and affecting the flowers.
- Flower Preservative: Consider using commercially available flower preservatives. These products contain antibacterial agents that can help slow down bacterial growth and extend the life of your lilies. Follow the instructions on the package for proper usage.
- Maintain Proper Hydration: Ensure that the water level in the vase is sufficient to keep the stems submerged but not too high that leaves and other foliage are in the water. This helps prevent bacterial contamination.
- Monitor and Address: Regularly inspect your lilies for any signs of bacterial infection, such as slimy stems or foul odors. If you notice any issues, remove the affected flowers promptly, change the water, and sanitize the vase.
By following these preventative measures, you can significantly reduce the risk of bacterial growth and keep your lilies healthy for a longer period. A clean and hygienic environment, along with proper water care, will help maintain the freshness and beauty of your floral arrangement.
Removing Pollen Stains
Dealing with pollen stains can be a challenging task, but with the right techniques, you can effectively remove them without causing further damage to your lilies. Here’s how to remove pollen stains from your lilies:
- Avoid Touching: If you notice pollen on your lilies, avoid touching it directly. Touching the pollen can cause it to spread and further stain the petals.
- Blow or Brush Away: Gently blow on the lily blooms or use a clean, soft brush to remove loose pollen. Be careful not to brush it deeper into the petals.
- Tape or Lint Roller: Use a small piece of clear tape or a lint roller to gently press against the pollen. This will help lift the pollen off the petals without smudging or spreading it.
- Avoid Water: It’s important to avoid using water directly on the pollen stain. Water can cause the pollen to set deeper into the petals and make it harder to remove.
- Use Sticky Tape: If the pollen stain has settled on the petals, try using sticky tape to gently lift the pollen from the surface. Press the sticky side of the tape against the stain and carefully peel it off.
- Freezing Method: If the pollen stain persists, you can try gently freezing the affected area. Place the lily in a plastic bag and put it in the freezer for a few minutes. Once frozen, carefully scrape off the frozen pollen with a dull knife or credit card.
- Blotting: For stubborn stains, you can try using a clean, colorless cloth to gently blot the stain. Avoid rubbing the stain, as it can cause the pollen to spread and make the stain worse.
- Commercial Stain Removers: If none of the above methods work, you can try using a commercial stain remover suitable for delicate fabrics. Before using any product, test it on a small, inconspicuous area of the lily to ensure it doesn’t cause discoloration or damage.
- Professional Cleaning: If the stain remains persistent or if you are uncomfortable attempting to remove it, consider seeking professional cleaning services that specialize in treating delicate fabrics or flower stains.
When attempting to remove pollen stains from your lilies, always exercise caution and handle the flowers gently. It’s important to take immediate action to prevent the stain from setting or spreading. By using these methods, you can effectively remove pollen stains and restore the beauty of your lilies.
Preserving Cut Lilies
If you want to prolong the beauty of your cut lilies and enjoy them for as long as possible, here are some effective methods to preserve them:
- Water Quality: Use clean, fresh water when initially arranging your lilies. Replace the water every two to three days or as soon as it becomes cloudy or smelly.
- Stem Trimming: Trim the stems of your lilies regularly, about half an inch every few days. Make sure to cut them at an angle to allow for better water absorption.
- Remove Foliage: Remove any leaves or foliage that would be submerged in the water. Submerged foliage decomposes and promotes bacterial growth, which can shorten the lifespan of your lilies.
- Flower Preservative: Add a commercial flower preservative to the water in your vase. These additives contain nutrients, antibacterial agents, and pH balancers that help extend the life of cut flowers.
- Cool Environment: Place your lilies in a cool location away from direct sunlight and heat sources. High temperatures can cause the flowers to wilt and fade more quickly.
- Avoid Drafts: Protect your lilies from drafts or strong air currents. Drafts can dehydrate the flowers and cause them to wilt prematurely. Keep them away from open windows, fans, or air vents.
- Regular Maintenance: Inspect your lilies daily and remove any wilted or fading blooms. This prevents the flowers from releasing ethylene, a gas that accelerates the aging process.
- Rehydrate Wilting Lilies: If your lilies start to wilt, remove them from the vase, trim the stems, and place them in a clean container with fresh water. Allow them to rehydrate for several hours or overnight before returning them to the arrangement.
- Display Care: Avoid placing your lily arrangement near ripening fruits, as they release ethylene gas that can cause premature aging. Also, keep them away from areas with excessive humidity, as it can encourage bacterial growth.
- Bouquet Refresh: When your lilies start to fade, you can refresh the bouquet by removing the fading flowers and rearranging the remaining blooms in a smaller container. This allows you to continue enjoying the beauty of your lilies even as some of the flowers reach the end of their lifespan.
By following these preservation techniques, you can significantly extend the life of your cut lilies and savor their elegance and fragrance for an extended period. With care, attention, and a little maintenance, your lily arrangement will be a beautiful focal point in your home or office.