##
What is Kodi?
Kodi is an open-source media center software that allows you to organize and stream your favorite media content on various devices. It was initially developed for the Xbox gaming console but has since evolved to be compatible with different operating systems, including Windows, Mac OS, Linux, Android, and iOS. With Kodi, you can easily access your own media library, as well as online content from a wide range of sources, such as movies, TV shows, music, photos, and more.
One of the key features of Kodi is its customizable interface, which allows you to personalize your media center to suit your own preferences. You can choose different skins, customize menus, and arrange widgets to create a unique and user-friendly experience. Kodi also supports various remote control options, making it easy to navigate and control your media from the comfort of your couch. Whether you’re using a smartphone, tablet, or dedicated Kodi remote, you can easily browse and play your desired content.
Another advantage of Kodi is its vast community of developers and enthusiasts who create add-ons. Add-ons are like plugins that extend the functionality of Kodi, providing additional features and access to a wide variety of content. These add-ons can be installed directly within Kodi and give you access to popular streaming services, live TV channels, sports events, and much more. With the right add-ons, you can turn Kodi into a powerful and versatile media center that caters to all your entertainment needs.
It’s important to note that Kodi itself does not host or provide any content. Rather, it acts as a platform to manage and play media from different sources. This ensures that you have complete control over the content you choose to add to Kodi. You can organize your existing media files on your device or add online sources such as streaming websites or network-attached storage devices. Kodi supports a wide range of file formats and allows you to create playlists, mark favorites, and even sync your media across multiple devices.
In summary, Kodi is a powerful and versatile media center software that allows you to organize and stream your favorite media content. With its customizable interface, extensive library of add-ons, and support for various devices, Kodi provides a seamless and immersive entertainment experience. So, whether you’re a movie buff, TV show enthusiast, or music lover, Kodi is a must-have tool to enhance your media consumption.##
Setting up Kodi
Setting up Kodi is a straightforward process that can be done on a variety of devices. Here’s a step-by-step guide to help you get started:
-
Choose the device: First, decide on the device on which you want to install Kodi. It can be a computer, smartphone, tablet, or even a smart TV. Kodi is compatible with a wide range of operating systems, so make sure your device meets the requirements.
-
Download Kodi: Visit the official Kodi website at kodi.tv/download and download the appropriate installer for your device’s operating system. Follow the on-screen instructions to complete the installation process.
-
Configure Kodi: Once Kodi is installed, launch the application and go through the initial setup wizard. This will help you configure basic settings, such as language preferences and network connections. You can also choose to enable or disable certain features according to your preferences.
-
Customize the interface: Kodi offers a wide range of customization options to personalize the user interface. You can change the skin, customize the menus, add widgets, and more. Explore the settings menu to fine-tune Kodi to your liking.
-
Organize your media library: Before you start streaming content on Kodi, it’s essential to organize your media library. This includes adding your own media files, such as movies, TV shows, music, and photos. You can either store the files locally on your device or set up a network-attached storage (NAS) device to access media from multiple locations.
-
Install add-ons: To make the most of Kodi, you’ll want to install add-ons that provide access to online content. These add-ons can be found in the official Kodi repository or from third-party sources. Choose add-ons that suit your interests, such as streaming services, live TV channels, sports, podcasts, and more.
Once you have completed these steps, you are all set to start enjoying the vast world of media available through Kodi. Whether you want to watch movies, catch up on TV shows, listen to music, or explore online content, Kodi offers a user-friendly platform to do it all.
##
Installing the required add-ons
To maximize your Kodi experience and access a wide range of content, it’s essential to install the required add-ons. Here’s a step-by-step guide on how to install add-ons on Kodi:
-
Open Kodi: Launch the Kodi application on your device.
-
Navigate to the add-ons menu: In the Kodi home screen, click on the “Add-ons” tab, usually located in the left-hand menu.
-
Select the package installer: Look for the package installer icon or the “Download” icon in the top-left corner of the add-ons menu.
-
Choose install from repository: Select “Install from repository” to access the official Kodi add-on repository or choose “Install from zip file” if you have a specific add-on file to install.
-
Explore the add-on categories: The add-ons are usually categorized for easy navigation. You can choose from categories like “Video add-ons,” “Music add-ons,” “Program add-ons,” and more.
-
Select the desired add-on: Browse through the available add-ons within the category you prefer. You can use the search function or manually scroll through the list to find the add-on you want to install.
-
Install the add-on: Once you have chosen an add-on, open its information page by clicking on it. On this page, you will find an option to “Install” or “Enable.” Click on the appropriate button to start the installation process.
-
Wait for the installation to complete: Kodi will download and install the selected add-on. The progress will be displayed on the screen. Once the installation is complete, you will receive a notification.
-
Access the installed add-on: After the installation, you can access the add-on from the main add-ons menu or through the appropriate category page. Simply click on the add-on’s icon to launch it.
-
Update and manage add-ons: It’s important to keep your add-ons up to date to ensure optimum performance and access to the latest content. Some add-ons automatically update, while others require manual updates. You can manage and update your add-ons by going to the “My add-ons” section within the add-ons menu.
By following these steps, you can easily install the required add-ons on Kodi and expand your media options. Remember to choose reputable add-ons from trusted sources to ensure a safe and reliable streaming experience.
##
Selecting the right add-on for Split
To watch the movie “Split” on Kodi, you need to select the right add-on that offers access to a reliable source for streaming the movie. Here are some steps to help you find the right add-on for “Split”:
-
Research popular add-ons: Start by researching popular add-ons that provide access to a wide range of movies. Look for add-ons that have a good reputation and positive user reviews. Some popular add-ons for movie streaming include Exodus, Covenant, and Neptune Rising.
-
Check for available sources: Once you have identified potential add-ons, check if they have the necessary sources for streaming “Split.” Some add-ons may provide multiple sources to choose from, while others may have limited options. Having multiple sources increases the chances of finding a high-quality stream.
-
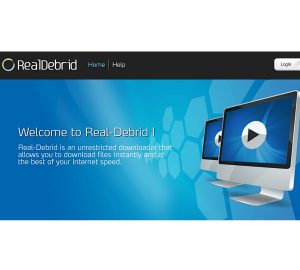
Consider real-debrid integration: Real-debrid is a premium service that improves the streaming experience on Kodi by providing access to high-quality and buffer-free streams. Some add-ons support real-debrid integration, which can enhance your movie-watching experience, including “Split.”
-
Check for cached torrents: Cached torrents are pre-downloaded and stored on cloud servers, enabling faster streaming of movies. Add-ons like Seren and Gaia support cached torrents and can offer reliable streams for movies like “Split.” These add-ons often require additional setup and configuration.
-
Explore specialized movie add-ons: There are add-ons specifically designed for movie enthusiasts that offer a wide range of movies, including “Split.” Look for popular movie add-ons like FilmRise, Popcornflix, and Tubi TV. These add-ons typically have a vast movie library and are dedicated to providing a seamless movie streaming experience.
-
Consider trakt.tv integration: Trakt.tv is a service that allows you to sync your watchlist and favorites across multiple devices. Some add-ons support trakt.tv integration, making it easier to keep track of movies you want to watch, including “Split.” This feature enhances your personalization and convenience.
-
Read user reviews and forums: Before finalizing your add-on selection, consider reading user reviews and forums to gather more information. Look for feedback on streaming quality, reliability, and availability of “Split” within the add-on. This can help you make an informed decision.
By following these steps and considering the factors mentioned, you can select the right add-on on Kodi to watch the movie “Split.” Remember, it’s important to use reputable add-ons and ensure compliance with copyright laws when streaming content.
##
Searching for Split on Kodi add-ons
Once you have installed the appropriate add-ons on Kodi, you can easily search for and stream the movie “Split.” Here’s how you can search for “Split” using Kodi add-ons:
-
Launch Kodi: Open the Kodi application on your device.
-
Navigate to the add-ons menu: Click on the “Add-ons” tab in the Kodi home screen. This will take you to the add-ons menu.
-
Select the desired add-on: Choose the add-on you have installed from which you want to search for “Split.” The add-on can be a popular movie add-on, a streaming service add-on, or any other add-on that offers movies.
-
Open the add-on: Click on the add-on’s icon to launch it. This will take you to the main interface of the add-on.
-
Access the search function: Look for the search box or magnifying glass icon within the add-on’s interface. This is usually located at the top or in a separate menu.
-
Enter the search term “Split”: Using the on-screen keyboard or your device’s remote or keyboard, enter the title “Split” in the search box.
-
Initiate the search: Once you have entered the search term, select the search or enter button to initiate the search process. The add-on will start searching for “Split” within its available sources.
-
Browse the search results: The add-on will display the search results related to “Split.” Look for the specific movie titled “Split” in the search results. You may see different versions or sources of the movie.
-
Select and play the desired source: Once you have found the movie “Split” in the search results, select it to access the available sources. Choose the source that best fits your preferences, taking into account quality, resolution, and availability.
-
Start streaming “Split”: After selecting the desired source, the movie “Split” will start streaming on your device. Depending on your internet connection and the selected source, it may take a few moments to buffer before playback begins.
By following these steps, you can easily search for and stream the movie “Split” using Kodi add-ons. Enjoy watching the movie and immerse yourself in the world of entertainment that Kodi offers!
##
Adding a video source to Kodi
Adding a video source to Kodi allows you to easily access your own media files, including movies, TV shows, and other video content. Here’s a step-by-step guide on how to add a video source to Kodi:
-
Launch Kodi: Open the Kodi application on your device.
-
Navigate to the settings menu: From the Kodi home screen, click on the gear icon located at the top-left corner. This will take you to the settings menu.
-
Select “File Manager”: Scroll down and click on the “File Manager” option. This will open the file manager interface.
-
Add a source: In the file manager, click on the “Add Source” option. This will open a dialog box where you can enter the details of the video source.
-
Enter the source path: In the dialog box, enter the path or location of the video source. This can be a local directory on your device, a network-attached storage (NAS) device, or a shared folder on your network. You can either type the path manually or browse for the location using the “Browse” button.
-
Specify a name for the source: Give a name to the video source. This name will be used to identify the source within Kodi.
-
Confirm and save the source: Double-check the entered path and source name for accuracy. Once verified, click “OK” or “Add” to save the video source.
-
Update library (optional): After adding the video source, Kodi can scan and update the library to recognize and index the available media files. To do this, go back to the Kodi home screen and click on “Library” and then “Movies” or “TV shows.” From there, select “Update Library” to initiate the scanning process.
-
Access the video source: Once the video source is added and the library is updated (if applicable), you can access the media files within Kodi. Go to the respective “Movies” or “TV shows” section on the home screen, and you will find the added source listed. Click on the source to browse and play the media files.
By following these steps, you can easily add a video source to Kodi and access your own media collection. Whether you have local files or network storage, Kodi provides a convenient and organized way to enjoy your favorite videos within a unified interface.
##
Playing Split on Kodi
Now that you have set up Kodi, installed the necessary add-ons, and added a video source, you are ready to play the movie “Split” on Kodi. Here’s how you can do it:
-
Launch Kodi: Open the Kodi application on your device.
-
Navigate to the Movies section: From the Kodi home screen, click on the “Movies” tab. This will take you to the Movies section.
-
Choose the added video source: In the Movies section, you will find the video source you previously added. Click on the source to access the media files within it.
-
Browse and find “Split”: Within the chosen video source, browse through the available movies until you find “Split.” You can use the navigation buttons or search function within Kodi to locate the movie.
-
Select “Split”: Once you have found “Split,” click on it to view more details and playback options.
-
Choose a playback option: Depending on the add-ons you have installed, you may have multiple playback options. You can select the desired option, such as “Play,” “Play with subtitles,” or “Play with external player.” If subtitles are available, you can enable or select them as well.
-
Wait for playback: After selecting the playback option, Kodi will start loading and buffering the movie. Depending on your internet connection and the selected source, it may take a few moments for playback to begin.
-
Enjoy “Split” on Kodi: Once the movie starts playing, sit back and enjoy watching “Split” on Kodi. You can use the Kodi playback controls to pause, rewind, fast forward, and adjust the volume as needed.
By following these steps, you can easily play the movie “Split” on Kodi and enjoy a seamless streaming experience. Kodi provides a user-friendly interface to access and play your favorite movies, ensuring that you never miss out on your preferred entertainment.
##
Troubleshooting common issues
While using Kodi to stream movies like “Split,” you may encounter some common issues. Here are a few troubleshooting tips to help you resolve these issues:
-
No streaming sources found: If you are unable to find any streaming sources for “Split” or any other movie, it may be due to a temporary issue with the add-on or the source itself. Try selecting a different add-on or waiting for a while before trying again.
-
Buffering or playback issues: If you experience buffering or playback issues while streaming “Split,” it can be due to a slow internet connection or insufficient bandwidth. Try pausing the video and allowing it to buffer for a few moments before resuming playback. You can also try reducing the video quality within the add-on settings to improve the streaming experience.
-
Audio or subtitle syncing issues: Sometimes, the audio or subtitles may not sync properly with the movie “Split.” In such cases, check the settings of the add-on or the media player you are using within Kodi. Look for options to adjust audio delay or subtitle syncing to correct any synchronization issues.
-
Add-on dependency errors: If you encounter dependency errors while using specific add-ons, it may be due to missing or outdated dependencies. Ensure that your add-ons and their dependencies are up to date. You can also try reinstalling the add-ons to resolve any dependency-related issues.
-
Streaming or playback errors: Occasionally, you may encounter errors or interruptions during the streaming or playback of “Split.” Restarting the Kodi application and refreshing the video source can often resolve these issues. If the problem persists, try selecting a different source or consider using a different add-on for streaming the movie.
-
Add-on installation issues: If you face difficulties installing or updating Kodi add-ons, it may be due to network connectivity issues or conflicts with other add-ons. Double-check your internet connection and try disabling any conflicting add-ons temporarily. You can also uninstall and reinstall the problematic add-ons to resolve installation issues.
By following these troubleshooting tips, you can overcome common issues that may arise while streaming “Split” or any other content on Kodi. It’s also recommended to keep your Kodi application, add-ons, and repositories up to date for optimal performance and access to the latest features.