
Gathering Your Materials
Before you can watch your camcorder tapes on your computer, you’ll need to gather a few essential materials. Here’s what you’ll need:
- Camcorder: Retrieve your camcorder from storage or wherever it is kept. Make sure it is in good working condition and has a fully charged battery or is plugged into a power source.
- USB Cable: Locate the USB cable that came with your camcorder. This cable will be used to connect your camcorder to your computer.
- Computer: Ensure that you have a computer with a USB port. Most modern computers have multiple USB ports, so you shouldn’t have any trouble finding one.
- Capture Software: Depending on your computer’s operating system, you may need to install capture software. This software is necessary to transfer the video footage from your camcorder to your computer. Check the instructions that came with your camcorder or search online for compatible capture software options.
- Tapes: Locate the camcorder tapes that you want to watch on your computer. Ensure that they are clean and in good condition to avoid any playback issues.
Once you have gathered these materials, you’ll be ready to connect your camcorder to your computer and start the process of transferring and watching your camcorder tapes. Remember, it’s important to have everything prepared to ensure a smooth and successful transfer of your video footage.
Connecting Your Camcorder to Your Computer
Now that you have gathered all the necessary materials, it’s time to connect your camcorder to your computer. Follow these steps to establish a connection:
- Power Off: Make sure both your camcorder and computer are powered off before you begin the connection process.
- Locate USB Port: Find the USB port on your computer. It is typically located on the side or back of your computer tower, or on the side of your laptop.
- Connect USB Cable: Take one end of the USB cable and insert it into the USB port on your computer. The USB cable should have a smaller end that matches the port on your camcorder.
- Connect Camcorder: Take the other end of the USB cable and connect it to the appropriate port on your camcorder. Refer to your camcorder’s manual or manufacturer’s instructions to locate the USB port.
- Power On: Power on both your camcorder and computer. The connection between the two devices should be established.
- Wait for Detection: Depending on your computer’s operating system, it may take a few moments for your computer to detect the camcorder. Be patient while the connection is established.
Once your computer has successfully recognized the camcorder, you’re ready to move on to the next step of installing the capture software.
Connecting your camcorder to your computer is a crucial step in the process of transferring and watching camcorder tapes. By following these steps carefully, you can ensure a stable and reliable connection between your devices.
Installing the Capture Software
After successfully connecting your camcorder to your computer, the next step is to install the appropriate capture software. This software is necessary to transfer the video footage from your camcorder to your computer. Here’s how you can install the capture software:
- Check Compatibility: Ensure that the capture software you have is compatible with your computer’s operating system. If you don’t have capture software, consider searching online for compatible options.
- Insert Installation Disc: If you have an installation disc that came with your camcorder, insert it into your computer’s CD/DVD drive. The installation process should start automatically. Follow the prompts on the screen to complete the installation.
- Download from Manufacturer’s Website: If you don’t have an installation disc or prefer to download the capture software, visit the manufacturer’s website for your camcorder. Look for the support or downloads section and locate the appropriate software for your model.
- Follow Installation Instructions: Once you have downloaded the software, run the installation file and follow the on-screen instructions. Typically, you’ll need to agree to the terms and conditions, choose the installation location, and select any additional settings.
- Finish Installation: After the installation process is complete, you can launch the capture software. It should now be ready to use for transferring and watching your camcorder tapes on your computer.
It’s important to have the capture software installed on your computer before proceeding to the next steps. This software serves as a bridge between your camcorder and computer, allowing you to transfer and view your video footage seamlessly. Taking the time to properly install the software will ensure a smooth and hassle-free experience.
Preparing Your Tapes for Playback
Before you can start enjoying your camcorder tapes on your computer, it’s essential to prepare them for playback. Here are some steps to follow in order to ensure optimal playback quality:
- Clean the Tapes: Over time, camcorder tapes can accumulate dust and debris, which can interfere with playback. Use a soft, lint-free cloth to gently clean the tape and remove any dirt or smudges. Make sure to handle the tapes with care to avoid damaging them.
- Check for Damage: Inspect each tape for any signs of damage, such as tears, wrinkles, or loose parts. If you notice any problems, it’s best to consult a professional for tape repair or recovery services.
- Rewind the Tapes: Before transferring the footage, rewind each tape to its starting point. This ensures that the entire video will be captured during the transfer process without any missing or incomplete sections.
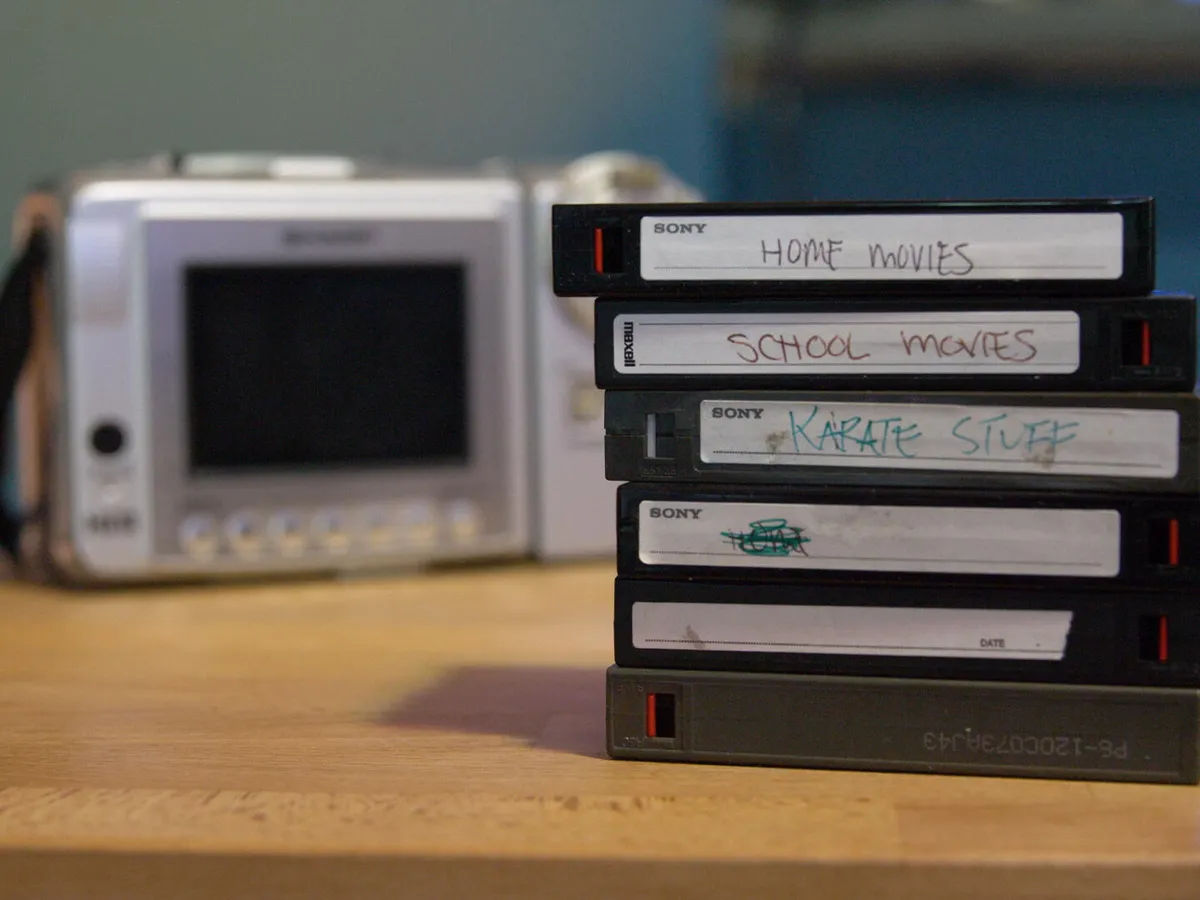
- Label the Tapes: To keep your tapes organized, consider adding labels or markers with brief descriptions or dates. This will make it easier to locate specific footage when you want to watch or transfer a particular tape.
- Storage: After preparing your tapes, store them in a cool, dry environment, away from direct sunlight or extreme temperatures. Proper storage will help preserve the quality of your footage for future playback.
By taking the time to properly prepare your camcorder tapes for playback, you can ensure that you will have a smooth and enjoyable viewing experience. Cleaning and inspecting the tapes, rewinding them, labeling them for easy identification, and storing them correctly are all important steps in maintaining the quality and longevity of your video footage.
Transferring Your Tapes to Your Computer
Now that you have prepared your camcorder tapes, it’s time to transfer the footage to your computer. Follow these steps to ensure a successful transfer:
- Launch Capture Software: Start by launching the capture software on your computer. Ensure that your camcorder is connected properly and turned on.
- Select Source: Within the capture software, look for an option to select the video source. Choose your camcorder from the available options to establish the connection.
- Set Capture Settings: Adjust the capture settings according to your preferences. You may have options to select the video format, resolution, or audio settings. Consult the capture software’s documentation or help guide for more information.
- Begin Capture: Once you have set up the capture settings, you can start the capture process. Typically, you’ll need to press a “Capture” or “Start” button within the software to begin recording the video footage from your camcorder.
- Monitor Progress: Keep an eye on the capture software to monitor the progress of the transfer. It will show you the duration of the recording and the amount of footage captured so far.
- Complete Transfer: Once you have captured all the desired footage, stop the recording process within the capture software. The captured video will now be stored on your computer, ready to be played back.
During the transfer process, it is important to ensure a stable connection between your camcorder and computer. Keep an eye out for any error messages or interruptions that may occur during the transfer. If you encounter any issues, refer to the troubleshooting section or seek assistance from the capture software’s support resources.
Transferring camcorder tapes to your computer opens up a world of possibilities for viewing, editing, and sharing your video footage. By following these steps, you can easily preserve your precious memories and enjoy them on your computer anytime you want.
Playing Back Your Tapes on Your Computer
After successfully transferring your camcorder tapes to your computer, it’s time to enjoy the fruits of your labor by playing back the footage. Here’s how you can do it:
- Locate the Captured Videos: First, navigate to the folder or location on your computer where the transferred videos are stored. This could be a specific folder you designated during the transfer process.
- Select Video Player: Choose a video player software that is compatible with the file format of your captured videos. Popular options include VLC Media Player, Windows Media Player, QuickTime Player, or the built-in video player of your computer’s operating system.
- Open the Video File: Launch the selected video player and open the captured video file by navigating to the folder where the videos are stored and selecting the desired file. The video should start playing automatically.
- Adjust Playback Settings: Within the video player, you may have the option to adjust playback settings such as volume, playback speed, and full-screen mode. Familiarize yourself with the player’s settings to customize your viewing experience.
- Enjoy Your Footage: Sit back and enjoy watching your camcorder tapes on your computer’s screen. Relive the memories, cherish the moments, and share the experience with friends and family.
During playback, you can pause, rewind, or fast forward the video as desired. Take advantage of the features offered by the video player to enhance your viewing experience, such as taking screenshots or creating bookmarks for important scenes.
Playing back your camcorder tapes on your computer allows for easy accessibility and sharing of your video footage. Whether you want to reminisce about past events or edit the footage for a special project, your computer provides a convenient and versatile platform for viewing your tapes.
Troubleshooting Common Issues
While transferring and playing back camcorder tapes on your computer, you may encounter some common issues. Here are a few troubleshooting tips to help you resolve them:
- No Connection: If your computer fails to recognize the camcorder when connected, make sure the USB cable is securely plugged in on both ends. Try using a different USB port or cable to eliminate any potential connection issues.
- No Playback Sound: If you experience video playback without any sound, check the volume settings on both your computer and the video player software. Make sure the audio is not muted or set to a very low level.
- Playback Issues: If you encounter stuttering, freezes, or other playback problems, ensure that your computer meets the minimum system requirements for playing the captured videos. Close any unnecessary programs that may be running in the background to free up resources.
- Corrupted Files: In some cases, the transferred video files may become corrupted during the transfer process. If you encounter an error or the video refuses to play, try transferring the tape again and make sure to use reliable capture software.
- Incompatible Video Format: If the video files are not playing in your preferred video player, it could be due to an incompatible video format. Consider using a video converter tool to convert the files to a format supported by your chosen video player.
It’s also recommended to consult the documentation or support resources of your capture software and video player for specific troubleshooting guides, as they may provide solutions to common issues encountered by users.
Remember, troubleshooting is a process of trial and error. If the above tips don’t resolve the issue, consider seeking assistance from tech support or online forums dedicated to camcorder transfers and video playback. With a little patience and perseverance, you’ll overcome any obstacles and fully enjoy your camcorder tapes on your computer.
Awesome Tips and Tricks
When it comes to watching your camcorder tapes on your computer, there are some handy tips and tricks that can enhance your experience. Here are a few awesome tips to make the most out of your camcorder footage:
- Edit and Enhance: Use video editing software to trim, merge, or add effects to your captured videos. Add titles, subtitles, or background music to create a personalized touch and make your footage even more engaging.
- Create a Digital Archive: Make digital backups of your camcorder tapes by storing the captured videos on an external hard drive or cloud storage service. This ensures that your precious memories are safe and easily accessible even if the tapes deteriorate over time.
- Share with Loved Ones: Use video sharing platforms or social media to showcase your favorite moments with friends and family. Create compilations or highlight reels to share the best parts of your footage with others.
- Get Creative with Transitions: Experiment with different transition effects between scenes to add a professional touch to your videos. Smooth transitions can make your footage more visually appealing and seamless.
- Organize Your Files: Create a well-structured folder system on your computer to keep your captured videos organized. Categorize them by date, event, or any other criteria that makes sense to you. This makes it easier to locate specific videos in the future.
- Backup Regularly: Remember to regularly back up your captured videos to external storage devices or cloud services. This ensures that your hard work and precious memories are protected even in case of computer or storage device failure.
- Experiment with Effects: Explore different video filters and effects offered by your video editing software. Play around with color grading, special effects, or even slow-motion to add an artistic touch to your videos.
By applying these tips and tricks, you can take your camcorder tape viewing experience to the next level. Whether it’s creating professional-looking edits or sharing your memories with the world, these tips will help you unlock the full potential of your captured videos.