
Preparing Your Antenna and Roku Device
Before you can enjoy watching antenna TV on your Roku device, you’ll need to ensure that your antenna is properly set up and your Roku device is ready to connect. Here are the steps to get started:
1. Choose the right antenna: First, make sure you have a good-quality antenna that is suitable for your location. Consider factors such as the distance to the nearest broadcast towers, signal strength, and the type of antenna that works best in your area.
2. Position the antenna: Find a suitable location for your antenna, preferably near a window or outer wall facing the direction of the broadcast towers. Keep in mind that obstacles like tall buildings or trees can affect signal reception, so aim for the clearest line of sight.
3. Connect the coaxial cable: Attach one end of the coaxial cable to the antenna’s output port and the other end to the input port on your Roku device. Ensure that the connections are secure to avoid signal loss.
4. Power up your Roku device: Plug your Roku device into a power source and connect it to your TV using an HDMI cable. Follow the on-screen instructions to complete the setup process and connect to your Wi-Fi network, if necessary.
5. Update your Roku software: To ensure compatibility and optimal performance, make sure your Roku device’s software is up to date. Go to the settings menu, select “System,” and then choose “System Update” to check for available updates and install them, if any.
6. Check the antenna input on your TV: On your TV remote, select the corresponding input source for the HDMI port connected to your Roku device. If you’re not sure which input to choose, consult your TV’s user manual.
Once you have completed these steps, you are now ready to proceed with setting up your antenna and scanning for channels on your Roku device. Stay tuned for the next section to learn how to accomplish this and start enjoying your favorite antenna TV programs on Roku!
Setting Up the Antenna
Now that you have your antenna and Roku device prepared, it’s time to set up your antenna for optimal reception. Follow these steps to ensure a smooth setup:
1. Locate the broadcast towers: Before you position your antenna, it’s crucial to know the directions of the broadcast towers. Use online tools or mobile apps to find the tower locations in your area. This information will help you aim your antenna correctly for better signal reception.
2. Position the antenna: Place your antenna in a location that provides the clearest line of sight to the broadcast towers. If possible, mount it as high as you can, like on a roof or an attic. However, if mounting is not an option, you can place it near a window or any other suitable spot. Remember to avoid obstructions like buildings or trees that could interfere with the signal.
3. Adjust the antenna direction: Point your antenna towards the direction of the broadcast towers you identified earlier. Make small adjustments to the angle and direction of the antenna, as even a slight change can significantly impact signal quality. Keep an eye on your TV screen or the signal strength meter on your Roku device as you make these adjustments.
4. Secure the antenna: Once you have found the best position for your antenna, ensure it is securely mounted or placed to maintain its alignment. This will prevent it from moving or getting knocked out of position, ensuring consistent signal reception.
5. Perform a channel scan: With your antenna properly set up, it’s time to scan for available channels on your Roku device. Go to the Roku home screen, navigate to the settings menu, select “TV inputs,” and then choose “Antenna TV.” Follow the on-screen instructions to initiate the channel scan. This process may take a few minutes, so be patient as the Roku device searches for available channels in your area.
Once the channel scan is complete, you will have a list of available channels that you can watch through your Roku device. Remember to position your antenna for the best signal reception and periodically re-scan for channels if you reposition your antenna or if new channels become available in your area. Enjoy your antenna TV viewing experience on your Roku device!
Connecting the Antenna to Your Roku Device
Now that you have set up your antenna, it’s time to connect it to your Roku device so you can watch antenna TV. Follow these simple steps to get connected:
1. Locate the antenna input: On your Roku device, locate the antenna input. It is typically labeled as “ANT IN” or “TV IN” and is usually located on the back or side of the device. Look for a coaxial input port.
2. Connect the antenna cable: Take the other end of the coaxial cable connected to your antenna and plug it into the antenna input on your Roku device. Ensure that the connection is secure to avoid any signal loss.
3. Power on your Roku device and TV: Plug your Roku device into a power source and turn on your TV. Make sure your TV is set to the correct HDMI input that corresponds to the Roku device. You should see the Roku home screen on your TV.
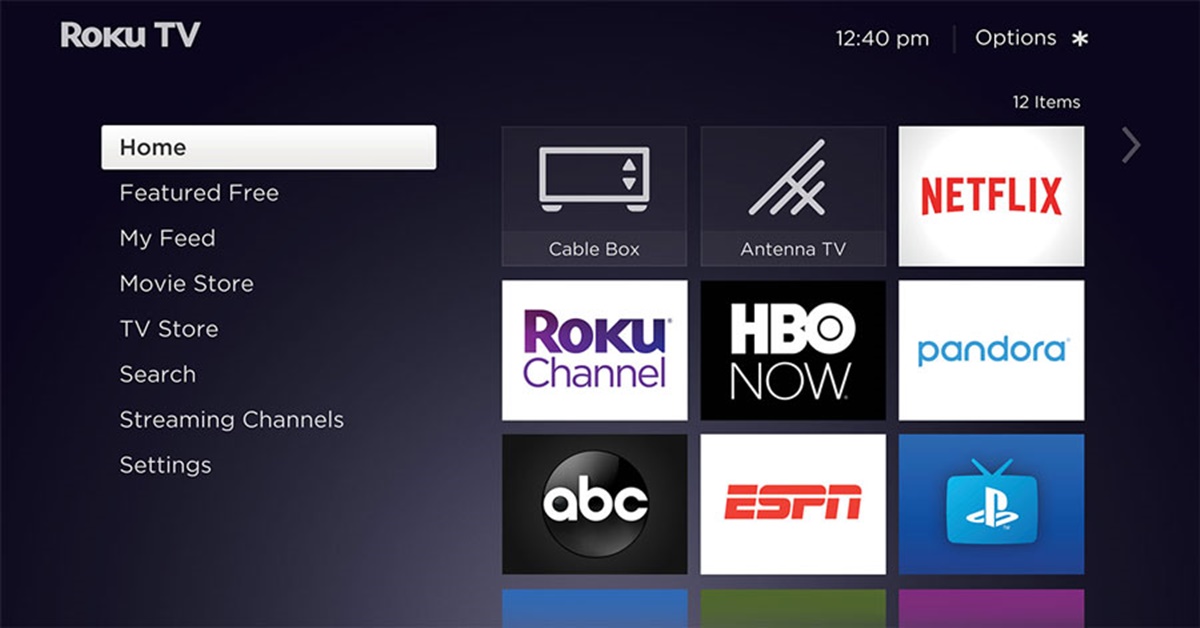
4. Navigate to the Antenna TV input: On the Roku home screen, use the remote control to navigate to the left-hand side menu. Scroll down and select “Antenna TV” under the “TV inputs” section.
5. Let Roku detect the antenna: Once you’ve selected “Antenna TV,” your Roku device will begin detecting the connected antenna. This process may take a moment, so be patient while Roku scans for available channels.
6. Confirm the detected channels: After the scan is complete, your Roku device will display a list of available channels. This list will vary depending on your location and the strength of the signals received by your antenna. Take some time to review the channels to see which ones you can access through your Roku device.
7. Organize your channel lineup: After the scan, you can rearrange the channel lineup to your liking. Use the Roku remote control to move channels up or down and prioritize your favorite ones.
With the antenna successfully connected to your Roku device, you are now ready to enjoy antenna TV channels. Simply navigate to the Antenna TV input on your Roku device to access the channels you have scanned and start watching your favorite live TV shows and programs.
Scanning for Channels on Roku
After connecting your antenna to your Roku device, the next step is to perform a channel scan. This scan will allow your Roku device to detect the available channels that can be accessed through your antenna. Follow these steps to scan for channels:
1. Access the Antenna TV input: Make sure your Roku device is turned on and your TV is set to the correct HDMI input for your Roku device. Use the Roku remote control to navigate to the left-side menu on the Roku home screen.
2. Select “Antenna TV”: Scroll down the left-side menu until you find the “TV inputs” section. Within the section, select “Antenna TV” to switch to the input associated with your antenna.
3. Scan for available channels: Once you are on the Antenna TV input, your Roku device will automatically start scanning for available channels based on the signals received by your antenna. The scanning process may take a few minutes, so remain patient as the device completes the scan.
4. Review the list of detected channels: After the scan is complete, your Roku device will display a list of the channels that have been detected. The number and variety of channels can vary depending on your location and the strength of the signals received by your antenna. Take some time to review the list and familiarize yourself with the available channels.
5. Customize your channel lineup: Once the scan is finished, you can customize the order of the channels to your preference. Using the Roku remote control, navigate to the channel you want to move and press the star (*) button. From the options that appear, choose “Move channel” and then position it in your desired location within the lineup.
6. Update your channel lineup: Channels can change or new ones can become available over time. It’s a good idea to periodically re-scan for channels to ensure that your lineup is up to date. To do this, go back to the Antenna TV input and repeat the scanning process to detect any new channels.
By following these steps, you will successfully scan for and detect the available channels on your Roku device. Make sure to periodically re-scan to keep your channel lineup updated and enjoy a wide range of antenna TV programming through your Roku device.
Options for Antenna TV Apps on Roku
While scanning for channels on your Roku device is a great way to access antenna TV, there are also several antenna TV apps available on the Roku platform that can enhance your viewing experience. These apps provide additional features and functionality for watching live TV and managing your antenna channels. Here are some popular options:
1. Live TV Pause: This app allows you to pause and rewind live TV programs, just like you would with a DVR. It also provides the ability to schedule recordings of your favorite shows, so you never miss an episode. Live TV Pause is a convenient option if you want to have more control over your antenna TV viewing.
2. HDHomeRun: HDHomeRun is a versatile app that allows you to watch live TV on multiple devices, including your Roku device. It supports over-the-air antenna signals as well as cable TV, giving you access to a wide range of channels. HDHomeRun also offers DVR capabilities, allowing you to record and playback your favorite shows.
3. Channels: Channels is a highly rated antenna TV app on Roku that provides a seamless and user-friendly experience. It offers an intuitive program guide, giving you a clear view of what’s currently airing and what’s coming up. Channels also supports DVR functionality, allowing you to schedule and record your favorite shows.
4. Plex: While primarily known as a media server, Plex also offers a Live TV and DVR feature. By connecting an antenna to a compatible tuner and setting up Plex on your Roku device, you can watch live TV and record shows from your antenna channels. Plex provides a comprehensive and customizable interface for antenna TV viewing.
5. Tablo: Tablo is an app that works in conjunction with a dedicated Tablo device. Once connected, Tablo lets you stream live antenna TV and record shows to a connected USB or networked hard drive. The app offers an easy-to-use interface with features like a program guide and the ability to watch on multiple devices.
These are just a few examples of the antenna TV apps available on the Roku platform. Each app has its own unique features and functionalities, so explore and choose the one that best suits your preferences and needs. By utilizing these antenna TV apps, you can enhance your antenna TV viewing experience and take advantage of additional features like live TV pause, DVR capabilities, and more.
Installing and Setting Up the Antenna TV App on Roku
If you want to further enhance your antenna TV experience on Roku, you can install and set up dedicated antenna TV apps. Here’s a step-by-step guide to help you install and set up an antenna TV app on Roku:
1. Access the Roku Channel Store: From the Roku home screen, use the remote control to navigate to the left-side menu. Scroll down and select “Streaming Channels” to open the Roku Channel Store.
2. Browse or search for antenna TV apps: In the Roku Channel Store, you can explore different categories or use the search function to find antenna TV apps. Some popular options include Live TV Pause, HDHomeRun, Channels, Plex, and Tablo.
3. Select and install the app: Once you have found the desired antenna TV app, navigate to its page and select “Add channel” to install it to your Roku device. The app will then be added to your Roku home screen.
4. Launch the app: Go back to the Roku home screen and locate the newly installed antenna TV app. Select it to launch the app.
5. Follow the on-screen instructions: Each antenna TV app will have its own setup process. Follow the on-screen instructions provided by the app to complete the setup. This may include granting permissions, logging in to an account associated with the app, and configuring any additional settings.
6. Scan for channels (if required): Depending on the app, you may need to perform a separate channel scan within the app to identify and add the available channels from your antenna. Follow the app’s instructions to initiate the channel scan.
7. Customize your settings: Once installed and set up, explore the app’s settings to personalize your antenna TV experience. This may include adjusting picture quality, enabling closed captions, or configuring any additional features provided by the app.
By following these steps, you can install and set up an antenna TV app on your Roku device. Enjoy the additional features and functionalities offered by the app, such as live TV pause, DVR capabilities, and enhanced channel management. Discover a new level of convenience and control as you watch your favorite antenna TV programs through the app on your Roku device.
Navigating the Antenna TV App on Roku
Once you have installed and set up an antenna TV app on your Roku device, it’s time to navigate through the app and explore its features. Here are some general steps to help you navigate the antenna TV app:
1. Launch the app: From the Roku home screen, locate and select the antenna TV app that you installed. The app will open, and you will be presented with its main interface.
2. Main menu: The main menu of the app may vary depending on the specific app you are using. Generally, you will find options such as “Live TV,” “Guide,” “Recordings” (if DVR functionality is available), and “Settings.” Use the remote control to navigate through the menu options and select the desired feature or section.
3. Live TV: If available, the “Live TV” section will display the currently airing programs on the available channels. You can use the remote control to scroll through the list and select the program you wish to watch.
4. Guide: The “Guide” section (if present) will provide a comprehensive schedule of the upcoming shows on your antenna TV channels. Use the remote control to navigate through the guide and select the program you want to watch. Some apps may allow you to filter the guide by genre or customize it according to your preferences.
5. Recordings (if applicable): If your antenna TV app offers DVR functionality, you may find a “Recordings” section. This section will display your recorded shows and allow you to manage your recorded content. You can select a recording to watch, delete recordings, or schedule new recordings if the app supports it.
6. Settings: Access the “Settings” section of the app to customize various aspects of your antenna TV experience. This may include adjusting picture quality, enabling closed captions, configuring DVR settings, managing channel lineups, or other app-specific options. Explore the settings menu to tailor the app to your preferences.
7. Return to the Roku home screen: Whenever you want to return to the Roku home screen, press the Roku home button on your remote control. This will exit the app and take you back to the main Roku interface.
Remember that the specific navigation and features within the antenna TV app can vary based on the app you are using. Familiarize yourself with the app’s interface and features by exploring the menus and trying out different options. Enjoy the convenience and enhanced viewing experience as you navigate through the antenna TV app on your Roku device!
Watching Live TV on the Antenna TV App
One of the main features of an antenna TV app on Roku is the ability to watch live TV. Once you have selected a channel, here’s how you can enjoy watching live TV on the antenna TV app:
1. Launch the app: From the Roku home screen, locate and select the antenna TV app that you have installed. The app will open, and you will be presented with its main interface.
2. Navigate to the “Live TV” section: Use the remote control to navigate through the app’s main menu and select the “Live TV” section. This section typically shows the currently airing programs on the available channels.
3. Select a channel: Scroll through the list of available channels to find the one you want to watch. Use the remote control to highlight the channel and press the OK or select button to tune in.
4. Enjoy live TV: Once you have selected a channel, the live TV stream will start playing on your TV screen. Sit back, relax, and enjoy watching your favorite live TV programs in real-time.
5. Control the playback: Depending on the antenna TV app you are using, you may have options to pause, rewind, or fast-forward live TV. Use the playback controls on your remote control to interact with the live TV stream. Note that some apps, like Live TV Pause or HDHomeRun, offer advanced DVR-like features that allow you to pause and even record live TV for later viewing.
6. Switch channels: If you want to switch to a different channel, simply go back to the live TV section or the app’s main menu, and select another channel. You can explore different channels and discover a wide range of content available through your antenna.
7. Additional features: Depending on the antenna TV app you are using, you may have access to additional features while watching live TV. These can include closed captions, program information, channel guide, and more. Explore the on-screen options or consult the app’s user manual to make the most of these additional features.
Watching live TV through the antenna TV app on your Roku device provides you with the convenience of accessing a variety of channels and watching your favorite shows in real-time. Relax, tune in, and enjoy the excitement of live TV from the comfort of your own home.
Using the Guide and DVR Features on the Antenna TV App
Many antenna TV apps available on Roku offer additional features such as a program guide and DVR functionality. These features enhance your antenna TV viewing experience by providing a convenient way to browse upcoming shows and record your favorite programs. Here’s how you can make use of the guide and DVR features on the antenna TV app:
1. Access the program guide: Navigate to the “Guide” section within the antenna TV app. This section displays a schedule of upcoming shows on your antenna TV channels. Use the remote control to scroll through the guide and explore the different time slots and channels.
2. Browse the guide: Depending on the app, the guide may show program names, descriptions, start and end times, and channel numbers. Use the remote control to highlight a specific program and press the OK or select button for more details.
3. Set reminders: To ensure you don’t miss your favorite shows, set reminders within the guide. Highlight the desired program, and in the options menu, select “Set Reminder” or a similar option. The app will notify you when the program is about to start.
4. Schedule recordings: If your antenna TV app includes DVR functionality, you can schedule recordings of your favorite shows. In the guide or the program details screen, select the “Record” or “Add to Recordings” option to schedule a recording. The app will automatically record the show at the specified time.
5. Manage your recordings: Access the “Recordings” section within the antenna TV app to manage your recorded content. You can view a list of your recorded shows, organize them by date or title, and select a recording to watch.
6. Playback recorded shows: Within the “Recordings” section, select a recorded show to start playback. Use the playback controls on your remote control to pause, rewind, fast-forward, or skip through the recorded content, similar to a DVR experience.
7. Adjust DVR settings: Some antenna TV apps provide options to customize your DVR settings. This may include setting up recording priorities, managing available storage space, or adjusting the recording quality. Consult the app’s settings menu or user guide for the available DVR settings and options.
By utilizing the guide and DVR features on the antenna TV app, you can stay organized, never miss your favorite shows, and have the flexibility to watch recorded content at your convenience. Take advantage of these features to enhance your antenna TV viewing experience and customize your TV schedule according to your preferences.
Troubleshooting Common Issues
While watching antenna TV on your Roku device, you may encounter some common issues that can disrupt your viewing experience. Here are a few troubleshooting tips to help you resolve these issues:
1. No signal or weak signal:
- Check your antenna connections: Make sure the coaxial cable is securely connected to both your antenna and the Roku device.
- Reposition your antenna: Try moving your antenna to a different location or adjusting its angle to optimize the signal reception.
- Check for obstructions: Ensure there are no physical obstructions, such as buildings or trees, blocking the signal path between your antenna and the broadcast towers.
2. Missing channels:
- Perform a channel scan: Go to the Roku settings menu and initiate a channel scan to detect any missing channels. This can be done by accessing the “TV inputs” section and selecting the “Antenna TV” input.
- Reposition your antenna: Try adjusting the position or direction of your antenna to improve signal reception and capture all available channels.
- Check for channel updates: Channels can occasionally change frequencies or add new sub-channels. Re-scan for channels periodically to ensure you have the most up-to-date channel lineup.
3. Poor video or audio quality:
- Check your connections: Ensure that all cables are securely connected and that there is no damage to the cables or ports.
- Adjust picture and sound settings: Access the Roku device settings or the antenna TV app settings and adjust the video and audio settings to optimize the quality for your TV.
- Restart your Roku device: Sometimes, a simple restart can resolve temporary glitches. Unplug your Roku device from the power source, wait a few seconds, and then plug it back in.
4. App-related issues:
- Update the app: Check for any available updates for the antenna TV app. Outdated versions can sometimes cause compatibility issues or bugs.
- Reinstall the app: If the app continues to have issues, try uninstalling and then reinstalling it from the Roku Channel Store.
- Reset the app: In some cases, resetting the app to its default settings can resolve persistent issues. Look for the option to reset the app within its settings or consult the app’s user guide for instructions.
If these troubleshooting tips do not resolve the issues you are experiencing, you may need to consult the support resources provided by both Roku and the antenna TV app. They may have specific troubleshooting steps or customer support channels to assist you in resolving any technical difficulties.
Tips and Tricks for Watching Antenna TV on Roku
Watching antenna TV on Roku can be a rewarding experience, offering access to a variety of channels and live programming. Here are some tips and tricks to enhance your antenna TV viewing on Roku:
1. Position your antenna for optimal reception: Experiment with different antenna placements to find the position with the strongest signal. Higher elevations, near windows, or outside walls facing the broadcast towers often yield better reception.
2. Use an amplified antenna: If you have difficulty receiving clear signals, consider upgrading to an amplified antenna. These antennas boost signal strength, improving your chances of accessing more channels.
3. Regularly perform channel scans: Scan for channels periodically, especially when you reposition your antenna or relocate to a new area. This ensures you have the most up-to-date channel lineup available.
4. Explore antenna TV apps: Try different antenna TV apps available on Roku to discover additional features and functionalities that enhance your viewing experience, such as DVR capabilities, program guides, and advanced playback controls.
5. Utilize DVR functionality (if available): If your antenna TV app supports DVR functionality, take advantage of the ability to schedule and record your favorite shows. This allows you to watch programs at your convenience, even if you miss the live broadcast.
6. Customize your channel lineup: Most antenna TV apps on Roku offer the option to rearrange your channel lineup. Prioritize the channels you watch frequently and remove any channels you rarely use, creating a personalized and streamlined viewing experience.
7. Use closed captions and accessibility features: If you prefer watching with closed captions or require accessibility features, explore the options within both the Roku device and the antenna TV app. Adjusting these settings can improve your overall viewing experience.
8. Schedule regular antenna maintenance: Periodically inspect and clean your antenna to ensure it remains in good condition. Dust, debris, or corrosion can impact signal reception. Wipe down the antenna and check for any damaged components.
9. Stay updated with software and app updates: Keep your Roku device’s software and antenna TV app up to date to benefit from the latest features, bug fixes, and performance improvements. Set your Roku device to automatically install updates for a hassle-free experience.
10. Connect to a strong Wi-Fi network: While antenna TV does not require an internet connection, having a reliable Wi-Fi network is important for streaming antenna TV apps, accessing program guides, and utilizing any online features associated with the apps.
By implementing these tips and tricks, you can optimize your antenna TV watching experience on Roku. Take advantage of the features, customization options, and resources available to maximize your enjoyment of live TV and your favorite programs.