
What is a Z File?
A Z file is a type of compressed file that is created using compression algorithms to reduce the file size. It is commonly used to store large amounts of data in a smaller and more manageable form. The “Z” in Z file stands for “compressed,” indicating that the file has been compressed to save storage space and make it easier to transfer or share.
Z files are similar to other compressed file formats, such as ZIP or RAR files. However, Z files are specifically associated with the Unix/Linux operating system. The Z file format was originally created by the Unix compress utility and is still commonly used in Unix-based systems.
A Z file can contain a single file or a collection of files and directories. When a file is compressed into a Z file, it undergoes a process where redundant or unnecessary data is removed, resulting in a smaller file size. This compression process is reversible, meaning the original file can be reconstructed by decompressing the Z file.
One of the advantages of using Z files is that they offer efficient storage and transfer capabilities. Due to their smaller size, Z files save disk space and bandwidth when transferring or sharing files over networks. They also make it easier to archive and backup large volumes of data.
It’s important to note that Z files are specific to Unix/Linux systems and may not be directly compatible with other operating systems, such as Windows or macOS. However, there are tools and utilities available for opening and extracting the contents of Z files on different platforms.
How to Recognize a Z File
Recognizing a Z file is important in order to identify it correctly and understand how to handle it. While Z files may not have a specific file extension, there are certain characteristics that can help you recognize them:
- File Size: Z files are typically smaller in size compared to their uncompressed counterparts. If you encounter a file that is significantly smaller than expected, it might be a Z file.
- File Headers: Some Z file formats have specific file headers or signatures that indicate their compression. For example, a Z file compressed using the Unix compress utility will have the characters “x1F” and “x9D” at the beginning of the file.
- File Tools: If you are using Unix/Linux, you can use command-line tools like the “file” command or the “zcat” command to check the file type and attempt to decompress the Z file.
It’s important to note that Z files may not always be recognizable by their filenames alone. In some cases, the file extension may not accurately represent the file format, so relying solely on the file extension may not guarantee accurate recognition.
If you are uncertain whether a file is a Z file or not, it’s advisable to use file analysis tools or consult resources specific to your operating system to confirm the file type and take appropriate actions.
Being able to recognize a Z file is essential for performing specific actions, such as opening, extracting its contents, or converting it to a different file format. By understanding the indicators mentioned above, you can easily identify whether a file is a Z file and proceed accordingly.
Z File Formats
While the term “Z file” is commonly associated with the Unix compress utility, there are actually several different file formats that may use the .Z extension or be referred to as Z files. Let’s take a look at some of the most common Z file formats:
- .Z File Format: This is the original Z file format created by the Unix compress utility. It uses the Lempel-Ziv-Welch (LZW) compression algorithm and is primarily used on Unix/Linux systems.
- .GZ File Format: The .gz file format, also known as GNU zip, is a widely used compression format in Unix/Linux systems. It uses the gzip compression algorithm and is compatible with numerous compression tools.
- .TAR.Z or .TZ File Format: This format combines the TAR archive format with the Z compression algorithm. It is often used for creating compressed archives of multiple files and directories in Unix/Linux systems.
These are just a few examples of the Z file formats available. It’s important to note that while some of these formats are more commonly associated with Unix/Linux systems, there are also tools and utilities available for opening and extracting Z files on other operating systems, such as Windows and macOS.
Additionally, it’s worth mentioning that Z files are often used alongside common file extensions to indicate the file format they contain. For example, a compressed text file may have the extension .txt.Z, or a compressed image file may have the extension .jpg.Z. These combined extensions help to signify the file format and compression used.
When dealing with Z files, it’s crucial to ensure that you have the necessary tools or software to handle the specific file formats. Understanding the different Z file formats will help you determine the appropriate methods and utilities for opening, decompressing, or manipulating these files efficiently.
How to Open a Z File on Windows
Opening a Z file on Windows requires the use of third-party compression software that supports the Z file format. Here’s a step-by-step guide on how to open a Z file in Windows:
- Download a Compression Tool: Start by downloading and installing a compression tool that supports the Z file format. One popular option is 7-Zip, a free and open-source compression utility.
- Install the Compression Tool: Follow the installation instructions provided by the compression tool to install it on your Windows system.
- Locate the Z File: Navigate to the directory where the Z file is located. It’s important to know the exact location of the Z file on your Windows system.
- Extract the Z File: Right-click on the Z file and select the extraction option from the context menu. In the extraction dialog, choose the destination folder where you want to extract the contents of the Z file.
- Wait for Extraction: The extraction process may take some time, depending on the size of the Z file and the performance of your system. Once the extraction is complete, you will have access to the uncompressed files.
After following these steps, you should be able to successfully open and extract the contents of the Z file on your Windows system using a compatible compression tool.
It’s worth mentioning that there are other compression tools available for Windows, such as WinRAR and WinZip, which can also handle Z files. Whichever compression tool you choose, ensure that it supports the Z file format to ensure compatibility.
If you need to compress files into a Z file on Windows, the same compression tools mentioned above can be used. Simply select the files you want to compress, right-click, and choose the appropriate option from the compression tool’s context menu.
How to Open a Z File on macOS
Opening a Z file on macOS can be done using built-in tools or third-party compression software. Follow these steps to open a Z file on macOS:
- Locate the Z File: Navigate to the directory where the Z file is located. Make sure you know the exact location of the Z file on your macOS system.
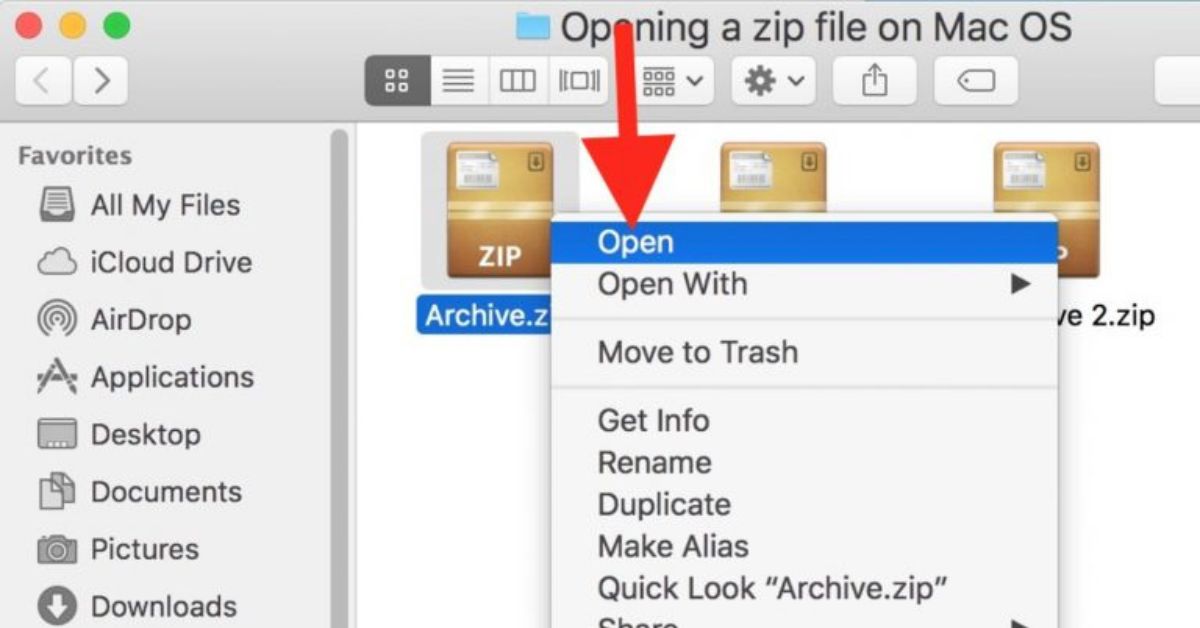
- Built-in Extraction: macOS comes with a built-in compression utility that can handle various file formats, including Z files. Simply double-click on the Z file, and the built-in utility will automatically extract the contents to a folder in the same location.
- Third-Party Compression Software: If the built-in utility is not suitable for your needs, you can use third-party compression software that supports Z files. One popular option is The Unarchiver, a free and easy-to-use application available on the App Store. Download and install the preferred compression software.
- Open with Third-Party Software: Right-click on the Z file, select “Open With,” and choose the third-party compression software you installed. The software will open the Z file and extract its contents to a specified folder.
Once you’ve completed these steps, you should be able to open and extract the contents of the Z file on your macOS system.
It’s essential to note that the built-in compression utility on macOS can handle many file formats, including the Z file format. However, if you regularly work with Z files or require more advanced features, using third-party compression software may provide a better user experience and more options.
Similarly, if you need to compress files into a Z file on macOS, you can use the same third-party compression software or the built-in utility to create the Z file. Select the files you want to compress, right-click on them, and choose the compression software or the “Compress” option from the context menu.
How to Open a Z File on Linux
Linux systems have built-in tools and commands that can handle the Z file format. Here’s a step-by-step guide on how to open a Z file on Linux:
- Open a Terminal: Launch a terminal emulator on your Linux system. You can typically find it in the applications menu or by using the keyboard shortcut CTRL+ALT+T.
- Navigate to the Z File: Use the
cdcommand to navigate to the directory where the Z file is located. For example, if the file is in the Documents folder, typecd Documentsto navigate to that folder. - Extract the Z File: Once you are in the correct directory, use the
uncompresscommand followed by the Z file name to extract the contents of the Z file. For example, if the Z file is named “example.Z”, enter the commanduncompress example.Z. - Verify Extraction: The extraction process will create one or more uncompressed files in the same directory as the Z file. Use commands such as
lsto verify that the files have been successfully extracted.
By following these steps, you can open and extract the contents of a Z file on your Linux system using the built-in terminal and commands.
In addition to the uncompress command, Linux also provides other utilities for handling Z files. These include gzip and gunzip, which are widely used for working with compressed files on Linux.
If you prefer a graphical user interface (GUI), there are several third-party compression tools available for Linux that provide a more user-friendly experience. These tools often support multiple file formats, including Z files. Examples of popular GUI compression tools for Linux include File Roller, Ark, and PeaZip.
When using these GUI tools, simply open the tool, navigate to the location of the Z file, and select the option to extract the contents. The GUI tools offer intuitive interfaces and additional features, making it easier to work with Z files on Linux.
How to Open a Z File on Android
Opening a Z file on an Android device requires the use of a file manager app and a compression/decompression utility. Follow these steps to open a Z file on Android:
- Install a File Manager: Start by installing a file manager app from the Google Play Store. Popular file manager apps for Android include File Manager, ES File Explorer, and Solid Explorer.
- Locate the Z File: Open the file manager app and navigate to the directory where the Z file is located. Make sure you know the exact location of the Z file on your Android device.
- Extract the Z File: Tap and hold on the Z file to reveal the available options. Select the option to extract or decompress the Z file. The exact wording or icon may vary depending on the file manager app.
- Choose Extraction Destination: After selecting the extraction option, you will be prompted to choose a destination folder for the extracted contents of the Z file. Select a folder or create a new one to store the extracted files.
- Wait for Extraction: The file manager app will begin the extraction process, unpacking the contents of the Z file into the chosen destination folder. The time required for extraction depends on the size of the Z file and the performance of your Android device.
After completing these steps, you should be able to open and access the extracted contents of the Z file on your Android device using the chosen file manager app.
It is worth noting that there are also dedicated compression and decompression apps available on the Google Play Store for opening and managing various file formats, including Z files. Examples include ZArchiver, RAR for Android, and WinZip.
These apps provide more advanced compression and decompression features, allowing you to not only extract the contents of Z files but also compress files into a Z file directly on your Android device.
Whether you use a file manager app or a dedicated compression app, opening and working with Z files on Android devices has become more accessible and user-friendly, making it convenient to handle compressed files on the go.
How to Open a Z File on iOS
Opening a Z file on an iOS device requires the use of a third-party app that supports compression and decompression. Follow these steps to open a Z file on iOS:
- Install a Compression App: Start by installing a compression and decompression app from the App Store. Examples of popular apps that support Z files on iOS include File Manager & Browser, iZip, and WinZip.
- Locate the Z File: Open the compression app and navigate to the directory where the Z file is located. Ensure that you know the exact location of the Z file on your iOS device.
- Import the Z File: Use the import or add file option in the compression app to import the Z file into the app’s file manager. This will make the Z file accessible within the app.
- Extract the Z File: Once the Z file is imported, tap on it and select the extract or decompress option within the compression app. Choose a destination folder where the extracted contents will be placed.
- Wait for Extraction: The app will begin extracting the contents of the Z file into the chosen destination folder. The time taken for extraction depends on the size of the Z file and the performance of your iOS device.
After completing these steps, you should be able to open and access the extracted contents of the Z file on your iOS device using the chosen compression and decompression app.
It’s important to note that iOS has a more restricted file system compared to other operating systems. Therefore, using third-party apps for handling Z files is necessary. These apps provide additional features for managing and working with compressed files, such as creating new Z files, renaming, and sharing.
With the help of compression and decompression apps, opening Z files on iOS devices has become a convenient and user-friendly process, allowing users to handle compressed files on their iPhones or iPads with ease.
How to Extract a Z File
Extracting a Z file allows you to decompress its contents and access the original files and folders that were compressed. The extraction process may vary depending on the operating system you are using. Here’s a general guide on how to extract a Z file:
- Locate the Z File: Open the file manager or file explorer on your operating system and navigate to the directory where the Z file is located. Make sure you know the exact location of the Z file.
- Select the Z File: Click on or tap the Z file to select it
- Extract the Z File: Right-click on the selected Z file and choose the extraction or decompression option from the context menu. This action will initiate the extraction process.
- Choose Extraction Destination: Select the destination folder where you want to extract the files from the Z file. This can be an existing folder or a new folder that you create for the extracted files.
- Wait for Extraction: The extraction process will begin, and the compressed files and folders from the Z file will be extracted to the chosen destination folder. The time required for extraction will depend on the size of the Z file and the performance of your system.
After completing these steps, you should have successfully extracted the contents of the Z file, and you can now access the uncompressed files and folders. These files can then be opened, edited, or shared as needed.
It’s important to note that some operating systems may have built-in tools or utilities for extracting Z files, while others may require the use of third-party compression/decompression software. Make sure you have the necessary software or apps installed for the extraction process.
Remember to keep a backup of the original Z file, especially if the extracted contents are crucial. This will ensure that you can always revert to the original Z file if needed.
How to Compress Files into a Z File
Compressing files into a Z file allows you to reduce their size and make them easier to store, transfer, or share. The process of compressing files into a Z file can vary depending on the operating system you are using. Here’s a general guide on how to compress files into a Z file:
- Select the Files: Choose the files and folders you want to compress into a Z file. These can be individual files or a collection of multiple files and directories.
- Create a New Z File: Right-click on the selected files and choose the “Compress” or “Create Archive” option from the context menu. This action will create a new archive file in the specified format, including a Z file.
- Choose Compression Format: In the compression settings or options, select the Z file format or choose the appropriate compression algorithm associated with Z files. Ensure that the compression software or utility you are using supports the creation of Z files.
- Specify Compression Settings: Depending on the compression software or utility, you may have the option to specify additional settings, such as the compression level. Adjust these settings according to your requirements or leave them at default values.
- Choose Compression Destination: Specify the destination folder or directory where you want to save the newly created Z file. This can be any location on your system.
- Start the Compression: Begin the compression process by clicking on the “Start” or “Create” button. The selected files will be compressed into the Z file and saved in the specified destination folder.
After completing these steps, you will have successfully compressed the selected files into a Z file. This compressed file can now be used for storage, transfer, or sharing purposes.
It’s important to note that some operating systems may have built-in tools or utilities for compressing files into Z files, while others may require the use of third-party compression software. Make sure you have the necessary software or apps installed for the compression process.
Remember to keep a backup of the original files before compressing them into a Z file. This will ensure that you can always access the uncompressed files if needed.