
Quick Troubleshooting Tips
If you’re experiencing issues with setting up your Oculus Rift, don’t panic! Here are some quick troubleshooting tips to help you get your Oculus Rift up and running smoothly:
- Check your connections: Ensure that all cables are securely connected to the appropriate ports on your computer and headset. Loose connections can cause connectivity issues.
- Restart your computer: Sometimes a simple restart can resolve software conflicts or temporary glitches.
- Update your graphics card drivers: Outdated drivers can cause compatibility issues. Visit the website of your graphics card manufacturer to download and install the latest drivers.
- Check for software updates: Make sure that your Oculus software is up to date. Open the Oculus app and navigate to the settings menu to check for updates. Install any available updates to ensure you have the latest features and bug fixes.
- Calibrate your sensors and controllers: Improper sensor or controller alignment can cause tracking issues. Follow the instructions provided by Oculus to properly calibrate your sensors and controllers for optimal performance.
- Disable power management settings: Some power management settings can interfere with the performance of your Oculus Rift. Open the Power Options in your computer’s Control Panel and disable any sleep or hibernation settings that may affect USB ports or graphics card activity.
- Run the Oculus Compatibility Tool: If you’re unsure whether your computer meets the recommended system requirements, you can run the Oculus Compatibility Tool. This tool will analyze your computer’s hardware and provide recommendations for optimal performance.
- Reset your headset: If all else fails, you can try resetting your headset. Refer to the Oculus documentation or support website for instructions on how to perform a factory reset.
By following these troubleshooting tips, you should be able to address most common issues encountered during the Oculus Rift setup process. Remember, patience is key, and don’t hesitate to reach out to Oculus support if you’re still experiencing difficulties.
Checking System Requirements
Before setting up your Oculus Rift, it is crucial to ensure that your computer meets the minimum system requirements. This will ensure optimal performance and compatibility. Here’s how you can check if your system is compatible:
- Processor: Check if your computer has a processor that meets or exceeds the recommended specifications. Faster processors will generally provide better performance.
- RAM: Verify that your computer has sufficient RAM to support the Oculus Rift. The recommended amount is typically 8GB or more for a smooth VR experience.
- Graphics Card: The graphics card is a crucial component for VR gaming. Make sure your system has a compatible graphics card that meets the minimum requirements specified by Oculus.
- Operating System: Check if your computer’s operating system is compatible with Oculus software. Oculus typically supports the latest versions of Windows, so ensure that your OS is up to date.
- USB Ports: Oculus Rift requires several USB ports for connections. Confirm that your computer has the necessary USB ports available and that they meet the required specifications.
- Display: The Oculus Rift relies on a high-resolution display to deliver an immersive VR experience. Ensure that your computer’s display meets the recommended resolution and refresh rate specified by Oculus.
To find detailed system requirements for the Oculus Rift, visit the official Oculus website or consult the user manual that came with your device. Matching or exceeding the recommended system requirements will greatly enhance your overall VR experience.
If your computer falls short of the recommended specifications, you may need to upgrade certain components to ensure smooth operation. However, always keep in mind that even if your system meets the minimum requirements, more powerful hardware will often result in better performance and more enjoyable VR experiences.
Updating Graphics Card Drivers
One common cause of issues during Oculus Rift setup is outdated graphics card drivers. To ensure optimal performance and compatibility with the Oculus software, it is crucial to regularly update your graphics card drivers. Here’s how you can update your drivers:
- Identify your graphics card: Determine the manufacturer and model of your graphics card. This information can usually be found in the system settings or by opening the graphics card control panel.
- Visit the manufacturer’s website: Go to the website of your graphics card manufacturer, such as Nvidia or AMD. Look for the driver download section or support page.
- Download the latest driver: Locate the appropriate driver for your specific graphics card model and download it. Be sure to select the correct operating system version to ensure compatibility.
- Run the installer: Once the driver file is downloaded, run the installer and follow the on-screen instructions. The installation process may require you to restart your computer.
- Check for automatic updates: Some graphics card drivers have built-in software that can automatically check for updates. Enable this feature if available, so your drivers stay up to date without manual intervention.
- Verify the driver update: After the installation is complete, confirm that the new driver version is installed correctly. You can typically check this in the graphics card control panel or through the device manager in your operating system.
It is recommended to periodically check for graphics card driver updates, as new versions often include performance enhancements, bug fixes, and compatibility improvements for VR applications such as the Oculus Rift. By keeping your drivers up to date, you can ensure a smoother and more enjoyable virtual reality experience.
If you encounter any issues during the driver update process or continue to experience problems with your Oculus Rift setup, it may be worth seeking assistance from the graphics card manufacturer’s support team or contacting Oculus customer support for further guidance.
Downloading and Installing Oculus Software
Before you can start using your Oculus Rift, you’ll need to download and install the Oculus software on your computer. This software serves as the central hub for managing your VR experiences. Here’s a step-by-step guide to help you through the process:
- Prepare your computer: Make sure your computer is connected to the internet and meets the minimum system requirements for Oculus Rift. Refer to the previous section on checking system requirements for more details.
- Visit the Oculus website: Open your preferred web browser and navigate to the official Oculus website (www.oculus.com).
- Download the Oculus software: Look for the “Downloads” section on the Oculus website and click on the appropriate download link for your operating system (Windows or macOS).
- Run the installer: Locate the downloaded Oculus software file on your computer and run the installer. Follow the on-screen prompts to complete the installation process.
- Create an Oculus account: If you don’t already have an Oculus account, you will be prompted to create one during the installation process. Fill in the required information and follow the instructions to set up your account.
- Set up your Oculus Rift: Once the installation is complete, connect your Oculus Rift headset to your computer using the provided cables. Follow the on-screen instructions in the Oculus app to complete the setup process and calibrate your sensors.
- Explore the Oculus Store: With the Oculus software installed, you can now access the Oculus Store, where you can browse and download a wide range of VR games, experiences, and applications.
It’s important to note that you will need to have your Oculus Rift headset connected to your computer in order to fully utilize the Oculus software. Additionally, make sure to keep the Oculus software up to date by checking for updates in the app settings periodically.
If you encounter any difficulties during the downloading or installation process, refer to the official Oculus support documentation or contact their customer support for assistance. They are readily available to help you get started with your Oculus Rift and enjoy the exciting world of virtual reality.
Correctly Connecting the Oculus Rift Cables
Properly connecting the cables of your Oculus Rift is essential for a seamless and trouble-free VR experience. Follow these steps to ensure that your cables are correctly connected:
- Unpack your Oculus Rift: Start by carefully unpacking your Oculus Rift headset and all its accessories. Lay them out on a clean, flat surface.
- Connect the headset to your computer: Take the HDMI cable from your Oculus Rift and connect it to the HDMI port on your computer’s graphics card. This cable is responsible for transmitting the visual content to the headset.
- Connect the USB cable: Attach the USB cable from your Oculus Rift to an available USB 3.0 port on your computer. This cable facilitates communication between your computer and the headset.
- Position the sensors: Place the Oculus sensors in strategic locations around your play area, ensuring they have a clear line of sight to the headset. Connect the sensors to your computer using USB cables.
- Connect the sensor sync cable: If you have multiple sensors, connect them together using the sensor sync cable included with your Oculus Rift. This syncs the sensors and improves tracking accuracy.
- Connect the earphones (if applicable): If your Oculus Rift has detachable earphones, connect them to the integrated audio jack on the headset. Ensure they fit securely for optimal sound quality.
Once you have properly connected all the cables, make sure to organize and secure them to prevent accidental disconnection or tangling. Additionally, be mindful of any cable length limitations to avoid stretching or damaging the cables.
If you encounter any issues with the cable connections, check for any signs of damage, such as frayed wires or bent connectors. Replace any faulty cables or connectors as needed. It’s also worth checking the Oculus support documentation for specific instructions related to your Oculus Rift model.
Remember, correctly connecting the Oculus Rift cables is crucial for a smooth and uninterrupted VR experience. Take your time to ensure everything is securely connected before diving into the exciting world of virtual reality.
Checking USB Ports
When setting up your Oculus Rift, it is important to check your computer’s USB ports to ensure they meet the necessary requirements and are functioning properly. Here are some steps to help you check your USB ports:
- Identify USB 3.0 ports: USB 3.0 ports are recommended for optimal performance with the Oculus Rift. Locate the USB ports on your computer and look for those labeled as “USB 3.0” or with the distinctive blue color inside.
- Ensure sufficient available ports: Check that you have enough available USB 3.0 ports to connect the Oculus Rift headset and sensors. If you don’t have enough ports, consider using a powered USB hub to expand your available ports.
- Check USB power management: Some computers have power management settings that may affect the performance of USB ports. Access your computer’s power settings and ensure that USB power management options are disabled.
- Verify USB bandwidth: USB bandwidth can be a limiting factor for the smooth operation of the Oculus Rift. Ensure that your USB ports have enough available bandwidth to handle the data transfer requirements of the headset and sensors.
- Test USB ports: Connect a different USB device to each of your USB ports to test their functionality. This can help identify any faulty ports that may cause issues with the Oculus Rift.
- Update USB drivers: Ensure that your USB drivers are up to date. You can visit the website of your computer’s manufacturer or the USB controller manufacturer to download and install the latest drivers.
If you encounter any issues with your USB ports, such as poor connection or intermittent disconnection, try the following troubleshooting tips:
- Disconnect and reconnect the USB cables to ensure a secure connection.
- Try using different USB ports on your computer to determine if the issue persists across all ports.
- Use high-quality USB cables that are known to be compatible with the Oculus Rift.
If you continue to experience USB-related issues with your Oculus Rift, it is recommended to contact Oculus support for further assistance. They can provide specific troubleshooting steps tailored to your situation.
Checking your USB ports is an essential part of the Oculus Rift setup process. By ensuring that your USB ports meet the requirements and are in good working condition, you can enjoy a smooth and immersive virtual reality experience.
Calibrating Sensors and Controllers
Properly calibrating the sensors and controllers of your Oculus Rift is crucial for accurate tracking and an immersive virtual reality experience. Here’s how you can calibrate your sensors and controllers:
- Set up your play area: Make sure your play area is clear of any obstacles and has sufficient space for movement. Ideally, follow the recommended play area dimensions provided by Oculus for optimal tracking.
- Position the sensors: Place the Oculus sensors in strategic locations around your play area. Make sure they have a clear and unobstructed line of sight to your headset and controllers. Ideally, position them higher up and at opposite corners of your play area for better coverage.
- Start the Oculus software: Launch the Oculus app on your computer and navigate to the settings menu.
- Enter Guardian setup: Within the settings menu, locate the Guardian setup option. This will guide you through the process of defining the boundaries of your play area.
- Follow the on-screen prompts: The Oculus app will prompt you to put on your Oculus Rift headset and hold the Oculus Touch controllers. Follow the on-screen instructions to calibrate the sensors and define the play area boundaries.
- Test the tracking: After completing the calibration and Guardian setup, test the tracking by moving around your play area, picking up objects, and interacting with the virtual environment. Verify that the sensors accurately track your movements and that the controllers respond accordingly.
- Adjust sensor positions if necessary: If you notice any tracking issues or dead zones within your play area, you may need to adjust the positions of the sensors. Experiment with different sensor angles and heights, ensuring they still maintain a clear line of sight to your headset and controllers.
It’s important to periodically recalibrate your sensors and controllers to ensure optimal performance. Changes in room lighting, sensor positions, or other factors can affect tracking accuracy over time.
If you continue to experience tracking issues or calibration problems, consult the Oculus support documentation for specific troubleshooting steps or contact their customer support for further assistance. They can provide guidance based on your specific setup and help ensure that your sensors and controllers are correctly calibrated for an immersive VR experience.
Checking for Firmware Updates
Regularly checking for firmware updates is an important step in maintaining the optimal performance and compatibility of your Oculus Rift. Firmware updates often include bug fixes, stability improvements, and new features. Here’s how you can check for firmware updates:
- Open the Oculus app: Launch the Oculus app on your computer.
- Navigate to the settings menu: Locate and click on the gear icon in the top-right corner of the Oculus app to access the settings menu.
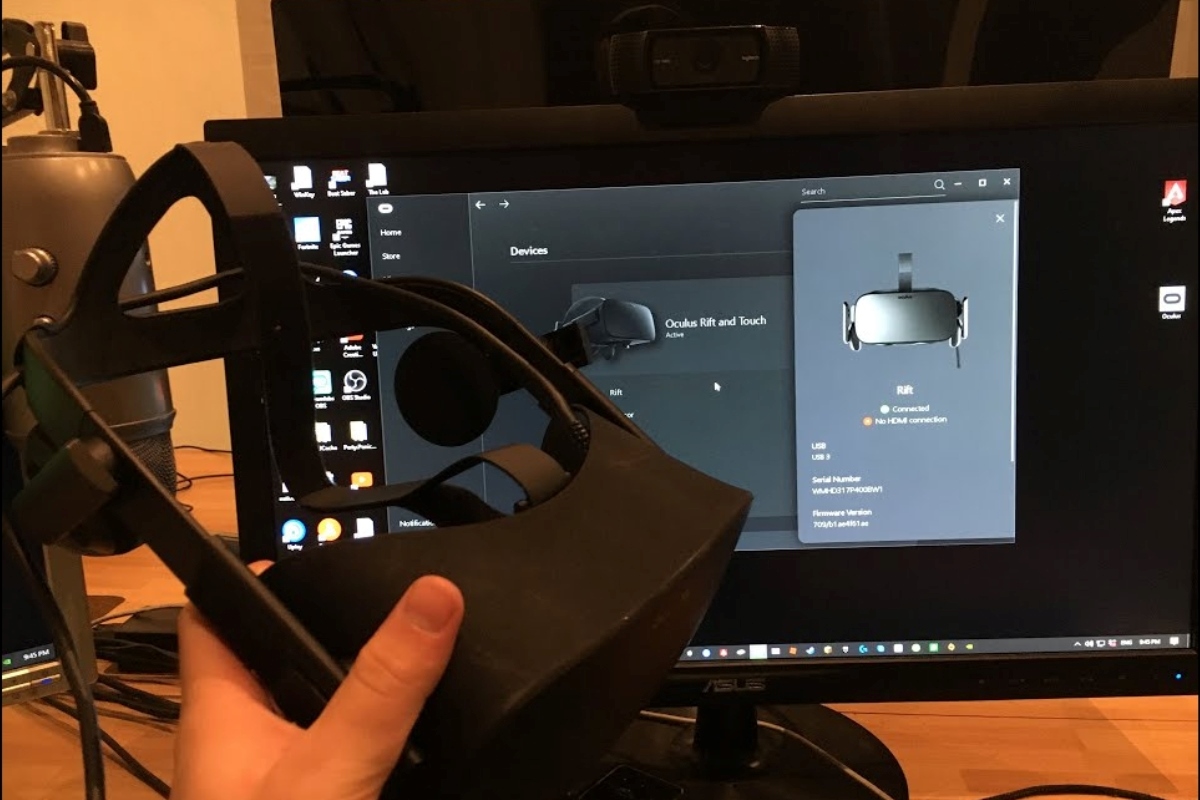
- Check for updates: Within the settings menu, look for the “Device” or “Headset” section. Here, you should find an option to check for firmware updates.
- Follow the prompts: Initiate the firmware update check by following the on-screen prompts. The Oculus app will connect to the Oculus servers and check for any available firmware updates for your headset and controllers.
- Download and install updates: If there are any firmware updates available, the Oculus app will prompt you to download and install them. Follow the instructions provided to complete the update process.
- Restart your Oculus Rift: After updating the firmware, it is recommended to restart your Oculus Rift headset and controllers. This will ensure the changes are applied and any necessary adjustments are made.
It’s important to note that firmware updates can take some time to download and install, so ensure that you have a stable internet connection and allow sufficient time for the process to complete.
By regularly checking for firmware updates and keeping your Oculus Rift up to date, you can take advantage of the latest improvements and ensure optimal performance. Firmware updates may address known issues, enhance tracking accuracy, or introduce new features to enhance your virtual reality experience.
If you encounter any issues during the firmware update process or have difficulty updating your Oculus Rift, refer to the official Oculus support documentation or reach out to their customer support for further assistance. They can provide specific instructions tailored to your situation and help resolve any firmware-related issues.
Running the Oculus Compatibility Tool
Before diving into the world of virtual reality with your Oculus Rift, it is essential to ensure that your computer meets the necessary requirements for optimal performance. The Oculus Compatibility Tool is a handy tool that can help you determine if your PC is compatible with the Oculus Rift. Here’s how you can run the tool:
- Visit the Oculus website: Go to the official Oculus website (www.oculus.com) using your preferred web browser.
- Download the Oculus Compatibility Tool: Look for the “Downloads” section on the Oculus website and click on the link to download the Oculus Compatibility Tool.
- Run the Compatibility Tool: Locate the downloaded file on your computer and run the Compatibility Tool. It will automatically scan your system to determine its compatibility with the Oculus Rift.
- Review the compatibility report: After the scan is complete, the Compatibility Tool will generate a compatibility report. It will provide you with an overview of your computer’s compatibility, highlighting any potential issues or shortcomings.
- Take note of recommendations: The compatibility report may include recommendations on how to improve compatibility or performance. Pay close attention to these recommendations for a better VR experience.
The Oculus Compatibility Tool provides valuable information about your computer’s compatibility with the Oculus Rift. It will assess factors such as your computer’s hardware specifications, graphics card, and USB ports to ensure they meet the necessary requirements.
If the Compatibility Tool determines that your PC falls short of the recommended specifications, it does not necessarily mean that your computer cannot run the Oculus Rift. However, it may indicate that you may experience suboptimal performance or encounter compatibility issues with certain applications.
By running the Oculus Compatibility Tool, you can make an informed decision on whether to proceed with setting up and using the Oculus Rift on your computer. In some cases, upgrading certain components or addressing the highlighted recommendations may be necessary to maximize your VR experience.
If you have any questions about the compatibility report generated by the Compatibility Tool or need further assistance, refer to the official Oculus support documentation or contact their customer support for personalized guidance and recommendations.
Disabling Power Management Settings
Power management settings on your computer can sometimes interfere with the proper functioning of your Oculus Rift. Disabling these settings can help ensure a smooth and uninterrupted virtual reality experience. Here’s how you can disable power management settings:
- Access Power Options: Open the Control Panel on your computer and search for “Power Options” or “Power Management.”
- Select High Performance mode: Within the Power Options menu, select the High Performance power plan. This setting ensures that your computer operates at its full potential rather than conserving power.
- Change sleep and hibernation settings: Locate the sleep and hibernation settings within the Power Options menu. Set both options to “Never” or “Off” to prevent your computer from entering sleep or hibernation mode.
- Adjust USB selective suspend settings: Look for a setting called “USB selective suspend” within the Power Options menu. Disable this setting to prevent USB devices, including the Oculus Rift, from being suspended during periods of inactivity.
- Apply changes and restart: Save your changes and restart your computer to ensure that the power management settings take effect.
Disabling power management settings can prevent USB ports from shutting down or experiencing interruptions, ensuring a consistent connection between your computer and the Oculus Rift headset.
Please note that power management settings can vary depending on your operating system version and computer manufacturer. If you have trouble locating specific power management settings or need further guidance, consult the documentation provided by your computer manufacturer or refer to their support website.
By disabling power management settings, you can eliminate potential disruptions and enhance the stability of your Oculus Rift setup. However, it is essential to consider the power consumption implications and adjust these settings as needed when not using the Oculus Rift to conserve energy.
If you continue to experience issues with power management settings or encounter other problems with your Oculus Rift, review the official Oculus support documentation or reach out to their customer support for further assistance. They can provide tailored guidance specific to your setup and help resolve any power-related issues.