What is Trello?
Trello is a highly versatile and user-friendly project management tool that helps individuals and teams stay organized and collaborate effectively. It provides a visual and intuitive interface, based on the concept of a virtual kanban board, to streamline the management of tasks and projects.
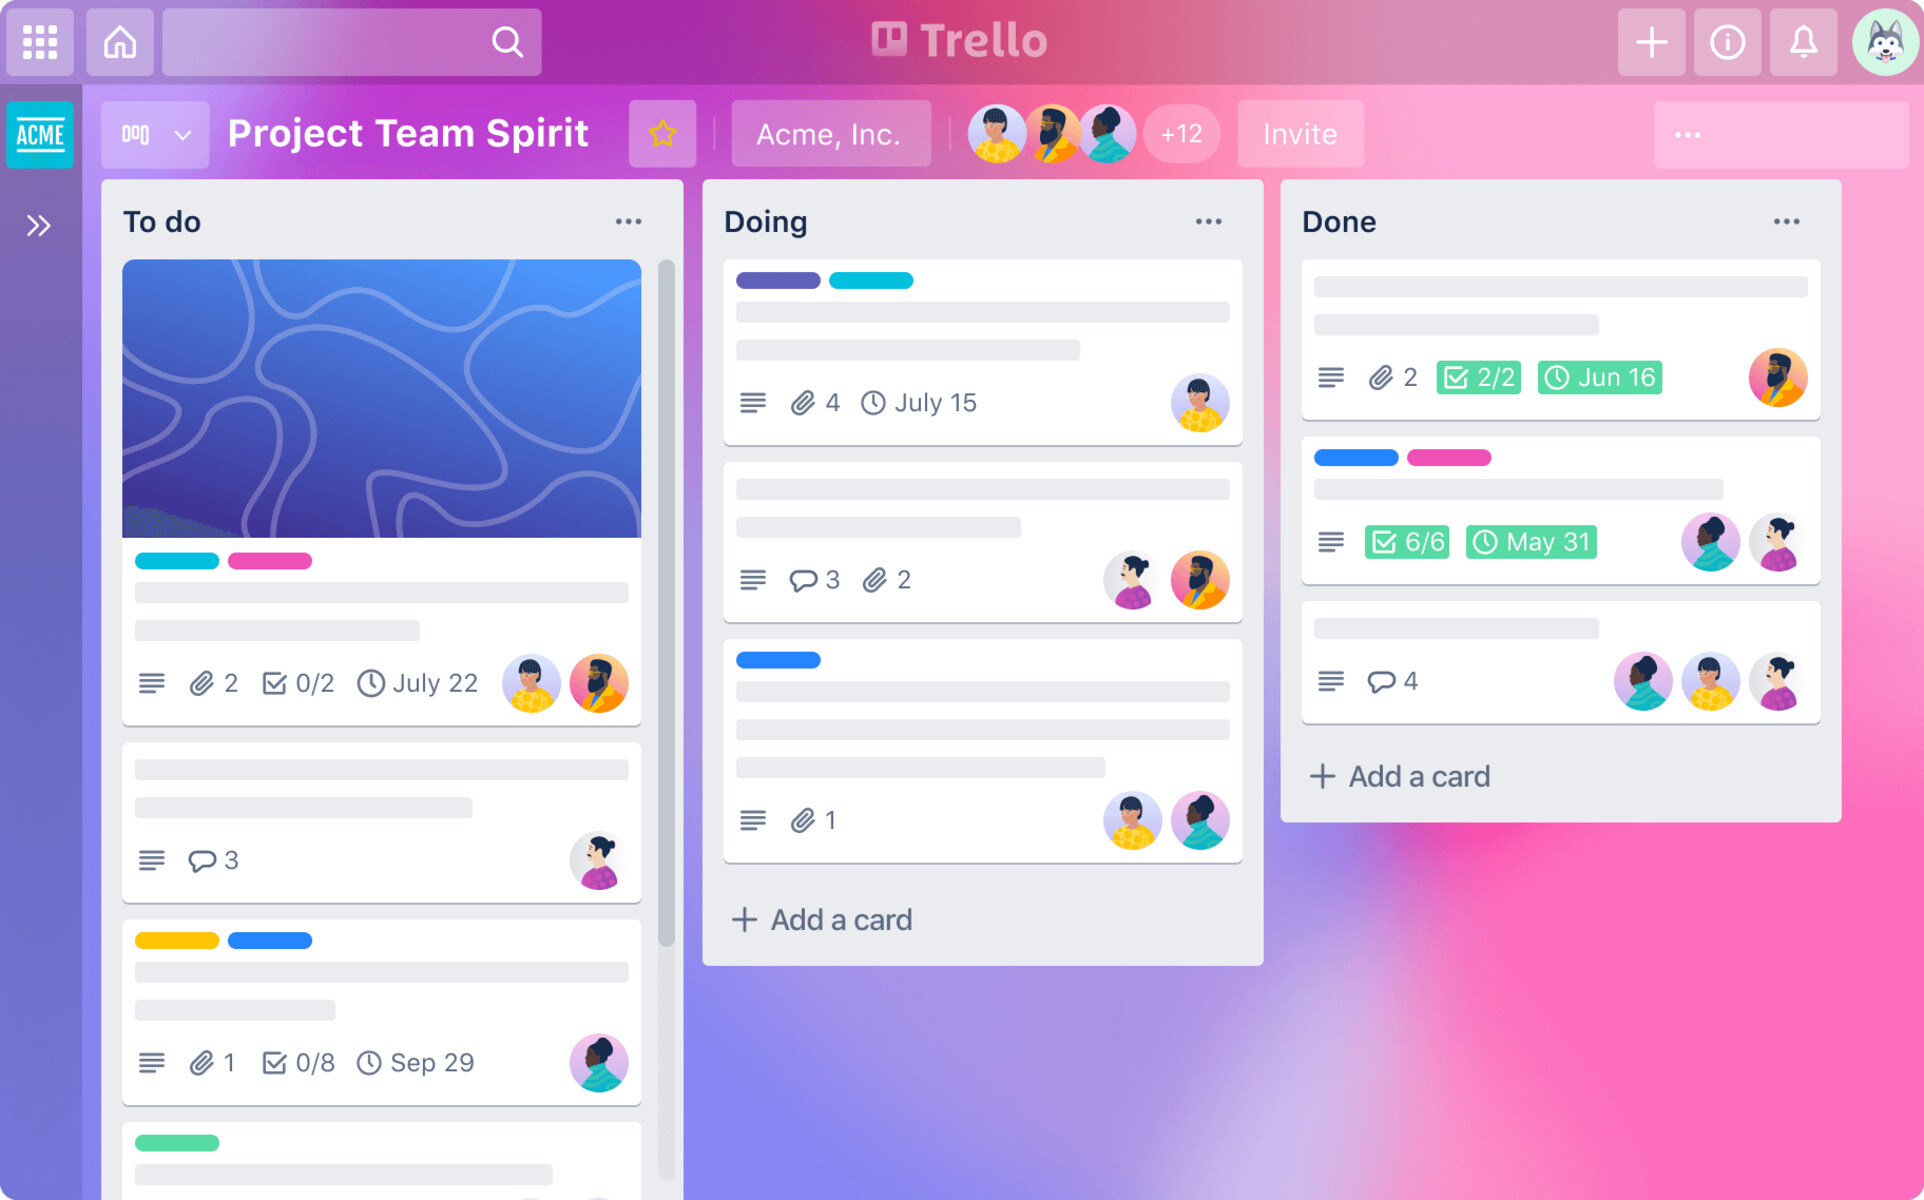
At its core, Trello revolves around boards, which act as containers for organizing your work. Each board represents a project or area of focus and can be customized to fit your specific needs. Within each board, you can create lists, which serve as different stages or categories of your project. These lists can be further broken down into individual cards, which represent specific tasks, ideas, or pieces of information.
The beauty of Trello lies in its simplicity and flexibility. The drag-and-drop functionality enables you to easily move cards between lists, rearrange their order, and prioritize tasks. This visual approach offers a clear overview of your project at a glance, making it easy to track progress and plan ahead.
Collaboration is a key aspect of Trello. You can invite team members to your boards, assign tasks, and even add due dates, labels, and attachments to cards. This ensures that everyone is on the same page and can contribute to the project’s success. Additionally, Trello allows for real-time updates and notifications, keeping everyone informed about any changes or comments on cards.
One of the many reasons why Trello is highly regarded is its compatibility with various devices and platforms. Whether you prefer using it on your computer, smartphone, or tablet, Trello seamlessly syncs your data across devices, allowing you to access important information from anywhere at any time.
Trello also offers a range of integrations with other popular tools and apps, such as Google Drive, Dropbox, Slack, and Jira. This enables you to centralize your workflow and easily connect Trello with your existing tools and systems, maximizing efficiency and productivity.
Overall, Trello empowers individuals and teams by providing a straightforward solution for project management. Its visual approach, flexibility, and collaborative features make it an ideal choice for both personal and professional use. Whether you’re planning a vacation, managing a marketing campaign, or organizing a software development project, Trello can help you stay organized, streamline your processes, and achieve your goals.
The key features of Trello
Trello offers a plethora of powerful features that make it a popular choice for project management. Let’s explore some of its key features:
1. Boards, Lists, and Cards: Trello’s hierarchical structure allows you to create boards to represent projects, lists to organize tasks or stages, and cards to represent individual items or detailed information.
2. Drag-and-Drop Interface: The intuitive drag-and-drop functionality makes it easy to move cards between lists, reorder tasks, and update progress, providing a visual representation of your project’s status.
3. Collaborative Tools: Trello facilitates effective collaboration with team members. You can invite colleagues, assign tasks, and leave comments on cards, ensuring everyone stays informed and can contribute to the project’s success.
4. Due Dates and Reminders: By adding due dates to your cards, you can set deadlines and receive reminders for upcoming tasks, helping you stay on top of your project and meet important milestones.
5. Labels and Tags: Trello allows you to easily categorize and prioritize cards using color-coded labels or tags. This way, you can quickly identify tasks, filter information, and focus on the most important aspects of your project.
6. Attachments and File Sharing: Trello enables you to attach files, documents, and images directly to your cards. This feature streamlines communication and ensures that all relevant information is readily accessible within the project board.
7. Activity Feed and Notifications: Trello keeps you informed about the latest updates with its activity feed and notification system. You’ll receive real-time notifications when tasks are completed, comments are added, or changes are made, allowing for seamless communication and collaboration.
8. Power-Ups: Trello offers various Power-Ups, which are integrations with other third-party applications. With Power-Ups, you can extend Trello’s functionality, integrate with apps like Google Drive or Slack, and customize your workflow to suit your specific needs.
9. Mobile Apps and Syncing: Trello provides mobile apps for iOS and Android devices, ensuring that you can access and manage your projects on the go. The data syncs in real-time, allowing you to seamlessly switch between devices while keeping your information up to date.
10. Privacy and Security: Trello offers different privacy settings, enabling you to control who can access your boards. Additionally, Trello follows industry-standard security practices, safeguarding your data and ensuring a secure project management environment.
With these key features, Trello equips individuals and teams with a convenient and efficient project management solution. Whether you’re a freelancer managing multiple projects or a large team collaborating on complex tasks, Trello provides the necessary tools to stay organized, streamline processes, and achieve optimal productivity.
Setting up your Trello account
Getting started with Trello is quick and straightforward. Follow these steps to set up your Trello account:
1. Visit the Trello website: Go to trello.com and click on the “Sign Up” button located at the top right corner of the page.
2. Sign up with your email: Enter your email address and create a password. Alternatively, you can sign up using your Google or Microsoft account by clicking on the respective buttons.
3. Verify your account: An email will be sent to the address you provided. Click on the verification link in the email to confirm your account and proceed with the setup.
4. Create your first board: Once your account is verified, you can start creating your first board. Give it a name that reflects the project you’re working on and add a description if needed.
5. Customize your board: Trello allows you to personalize your board by adding background images, changing colors, and adjusting other settings. Explore the options available to create an environment that suits your preferences and style.
6. Add members: If you’re working on a collaborative project, you can invite team members to join your board. In the “Members” section, enter their email addresses or Trello usernames and assign them appropriate roles (e.g., admin, member, observer).
7. Create lists and cards: Now it’s time to organize your project by creating lists and cards. Think about the different stages, tasks, or categories relevant to your project and create lists accordingly. Within each list, you can create individual cards to represent specific tasks or pieces of information.
8. Customize cards with details: Enhance the functionality of your cards by adding due dates, attaching files, assigning team members, adding labels, and leaving comments. These details help prioritize tasks, track progress, and facilitate collaboration.
9. Explore additional features: Trello offers a range of additional features and settings to optimize your project management experience. Familiarize yourself with features like labels, power-ups, integrations with other apps, and more to enhance your workflow.
10. Download the Trello mobile app: To access Trello on the go, download the Trello mobile app for iOS or Android devices. This allows you to stay connected and manage your projects from anywhere at any time.
By following these steps, you can easily set up your Trello account and start managing your projects effectively. Remember to customize the boards, lists, and cards to align with your specific project requirements, and explore the various features and settings to tailor Trello to your workflow.
Navigating the Trello interface
Once you’ve set up your Trello account, it’s important to familiarize yourself with the Trello interface so you can navigate through the platform efficiently. Here’s a breakdown of the key components:
1. Boards: The main screen of Trello displays all your boards. You can switch between boards by clicking on them, or use the search bar at the top of the page to find specific boards.
2. Lists: Within each board, you’ll find lists. Lists represent different stages, categories, or areas of focus for your project. To navigate through lists, simply scroll horizontally or use the left and right arrows located at the top of the board.
3. Cards: Cards reside within lists and represent individual tasks, ideas, or pieces of information. You can click on a card to view its details, including descriptions, comments, due dates, attachments, labels, and assigned team members.
4. Drag-and-Drop: Trello’s drag-and-drop functionality is at the core of its interface. You can easily move cards between lists, reorder them within a list, or even drag cards to a different board.
5. Menu Options: Trello offers several menu options for each board. These options reside in the top right corner of the board and allow you to perform various actions, such as adding members, changing settings, archiving or deleting the board, and more.
6. Board Sidebar: Located on the right side of the board, the sidebar provides additional information and options. You’ll find features like the board description, activity feed, member list, labels, and more.
7. Notifications: To keep you informed about board activities, Trello provides a bell icon in the top right corner. This bell icon displays a notification badge whenever there are new updates, comments, or actions related to your boards or cards.
8. Search: The search bar at the top of the Trello interface allows you to quickly locate boards, cards, members, or specific information within your Trello account. Simply enter your search query and Trello will display the relevant results.
9. Keyboard Shortcuts: Trello offers a wide range of keyboard shortcuts to navigate and perform various actions quickly. To view a list of available shortcuts, simply press “?” on your keyboard.
10. Personal Settings: To access your personal settings, including profile information, account preferences, and notification settings, click on your profile picture in the top right corner and select “Edit Profile” from the dropdown menu.
By understanding the various components and options within the Trello interface, you’ll be able to navigate through the platform effortlessly and efficiently. Take advantage of the drag-and-drop functionality, menu options, search capabilities, and keyboard shortcuts to optimize your workflow and make the most of Trello’s project management capabilities.
Creating and organizing boards
Creating and organizing boards in Trello is a fundamental step to effectively manage your projects. Let’s delve into the process of creating a board and organizing your boards:
Creating a Board:
To create a new board in Trello, follow these simple steps:
1. Click “Create New Board”: On the Trello home screen, locate the “Create New Board” button, usually positioned on the left-hand side. Click on it to initiate the board creation process.
2. Choose a Title: Give your board a descriptive and meaningful title that represents the project or area of focus. This makes it easy for you and your team members to identify the board.
3. Add a Description (optional): If necessary, provide additional information or context about the board by adding a description. This can help set expectations or highlight important details about the project.
4. Set the Visibility: Determine the visibility of your board. You have three options: public, where anyone can view and join the board, private, where only invited members can access the board, or team, exclusive to members of your Trello team.
5. Customize the Background (optional): Trello allows you to choose a background image or color for your board. This customization can help visually differentiate boards or align them with specific projects or themes.
6. Click “Create”: Once you’ve added all the necessary information and customization options, click the “Create” button to finalize the creation of your board.
Organizing Your Boards:
To ensure effective organization and easy accessibility, consider implementing the following techniques:
1. Board Naming System: Develop a consistent naming system for your boards. This can involve project codes, client names, or specific categories to make it easier to find and manage boards as your project list grows.
2. Sorting and Prioritizing: Arrange your boards in a logical order based on priority, timeline, or any other criteria that suits your workflow. This allows you to quickly locate and focus on the most critical boards.
3. Board Labels: Utilize labels to visually categorize and differentiate your boards. Assign specific colors to represent different types of projects, teams, or departments, making it easier to identify and navigate between them.
4. Archive Old or Completed Boards: Keep your board list clean and clutter-free by archiving boards that are no longer active or relevant. Archiving helps maintain focus on current or ongoing projects and reduces visual distractions.
5. Collaboration and Invitation: If you’re working with a team, invite members to specific boards to ensure seamless collaboration. Assign appropriate roles to team members, such as admins, members, or observers, depending on their level of participation.
6. Duplicate Boards: If you have similar projects or recurring tasks, consider duplicating boards to save time and effort. Duplicating a board creates a new board with the same structure, lists, and cards, serving as a template for future projects.
7. Utilize Board Templates: Trello provides pre-built templates for various project types and purposes. These templates offer pre-defined lists, cards, and labels, streamlining the board creation process and ensuring consistency across projects.
By creating boards thoughtfully and organizing them effectively, you can streamline your project management in Trello, improve collaboration, and maintain clarity in your workflow.
Understanding the concept of lists and cards
In Trello, the concept of lists and cards forms the foundation for organizing your tasks and projects. Let’s explore what lists and cards are and how they function within the Trello ecosystem:
Lists:
Lists in Trello represent different stages, categories, or areas of focus for your project. They act as containers for organizing your tasks or ideas. Typically, lists are displayed vertically on a Trello board.
Common examples of lists might include stages of a project, such as “To Do,” “In Progress,” and “Completed,” or categories, like “Marketing,” “Design,” and “Development.”
You can easily create new lists by clicking the “Add a List” button on your board. You can also rename lists, reorder them, or archive them when they are no longer needed.
Cards:
Cards reside within lists and represent individual tasks, ideas, or pieces of information. Each card is essentially a container for relevant details, such as descriptions, due dates, attachments, and assigned members.
Think of cards as the building blocks of your project, where each card represents a specific action item or piece of information. Cards are displayed within their respective lists, and you can easily move them between lists to reflect changes in progress or status.
To create a card, click on the “Add a card” button within a list. Give the card a descriptive title and, if necessary, add more details by opening the card. Within each card, you can set due dates, add labels, assign members, and leave comments or attachments.
Cards can be moved by simply dragging and dropping them to a different list. This flexible functionality allows you to easily update the progress of your tasks and adapt to changing project requirements.
Benefits of Lists and Cards:
The concept of lists and cards in Trello offers several benefits for effective project management:
- Visual Organization: The visual representation of lists and cards provides a clear overview of your project and allows you to categorize and prioritize tasks.
- Flexibility and Adaptability: Cards can be easily moved between lists, reflecting changes in progress or status, and providing a dynamic and agile workflow.
- Collaboration: Each card includes features like comments, attachments, and assigned members, promoting seamless collaboration and communication amongst team members.
- Centralized Information: By storing all relevant details within cards, Trello ensures that information is easily accessible and consolidated within each project board.
- Trackable Progress: Lists and cards allow you to track the progress of tasks or stages, making it easy to see what’s been completed and what’s still pending.
Understanding how lists and cards function in Trello provides a solid foundation for organizing your projects, managing tasks effectively, and collaborating with team members in a streamlined manner.
Customizing your boards with labels, due dates, and attachments
Trello offers a range of customization options that allow you to personalize your boards and enhance their functionality. Let’s explore how you can customize your boards using labels, due dates, and attachments:
Labels:
Labels are a powerful tool for categorizing and visually organizing your cards. With labels, you can apply color-coded tags to cards to indicate specific attributes, priorities, or categories. For example, you may use labels to differentiate tasks by urgency, client, team member, or project type.
To add labels to a card, simply click on the card and choose the desired label(s) from the label menu. You can customize the label colors to match your preferences and customize the available labels to suit your specific needs. Labels provide a quick and easy way to identify cards at a glance and streamline your workflow.
Due Dates:
Setting due dates for your cards helps you manage your tasks effectively and stay on track for project deadlines. Due dates provide a visual reminder of when tasks need to be completed and can be assigned to individual cards or entire lists.
To add a due date to a card, open the card and click on the due date field. Select the desired date from the calendar or input it manually. Trello will display the due dates on the front of the card, making it easy to see which tasks are approaching or overdue. Additionally, Trello can send you email notifications to remind you of upcoming due dates, keeping you organized and on schedule.
Attachments:
Attachments allow you to associate files, documents, and images with your cards, ensuring that all relevant information is readily accessible within your boards. You can attach files or drag and drop them directly onto cards from your computer, or link files from cloud storage services like Google Drive or Dropbox.
To attach a file to a card, open the card and click on the attachment icon. Choose the file you want to attach, and Trello will display it on the card for easy access. This feature is particularly valuable for sharing documents, design files, or reference materials related to your tasks.
Customizing your boards with labels, due dates, and attachments enhances your organization and efficiency within Trello. Labels provide a visual categorization system, due dates keep you on track with task deadlines, and attachments ensure that all necessary information is easily accessible. Utilizing these customization options helps streamline your workflow and maximize productivity.
Collaborating with team members on Trello
Trello offers robust collaboration features that facilitate seamless teamwork and communication among team members. Let’s explore how you can effectively collaborate with your team on Trello:
Inviting Team Members:
Collaboration starts by inviting your team members to join your Trello boards. To invite team members, open the board you want to collaborate on and click the “Invite” button. Enter their email addresses or Trello usernames, assign them appropriate roles (admin, member, observer), and send the invitations. Collaborators will receive an email notification and can join the board with a single click.
Assigning Tasks:
Trello allows you to assign tasks to specific team members. By assigning a card to a team member, you delegate responsibility and clearly indicate who is accountable for completing the task. To assign a card, open it and click on the “Assign” button. Select the team member’s name or username from the list, and they will be notified of their assignment.
Adding Comments:
Comments enable real-time communication and conversations within cards. Team members can leave comments, ask questions, provide updates, or offer feedback directly on the relevant card. To add a comment, open the card and enter the text in the comment section. Each comment has a timestamp, allowing team members to track the progress of discussions and responses.
Attaching Files and Documents:
Sharing files and documents is essential for collaboration. Trello allows you to attach files directly to cards, ensuring that important documents and references are easily accessible to everyone involved. You can attach files from your computer or link documents from cloud storage services like Google Drive or Dropbox.
Collaboration Notifications:
Trello’s notification system keeps everyone informed about board activities and changes. When team members are invited to a board or assigned to a card, they receive email notifications. Additionally, they receive real-time notifications within Trello for updates, comments, or changes related to the boards and cards they are involved with. This ensures that everyone stays up to date with the latest developments.
Activity Feed:
The activity feed provides a centralized view of all the actions and updates on your boards. It shows a timeline of recent activities, such as card movements, comments, due date changes, and attachment additions. By referring to the activity feed, team members can quickly catch up on the latest project developments and stay informed.
Collaboration Best Practices:
To enhance collaboration on Trello, consider implementing the following best practices:
- Establish Clear Communication Channels: Define how you and your team will communicate on Trello, whether it’s through comments, notifications, or regular check-ins.
- Encourage Regular Updates: Encourage team members to provide regular updates on their tasks, share progress, and ask for assistance or clarification when needed.
- Utilize Due Dates: Set realistic due dates for tasks and encourage team members to update their status if they anticipate delays or need to adjust deadlines.
- Keep Conversations Organized: Use the ‘@’ mention to direct comments or questions to specific team members, keeping conversations organized and ensuring the right people are notified.
- Encourage Collaboration on Cards: Promote active collaboration by inviting team members to leave comments, suggestions, or ideas on relevant cards, generating a lively discussion around the task or topic at hand.
By leveraging Trello’s collaboration features and following best practices, you can foster efficient teamwork, streamline communication, and ensure that everyone is on the same page throughout the project lifecycle.
Using Trello for project management
Trello is an excellent tool for project management, offering a versatile and intuitive platform to organize, track, and collaborate on projects of all sizes. Let’s explore how you can effectively use Trello for project management:
1. Create a Board for Each Project:
Start by creating a board for each project you’re managing. Give the board a descriptive title and add a brief description to provide context for the project. Customize the board according to your needs by adding lists and cards.
2. Set Up Lists to Reflect Workflow:
Create lists on your board to represent the different stages or phases of your project. This allows you to visually track progress and manage tasks effectively. Common list names could include “To Do,” “In Progress,” “Review,” and “Completed.”
3. Break Down Tasks into Cards:
Create cards within each list to represent individual tasks or action items. Include detailed descriptions, due dates, attachments, or any other relevant information within the cards. This helps team members understand their responsibilities and deadlines.
4. Assign Tasks to Team Members:
Assign cards to team members to delegate tasks and ensure accountability. By assigning specific cards to individuals, you clarify who is responsible for completing each task. This keeps everyone aligned and allows for easy tracking of progress.
5. Utilize Labels for Categorization:
Use labels to categorize and prioritize cards within lists. Create a set of label colors to represent different task types, priorities, or categories. This visual distinction helps team members quickly identify and focus on specific tasks.
6. Set Due Dates and Reminders:
Assign due dates to cards to establish deadlines and create a sense of urgency. This helps team members prioritize their work and stay on track. Trello’s notification system sends reminders to team members about upcoming due dates, ensuring timely task completion.
7. Collaborate with Team Members:
Encourage collaboration and communication by utilizing Trello’s commenting system. Team members can leave comments, ask questions, provide updates, or offer feedback directly on relevant cards. This fosters effective communication and keeps conversations organized.
8. Monitor Progress and Make Adjustments:
Regularly review your board to monitor progress and identify any bottlenecks or issues. Move cards between lists as tasks progress and update due dates or assignment of tasks as needed. This allows you to keep your project on track and make adjustments in real-time.
9. Integrate with Third-Party Apps:
Take advantage of Trello’s integrations with other productivity tools and services. Sync Trello with apps like Google Drive, Slack, or Jira to streamline your workflow and ensure that all relevant information is easily accessible within Trello.
10. Embrace Mobile Accessibility:
Install the Trello mobile app on your devices to stay connected and manage your projects on the go. The mobile app allows you to access your boards, add or update cards, and collaborate with team members from anywhere at any time.
By utilizing Trello’s features and implementing best practices, you can effectively manage your projects, streamline communication, and ensure efficient collaboration among team members.
Integrating Trello with other apps and tools
Trello offers a seamless integration with a wide range of apps and tools, allowing you to streamline your workflow and centralize your project management efforts. Let’s explore the benefits of integrating Trello with other apps and how it enhances your productivity:
1. Google Drive:
Integrate Trello with Google Drive to easily attach files from your Google Drive account to Trello cards. This integration ensures that all relevant documents, spreadsheets, or presentations are accessible and viewable within Trello, eliminating the need to switch between multiple platforms.
2. Dropbox:
By integrating Trello with Dropbox, you can quickly attach files or folders from your Dropbox account to Trello cards. This simplifies file sharing and collaboration, making it effortless to access and manage important documents associated with your Trello projects.
3. Slack:
Connecting Trello with Slack allows you to receive real-time notifications and updates from Trello within your Slack workspace. You can set up notifications for specific boards, lists, or cards, ensuring that you and your team stay informed about project activities without constant manual monitoring.
4. Jira:
If you’re using Jira for software development, integrating it with Trello helps bridge the gap between project management and development workflows. The integration enables you to link Trello cards to Jira issues, ensuring seamless collaboration between teams and synchronizing project updates between the two platforms.
5. GitHub:
Integrating Trello with GitHub allows for streamlined project management and issue tracking for software development projects. You can create Trello cards directly from GitHub issues and link them to the corresponding code repositories, simplifying the coordination between development tasks and project management.
6. Evernote:
By integrating Trello with Evernote, you can capture and attach notes, ideas, or reference materials directly to Trello cards. This integration ensures that all your important thoughts and information are readily accessible within Trello, consolidating your project-related resources in a single location.
7. Microsoft Teams:
When you integrate Trello with Microsoft Teams, you can remain updated on Trello activities directly within your Teams channel. This integration centralizes communication and collaboration, allowing team members to access and discuss Trello projects without toggling between multiple platforms.
8. Calendar apps (Google Calendar, Outlook, etc.):
Syncing Trello with calendar apps allows you to view due dates and tasks from your Trello boards directly in your calendar application. This integration provides a holistic view of your schedule and helps manage your time effectively by integrating project deadlines with your existing calendar events.
9. Zapier:
Zapier is a powerful automation tool that enables you to connect Trello with thousands of other apps. With Zapier, you can automate repetitive tasks, create custom workflows, and trigger actions in other apps based on Trello events or changes, streamlining your project management process.
10. Custom Integrations:
For more specific needs, Trello offers a robust API that allows developers to create custom integrations with other apps or internal systems. This enables you to tailor the Trello experience to your unique requirements and connect it with the tools and services that are critical to your workflow.
Integrating Trello with other apps and tools enhances your productivity, simplifies collaboration, and consolidates project management efforts. By connecting Trello with your favorite tools, you can create a seamless workflow that boosts efficiency and ensures that you have all the necessary information within reach.
Tips and best practices for using Trello effectively
Trello is a powerful project management tool with various features and customization options. To make the most of Trello and maximize your productivity, consider implementing the following tips and best practices:
1. Customize Your Boards:
Personalize your boards by adding background images, changing colors, and arranging them according to your workflow. Customization helps create a visually appealing and organized workspace.
2. Use Labels Consistently:
Establish a standardized labeling system and ensure team members use labels consistently. This promotes clarity, allows for easy categorization, and enables quick identification of task types, priorities, or categories.
3. Utilize Checklists:
Within cards, use the checklist feature to break down complex tasks into smaller, more manageable steps. This helps track progress and ensures that all necessary subtasks are completed.
4. Take Advantage of Power-Ups:
Explore Trello’s Power-Ups to extend its functionality. Power-Ups offer integrations with popular tools and services, providing additional capabilities that align with your specific project management needs.
5. Regularly Review and Update Boards:
Take time to review your boards regularly, ensuring that they reflect the current status of your projects. Update cards, due dates, assignments, and labels as needed to keep everything accurate and up to date.
6. Create Board Templates:
If you frequently work on similar projects or have recurring workflows, create board templates. Templates allow you to quickly duplicate the structure, lists, and labels, saving time and ensuring consistency across projects.
7. Enable Calendar Power-Up:
By enabling the Calendar Power-Up, you can view due dates from your Trello boards in your preferred calendar application. This helps visualize deadlines alongside other commitments and ensures you stay organized.
8. Collaborate Effectively with Comments:
Encourage team members to leave comments on cards to foster effective communication and collaboration. Use comments to ask questions, provide updates, or share feedback, keeping all relevant information organized within the context of the task or project.
9. Establish Timeframes:
Use Trello’s due dates and calendar view to set realistic timeframes for tasks. Be mindful of dependencies and allocate sufficient time for tasks to ensure a smooth workflow and project progress.
10. Regularly Explore New Features:
Trello continuously adds new features and improvements. Stay up to date with Trello’s updates, announcements, and blog posts to discover new functionalities, shortcuts, and best practices that can enhance your project management experience.
By implementing these tips and embracing best practices, you can optimize your workflow, streamline collaboration, and maximize your productivity when using Trello for project management.