
Benefits of Philips Hue Kit
With the increasing popularity of smart home technology, the Philips Hue kit stands out as one of the most innovative and versatile lighting solutions available. This smart lighting system offers a range of benefits that improve both convenience and ambiance in your home. Let’s explore some of the key advantages of the Philips Hue kit:
1. Customizable Lighting: One of the major benefits of the Philips Hue kit is the ability to customize your lighting experience. With a wide range of colors and brightness levels, you can create the perfect ambiance for any occasion.
2. Remote Access: The Philips Hue kit allows you to control your lights from anywhere in the world using the dedicated mobile app. Whether you’re at work or on vacation, you can easily turn your lights on or off, adjust their brightness, or change colors with just a few taps on your smartphone.
3. Automated Lighting: Take advantage of the automation capabilities of the Philips Hue kit to simplify your daily routine. You can set schedules to automatically turn your lights on or off at specific times, creating an illusion of occupancy when you’re away or ensuring you wake up to a gradual sunrise-like lighting experience.
4. Energy Efficient: Philips Hue bulbs are designed to be energy-efficient, helping you save on your electricity bills. LED technology is used in these bulbs, making them consume less energy compared to traditional incandescent or even CFL bulbs.
5. Integration with Smart Home Systems: The Philips Hue system is compatible with various smart home platforms such as Amazon Alexa, Google Assistant, Apple HomeKit, and more. This integration allows you to control your lights using voice commands or integrate them with other smart devices for seamless home automation.
6. Enhances Home Security: Set up automated lighting routines to give the impression that someone is home, even when you’re away. This can help deter potential intruders and improve the security of your home.
7. Personalized Lighting Scenes: Create personalized lighting scenes to match your mood or activities. Whether you want a cozy and warm atmosphere for movie nights or a vibrant and energizing ambiance for parties, the Philips Hue kit allows you to easily switch between different lighting scenes.
Overall, the Philips Hue kit offers a wide range of benefits that enhance convenience, energy efficiency, and the overall ambiance of your home. As you explore the possibilities of this smart lighting system, you’ll discover even more ways to enjoy the benefits it brings to your everyday life.
Components of Philips Hue Kit
The Philips Hue kit consists of several components that work together to deliver an exceptional smart lighting experience. Let’s take a closer look at each of these components:
1. Bridge: The bridge is the heart of the Philips Hue system. It acts as the central hub that connects and controls all the Hue lights in your home. The bridge connects to your home’s Wi-Fi network and allows you to control your lights using the Philips Hue app or other compatible smart home platforms.
2. Bulbs: Philips Hue bulbs are the main lighting source that you can replace your existing bulbs with. These smart LED bulbs come in various options, including white light bulbs or color-changing bulbs. The bulbs are compatible with standard light sockets and can be controlled individually or grouped together to create different lighting scenes.
3. Lightstrips and Lamps: In addition to bulbs, the Philips Hue system also offers flexible lightstrips and lamps. Lightstrips are adhesive-backed LED strips that can be placed under cabinets, behind TVs, or along walls to provide indirect lighting. Hue lamps are standalone fixtures that can be placed anywhere in the room for targeted lighting.
4. Installation Process: Setting up the Philips Hue kit is a straightforward process. First, you need to connect the bridge to your Wi-Fi router using the Ethernet cable provided. Then, screw in the Philips Hue bulbs or connect the lightstrips and lamps to a power source. Finally, download the Philips Hue app, follow the on-screen instructions to detect the bulbs, and you’re ready to go.
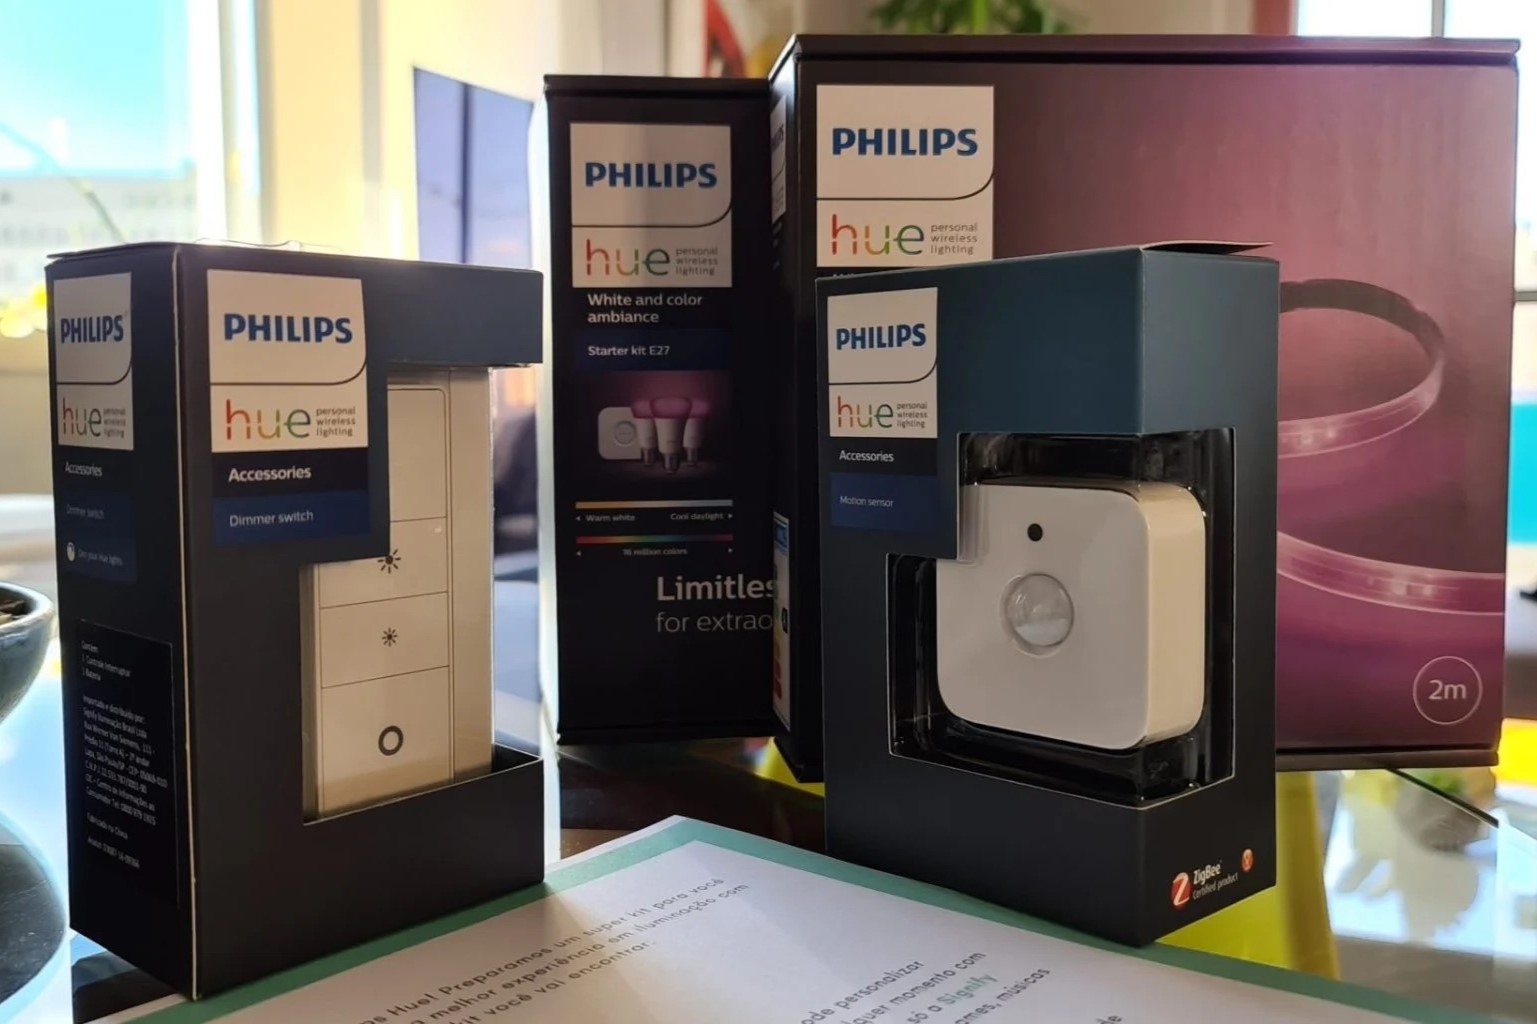
5. Additional Accessories: Apart from the essential components, Philips also offers additional accessories to enhance your lighting experience. These include motion sensors, dimmer switches, and smart buttons that provide convenient ways to control your lights without using your smartphone.
6. Compatibility: The Philips Hue kit is compatible with a wide range of smart home platforms, making it easy to integrate with your existing smart home devices. You can control your lights using voice commands through popular smart assistants like Amazon Alexa, Google Assistant, or Apple Siri.
7. Expandability: The Philips Hue kit is built to be scalable, allowing you to add more lights and accessories as your needs evolve. You can expand your system by simply connecting additional bulbs or components to the existing bridge, making it a flexible and future-proof lighting solution.
With its versatile components, easy installation process, and compatibility with other smart home devices, the Philips Hue kit offers a comprehensive smart lighting solution for any home. Whether you’re looking to create a cozy ambiance, enhance convenience, or improve home security, the Philips Hue kit has everything you need to transform your space into a smart and connected haven.
Bridge
The bridge is a crucial component of the Philips Hue kit, serving as the central control hub for all your Hue lights. Without the bridge, you won’t be able to fully unlock the capabilities of your smart lighting system. Let’s delve into the details of the Philips Hue bridge:
Functionality: The primary function of the bridge is to connect your Philips Hue lights to your home’s Wi-Fi network. It acts as a bridge between your smartphone, smart home assistant, or other compatible devices and the Hue lights, enabling seamless communication and control.
Connectivity: To set up the bridge, simply connect it to your Wi-Fi router using the provided Ethernet cable. This enables the bridge to establish a reliable connection to your home network, allowing you to control your lights from anywhere within the range of your Wi-Fi signal.
Control Options: Once the bridge is connected, you can control your lights using the Philips Hue app, which is available for both iOS and Android devices. The app provides a user-friendly interface that allows you to turn lights on or off, adjust brightness, change colors, and create custom lighting scenes.
Integration: The Philips Hue bridge is designed to integrate seamlessly with other smart home ecosystems. It is compatible with popular smart home platforms like Amazon Alexa, Google Assistant, and Apple HomeKit. This means you can control your lights using voice commands or include them in routines and automation sequences alongside other smart devices.
Scalability: The bridge serves as the foundation for expanding your Philips Hue lighting setup. It can support up to 50 Philips Hue lights, including bulbs, lightstrips, and lamps. This scalability allows you to add more lights and accessories to your system as needed without the need for additional bridges.
Software Updates: Philips frequently releases software updates for the bridge to enhance its performance and add new features. These updates are usually delivered over-the-air and can be installed through the Philips Hue app, ensuring that your bridge remains up to date with the latest advancements.
Security: Philips takes the security of their Hue bridge seriously. The bridge utilizes encryption technology to protect your wireless connection and ensure that your lights are secured from unauthorized access. This gives you peace of mind knowing that your smart lighting system is protected.
The Philips Hue bridge is the backbone of your smart lighting setup, enabling you to control and customize your lights in ways that enhance your daily life. With its connectivity options, integration with other smart home platforms, and scalability, the bridge provides a solid and reliable foundation for building a truly smart and versatile lighting system.
Bulbs
The Philips Hue bulbs are the primary lighting source in the Hue ecosystem, offering a wide range of options to fulfill your lighting needs. These smart LED bulbs bring convenience, versatility, and ambiance to your home. Let’s dive into the details of Philips Hue bulbs:
Variety of Options: Philips Hue bulbs come in a variety of options to suit different preferences and lighting requirements. You can choose from white ambiance bulbs, which offer various shades of white light, from warm to cool. Alternatively, you can opt for color ambiance bulbs, which provide a spectrum of colors, allowing you to create vibrant and dynamic lighting scenes.
Easy Installation: Installing Philips Hue bulbs is a breeze. Just screw the bulbs into your existing light sockets, and they are ready to use. The bulbs are compatible with standard E26/E27 sockets, making them a simple replacement for your traditional incandescent or CFL bulbs.
Individual and Group Control: With the Philips Hue bulbs, you have the flexibility to control each bulb individually or group them together into zones or rooms. This enables you to tailor the lighting atmosphere in different areas of your home, whether it’s creating a cozy setting in the living room or adjusting the brightness in the kitchen.
Dimming and Brightness: Philips Hue bulbs offer adjustable brightness levels, allowing you to set the perfect lighting intensity for any mood or occasion. You can dim the lights for a relaxed and cozy atmosphere or increase the brightness for tasks that require more illumination.
Wireless and Remote Control: Philips Hue bulbs can be wirelessly controlled using the Philips Hue app on your smartphone or tablet. This means you can turn your lights on or off, adjust the brightness, and change colors directly from your mobile device, even when you’re not at home. It offers convenience and flexibility at your fingertips.
Customizable Lighting Scenes: With the Hue app, you can create custom lighting scenes to match your preferences or specific activities. Whether you want a vibrant disco-like atmosphere for a party or a soft, warm glow for a relaxing evening, the Philips Hue bulbs allow you to easily switch between different lighting presets with just a few taps on your smartphone.
Voice Control: Philips Hue bulbs are compatible with popular smart home assistants like Amazon Alexa, Google Assistant, and Apple Siri. You can control your lights using voice commands, allowing for even greater convenience and hands-free control of your lighting system.
Energy Efficiency: Philips Hue bulbs are designed to be energy-efficient, consuming less energy compared to traditional incandescent or CFL bulbs. The LED technology used in the Hue bulbs not only reduces power consumption but also offers a longer lifespan, resulting in cost savings and a reduced environmental impact.
The Philips Hue bulbs bring a new level of convenience, versatility, and personalization to your home lighting. With their easy installation, wireless control, and wide range of options, these smart bulbs allow you to create the ideal lighting ambiance for any room or situation, all at the touch of a button or a voice command.
Lightstrips and Lamps
The Philips Hue system offers more than just traditional light bulbs. It also includes lightstrips and lamps that provide additional ways to enhance your home’s lighting. Let’s explore the versatility and functionality of Philips Hue lightstrips and lamps:
Lightstrips: Philips Hue lightstrips are flexible, adhesive-backed LED strips that can be placed in various locations to create unique lighting effects. They are perfect for adding ambient or accent lighting to areas such as under cabinets, behind TVs, or along walls. The lightstrips come in different lengths and can be easily cut or extended to fit your specific needs.
Lamps: Philips Hue also offers a selection of lamps that integrate seamlessly with the Hue system. These standalone fixtures are designed to provide targeted lighting in specific areas or as decorative elements in your home. You can place lamps on tables, desks, or shelves to create focal points or to enhance the ambiance of a room.
Color and Brightness Control: Like the Hue bulbs, the lightstrips and lamps allow you to control the color and brightness levels through the Philips Hue app. You can choose from a wide range of colors and shades to set the perfect mood or match your preferred aesthetic. Adjusting the brightness levels enables you to create the ideal lighting atmosphere for any occasion.
Sync with Entertainment: One of the standout features of Philips Hue lightstrips and lamps is the ability to sync with your entertainment setup. With the help of the Hue Sync app or other compatible apps, you can create dynamic lighting effects that sync with movies, music, or games. This adds an immersive element to your entertainment experience, making it more visually captivating.
Smart Controls: Just like the Hue bulbs, lightstrips, and lamps can be controlled wirelessly using the Philips Hue app. You can turn them on or off, adjust the colors and brightness, and create custom lighting scenes. Additionally, you can control these lighting fixtures using compatible smart assistants, such as Amazon Alexa or Google Assistant, allowing for convenient voice control.
Integration with Philips Hue System: Lightstrips and lamps seamlessly integrate with the Philips Hue system, enabling you to incorporate them into your existing lighting setups and routines. You can group them together with your Hue bulbs or include them in customized lighting scenes. This integration allows for synchronized control and enhances the overall lighting experience in your home.
Easy Installation: The lightstrips and lamps are designed for easy installation. With the lightstrips, simply peel off the adhesive backing and attach them to the desired surface. The lamps can be placed on a tabletop or other suitable surfaces without the need for complicated installation processes.
Philips Hue lightstrips and lamps offer unique and creative ways to transform your home’s lighting. Whether you want to add accent lighting to highlight certain areas or create immersive entertainment experiences, these versatile lighting options give you the flexibility and control to create the perfect lighting ambiance for your space.
Installation Process
The installation process for the Philips Hue kit is designed to be simple and user-friendly, allowing you to set up your smart lighting system with ease. Whether you’re new to smart home technology or an experienced enthusiast, the following steps will guide you through the installation process:
1. Connect the Bridge: Start by connecting the Hue bridge to your Wi-Fi router using the provided Ethernet cable. This established connection ensures that the bridge can communicate with the Philips Hue app and other compatible devices.
2. Screw in the Bulbs or Connect the Lightstrips and Lamps: Next, replace your existing bulbs with the Philips Hue bulbs or connect the lightstrips and lamps to a power source. The bulbs can be screwed into standard E26/E27 sockets, while the lightstrips and lamps require a power outlet.
3. Download the Philips Hue App: On your smartphone or tablet, download the Philips Hue app from the App Store or Google Play Store. This app will serve as your control hub for managing your Philips Hue lights.
4. Follow the On-screen Instructions: Open the Philips Hue app and follow the on-screen instructions to set up your lights. The app will guide you through the process of discovering and adding the bulbs, lightstrips, and lamps to your system.
5. Name and Organize your Lights: Once the bulbs, lightstrips, and lamps are detected, you can give them specific names and assign them to rooms or zones within your home. This organization allows for easier control and management of your lights, especially if you have multiple devices.
6. Explore Features and Customization Options: Once your lights are set up, take some time to explore the features and customization options available in the Philips Hue app. Experiment with different colors, brightness levels, and pre-defined scenes to find the lighting settings that suit your preferences.
7. Connect to Smart Home Systems: If desired, you can integrate your Philips Hue lights with other smart home systems or platforms. This enables you to control your lights using voice commands through popular smart assistants like Amazon Alexa, Google Assistant, or Apple Siri.
8. Expand your System: As your needs evolve, you can easily expand your Philips Hue system by adding more bulbs, lightstrips, or lamps. Simply connect the additional devices to your existing bridge, and they will become part of your smart lighting setup.
Note: It is important to follow the specific installation instructions provided with each Philips Hue product to ensure proper setup and functionality.
By following these steps, you can smoothly install and set up your Philips Hue kit, bringing intelligent and customizable lighting to your home. The installation process is designed to be user-friendly, allowing you to quickly enjoy the benefits of a smart lighting system in your living space.
Setting Up the Philips Hue Bridge
The Philips Hue bridge is the central hub that connects and controls all the Hue lights in your smart lighting system. Setting up the bridge is the first step in getting your Philips Hue kit up and running. Here’s a guide to setting up the Philips Hue bridge:
1. Location: Choose a suitable location for the bridge near your Wi-Fi router. Make sure it’s within reach of an available power outlet and has proper ventilation to prevent overheating.
2. Connect Ethernet Cable: Start by connecting one end of the Ethernet cable to the port on the back of the bridge. Then, connect the other end of the cable to an available LAN port on your Wi-Fi router. This wired connection ensures a stable and reliable connection between the bridge and your home network.
3. Power Up the Bridge: Plug the provided power adapter into the power port on the bridge and connect it to a nearby power outlet. The bridge will power on and initiate the setup process.
4. Wait for the Lights: Once the bridge is powered on, the LED lights on the front will start to blink. These lights indicate that the bridge is in pairing mode, ready to connect with your Philips Hue app.
5. Download the Philips Hue App: On your smartphone or tablet, download the Philips Hue app from the App Store or Google Play Store. The app is available for both iOS and Android devices and will serve as your control hub for managing your Philips Hue lights.
6. Open the App: Open the Philips Hue app and follow the on-screen instructions to set up your Hue bridge. The app will guide you through the process, including searching for and connecting to the bridge in your home network.
7. Discover the Bridge: The app will scan your network to find the Philips Hue bridge. Once detected, select the bridge from the list of available devices to establish a connection. The app will prompt you to confirm the connection by pressing the button on the bridge.
8. Create a Philips Hue Account: If you don’t have an existing Philips Hue account, the app will guide you to create one. This account allows you to personalize and access your Hue lights across multiple devices.
9. Customize your Settings: Once the bridge is successfully connected, you can customize your settings in the app. This includes naming your rooms, creating lighting scenes, and adjusting preferences like brightness and color temperature.
10. Enjoy your Smart Lighting: With the bridge set up and connected to your Philips Hue app, you are now ready to enjoy the benefits of your smart lighting system. You can control your lights, create dynamic lighting scenes, and explore the various features and functionalities offered by the Philips Hue ecosystem.
By following these steps, you can easily set up your Philips Hue bridge and begin the exciting journey of transforming your home’s lighting into a smart and personalized experience.
Pairing the Philips Hue Bulbs
Pairing the Philips Hue bulbs with your Hue bridge is a crucial step in the setup process, allowing you to control and customize your lights. Here’s a step-by-step guide to help you pair your Philips Hue bulbs:
1. Ensure Proper Setup: Before starting the pairing process, make sure that your Philips Hue bridge is connected to your Wi-Fi network and powered on. The bridge should be in close proximity to the bulbs you want to pair.
2. Turn on the Bulbs: Ensure that the power switch or socket for each bulb you want to pair is turned on. The bulbs need to be supplied with power in order to be discovered by the bridge.
3. Open the Philips Hue App: Launch the Philips Hue app on your smartphone or tablet. Make sure you are connected to the same Wi-Fi network as your Hue bridge.
4. Add Bulbs: In the app, navigate to the “Settings” or “Add New” section. Choose the option to add new bulbs or lights to your setup. The app will then search for any available bulbs in its range.
5. Press the Bridge Button: While the app is searching, press the button on the Philips Hue bridge. This button is usually located on the front or back of the bridge. Pressing it will initiate the pairing process.
6. Wait for Pairing Confirmation: Once the bridge and bulb are successfully paired, you will receive a notification in the Philips Hue app confirming the successful connection. The app will assign a name and icon to each bulb, allowing you to identify and control them individually or as a group.
7. Repeat for Multiple Bulbs: If you have multiple bulbs you want to pair, repeat the process for each bulb individually. Make sure that each bulb is turned on and within close proximity to the bridge during the pairing process.
8. Customize Bulb Settings: Once the bulbs are paired with the bridge, you can customize their settings to suit your preferences. Use the Philips Hue app to adjust brightness levels, set colors, create lighting scenes, and assign bulbs to specific rooms or zones in your home.
9. Test and Enjoy: After completing the pairing process and customizing your bulb settings, test your new lighting setup. Use the app to turn the bulbs on and off, adjust their brightness, and explore the various features and functionalities offered by the Philips Hue ecosystem.
By following these simple steps, you can successfully pair your Philips Hue bulbs with the Hue bridge and take full control of your smart lighting system. Enjoy the flexibility and convenience of customizing your lighting to suit any mood, occasion, or activity.
Connecting Philips Hue Lightstrips and Lamps
Connecting Philips Hue lightstrips and lamps to your smart lighting system is a great way to add versatility and enhance the ambiance of your home. Here is a step-by-step guide to help you connect your Philips Hue lightstrips and lamps:
1. Prepare the Lightstrips and Lamps: Unbox the Philips Hue lightstrips and lamps and ensure that all the necessary components are included. For lightstrips, unroll and straighten them, making sure there are no twists or kinks that may affect the performance.
2. Find Suitable Locations: Identify the areas where you want to install the lightstrips or place the lamps. Lightstrips can be placed under cabinets, behind TVs, or along walls, while lamps can be placed on tables, shelves, or other suitable surfaces.
3. Connect the Lightstrips: For lightstrips, peel off the adhesive backing to expose the sticky side. Carefully attach the lightstrips to the desired surface, ensuring a secure and even placement. If needed, you can use additional mounting clips or tape to further secure the lightstrips in place.
4. Supply Power: Connect the power adapter to the lightstrips, making sure to follow the specific instructions provided with the lightstrips. Plug the power adapter into a nearby power outlet to provide electricity to the lightstrips.
5. Set Up the Lamps: For lamps, place them in the desired location and connect them to a power source. Some lamps may have built-in switches or dimmers that need to be turned on or adjusted to activate the lights.
6. Open the Philips Hue App: Launch the Philips Hue app on your smartphone or tablet. Make sure you are connected to the same Wi-Fi network as your Hue bridge and that the bridge is already set up and connected to the app.
7. Add the Lightstrips and Lamps: In the app, navigate to the “Settings” or “Add New” section. Select the option to add new lights or devices to your setup. The app will search for any available lightstrips or lamps within its range.
8. Pair the Lightstrips and Lamps: Follow the on-screen instructions in the app to pair and connect the lightstrips and lamps with your Hue bridge. This process usually involves pressing a button or following a specific sequence of actions to establish the connection.
9. Customize Settings: Once the lightstrips and lamps are successfully connected, use the Philips Hue app to customize their settings. Adjust the brightness, set colors or color temperatures, and group them with other lights or devices to create personalized lighting scenes.
10. Test and Enjoy: After completing the connection and customization process, test your new lighting setup. Use the app to turn the lightstrips and lamps on and off, adjust their brightness or colors, and explore the extensive features and functionalities offered by the Philips Hue ecosystem.
By following these steps, you can effortlessly connect your Philips Hue lightstrips and lamps to your smart lighting system. Enjoy the ability to add dynamic and personalized lighting effects to any area of your home, enhancing the overall ambiance and creating a more immersive lighting experience.
Controlling the Philips Hue Kit
Controlling the Philips Hue kit is a straightforward process that allows you to manage and customize your smart lighting system to suit your preferences. With the Philips Hue app and compatible smart home devices, you have multiple options for controlling your lights. Let’s explore the various methods of controlling your Philips Hue kit:
1. Using the Philips Hue App: The Philips Hue app serves as the primary control hub for your smart lighting system. From the app, you can turn your lights on or off, adjust brightness levels, and change colors. The app also allows you to create customized lighting scenes and set schedules for automated lighting.
2. Voice Control with Smart Assistants: With the growing popularity of smart home devices, controlling your Philips Hue lights using voice commands has become increasingly convenient. By integrating your Philips Hue system with smart assistants like Amazon Alexa, Google Assistant, or Apple Siri, you can control your lights by simply speaking voice commands. For example, you can say “Alexa, turn on the living room lights” or “Hey Google, dim the bedroom lights”.
3. Using Physical Controls: You can also control your Philips Hue lights using physical controls such as dimmer switches or smart buttons. These devices allow for easy access to basic lighting controls without relying on your smartphone or voice commands. Dimmer switches can be mounted on the wall and provide the ability to adjust brightness and switch between predefined scenes, while smart buttons can be placed anywhere within reach and allow for customizable control options.
4. Exploring Third-Party Apps: The Philips Hue ecosystem offers compatibility with various third-party apps, expanding the possibilities for controlling and customizing your lights. These apps provide additional features like disco lighting effects, dynamic color patterns, or integration with other smart home devices. Explore app stores to find and experiment with different apps that enhance your lighting experience.
5. Syncing with Entertainment: Philips Hue can also be synchronized with your entertainment setup, creating an immersive lighting experience that reacts to movies, music, or games. Using the Hue Sync app or other compatible apps, your lights can dynamically change colors and brightness to match the on-screen or audio content, adding a new level of visual engagement to your entertainment sessions.
6. Integrating with Other Smart Home Devices: Philips Hue lights seamlessly integrate with other smart home devices and platforms, allowing you to control your lights in coordination with other devices or routines. For example, you can set your lights to turn on automatically when motion is detected, have them dim when you start watching a movie, or include them in customized routines that sync with your waking and sleeping schedule.
7. Remote Access: The Philips Hue system provides remote access, allowing you to control your lights even when you’re away from home. With the Philips Hue app and an internet connection, you can turn your lights on or off, adjust their settings, or activate lighting scenes from anywhere in the world. This feature offers convenience, security, and peace of mind.
By utilizing the various control options available, you can easily manage and customize your Philips Hue lights to create the perfect lighting ambiance for any situation. Whether it’s through the app, voice commands, physical controls, or integration with other smart home devices, controlling your Philips Hue kit is designed to be flexible, intuitive, and tailored to your needs.
Using Philips Hue App
The Philips Hue app is the central control hub for your Philips Hue smart lighting system. It provides a user-friendly interface that allows you to easily manage and customize your lights with just a few taps on your smartphone or tablet. Let’s explore the features and functionalities of the Philips Hue app:
1. Accessible Remote Control: The Philips Hue app serves as a convenient remote control for your lights. From the app, you can turn your lights on or off, adjust their brightness levels, and change colors to create the desired ambiance in any room or area of your home. The intuitive layout makes it easy to navigate and control your lights with precision.
2. Custom Lighting Scenes: The app enables you to create and save custom lighting scenes. You can adjust the brightness, color, and saturation levels for each light in your setup, and then save the settings as a scene. This allows you to recreate specific lighting atmospheres for different activities or moods. For example, you can create scenes like “Relaxation”, “Movie Night”, or “Party Mode”.
3. Automate with Schedules: The Philips Hue app allows you to automate your lights with schedules. You can set specific times for your lights to turn on or off, or create routines that gradually adjust the brightness levels to mimic a natural sunrise or sunset. This feature is useful for creating an illusion of occupancy when you’re away, or for establishing a consistent daily lighting routine.
4. Control Multiple Rooms and Zones: If you have multiple rooms or zones with Philips Hue lights, the app allows you to control each area individually or group them together. This gives you the flexibility to adjust the settings for a specific room or synchronize the lighting across different areas of your home. You can create zones for living spaces, bedrooms, or even outdoor areas.
5. Explore Lighting Recipes: The Philips Hue app provides a gallery of pre-designed lighting recipes that offer specific lighting settings for specific activities. These recipes are curated by lighting experts and can enhance your experiences such as reading, concentration, relaxation, or even romance. You can effortlessly apply these recipes to set the mood or create the ideal lighting conditions for your desired activity.
6. Sync with Entertainment: With the Philips Hue app, you can sync your lights with your favorite entertainment content. By integrating the app with services like Netflix or Spotify, your lights can respond to the colors and intensity of the on-screen action or the beat of your music. This creates an immersive and dynamic lighting experience that complements your entertainment sessions.
7. Personalize and Organize: The app allows you to personalize your lighting setup by assigning names to each light, room, or zone. You can organize your lights into groups, assign icons, and even create favorites for quick access to frequently used settings or scenes. This helps you easily navigate and manage your lights, especially if you have a large number of devices.
8. Voice Control Integration: The Philips Hue app seamlessly integrates with popular voice assistants like Amazon Alexa, Google Assistant, and Apple Siri. This allows you to control your lights using voice commands, further enhancing the convenience and effortless control of your smart lighting system.
With the Philips Hue app, you have full control over your smart lighting system, enabling you to create the perfect ambiance for any occasion. The app’s intuitive interface, customizable settings, lighting scenes, and integration options make it a powerful tool to personalize and elevate your home lighting experience.
Voice Control with Smart Assistants
Voice control with smart assistants has revolutionized the way we interact with our smart devices, including the Philips Hue lighting system. Through integration with popular smart assistants like Amazon Alexa, Google Assistant, and Apple Siri, you can conveniently control your Philips Hue lights using voice commands. Let’s explore the benefits and functionalities of voice control with smart assistants:
1. Hands-Free Convenience: Voice control eliminates the need to physically interact with your smartphone or the Philips Hue app. With simple voice commands, you can easily control your lights without needing to reach for a remote or use your hands.
2. Seamless Integration: The Philips Hue system seamlessly integrates with popular smart assistants, allowing you to control your lights with the smart assistant of your choice. Whether it’s Amazon Alexa, Google Assistant, or Apple Siri, you can experience a smooth and effortless control experience.
3. Basic Commands: You can perform basic commands such as turning your lights on or off, adjusting brightness levels, and changing colors using voice control. For example, you can say, “Hey Google, turn on the kitchen lights to 50% brightness” or “Alexa, set the living room lights to blue.”
4. Control Multiple Lights or Groups: Voice control allows you to control multiple lights simultaneously or group them together for synchronized control. This is especially useful when you have multiple Philips Hue lights in one room or area and want to control them as a collective unit. You can say, “Siri, turn off all the bedroom lights” or “Hey Google, dim all the lights in the living room.”
5. Activating Lighting Scenes: With voice control, you can easily activate preconfigured lighting scenes or lighting recipes that you have set up in the Philips Hue app. Instead of manually adjusting each light’s settings, you can simply say, “Alexa, activate the movie night scene” or “Hey Google, set the lights to relax mode.”
6. Routines and Automation: Smart assistants offer routines and automation capabilities that allow you to create customized sequences of actions. You can combine your Philips Hue lights with other smart home devices to create routines based on time, events, or your personal needs. For example, you can say, “Hey Google, start my morning routine” to have your lights gradually turn on along with other actions like adjusting the thermostat and playing your favorite news podcast.
7. Remote Control: Voice control extends beyond your home’s boundaries, allowing you to control your Philips Hue lights remotely. If your smart assistant is connected to the internet, you can give voice commands to control your lights even when you’re away from home. For instance, you can say, “Alexa, turn off the lights at home” while you’re at the office or on vacation.
Voice control with smart assistants enhances the convenience and accessibility of your Philips Hue lighting system. With the ability to control multiple lights, activate lighting scenes, and incorporate routines and automation, voice control adds a new level of flexibility and hands-free control to your smart home setup.
Integrating with Other Smart Home Devices
The Philips Hue lighting system is designed to seamlessly integrate with other smart home devices and platforms, allowing you to create a fully connected and synchronized smart home experience. By integrating your Philips Hue lights with other devices, you can enhance automation, expand control options, and explore endless possibilities. Let’s explore the benefits and functionalities of integrating Philips Hue with other smart home devices:
1. Expanded Control Options: Integrating your Philips Hue lights with other smart home devices gives you additional ways to control your lighting system. You can use dedicated smart home hubs or control panels to manage your lights alongside other devices, providing a centralized and intuitive control experience.
2. Voice Control Integration: Philips Hue lights can be integrated with popular voice assistants like Amazon Alexa, Google Assistant, and Apple Siri. This integration allows you to control your lights using voice commands, providing a convenient and hands-free control experience. You can say, “Alexa, dim the living room lights” or “Hey Google, turn on the bedroom lights.”
3. Synchronization with Entertainment Devices: Integrating Philips Hue lights with your entertainment devices, such as your TV, gaming console, or music system, allows for synchronized lighting effects. The lights can react to the on-screen action, music beats, or in-game events, creating an immersive and dynamic lighting experience that enhances your entertainment sessions.
4. Smart Home Routines and Automation: By integrating Philips Hue lights with other smart home devices and platforms, you can create complex routines and automation sequences. For example, you can set your Philips Hue lights to turn on automatically when a motion sensor detects movement, or have them adjust their brightness and colors based on the time of day or your location.
5. Scene Integration: Integrating your Philips Hue lights with other smart home devices allows you to include them in customized scenes or routines. For instance, you can create a “Goodnight” scene that simultaneously dims your lights, adjusts your thermostat, and locks your doors with a single voice command or tap on a control panel.
6. Security and Home Monitoring: Integrating Philips Hue lights with security systems, such as smart door locks and cameras, can enhance the security of your home. You can set your lights to turn on or change colors when a motion sensor is triggered or receive notifications on your smartphone when an event occurs.
7. Ecosystem Compatibility: Philips Hue lights are compatible with various smart home platforms and ecosystems. You can integrate them with popular systems like Apple HomeKit, Samsung SmartThings, or Google Nest, allowing for seamless interaction and control across multiple devices and platforms.
8. Extended Compatibility: Integrating Philips Hue lights with other smart home devices expands compatibility and opens up opportunities for more advanced automation and customization. You can connect with smart thermostats, smart plugs, motorized blinds, and more, creating a fully integrated and connected smart home experience.
Integrating Philips Hue lights with other smart home devices allows you to unlock the full potential of your smart lighting system. With expanded control options, enhanced automation, and seamless interaction with other devices, you can create a personalized and cohesive smart home ecosystem that meets your unique needs and preferences.
Tips and Tricks for Philips Hue Kit
Getting the most out of your Philips Hue kit involves discovering the various features and functionalities it offers. Here are some useful tips and tricks to enhance your Philips Hue experience:
1. Explore Lighting Scenes: Experiment with different lighting scenes available in the Philips Hue app or create your own. Try out different combinations of colors, brightness levels, and saturation to find the perfect lighting ambiance for each room or activity.
2. Use Lightstrips Creatively: Philips Hue lightstrips can be cut or extended to fit specific areas. Get creative with placement, such as under cabinets, behind furniture, or along staircases, to create unique and eye-catching lighting effects.
3. Assign Room-Specific Colors: Assign specific preset colors to different rooms in your home. This makes it easy to activate room-specific atmospheres with just a voice command or a few taps on your smartphone.
4. Utilize Color Loop: Activate the Color Loop feature in the Philips Hue app to have your lights cycle through different colors continuously. This is especially useful for creating an energetic or festive atmosphere during parties or events.
5. Set Timers for Automation: Take advantage of the timer function in the Philips Hue app to automate certain lighting actions. For example, you can set your lights to turn on gradually in the morning to simulate a sunrise, or gradually dim at bedtime to help you wind down.
6. Experiment with Third-Party Apps: Explore the variety of third-party apps available for Philips Hue lights. These apps offer additional features like dynamic lighting effects, sound syncing, or integrations with other smart devices, expanding the possibilities and personalization of your lighting.
7. Take Advantage of Voice Assistants: Set up voice assistants like Amazon Alexa, Google Assistant, or Apple Siri to control your Philips Hue lights with voice commands. This allows for hands-free control and adds convenience to your daily routines.
8. Utilize Geo-Fencing: Take advantage of geo-fencing features in the Philips Hue app to automatically turn your lights on or off when you leave or arrive at home. This ensures that your lights are not left on when unnecessary and enhances energy efficiency.
9. Share Access with Family Members: Allow family members or roommates to control the Philips Hue lights by granting them access in the app. This ensures that everyone can enjoy the convenience and personalization of the smart lighting system.
10. Explore IFTTT Integration: Integrate your Philips Hue lights with IFTTT (If This Then That) to create powerful automation and connect with a wide range of other smart devices and platforms. This allows for even more customization and control options.
By exploring these tips and tricks, you can maximize the potential of your Philips Hue kit and create a truly immersive and personalized lighting experience in your home.
Troubleshooting Common Issues
While the Philips Hue lighting system is designed to be user-friendly and reliable, you may encounter some common issues along the way. Here are some troubleshooting tips to help you resolve these issues and ensure a smooth experience with your Philips Hue kit:
1. Connection Problems: If you’re experiencing connection issues between your Philips Hue bridge and lights, make sure that the bridge is connected to your Wi-Fi network and powered on. Check that the lights are within the range of the bridge and that there are no obstructions interfering with the signal.
2. Unresponsive Lights: If your lights are not responding to commands from the Philips Hue app or voice assistants, ensure that they have power and are properly connected to the bridge. Try turning the lights off and on again to see if that resolves the issue. If not, reset the lights by following the instructions provided by Philips Hue.
3. Bridge Connection Issues: If you’re having trouble connecting the Philips Hue bridge to your Wi-Fi network, double-check that the Ethernet cable is securely connected to both the bridge and your router. Make sure that your Wi-Fi network is working properly and that you have entered the correct network credentials during the setup process.
4. App Communication Problems: If you’re experiencing difficulties controlling your lights through the Philips Hue app, check your internet connection and ensure that you’re using the latest version of the app. Try closing and reopening the app, or restarting your smartphone or tablet. If the problem persists, reinstall the app and log back into your Philips Hue account.
5. Firmware Updates: Regularly check for firmware updates for your Philips Hue bridge and lights. Updating the firmware ensures that you have the latest features, bug fixes, and security enhancements. Updates can be done through the Philips Hue app or by visiting the official Philips Hue website.
6. Wi-Fi Interference: If you’re experiencing intermittent connectivity or performance issues, check for potential Wi-Fi interference from other devices or nearby networks. Move the bridge away from sources of interference such as microwaves, cordless phones, or other electronics. You can also try changing the Wi-Fi channel on your router to avoid congestion.
7. Dimmer Switch Problems: If you’re using a Philips Hue dimmer switch, ensure that it is within range of the bulbs and that the batteries are not depleted. If the dimmer switch is not responding, try re-pairing it with the bridge by following the instructions provided with the switch.
8. Resetting Devices: If all else fails, you may need to reset your Philips Hue bridge, lights, or accessories. Each device has specific instructions for resetting, so consult the user manual or the official Philips Hue website for detailed guidance.
9. Reach Out for Support: If you’re still experiencing issues after troubleshooting on your own, reach out to the Philips Hue support team. They can provide further assistance and troubleshooting steps specific to your situation.
Remember, troubleshooting common issues is a normal part of using any smart home technology, including the Philips Hue lighting system. By following these tips, you can quickly resolve issues and continue enjoying the convenience and personalized ambiance that Philips Hue provides.