
Overview of Automation Studio
Automation Studio is a powerful tool within Salesforce Marketing Cloud that allows marketers to automate various marketing tasks and workflows. It provides a visual interface that enables users to design and build complex automation workflows without the need for coding. With Automation Studio, you can create, schedule, and execute automated processes based on predefined triggers and actions.
One of the key benefits of Automation Studio is its ability to streamline marketing operations and improve efficiency. It eliminates the need for manual intervention in repetitive tasks, allowing marketers to focus on more strategic and creative aspects of their campaigns. By automating marketing processes, you can ensure that your campaigns run smoothly and consistently, while saving time and resources.
Automation Studio offers a wide range of functionalities and flexibility in designing automation workflows. You can customize these workflows to meet your specific business requirements and marketing goals. Whether it’s sending personalized emails, updating subscriber lists, or triggering follow-up actions based on customer interactions, Automation Studio empowers you to create automated, targeted, and personalized marketing experiences.
Moreover, Automation Studio provides real-time tracking and reporting features, allowing you to monitor the performance and effectiveness of your automation workflows. You can track key metrics, such as open rates, click-through rates, and conversion rates, and make data-driven decisions to optimize your campaigns.
With the drag-and-drop interface of Automation Studio, you can easily design and visualize the flow of automation activities. This makes it simple for marketers to collaborate with other team members, ensuring a seamless execution of marketing workflows. Additionally, Automation Studio integrates seamlessly with other Salesforce Marketing Cloud features, such as Email Studio, Mobile Studio, and Journey Builder, providing a comprehensive solution for your marketing automation needs.
Benefits of Using Automation Studio in Marketing Cloud
Automation Studio in Salesforce Marketing Cloud offers a multitude of benefits for marketers. By leveraging this powerful tool, businesses can streamline their marketing operations and achieve greater efficiency. Here are some of the key benefits of using Automation Studio:
- Time-saving: Automation Studio eliminates manual intervention in repetitive marketing tasks, allowing marketers to save time and focus on more strategic activities. By automating processes such as email sends, data imports, and list segmentation, marketers can free up valuable resources.
- Improved accuracy and consistency: With Automation Studio, you can ensure that your marketing processes are executed consistently and accurately. By eliminating human error, such as missing or duplicate data, you can maintain a high level of data integrity and deliver a seamless customer experience.
- Enhanced personalization: Automation Studio enables you to deliver highly targeted and personalized marketing campaigns. By leveraging data-driven triggers and actions, you can send relevant content to the right audience at the right time. This personalized approach leads to higher engagement rates and improved customer satisfaction.
- Optimized campaign performance: By tracking and analyzing the performance of your automated marketing workflows, you can gain important insights into campaign effectiveness. Automation Studio provides real-time reporting and analytics, allowing you to make data-driven decisions and optimize your campaigns for better results.
- Efficient teamwork and collaboration: Automation Studio features a user-friendly interface that enables marketers to easily collaborate with other team members. The visual drag-and-drop interface allows for seamless workflow designing and facilitates effective communication among team members working on the same automation project.
- Flexibility and scalability: Automation Studio offers a high degree of flexibility, allowing you to create customized workflows tailored to your specific business needs. Whether you’re a small business or a large enterprise, Automation Studio can scale to accommodate your growing marketing automation requirements.
Key Components of Automation Studio
Automation Studio within Salesforce Marketing Cloud consists of several essential components that work together to automate and streamline your marketing processes. Understanding these key components is crucial for effectively building and managing automation workflows. Here are the key components of Automation Studio:
- Automations: This is the core component of Automation Studio. An automation is a set of activities and triggers that define the flow of your automated marketing process. It includes activities such as sending emails, updating data, running queries, and more. Automations can be scheduled to run at specific times or triggered based on specific events or conditions.
- Activities: Activities are the building blocks of an automation. They represent the specific tasks or actions that are performed as part of the automation workflow. Examples of activities include sending an email, importing data, updating subscriber lists, running SQL queries, and more. Activities can be set up, customized, and sequenced to create a seamless automation flow.
- Triggers: Triggers are the events or conditions that initiate an automation. They define when the automation should start running. Triggers can be based on specific dates and times, subscriber actions such as email opens or clicks, or external events such as data imports. By configuring triggers, you can ensure that your automations are activated at the right moment.
- Data Extensions: Data extensions are a feature of Automation Studio that allows you to store and manage custom data tables within the Marketing Cloud. Data extensions can be used to store subscriber data, customer preferences, purchase history, and more. They enable you to personalize your marketing campaigns and target specific segments of your audience.
- Query Activities: Query activities allow you to retrieve and manipulate data from your data extensions or the Marketing Cloud’s data views. You can use SQL-like queries to filter, segment, and transform your data. Query activities are useful for creating dynamic targeting criteria and personalizing your marketing campaigns based on specific data attributes.
- Triggered Sends: Triggered sends are a type of activity that allows you to send emails in response to specific subscriber actions or events. For example, you can set up a triggered send to automatically send a welcome email to new subscribers or a cart abandonment email to customers who abandoned their shopping cart. Triggered sends enable you to deliver personalized and timely messages to your audience.
These key components work together to create automation workflows that automate and optimize your marketing processes. By understanding how each component functions and how they can be configured, you can effectively harness the power of Automation Studio to drive your marketing success.
Creating a New Automation in Automation Studio
Creating a new automation in Automation Studio is a straightforward process that allows you to design and build custom workflows to automate your marketing tasks. Here’s a step-by-step guide to creating a new automation:
- Log in to your Salesforce Marketing Cloud account and navigate to the Automation Studio tab.
- Click on “Create” to start a new automation.
- Give your automation a descriptive name that reflects its purpose.
- Choose the type of automation you want to create. You can select from options such as a scheduled automation, triggered automation, or file drop automation. The type of automation you choose will depend on the specific marketing process you want to automate.
- Configure the automation workflow by adding activities. Drag and drop the desired activities from the Activity palette onto the canvas. Examples of activities include email sends, data imports, data extracts, SQL queries, and more.
- Sequencing the activities by connecting them with arrows to define the flow of the automation. You can also set up decision splits to create branching paths based on specific conditions or criteria.
- Set up triggers to determine when the automation should start running. Triggers can be based on specific dates and times, subscriber actions, or external events.
- Configure additional settings for the automation, such as the frequency of recurrence, target audience, and desired outcomes.
- Preview and test the automation to ensure it is working as expected. You can use the “Test” feature to simulate the automation with sample data before activating it.
- Once you are satisfied with the configuration and testing, activate the automation to make it live. Your automation will start running based on the defined triggers and schedule.
Creating a new automation in Automation Studio gives you the flexibility to automate a wide range of marketing tasks and workflows. Whether you want to send personalized emails, update subscriber lists, or run complex data manipulations, Automation Studio provides the tools you need to streamline your marketing operations and enhance your efficiency.
Configuring Activities in Automation Studio
Configuring activities is a crucial step in creating an automation workflow in Automation Studio. Activities represent the specific tasks or actions that you want to automate as part of your marketing process. Here’s a guide on how to configure activities in Automation Studio:
- Once you have created a new automation and added activities to the canvas, click on the activity you want to configure.
- A settings panel will open on the right-hand side of the screen, allowing you to customize the activity.
- Depending on the type of activity, you will have different configuration options. For example, if you are configuring an email send activity, you can select the email template, specify the target audience, and set up personalization or segmentation rules.
- Configure any data-related settings if applicable. For activities that involve data manipulation or integration, you may need to specify the source and target data extensions, define filtering or sorting criteria, and map data fields.
- Set up any additional settings specific to the activity. For example, if you are configuring a wait activity, you can specify the duration of the wait period. If you are configuring a decision split activity, you can define the conditions for branching paths.
- Preview the activity to ensure it is functioning as expected. Use the “Preview” or “Test” feature to simulate the activity with sample data and check for any errors or issues.
- Save and apply the configuration once you are satisfied. Your activity will now be included in the automation workflow.
- Repeat the configuration process for each activity in the automation. Ensure that the activities are connected in the desired sequence to create a logical flow.
- Review and validate the overall workflow before activating the automation. Make sure all activities are correctly configured and connected to ensure a smooth execution of the automation.
By properly configuring activities in Automation Studio, you can automate a wide range of marketing tasks and ensure a seamless flow throughout your automation workflow. Whether you are sending emails, updating data, running queries, or performing other marketing actions, the ability to customize and configure activities allows you to tailor the automation to your specific needs and achieve the desired outcomes.
Setting Up Triggers in Automation Studio
Triggers play a crucial role in determining when an automation should start running in Automation Studio. They define the events or conditions that initiate the execution of your automated marketing process. Here’s a guide on how to set up triggers in Automation Studio:
- Within the automation canvas, select the activity or activities to which you want to add a trigger.
- Click on the “Triggers” tab on the right-hand side settings panel.
- Choose the type of trigger you want to set up based on your specific requirements. There are various types of triggers available, such as scheduled triggers, file drop triggers, data-based triggers, or event-based triggers.
- Configure the settings of the selected trigger. This includes specifying the trigger event or condition, the frequency or recurrence, and any additional parameters required.
- Define the target audience or target data for the trigger. This could involve selecting a data extension, applying segmentation rules, or using filters to narrow down the audience for the trigger.
- Preview and test the trigger to ensure it is working as expected. Use testing features to simulate the trigger with sample data and validate its functionality.
- Save and apply the trigger settings to the activity. The trigger will now be associated with the activity, initiating its execution as per the specified event or condition.
- Repeat the process for other activities in the automation if you want to set up multiple triggers for different actions.
- Review and validate the overall trigger settings before activating the automation. Ensure that all triggers are correctly configured and aligned with your marketing objectives.
By setting up triggers in Automation Studio, you can automate your marketing processes to start at the right time or in response to specific events. Whether it’s scheduling an email send, initiating an automation based on a file drop, or triggering an action based on customer behavior, the ability to configure triggers provides flexibility and control over your automated workflows.
Monitoring and Troubleshooting Automations in Automation Studio
Monitoring and troubleshooting are essential aspects of managing and ensuring the smooth execution of automations in Automation Studio. Here are some tips for effectively monitoring and troubleshooting your automations:
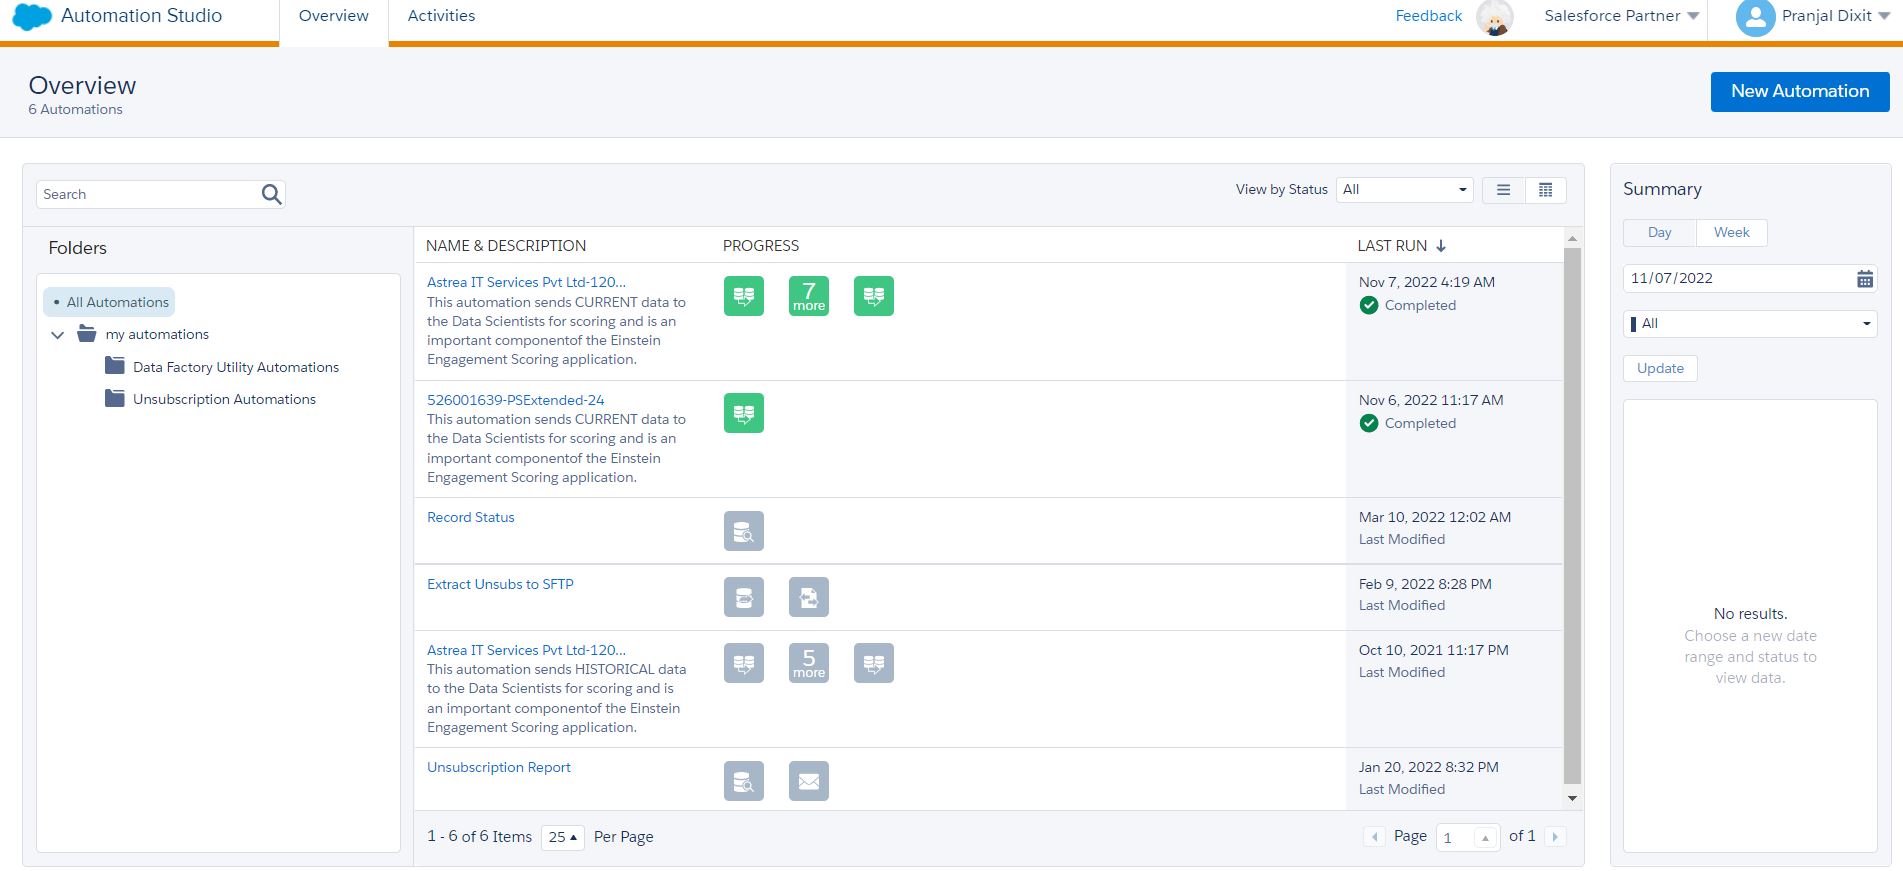
- Utilize the Monitoring tab in Automation Studio to get an overview of all active and completed automations. It provides vital information such as status, start time, end time, and any errors encountered.
- Regularly check the status of your automations to ensure they are running as intended. You can view the status under the “Status” column in the Monitoring tab. Green indicates a successful automation, while red indicates an error or failure.
- Review the automation logs for detailed information about the execution process. In Automation Studio, you can access the logs by clicking on the “Logs” link under each automation. Logs provide valuable insights into any issues or errors that occurred during the automation run.
- If an automation encounters errors or fails to execute, investigate the logs to identify the root cause. Common errors can include permissions issues, data-related problems, or configuration errors. Use the error messages in the logs to assist you in troubleshooting.
- Perform regular testing and validation of your automations before activating them. This can help detect and resolve any issues prior to running the automation with live data. Use sample data and simulate different scenarios to ensure the automation functions correctly.
- If an automation fails or encounters errors, make use of the error handling capabilities in Automation Studio. You can configure error handling activities, such as sending error notifications or retrying failed actions, to mitigate any issues that may arise.
- Collaborate with other team members or stakeholders to resolve any complex issues or errors. Utilize the sharing and collaboration features of Automation Studio to facilitate communication and troubleshooting efforts.
- Regularly monitor the performance and effectiveness of your automations. Take note of key metrics such as execution times, success rates, and any bottlenecks or delays. This can help you identify areas for improvement and optimize your automation workflows.
- Keep up to date with the latest Salesforce Marketing Cloud documentation and resources. This can provide valuable insights, best practices, and troubleshooting guidance specific to Automation Studio.
By actively monitoring and diligently troubleshooting your automations in Automation Studio, you can ensure their effectiveness and mitigate any potential issues that may arise. This will help you maintain a seamless and efficient marketing automation process.
Best Practices for Using Automation Studio in Marketing Cloud
To make the most out of Automation Studio in Salesforce Marketing Cloud, it’s important to follow best practices that ensure efficient and effective automation workflows. Here are some key best practices to consider:
- Plan and design your automation workflows: Before building an automation, carefully plan and map out the desired workflow. Define the goals, steps, and dependencies of your automation to ensure a streamlined and logical process.
- Segment and target your audience: Take advantage of segmentation capabilities to deliver personalized content to your audience. Define specific criteria for segmentation based on data attributes, behaviors, or preferences, and tailor your messaging accordingly.
- Optimize your data management: Ensure your data is clean, accurate, and up to date. Regularly perform data cleansing, deduplication, and validation processes to maintain data integrity and improve the accuracy of your automation workflows.
- Regularly test and validate: Always test your automation workflows before launching them with live data. Use sample data and simulate different scenarios to ensure that all activities, triggers, and decision splits function as expected.
- Leverage reporting and analytics: Utilize the reporting and analytics features of Automation Studio to track and measure the performance of your automations. Analyze key metrics such as open rates, click-through rates, and conversion rates to gain insights and optimize your campaigns.
- Follow industry best practices for email marketing: When using Automation Studio for email sends, adhere to best practices for email marketing to maximize deliverability and engagement. This includes maintaining a clean and engaged subscriber list, using compelling subject lines and relevant content, and following email marketing compliance regulations.
- Document your workflows and processes: Keep thorough documentation of your automation workflows, including detailed instructions, configurations, and any troubleshooting steps. This helps ensure consistency, facilitates knowledge sharing among team members, and simplifies future enhancements or modifications.
- Regularly review and optimize your automations: Continuously monitor the performance of your automations and analyze the results. Identify areas for improvement, such as bottlenecks or unused activities, and refine your automation workflows for better efficiency and effectiveness.
- Stay informed and seek support: Stay up to date with the latest features, updates, and resources related to Automation Studio in Salesforce Marketing Cloud. Attend training sessions, participate in user communities, and reach out to the Salesforce support team for guidance and assistance when needed.
By following these best practices, you can maximize the benefits of Automation Studio and create well-designed, targeted, and efficient automation workflows for your marketing campaigns in Salesforce Marketing Cloud.
Integration with Other Marketing Cloud Features
Automation Studio is seamlessly integrated with other powerful features within Salesforce Marketing Cloud, enhancing its capabilities and providing a comprehensive solution for your marketing automation needs. Here are some key integrations with other Marketing Cloud features:
- Email Studio: Automation Studio integrates seamlessly with Email Studio, allowing you to incorporate automated email sends into your automation workflows. You can leverage the drag-and-drop interface of Automation Studio to design and schedule email sends, personalize content based on customer data, and track email performance through Email Studio’s robust reporting and analytics capabilities.
- Journey Builder: Integration with Journey Builder enables you to create complex and personalized customer journeys that span across multiple channels and touchpoints. You can seamlessly connect Automations created in Automation Studio with Journey Builder, triggering and executing automated actions at specific points in the customer journey.
- Mobile Studio: With Mobile Studio integration, you can incorporate mobile messaging capabilities into your automation workflows. You can design and send personalized SMS messages, push notifications, or in-app messages as part of your automated marketing campaigns. This integration enables you to leverage mobile channels to deliver targeted and timely messages to your audience.
- Advertising Studio: Integration with Advertising Studio allows you to extend your marketing automation beyond email and mobile channels. You can create automations that trigger targeted advertising campaigns across various digital platforms, such as display ads, social media, and search engines. This integration helps to deliver a cohesive, omnichannel experience to your audience.
- Web Studio: Integration with Web Studio enables you to automate web personalization and tracking. You can incorporate automated activities within Automation Studio that capture and analyze customer interactions on your website, enabling you to deliver personalized content and experiences based on their browsing behavior.
- Sales Cloud Integration: Integration with Sales Cloud allows you to seamlessly sync customer data between Salesforce Marketing Cloud and Sales Cloud. This integration enables you to leverage customer data from Sales Cloud within your automation workflows, personalize marketing communications, and align your marketing and sales efforts.
By leveraging these integrations, you can create holistic and seamless marketing automation workflows that span across multiple channels and touchpoints. These integrations provide you with the ability to deliver targeted, personalized, and consistent experiences to your audience, enhancing your overall marketing effectiveness within Salesforce Marketing Cloud.
Automation Studio Use Cases and Examples
Automation Studio in Salesforce Marketing Cloud offers endless possibilities for automating marketing tasks and workflows. Here are some common use cases and examples of how Automation Studio can be utilized:
- Welcome Series: Set up an automation that triggers a series of personalized welcome emails when a new subscriber joins your email list. This helps create a positive first impression and engages new subscribers from the start.
- Abandoned Cart Recovery: Automate an email series to be sent to customers who abandon their shopping carts on your e-commerce website. By sending timely and personalized reminders, you can encourage them to complete their purchase and recover lost sales.
- Lead Nurturing: Implement an automation that nurtures leads through a series of targeted emails, delivering relevant content based on their specific interests or actions. This helps build relationships with potential customers and moves them closer to making a purchase.
- Re-engagement Campaigns: Create an automation that identifies inactive subscribers and sends them re-engagement emails to spark their interest and encourage them to re-engage with your brand. This helps maintain a healthy subscriber list and improves overall email engagement.
- Event Registrations: Automate the process of managing event registrations by integrating your registration form with Automation Studio. When a user registers for an event, a series of automated emails can be triggered, providing event details, reminders, and follow-up information.
- Drip Campaigns: Design an automation that sends a series of educational or promotional emails to subscribers over a specified period of time. Drip campaigns deliver content gradually, nurturing prospects and guiding them through the buyer’s journey.
- Customer Onboarding: Automate the onboarding process for new customers by sending a series of personalized emails that guide them through setting up their account, accessing relevant resources, and providing tips for success.
- Subscription Renewals: Set up an automation to send automated reminders and renewal notices to subscribers whose subscriptions are about to expire. This helps increase subscription renewals and retain valuable customers.
- Post-Purchase Follow-ups: Automate a series of post-purchase emails to thank customers for their purchase, provide order confirmations, and solicit feedback or reviews. This helps enhance the customer experience and build customer loyalty.
- Lead Scoring and Sales Handoff: Use automation to score leads based on their interactions and engagement with your marketing campaigns. When a lead reaches a certain score, automate the handoff to sales representatives, ensuring a prompt follow-up and maximizing the chances of conversion.
These are just a few examples of how Automation Studio can be used to automate various marketing tasks and workflows. The flexibility and customization options available within Automation Studio make it a powerful tool for enhancing your marketing efforts and driving better results in Salesforce Marketing Cloud.