
What Is an SRT File?
An SRT file, also known as a SubRip Subtitle File, is a plain text file that contains subtitles or captions for videos. It is a widely used subtitle format that allows viewers to read and understand the dialogue or narration in a video. SRT files are commonly used in movies, TV shows, and online videos to provide translated subtitles in different languages or to assist viewers with hearing impairments.
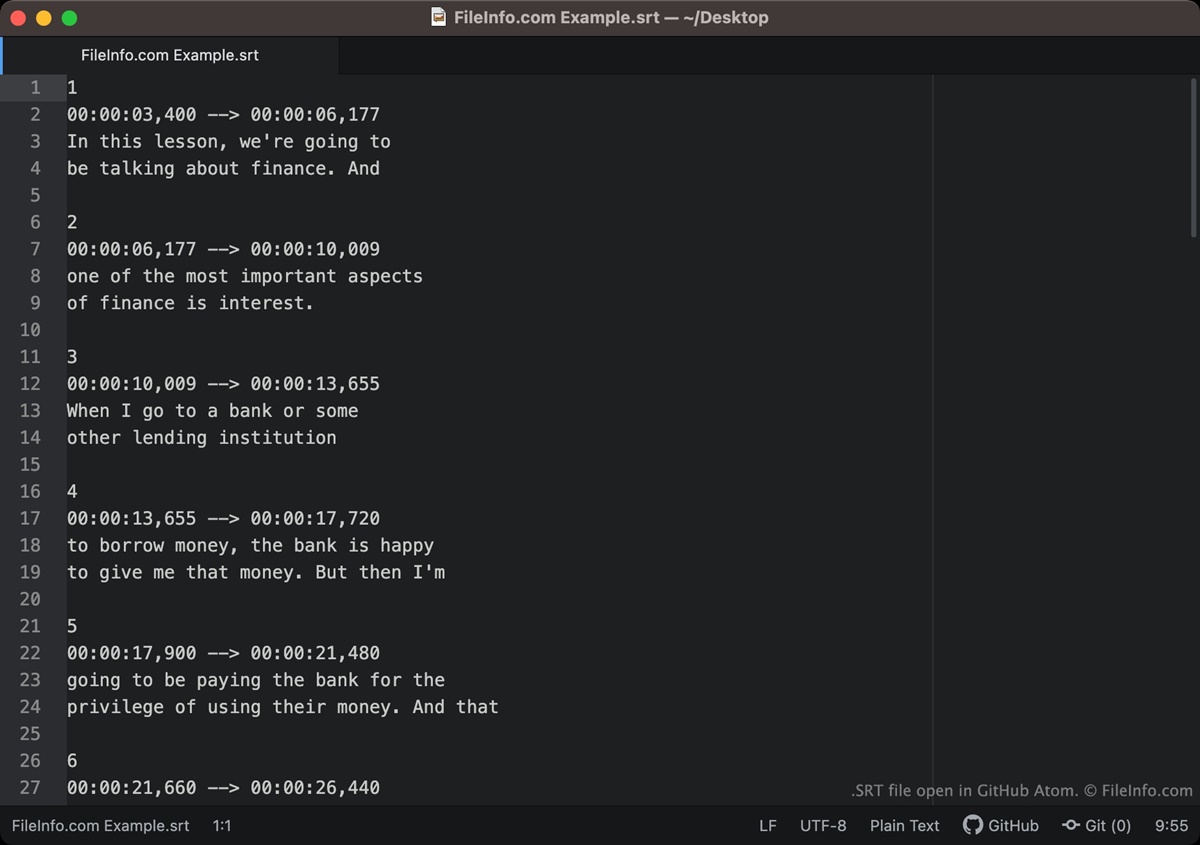
The SRT file format consists of numbered time codes and corresponding lines of text. Each line of text corresponds to a specific time frame in the video, indicating when the subtitle should be displayed and for how long. This synchronization between video and subtitle allows the subtitles to appear at the right moment, making it easier for viewers to follow along.
SRT files are incredibly flexible and can be used with various media players, video editing software, and subtitle editors. They can be customized in terms of font size, color, and style to suit the preferences of both content creators and viewers. With the increasing popularity and accessibility of video content from different countries and languages, SRT files play a crucial role in enabling accurate and effective communication across linguistic barriers.
To open an SRT file, you can use media players such as VLC Media Player, Windows Media Player, or online platforms like YouTube. These players automatically detect and display the subtitles when the corresponding SRT file is in the same directory as the video file. Additionally, video editing software and subtitle editors allow you to open, edit, and create SRT files to enhance the viewing experience and better convey the intended message of the content.
In the next sections, we will explore different methods to open, create, and edit SRT files. We will also provide some useful tips to make the most out of SRT files. Whether you are a content creator, a video editor, or simply a viewer, understanding SRT files can greatly enhance your multimedia experience.
How to Open an SRT File
Opening an SRT file is a simple process, and you can do it in different ways depending on your preferences and the tools available to you. Here, we will explore three common methods to open an SRT file:
- Using Media Players: Many media players support SRT files, making it convenient to watch videos with subtitles. Simply ensure that the SRT file is located in the same directory as the video file and has the same name. Popular media players like VLC Media Player, Windows Media Player, and KMPlayer will automatically detect and display the subtitles when playing the video.
- Using Video Editors: If you are working with video editing software, you can import the SRT file directly into the editor. This allows you to preview the video with the subtitles and make any necessary adjustments to ensure synchronization between the video and the subtitles. Programs like Adobe Premiere Pro, Final Cut Pro, and Sony Vegas Pro support importing SRT files for easy editing.
- Using Subtitle Editors: If you want to have more control over the subtitles or make changes to the text, you can use subtitle editing software. These tools allow you to open the SRT file, make edits to the timing or text, and save the modified file. Popular subtitle editors like Subtitle Workshop, Aegisub, and Subtitle Edit provide a user-friendly interface for editing SRT files.
Remember, the method you choose may depend on the specific software or tools you have access to. Whether you’re watching a movie with subtitles, editing video content, or working on subtitles for your own videos, these methods will help you open SRT files and enhance your multimedia experience.
Method 1: Using Media Players
One of the easiest ways to open an SRT file is by using media players that support subtitle files. Here’s a step-by-step guide on how to open an SRT file using media players:
- Ensure the SRT file and video file are in the same directory: To make sure that the media player detects the SRT file, ensure that the SRT file is located in the same folder as the video file. Additionally, make sure that the SRT file has the same name as the video file (excluding the file extension).
- Open the video file with the media player: Launch your preferred media player, such as VLC Media Player, Windows Media Player, or KMPlayer. You can either open the media player and navigate to the video file or use the “Open” option within the media player itself.
- Enable subtitle display: Once the video is playing, look for the option to enable subtitle display within the media player. In VLC Media Player, for example, you can go to the “Subtitles” menu and select “Subtitle Track” to choose the subtitle file you want to use.
- Verify subtitle synchronization: If the SRT file is correctly synchronized with the video, the subtitles should appear on the screen at the appropriate times. If the subtitles are out of sync, you can adjust the synchronization manually within the media player’s settings.
Using media players to open SRT files is a straightforward method that allows you to watch videos with subtitles effortlessly. Whether you’re watching movies, TV shows, or online videos, media players provide a user-friendly interface for adjusting subtitle settings and enhancing your viewing experience.
Method 2: Using Video Editors
If you’re working with video editing software, you can easily open an SRT file within the editor and customize the subtitles to fit your needs. Here’s a step-by-step guide on how to open an SRT file using video editors:
- Import the video file: Launch your preferred video editing software, such as Adobe Premiere Pro, Final Cut Pro, or Sony Vegas Pro. Create a new project or open an existing project, and import the video file you want to add subtitles to.
- Import the SRT file: Within the video editor, look for the option to import or add subtitles. This may vary depending on your software, but it is usually located in the menu or toolbar. Locate and select the SRT file you want to use, and import it into the project.
- Adjust subtitle settings: Once the SRT file is imported, you can customize the appearance of the subtitles within the video editor. Adjust settings such as font size, color, style, and position to ensure that the subtitles are visually appealing and easy to read.
- Preview and make adjustments: Play the video within the video editor to preview how the subtitles appear. Check for synchronization between the video and the subtitles, making sure that the subtitles appear at the right time and stay on screen for the desired duration. If needed, you can manually adjust the timing of the subtitles.
- Export or save the video: Once you are satisfied with the subtitles, proceed to export or save the video with the incorporated subtitles. Choose the desired file format and settings, and export the video with the subtitles embedded.
Using video editors to open SRT files gives you more control over the appearance, timing, and synchronization of subtitles in your videos. It allows you to create professional-looking videos with customized subtitles, making your content more engaging and accessible to a wider audience.
Method 3: Using Subtitle Editors
If you want more flexibility and control over your subtitles, using subtitle editing software is an ideal option. These tools allow you to open, edit, and create SRT files with ease. Follow these steps to open an SRT file using subtitle editors:
- Install a subtitle editor: Choose a subtitle editing software that suits your needs and download and install it on your computer. There are several subtitle editors available, such as Subtitle Workshop, Aegisub, and Subtitle Edit.
- Launch the subtitle editor: Open the subtitle editor you have installed on your computer.
- Open the SRT file: Look for the option to open an existing subtitle file within the subtitle editor. Navigate to the location where the SRT file is saved, select the file, and open it in the subtitle editor.
- Make necessary modifications: Once the SRT file is opened, you can make various modifications to the subtitles. This may include adjusting the timing, correcting errors, translating the text, adding or removing lines, or changing the formatting of the subtitles.
- Preview the changes: Many subtitle editors allow you to preview the changes in real-time. Play the video alongside the edited subtitles to ensure they are synchronized correctly and appear as desired.
- Save the modified SRT file: Once you are satisfied with the edits, save the modified SRT file. The subtitle editor may have options to save the file in different formats, but for SRT files, it is important to choose the standard .srt format to maintain compatibility.
Using subtitle editors provides advanced features and customization options for working with SRT files. You can make precise adjustments, correct errors, and ensure the subtitles perfectly match the audio and video. Whether you are a professional subtitler, a filmmaker, or someone who wants to create accurate subtitles, subtitle editing software is an excellent tool to accomplish your goals.
How to Create an SRT File
Creating an SRT file is a straightforward process that involves setting the time codes and adding the subtitles. Follow these steps to create your own SRT file:
- Create a new text document: Open a text editor or a simple word processor on your computer. Create a new document to start writing the SRT file.
- Set the time codes: In the SRT file, each subtitle is associated with a specific time frame in the video. Start by numbering each subtitle sequence sequentially, starting from 1. Then, set the time codes for each subtitle sequence in the format: hh:mm:ss,ms –> hh:mm:ss,ms. The first time code represents the start time, and the second time code represents the end time. For example: 00:00:10,000 –> 00:00:15,000.
- Add the subtitles: After each time code, add the corresponding subtitle text. Keep the subtitles clear and concise, ensuring that they can be easily read and understood by viewers.
- Repeat steps 2 and 3 for each subtitle: Continue adding time codes and subtitles for each sequence of your video. Remember to maintain the correct numbering and ensure that the time codes are set accurately.
- Save the SRT file: Once you have finished adding all the time codes and subtitles, save the file with a .srt extension. Choose a descriptive and appropriate file name to easily identify the content of the SRT file.
Creating an SRT file allows you to provide subtitles for your videos or share them with others. Whether you are creating subtitles in multiple languages or adding captions for accessibility, following this process will help you create an SRT file that accurately corresponds to your video.
Step 1: Create a New Text Document
The first step in creating an SRT file is to create a new text document. This serves as the foundation for writing the subtitles. Follow these guidelines to create a new text document for your SRT file:
- Choose a suitable text editor: Use a text editor or a simple word processor on your computer to create the SRT file. You can use a variety of software, such as Notepad (Windows), TextEdit (Mac), or any other plain text editor.
- Open the text editor: Launch the text editor application on your computer. If using Windows, you can open Notepad by searching for it in the Start menu. If using Mac, locate and open the TextEdit application.
- Create a new document: In the text editor, create a new, blank document. This can typically be done by selecting “New” from the file menu or by pressing the appropriate keyboard shortcut, such as Ctrl+N (Windows) or Command+N (Mac).
- Ensure plain text format: It’s important to ensure that the text document is set to plain text format. This ensures that no formatting or special characters are inserted that could interfere with the readability of the SRT file. You can usually find this option in the “Format” or “File” menu of the text editor.
- Save the document: Give the document a meaningful name and save it with a file extension of “.txt” or “.srt”. Choose a location on your computer where you can easily find the document later.
Creating a new text document sets the stage for writing the SRT file. It provides a clean and organized platform to write the time codes and subtitles accurately. By following this step, you are ready to continue to the next step of setting the time codes for your SRT file.
Step 2: Set the Time Codes
The second step in creating an SRT file is setting the time codes for each subtitle sequence. The time codes determine when each subtitle should start and end in the video. Follow these guidelines to set the time codes accurately:
- Number each subtitle sequence: Begin by numbering each subtitle sequence sequentially, starting from 1. This helps viewers easily follow the subtitles as they appear throughout the video.
- Format the time codes: Each subtitle sequence in the SRT file requires two time codes: the start time and the end time. Format the time codes in the following manner: hh:mm:ss,ms –> hh:mm:ss,ms. For example, if the subtitle should start at 00:01:23 and end at 00:02:15, the time codes would be: 00:01:23,000 –> 00:02:15,000.
- Ensure precise timing: Set the time codes accurately by referencing the specific points in the video that correspond to the beginning and end of each subtitle. It’s important to be as precise as possible to maintain synchronization between the video and the subtitles.
- Separate the time codes with an arrow: Use a double hyphen (–) or an arrow symbol (–>), without any spaces, to separate the start time and end time in the SRT file. This visually indicates the duration during which the subtitle should be displayed on the screen.
Setting the time codes correctly is crucial for synchronizing the subtitles with the video. It ensures that each subtitle appears at the appropriate moment to enhance the viewer’s understanding and enjoyment of the content.
Step 3: Add the Subtitles
After setting the time codes for each subtitle sequence in your SRT file, the next step is to add the subtitles themselves. Adding clear and concise subtitles enhances the viewer’s understanding of the dialogue or narration. Follow these guidelines to add the subtitles:
- Start a new line for each subtitle: Begin each new subtitle on a new line in the SRT file. This helps to maintain readability and organization.
- Use short, concise sentences: Keep each subtitle as short and concise as possible. Ideally, the length of a subtitle should be between one and two lines to ensure readability and avoid overcrowding the screen.
- Ensure proper punctuation: Use appropriate punctuation marks, such as commas and full stops, to enhance the clarity of the subtitles. This helps viewers understand the flow of the dialogue or narration.
- Use capitalization and italics when necessary: Capitalize the first letter of sentences and proper nouns, as you would in regular writing. Additionally, use italics to emphasize specific words or actions in the subtitles.
- Avoid excessive formatting: Keep the formatting of the subtitles clean and simple. Avoid using excessive formatting such as bold or underline, as it can distract viewers from the content.
Adding the subtitles accurately and concisely ensures that viewers can easily read and understand the dialogue or narration in the video. Well-crafted subtitles complement the visuals and enhance the overall viewing experience.
Step 4: Save the SRT File
The final step in creating an SRT file is to save it properly. Saving the file in the correct format and ensuring the appropriate file name are essential for compatibility and easy identification. Follow these guidelines to save the SRT file:
- Choose a descriptive file name: Give the SRT file a descriptive and relevant name that represents the video content or the language of the subtitles. This helps you easily identify the file later.
- Choose the appropriate file extension: To save the SRT file correctly, ensure that you use the standard “.srt” file extension. This extension ensures compatibility with various media players and subtitle editing software.
- Select the desired location: Choose a suitable location on your computer to save the SRT file. You may want to create a dedicated folder for your subtitle files to keep them organized and easily accessible.
- Save the SRT file: Once you’ve chosen the file name, file extension, and location, click the “Save” or “OK” button in your text editor to save the SRT file. The file will now be stored in the specified location.
Saving the SRT file correctly ensures that it can be easily accessed and used in various media players, video editing software, and subtitle editors. It also allows you to share the subtitles with others or use them for future reference.
How to Edit an SRT File
Editing an SRT file allows you to make changes to the timing or text of the subtitles. Whether you need to correct errors, adjust synchronization, or make any other modifications, follow these steps to edit an SRT file:
- Open the SRT file: Launch a text editor or a subtitle editing software on your computer. Open the SRT file you want to edit by navigating to its location and selecting it.
- Make the necessary changes: Edit the SRT file by making the desired modifications. You can adjust the timing codes to fine-tune the synchronization of the subtitles with the video. Additionally, you can modify the subtitle text to correct errors, improve clarity, or translate the content.
- Ensure proper formatting: Maintain the formatting conventions used in SRT files, such as the numbered time codes and the formatting of the subtitle text. Be cautious not to add unnecessary formatting that could disrupt the readability or compatibility of the SRT file.
- Preview the changes: Save the changes made to the SRT file and use a media player or subtitle editor to preview how the modified subtitles appear with the video. This allows you to verify the accuracy of the changes and ensure that the subtitles are correctly synchronized.
- Save the modified SRT file: Once you are satisfied with your edits, save the modified SRT file. Choose the same file name and location as the original file or create a new file if you prefer to keep the original version.
Editing an SRT file empowers you to refine the subtitles and improve the overall viewing experience. Whether it’s correcting mistakes or making adjustments for better comprehension, following these steps ensures accurate and well-crafted subtitles.
Step 1: Open the SRT File
The first step to edit an SRT file is to open it in a suitable text editor or subtitle editing software. This allows you to access and modify the contents of the SRT file. Follow these steps to open the SRT file:
- Choose a text editor or subtitle editing software: Select a text editor or subtitle editing software that meets your editing needs and preferences. You can use popular text editors like Notepad (Windows) or TextEdit (Mac), or opt for dedicated subtitle editing software like Subtitle Workshop, Aegisub, or Subtitle Edit.
- Launch the text editor or subtitle editing software: Open the application on your computer that corresponds to the chosen text editor or subtitle editing software. This typically involves double-clicking on the program’s icon or accessing it from your computer’s applications or programs list.
- Open the SRT file: In the text editor or subtitle editing software, navigate to the location where the SRT file is saved. Use the software’s “Open” or “Import” option, usually found in the “File” or “Open” menu, to select and open the SRT file.
- View the SRT file contents: Once the SRT file is opened, you can view its contents, including the numbered time codes and subtitle text. The file is typically displayed as plain text, and you can scroll through it to review the existing subtitles.
Opening the SRT file is the initial step towards editing it. By successfully opening the file in your chosen text editor or subtitle editing software, you can proceed to make the necessary modifications to the timing or text of the subtitles.
Step 2: Make the Necessary Changes
Once you have opened the SRT file in a text editor or subtitle editing software, the next step is to make the necessary changes to the timing or text of the subtitles. By making precise adjustments, you can improve synchronization, correct errors, or refine the content. Follow these steps to make the desired modifications:
- Modify the timing codes: To adjust the timing of a subtitle, modify the start and end time codes in the SRT file. This allows you to fine-tune the synchronization of the subtitles with the corresponding audio or video. Ensure that the time codes accurately reflect the intended timing.
- Edit the subtitle text: If there are errors or inaccuracies in the subtitle text, make the necessary edits. Correct any grammatical or spelling mistakes and ensure the subtitles convey the intended message clearly and concisely.
- Translate or transcribe the subtitles: If you need to translate the subtitles into a different language or transcribe the dialogue from a different source, modify the text accordingly. Ensure that the translation or transcription accurately reflects the meaning of the original subtitle.
- Proofread and revise: After making changes to the timing and text, carefully proofread and review the modified subtitles. Check for any errors, inconsistencies, or issues that may affect the readability or understanding of the subtitles. Make any necessary revisions to ensure the highest level of quality.
By making the necessary changes, you can enhance the accuracy, clarity, and overall effectiveness of the subtitles. Remember to save your modifications after completing this step, as they will be reflected in the updated version of the SRT file.
Step 3: Save the Modified SRT File
After you have made the necessary changes to the SRT file, it’s time to save the modified version. Saving the file ensures that your edits are preserved and can be used in various media players or shared with others. Follow these steps to save the modified SRT file:
- Ensure file format and compatibility: Confirm that the file is saved in the SRT format (.srt) to maintain compatibility with media players and subtitle editing software. Saving it in any other format may result in the loss of its structure and readability.
- Select the appropriate location: Choose a location on your computer where you want to save the modified SRT file. Consider creating a separate folder for your subtitle files to keep them organized and easily accessible.
- Give it a descriptive name: Provide a meaningful and descriptive name for the modified SRT file. The name should clearly indicate the video content, language, or any other relevant information that helps you identify the file later on.
- Save the SRT file: Click the “Save” or “Export” button in your text editor or subtitle editing software to save the modified SRT file. This action ensures that your changes are preserved and the updated version of the SRT file is stored in the designated location.
Saving the modified SRT file allows you to use it for different purposes, including playback with subtitles or further editing. Make sure to save the file with a clear and consistent naming convention to easily locate and manage your subtitle files in the future.
Tips for Using SRT Files
Using SRT files effectively can greatly enhance the viewing experience and ensure accurate subtitles. Here are some tips to help you make the most out of SRT files:
- Tip 1: Use a universal time format: When setting the time codes in your SRT file, use a universal time format (hh:mm:ss,ms) to maintain consistency and compatibility across different media players and subtitle editing software.
- Tip 2: Keep subtitles clear and concise: Strive to keep each subtitle clear, concise, and easy to read. Use simple language and avoid lengthy sentences to ensure that viewers can easily follow along.
- Tip 3: Proofread and revise subtitles: Before finalizing your SRT file, thoroughly proofread and revise the subtitles for accuracy and readability. Correct any spelling or grammatical errors, and ensure that the subtitles convey the intended message effectively.
- Tip 4: Ensure accurate synchronization: Double-check the timing of your subtitles to ensure they are correctly synchronized with the audio or video. Proper synchronization enhances the viewer’s comprehension and overall viewing experience.
- Tip 5: Customize subtitle display: Explore the options available in media players or subtitle editing software to customize the display of subtitles. You can adjust the font size, color, background, and position to make the subtitles more visually appealing and easy to read.
- Tip 6: Consider viewer preferences: Take into account viewer preferences when creating subtitles. For example, some viewers may prefer subtitles at the bottom of the screen, while others may prefer them at the top. Catering to these preferences enhances accessibility and user satisfaction.
- Tip 7: Test subtitles with different devices: After creating an SRT file, test it on different devices and media players to ensure compatibility and optimal viewing experience. This helps you identify and fix any inconsistencies or formatting issues that may arise.
By following these tips, you can create and utilize SRT files effectively to provide accurate and clear subtitles that enhance the accessibility and understanding of your videos.
Tip 1: Use a Universal Time Format
When creating SRT files, it is essential to use a universal time format to ensure consistency and compatibility across different media players and subtitle editing software. By adhering to a standard time format, you can prevent synchronization issues and make it easier for viewers to follow along. Here’s why using a universal time format is important:
Consistency: Using a universal time format, such as hh:mm:ss,ms (hours:minutes:seconds,milliseconds), ensures that the time codes in your SRT file are consistently formatted. Each time code should have the same structure to maintain accuracy and synchronization with the corresponding video.
Compatibility: Media players and subtitle editing software are designed to work with standard time formats. By using a universal time format, you increase the likelihood that your SRT file will be recognized and properly displayed across different platforms and devices.
Precision: A universal time format provides precise timing for the display of subtitles. It allows for exact coordination between the audio or video content and the corresponding subtitle text, ensuring that subtitles appear and disappear at the intended moments.
To use a universal time format in your SRT file, follow the pattern of hh:mm:ss,ms. Each time code represents the start and end time of a subtitle sequence. For example, if a subtitle should appear at 00:01:23 and disappear at 00:01:27, the time code would be: 00:01:23,000 –> 00:01:27,000. The milliseconds portion helps to fine-tune the timing, especially when subtitles need to be synchronized precisely.
By using a universal time format, you ensure that your SRT files are compatible, consistent, and accurately synchronized with the audio or video content. This allows viewers to experience seamless and well-timed subtitles, enhancing their understanding and enjoyment of the video.
Tip 2: Keep Subtitles Clear and Concise
When creating subtitles in an SRT file, it is crucial to keep them clear, concise, and easy to read. Well-crafted subtitles enhance the viewer’s understanding and engagement with the video content. Here are the reasons why it is important to keep subtitles clear and concise:
Clarity: Clear subtitles are essential to ensure that viewers can easily read and comprehend the dialogue or narration. Use straightforward language and avoid complex sentence structures to make the subtitles accessible to a wide range of viewers.
Readability: Concise subtitles allow viewers to read the text comfortably without feeling overwhelmed or rushed. Keep each subtitle within a reasonable length, typically one to two lines, to maintain readability and avoid overcrowding the screen.
Precise Meaning: Convey the intended message accurately by using subtitles that directly reflect the dialogues or narration. Focus on capturing the core meaning of the original content while ensuring that the subtitles are suitable for the target audience.
Avoidance of Information Overload: Overloading the subtitles with excessive information can overwhelm viewers and hinder their ability to follow the dialogue or narration. Stick to key points and essential information to prevent cognitive overload.
Timing: Concise subtitles help maintain synchronization with the audio or video. If subtitles are too lengthy or contain unnecessary information, it can lead to a mismatch between the displayed text and the corresponding dialogue or narration.
Consistency: Consistency in subtitle length and style enhances the overall viewing experience. Maintaining a similar format and length throughout the SRT file ensures a cohesive and professional look.
By keeping subtitles clear and concise, you ensure that viewers can easily read and understand the text while maintaining accurate timing and synchronization. Strive for simplicity and effectiveness in delivering the message, creating a more immersive and enjoyable viewing experience.
Tip 3: Proofread and Revise Subtitles
After creating subtitles in an SRT file, it is crucial to thoroughly proofread and revise them before finalizing the subtitles. This step ensures accuracy and readability, providing viewers with a seamless and enjoyable viewing experience. Here’s why proofreading and revising subtitles is important:
Accuracy: Proofreading allows you to correct any grammatical or spelling errors in the subtitles. Ensure that the subtitle text accurately reflects the dialogue or narration, maintaining the intended meaning and context.
Readability: Revise the subtitles to enhance their readability. Check for sentence structure, punctuation, and capitalization, ensuring that the subtitles are easy to read and understand. Break longer sentences into concise phrases and use appropriate punctuation to facilitate comprehension.
Consistency: Consistent subtitles contribute to a cohesive and professional viewing experience. Ensure that the formatting, style, and language of the subtitles remain consistent throughout the SRT file, maintaining a seamless flow of information.
Timing and Synchronization: Pay attention to the timings of the subtitles and check their synchronization with the audio or video content. Revise the start and end times of each subtitle to ensure accurate placement and synchronization with the corresponding dialogues or narration.
Grammar and Spelling: Double-check the grammar and spelling of the subtitles, as errors can distract viewers and diminish the overall quality of the subtitles. Proofreading helps catch any mistakes and ensures that the subtitles are free of grammatical errors and misspellings.
Audience Understanding: Consider the needs and preferences of your target audience while revising subtitles. Ensure that the subtitles convey the intended message clearly and concisely, facilitating better understanding and engagement for viewers.
By taking the time to proofread and revise subtitles, you can improve their accuracy, readability, and overall quality. This attention to detail enhances the viewing experience and allows viewers to fully engage with the content, benefiting both native and non-native speakers of the language.
Frequently Asked Questions (FAQs)
Here are some commonly asked questions about SRT files:
Q: What software or media players support SRT files?
A: Many media players, including VLC Media Player, Windows Media Player, and YouTube, support SRT files. Additionally, video editing software like Adobe Premiere Pro and Subtitle editing software such as Subtitle Workshop and Aegisub can open and work with SRT files.
Q: Can I create SRT files for any type of video?
A: Yes, you can create SRT files for any video as long as you have the corresponding dialogue or narration available. Whether it’s a movie, TV show, documentary, or online video, SRT files can be created to provide subtitles.
Q: How can I sync the subtitles with the video?
A: SRT files provide time codes for each subtitle sequence. By adjusting the timing in the SRT file, you can sync the subtitles with the corresponding audio or video. Ensure that the start and end times accurately match the points at which the subtitles should appear and disappear.
Q: Can I edit an SRT file after it has been created?
A: Yes, SRT files can be edited even after they have been created. You can open the SRT file in a text editor or subtitle editing software to make modifications such as adjusting timings, correcting errors, or translating the subtitles.
Q: Are SRT files language-specific?
A: SRT files can be created for any language. They allow subtitles to be added and displayed in different languages, making videos accessible to viewers who prefer or require subtitles in different languages.
Q: Are SRT files compatible with mobile devices and streaming platforms?
A: Yes, SRT files are widely compatible with various mobile devices and streaming platforms. Most media players and video streaming platforms support SRT files, making it convenient to watch videos with subtitles on smartphones, tablets, and other mobile devices.
Q: How can I make the subtitles more visually appealing?
A: Some media players and subtitle editing software allow you to customize the appearance of subtitles by adjusting the font size, color, background, and position. Experiment with these settings to make the subtitles more visually appealing and suitable for your audience.
These are just a few of the common questions related to SRT files. Understanding the basics of SRT files and their compatibility with different software and devices can help you create and work with subtitles effectively.