
What is an APN?
An APN (Access Point Name) is a setting on your mobile device that allows it to connect to the internet through your mobile network operator’s network. Think of it as a gateway that enables your device to establish a connection and communicate with the internet.
Each mobile network operator has its own unique APN, which is specific to their network infrastructure and services. When you insert a SIM card into your device and connect to your mobile network, your device automatically retrieves and uses the APN settings provided by your network operator.
The APN contains various configuration settings required for your device to access the internet. This includes the network protocol, IP address, username, password, and other authentication details necessary for establishing a secure and reliable connection.
While most devices can automatically retrieve and configure the correct APN settings, there may be instances where you need to manually change or update them to ensure a stable internet connection.
Let’s take a closer look at the purpose of an APN and how it works.
The Purpose of an APN
The primary purpose of an APN is to facilitate the connection between your mobile device and your network operator’s network, allowing you to access the internet and other network services. It acts as a bridge between your device and the network infrastructure.
Here are the key purposes of an APN:
- Internet Access: The APN enables you to connect to the internet using your mobile data plan. It provides the necessary configuration settings for your device to establish a data connection and access online content, browse websites, use applications, and more.
- MMS and Multimedia Services: In addition to internet access, the APN also facilitates multimedia messaging services (MMS). It allows you to send and receive multimedia messages, such as pictures, videos, and audio files, through your mobile network.
- Virtual Private Networks (VPNs): Some devices may use an APN to connect to a virtual private network (VPN). A VPN creates a secure, encrypted connection over a public network (such as the internet), providing a private and secure pathway for accessing corporate networks, protecting your data, and ensuring privacy while browsing.
- Roaming: When you travel internationally and use your device with a different network operator’s SIM card, you may need to update the APN settings to enable data connectivity. This ensures that your device can communicate with the new network and access the internet while roaming.
Overall, the APN plays a crucial role in establishing and maintaining a reliable internet connection on your mobile device. By configuring the correct APN settings, you can ensure seamless connectivity, faster data speeds, and access to various network services.
Now that we understand the purpose of an APN, let’s delve into how it actually works.
How Does an APN Work?
Understanding how an APN works can shed light on the process of establishing an internet connection on your mobile device. Here’s a simplified explanation of how an APN functions:
When you turn on your device and insert a SIM card, it automatically communicates with your network operator’s network. During this interaction, your device receives the APN settings specific to your network operator.
The APN settings contain various parameters, including the network identifier, authentication details, IP addressing, and more. These settings are essential for your device to establish a connection and communicate with the network.
When you attempt to access the internet or use network-dependent services on your device, it initiates a connection request. This request is sent to the APN, which acts as a gateway.
The APN performs several functions:
- Validation: The APN validates the connection request, ensuring that it is coming from a trusted and authorized device. It checks the authenticity of the SIM card and verifies the user’s credentials to ensure secure access.
- Routing: Once the connection request is validated, the APN determines the appropriate network route for your device. It maps the request to the correct network infrastructure and guides the data packets to the destination.
- Configuration: The APN configures the necessary protocols and parameters for the connection. It assigns your device an IP address, sets up the appropriate network protocols (such as GSM, CDMA, LTE), and establishes the network context required for data transmission.
- Packet Switching: As you browse the internet, send emails, or use other network services, data packets are generated. The APN manages the packet switching process, ensuring that the data is divided into smaller packets and sent over the network efficiently.
- Authentication: To maintain the security and integrity of the network, the APN continuously authenticates the connection. It verifies data integrity, checks for unauthorized access attempts, and enforces encryption measures to protect user information.
Together, these functions of the APN contribute to establishing a seamless and secure connection between your device and the network operator’s infrastructure. By enabling data transmission, validating connections, and managing network resources, the APN ensures smooth internet access and reliable performance.
Now that you have a better understanding of how an APN works, let’s explore how you can check your current APN settings on your device.
How to Check Your Current APN Settings
If you’re curious to know what APN settings are currently configured on your mobile device, you can easily check them through your device’s settings menu. Here’s how to do it:
Android:
- Go to your device’s “Settings” app.
- Scroll down and tap on “Network & internet” or “Connections.”
- Look for and select “Mobile network” or “Cellular networks.”
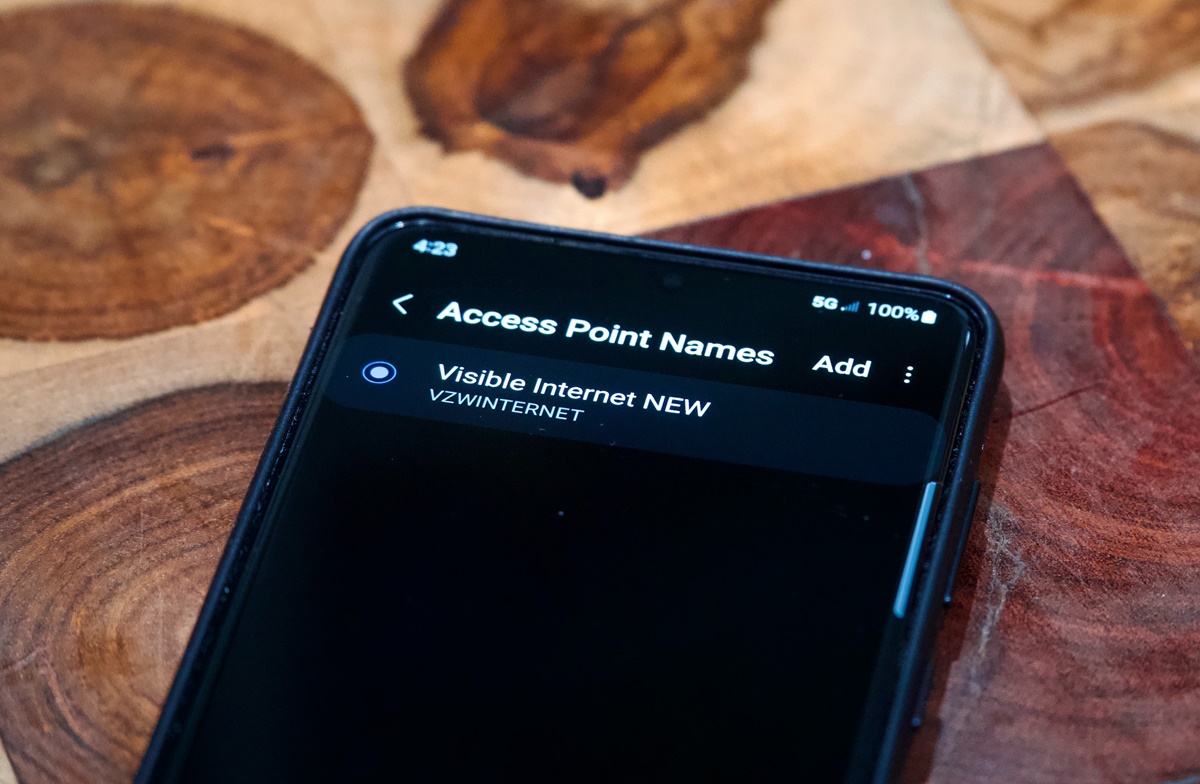
- Tap on “Access Point Names” or “APN.”
- You will see a list of APNs configured on your device. The one with a green dot or a tick mark is the active APN.
- To view the settings of a specific APN, tap on it, and it will display the details such as the name, APN, proxy, port, authentication type, and more.
iPhone:
- Open the “Settings” app on your iPhone.
- Tap on “Mobile Data” or “Cellular.”
- Choose “Mobile Data Options” or “Cellular Data Options.”
- Tap on “Mobile Data Network” or “Cellular Data Network.”
- Here, you will see the current APN settings, including the APN, username, password, and other options.
Windows Phone:
- Go to the “Settings” app on your Windows Phone.
- Tap on “Mobile network.”
- Select “SIM settings.”
- Tap on “Edit internet APN.”
- You will find the current APN settings displayed on the screen.
BlackBerry:
- Open the “Settings” app on your BlackBerry device.
- Go to “Network Connections.”
- Select “Mobile Network.”
- Tap on “APN.”
- You will be able to view the current APN settings.
By following these steps, you can quickly access and view the APN settings on your specific device. This information can be handy if you need to troubleshoot internet connectivity issues or if you want to compare your settings with the recommended settings provided by your network operator.
In the next section, we will discuss some reasons why you might want to change your APN settings.
Why Would You Need to Change Your APN?
While most users never need to manually change their APN settings, there are certain scenarios where modifying the APN becomes necessary. Here are a few reasons why you might need to change your APN:
- Network Compatibility: If you switch to a new network operator or insert a SIM card from a different network, you may need to update the APN settings to ensure compatibility and establish a connection with the new network. Different networks have different APN configurations, so it’s essential to input the correct settings for your specific network operator.
- Internet Connection Issues: If you’re experiencing difficulties connecting to the internet or facing slow data speeds, updating the APN settings could potentially resolve the problem. Sometimes, incorrect or outdated APN settings can prevent your device from establishing a stable and optimal connection. Adjusting the settings to the correct values provided by your network operator can help improve internet speeds and resolve connectivity issues.
- International Roaming: When traveling abroad and using a local SIM card or roaming on a foreign network, you might need to update your APN settings to access data services. Each network has its own unique APN settings, and by inputting the correct settings for the roaming network, you can ensure uninterrupted internet access while abroad.
- Network-Specific Features: Certain network operators offer specialized services or features that require specific APN settings. For example, some networks provide access to private networks, content filtering, or enhanced security through VPNs. To utilize these features, you may need to adjust your APN settings to enable the required functionalities.
- Customization and Optimization: Advanced users or those seeking to optimize their network settings for specific purposes, such as gaming, streaming, or VoIP services, may choose to modify their APN settings. By fine-tuning parameters like DNS servers or proxy settings, it’s possible to potentially enhance network performance and tailor it to your specific needs.
It’s important to note that when changing APN settings, it’s crucial to input the correct information provided by your network operator. Incorrect settings can disrupt connectivity or result in data charges. If you’re unsure about the appropriate APN settings, contacting your network operator’s customer support is the best course of action.
Now that you understand why you might need to change your APN settings, let’s explore how to do it on different devices.
How to Change Your APN on Android Devices
If you’re using an Android device and need to change your APN settings, you can follow these steps:
- Go to the “Settings” app on your Android device.
- Scroll down and tap on “Network & internet.”
- Select “Mobile network” or “Cellular networks.”
- Tap on “Access Point Names” or “APN.”
- You will see a list of APNs configured on your device. Tap on the APN that you want to modify or create a new one by tapping the “+” icon.
- Enter the correct APN settings provided by your network operator. These settings usually include the name, APN, proxy, port, username, password, and other parameters.
- Tap on the three-dot menu icon and select “Save” or “Save APN.”
- Once you’ve saved the new APN settings, go back to the previous screen and select the newly created APN as the active APN.
- Restart your device to apply the changes.
By following these steps, you can change and customize the APN settings on your Android device to ensure compatibility, enhance performance, or resolve connectivity issues. Remember to input the correct information provided by your network operator to ensure a successful configuration.
Now, let’s explore how to change the APN settings on an iPhone.
How to Change Your APN on iPhone
If you have an iPhone and need to change your APN settings, you can do so by following these steps:
- Open the “Settings” app on your iPhone.
- Tap on “Mobile Data” or “Cellular.”
- Choose “Mobile Data Options” or “Cellular Data Options.”
- Tap on “Mobile Data Network” or “Cellular Data Network.”
- Here, you will find the APN settings for your current network operator.
- Make the necessary changes to the APN, if required. This includes modifying the APN, username, password, proxy, and port settings.
- Once you’ve made the changes, you can either tap on the back arrow to save the new settings automatically or tap on “Reset Settings” to discard the changes and revert to the default settings.
When changing the APN settings on an iPhone, it’s important to have the correct information provided by your network operator to ensure a successful configuration. Make sure to input the specific details accurately, or contact your network operator’s customer support for assistance if needed.
Now, let’s move on to changing the APN settings on Windows Phone.
How to Change Your APN on Windows Phone
If you’re using a Windows Phone and need to change your APN settings, you can do so by following these steps:
- Go to the “Settings” app on your Windows Phone.
- Tap on “Network & wireless.”
- Select “Cellular & SIM.”
- Under the SIM settings, tap on the SIM card for which you want to change the APN settings.
- Tap on “Edit Internet APN.”
- Enter the correct APN settings provided by your network operator. These settings typically include the APN, username, password, proxy, port, and more.
- After entering the new APN settings, tap on the save icon.
- Restart your Windows Phone to apply the changes.
By following these steps, you can modify the APN settings on your Windows Phone according to the specific requirements of your network operator. Make sure to input the correct details provided by your network operator to ensure a successful configuration.
Now, let’s move on to changing the APN settings on BlackBerry devices.
How to Change Your APN on BlackBerry
If you’re using a BlackBerry device and need to change your APN settings, you can do so by following these steps:
- Open the “Settings” app on your BlackBerry device.
- Go to “Network Connections.”
- Select “Mobile Network.”
- Tap on “APN.”
- You will see the current APN settings for your network operator.
- Make the necessary changes to the APN, including the APN name, APN, username, password, proxy, and port settings.
- Tap on the back arrow or “Save” to save the new APN settings.
When changing the APN settings on a BlackBerry device, it’s important to have the correct information provided by your network operator to ensure a successful configuration. Make sure to input the specific details accurately, or contact your network operator’s customer support for assistance if needed.
Now that you know how to change the APN settings on different devices, let’s discuss some common issues that may arise when changing APN settings and how to resolve them.
Common Issues when Changing APN Settings
While changing APN settings can help resolve connectivity issues or improve network performance, there are a few common issues that users may encounter during this process. Let’s take a look at these issues and how to resolve them:
- Incorrect APN Settings: One of the most common problems is inputting incorrect APN settings. Make sure to double-check the information provided by your network operator and enter the details accurately. Mistyping or missing a single character can prevent your device from connecting to the network.
- Missing or Incomplete Settings: Another issue is missing or incomplete APN settings. Some network operators require additional parameters or have specific settings for certain services. Check if there are any specific requirements for your operator and ensure all necessary fields are filled in correctly.
- No Option to Add or Modify APN: Some devices or network operators may restrict users from adding or modifying APN settings. In such cases, you may need to contact your network operator’s customer support for further assistance or device-specific instructions.
- Unsupported Network: Occasionally, changing APN settings may not resolve compatibility issues if your device is not supported by a particular network. Some networks have specific requirements or limitations, and if your device does not meet these criteria, you may need to consider alternative options or contact your network provider for guidance.
- Data Connectivity Issues: Changing APN settings can sometimes result in temporary data connectivity issues. If you experience difficulties after modifying the APN settings, restart your device, or switch to a different APN temporarily. If the issue persists, contact your network operator for further assistance.
Remember, it’s important to exercise caution when modifying APN settings and to input the correct details provided by your network operator. If you encounter any issues or are unsure about the process, contacting your network operator’s customer support is the best course of action for guidance and troubleshooting.
Now that we’ve discussed common issues, let’s wrap up our discussion.
Final Thoughts
Understanding APN settings and how to change them can be beneficial in various situations. Whether you need to resolve connectivity issues, optimize network performance, or access specialized network services, having control over your APN settings gives you the flexibility to customize your device’s connection to your network operator’s infrastructure.
Remember, when changing APN settings, it’s crucial to input accurate information provided by your network operator. This ensures a successful configuration and avoids potential connectivity issues or data charges. If you’re unsure about the correct APN settings, reach out to your network operator’s customer support for assistance.
Additionally, keep in mind that changing APN settings may not always be necessary. In most cases, devices automatically retrieve and configure the correct APN settings when you insert a SIM card. Only make changes if you’re experiencing issues or if you want to optimize your network connection for specific purposes.
Lastly, be aware that the steps to change APN settings may vary slightly depending on your device’s operating system version and manufacturer. Always refer to the specific instructions for your device to ensure accuracy.
By understanding how APN settings work and knowing how to change them when necessary, you can take control of your device’s connection to the internet and optimize your network experience.
We hope this guide has provided you with the knowledge and confidence to manage your APN settings on your mobile device. Happy browsing!