
Why Transfer TiVo Recordings to Your PC
Transferring TiVo recordings to your PC offers a range of benefits and conveniences that enhance your entertainment experience. Whether you’re looking to free up space on your TiVo device, save your favorite shows for offline viewing, or simply have a backup of your recordings, transferring them to your PC is a worthwhile endeavor. Let’s explore the advantages in more detail:
1. Storage space optimization: TiVo devices have limited storage capacity, and if you’re a TV show enthusiast or a binge-watcher, you may find your TiVo filling up quickly. By transferring recordings to your PC, you can free up space on your TiVo for new content without losing access to your favorite shows.
2. Offline viewing: With your TiVo recordings on your PC, you can watch your favorite shows and movies anytime, anywhere, even without an internet connection. Perfect for those long flights, road trips, or vacations where internet access may be limited or unavailable.
3. Skip commercials: Watching recorded shows on your PC often comes with the advantage of skipping annoying commercials. With the appropriate video playback software or editing tools, you can easily fast-forward through those pesky ads and get straight to the content you love.
4. Personal media library: Transferring recordings to your PC allows you to build a personal media library where you can organize, categorize, and access your favorite shows, movies, and sports events with ease. You can create playlists, customize playback settings, and even share your collection with friends and family.
5. Backup and restore: Accidents happen, and there is always a risk of losing your TiVo recordings due to hardware failure, power surges, or other unforeseen circumstances. By transferring your recordings to your PC, you create a backup copy that can be easily restored in case of any unfortunate incidents.
6. Easy editing and sharing: Having your TiVo recordings on your PC opens up a world of possibilities for video editing and sharing. You can trim, merge, or add effects to your recordings using video editing software, and then share your masterpiece with friends or upload it to social media platforms.
What You Need to Transfer TiVo Recordings to Your PC
Before you can transfer your TiVo recordings to your PC, there are a few essential things you’ll need to ensure a smooth and successful process. Here’s a breakdown of the necessary requirements:
1. TiVo device: You’ll need a TiVo device with a built-in hard drive to store your recordings. Make sure your TiVo device is compatible with the transfer methods discussed below.
2. TiVo Desktop Software: If you choose to transfer your recordings using TiVo Desktop Software, you’ll need to download and install the appropriate version for your PC. The software allows communication between your TiVo device and your PC, facilitating the transfer of recordings.
3. Video Capture Card: If you opt for transferring your recordings using a video capture card, you’ll need to ensure that your PC has an available PCIe slot to accommodate the card. Additionally, check the system requirements of the video capture card to ensure compatibility.
4. Network Attached Storage (NAS) device: If you plan on using a NAS device to transfer your TiVo recordings to your PC, you’ll need a NAS device with enough storage capacity to accommodate your recordings. Ensure that your PC and the NAS device are connected to the same local network for seamless file transfer.
5. TiVo Mini: If you have a TiVo Mini connected to your network, you can utilize it to transfer your recordings to your PC. Make sure your TiVo Mini is set up and connected to your PC using either an Ethernet or MoCA connection.
6. Connection cables and hardware: Depending on the transfer method you choose, you may need various cables and hardware. For example, if you’re using a video capture card, you’ll need HDMI or component cables to connect your TiVo device to the capture card.
7. Adequate storage space: Ensure that your PC has enough available storage space to accommodate the transferred TiVo recordings. Large high-definition recordings can quickly fill up your hard drive, so it’s important to have sufficient space.
8. Software and drivers: Make sure you have the necessary software and drivers installed on your PC to facilitate the transfer process. This may include TiVo Desktop Software, video capture card drivers, or media server software for NAS devices.
By ensuring that you have these essential components and requirements in place, you’ll be well-prepared to transfer your TiVo recordings to your PC with ease.
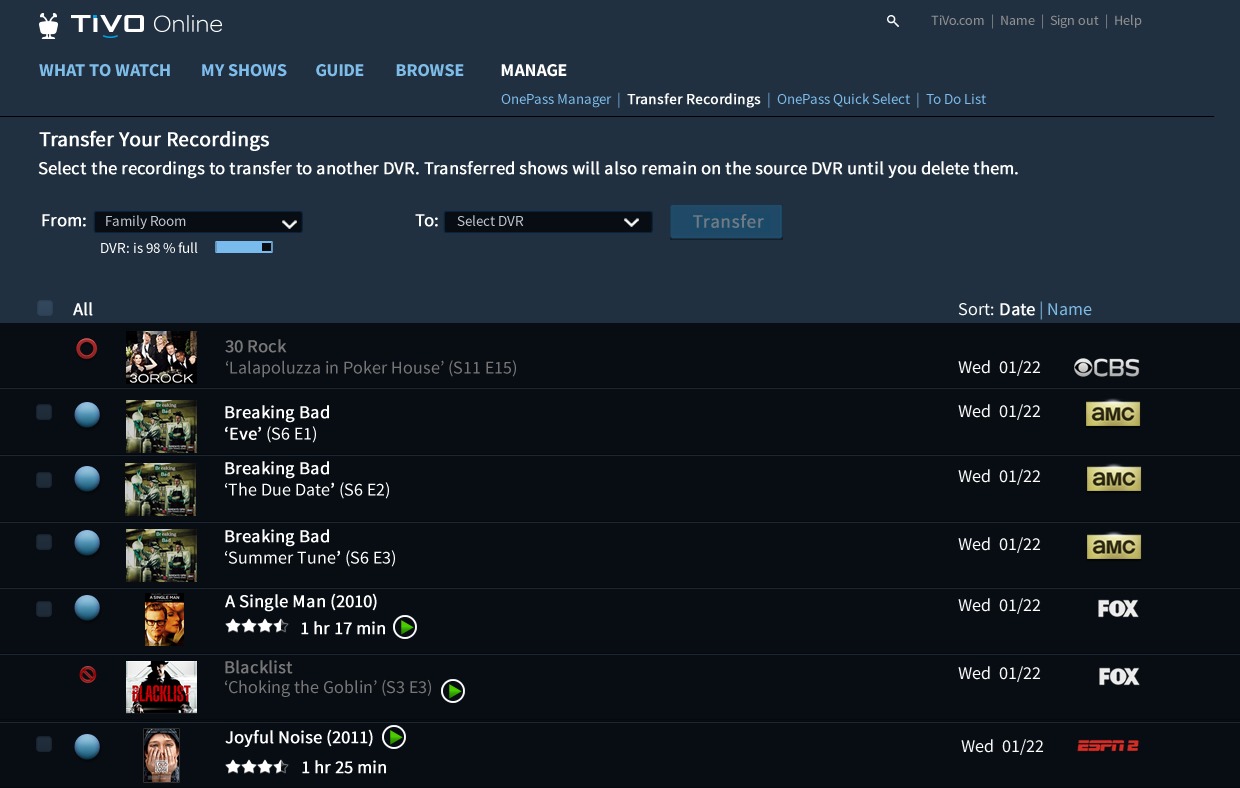
Option 1: Transferring TiVo Recordings to PC using TiVo Desktop Software
TiVo Desktop Software is a convenient and user-friendly method to transfer your TiVo recordings to your PC. Here’s how you can do it:
Step 1: Install TiVo Desktop Software: Download and install the TiVo Desktop Software on your PC. Ensure that your PC and TiVo device are connected to the same local network.
Step 2: Launch TiVo Desktop Software: Open the TiVo Desktop Software on your PC. You may need to go through the setup process and provide your TiVo account details.
Step 3: Enable file transfer: In the TiVo Desktop Software, navigate to the preferences or settings section. Ensure that the file transfer option is enabled, allowing your TiVo device to communicate with your PC.
Step 4: Select recordings to transfer: Within the TiVo Desktop Software, you should be able to see a list of the recordings stored on your TiVo device. Select the recordings you want to transfer to your PC. You may have the option to transfer individual episodes, entire series, or specific folders.
Step 5: Start the transfer: Once you have selected the recordings, initiate the transfer process. The TiVo Desktop Software will begin transferring the selected recordings from your TiVo device to your PC. The transfer speed will depend on your network connection and the file size of the recordings.
Step 6: Access your transferred recordings: After the transfer is complete, you can access your transferred TiVo recordings on your PC. The recordings will typically be saved in a specific folder designated by the TiVo Desktop Software.
Step 7: Enjoy your TiVo recordings on your PC: Now that your TiVo recordings are on your PC, you can use your favorite media player software to watch and enjoy them. You may also choose to copy the recordings to other devices or external storage for convenience.
By utilizing TiVo Desktop Software, you can easily transfer your TiVo recordings to your PC and have them readily available for offline viewing or archiving purposes. It provides a straightforward and hassle-free method to enjoy your favorite shows on a larger screen and in the comfort of your PC environment.
Option 2: Transferring TiVo Recordings to PC using a Video Capture Card
If you prefer a hardware-based solution, using a video capture card is an effective method to transfer your TiVo recordings to your PC. Follow the steps below:
Step 1: Check compatibility: Ensure that your PC has an available PCIe slot to accommodate the video capture card. Additionally, check the system requirements of the capture card to ensure compatibility with your PC and TiVo device.
Step 2: Install the video capture card: Insert the video capture card into the appropriate PCIe slot on your PC. Make sure it is properly connected and secured.
Step 3: Connect TiVo device to the capture card: Use HDMI or component cables to connect your TiVo device to the video capture card. Follow the instructions provided with the capture card for the specific connection process.
Step 4: Install capture card software: Install the software provided with the video capture card. This software enables your PC to recognize and capture the video signal from your TiVo device.
Step 5: Configure capture settings: Open the capture card software on your PC and configure the capture settings. Ensure that the software is set to capture from the connected TiVo device and adjust any necessary video or audio settings.
Step 6: Initiate the recording: Start the recording in the capture card software and then begin playback of the desired TiVo recording on your TiVo device. The video capture card will capture the video signal in real-time and save it to your PC’s storage.
Step 7: Access your captured recordings: Once the recording is complete, you can access the captured TiVo recordings on your PC. The recordings will typically be saved as video files that you can locate in the designated storage location set in the capture card software.
Step 8: Watch and edit: You can now use your preferred media player software to watch the captured TiVo recordings on your PC. If desired, you can also use video editing software to trim, merge, or enhance the recordings before storing or sharing them.
Transferring TiVo recordings to your PC using a video capture card gives you the flexibility to capture the audio and video signal directly from your TiVo device. It is a reliable method that allows for high-quality recordings and gives you full control over the capture process.
Option 3: Transferring TiVo Recordings to PC using a Network Attached Storage (NAS) device
If you have a Network Attached Storage (NAS) device in your home network, you can utilize it to transfer TiVo recordings to your PC seamlessly. Here’s how:
Step 1: Set up the NAS device: Connect and set up the NAS device on your local network. Follow the instructions provided with the NAS device to ensure proper configuration and access from your PC.
Step 2: Enable TiVo file sharing: On your TiVo device, navigate to the settings or preferences menu and enable file sharing. This will allow your TiVo to communicate with the NAS device over the network.
Step 3: Map the NAS device: On your PC, map the NAS device to a specific drive or folder. This allows your PC to establish a direct connection with the NAS device and access its file system.
Step 4: Transfer TiVo recordings to the NAS: Using the TiVo device, navigate to the recordings you want to transfer and select the option to transfer them to the NAS device. Depending on your TiVo model and software version, this process may vary. Consult the TiVo user manual for specific instructions.
Step 5: Access the transferred recordings: After the transfer is complete, you can access the TiVo recordings on your PC by navigating to the mapped drive or folder where the NAS device is located. The transferred recordings will be saved in a specific directory or folder.
Step 6: Enjoy your TiVo recordings on your PC: With the transferred recordings on your PC, you can now use your preferred media player software to watch and enjoy them. You can also copy the recordings to other devices or external storage for additional flexibility.
Step 7: Manage and organize your recordings: The NAS device provides a centralized storage solution for your TiVo recordings. You can use the NAS management software or file explorer on your PC to organize, categorize, and manage your recordings effectively.
Transferring TiVo recordings to your PC using a NAS device offers a convenient way to access your recordings from multiple devices within your home network. It eliminates the need for direct connections or physical transfers and provides a seamless experience for enjoying your favorite shows on your PC.
Option 4: Transferring TiVo Recordings to PC using a TiVo Mini
If you have a TiVo Mini connected to your network, you can leverage it to transfer your TiVo recordings to your PC effortlessly. Follow the steps below:
Step 1: Set up the TiVo Mini: Ensure that your TiVo Mini is properly set up and connected to your network. This involves connecting the TiVo Mini to your TV and following the on-screen instructions to connect it to your home network.
Step 2: Connect the TiVo Mini to your PC: Using an Ethernet or MoCA connection, connect the TiVo Mini to your PC. This connection establishes a direct link between the TiVo Mini and your PC for file transfer.
Step 3: Enable TiVo file sharing: On your TiVo Mini settings, enable file sharing. This allows your TiVo Mini to communicate with your PC and transfer recordings seamlessly.
Step 4: Launch TiVo Desktop Software: Open the TiVo Desktop Software on your PC. If you don’t have the software installed, download and install the appropriate version for your PC.
Step 5: Start the transfer: Within the TiVo Desktop Software, select the TiVo Mini as the source device for the transfer. Choose the recordings you want to transfer and initiate the transfer process. The software will transfer the selected recordings from the TiVo Mini to your PC.
Step 6: Access your transferred recordings: After the transfer is complete, you can access the transferred TiVo recordings on your PC. The recordings will typically be saved in a designated folder or directory determined by the TiVo Desktop Software.
Step 7: Watch and manage your recordings: With the transferred recordings on your PC, you can use a media player of your choice to watch and enjoy them. You can also use the TiVo Desktop Software to organize, categorize, and manage your recordings efficiently.
Step 8: Disconnect the TiVo Mini: Once the transfer is complete, you can disconnect the TiVo Mini from your PC. However, keep in mind that you might need to reconnect it in the future if you wish to transfer more recordings.
Using a TiVo Mini to transfer your TiVo recordings to your PC offers a straightforward and convenient method, especially if you already have a TiVo Mini connected to your network. It eliminates the need for additional hardware or complex configurations, making it a user-friendly solution for accessing your recordings on your PC.
Common Issues and Troubleshooting Tips
While transferring TiVo recordings to your PC can be a relatively smooth process, there are some common issues that may arise. Here are a few troubleshooting tips to help you overcome these challenges:
1. Network connectivity issues: If you encounter network connectivity issues while transferring recordings, ensure that your PC and TiVo device are connected to the same network and that both devices have a stable internet connection. Restarting your router or checking network settings can help resolve connectivity problems.
2. Software compatibility: Ensure that the software being used, such as TiVo Desktop Software or video capture card software, is compatible with your PC’s operating system. Check for software updates and try reinstalling the software if issues persist.
3. Insufficient storage space: If you run into insufficient storage space on your PC when transferring recordings, consider freeing up space on your hard drive by deleting unnecessary files or transferring recordings to an external storage device.
4. Transcoding issues: If you encounter playback issues or quality problems with transferred recordings, it may be due to incompatible video codecs or formats. Try converting the recordings to a more universally supported format using video conversion software.
5. TiVo software/firmware updates: Ensure that your TiVo device has the latest software or firmware updates installed. Outdated software may cause compatibility issues or hinder the transfer process. Check for updates through the TiVo device settings or consult the TiVo website for instructions.
6. Cable and hardware troubleshooting: If you’re using a video capture card, check the cable connections between your TiVo device and the capture card. Ensure that the cables are securely plugged in and not damaged. If you suspect a hardware issue, consult the manufacturer’s troubleshooting guide or contact customer support.
7. Firewall and antivirus software: Sometimes, firewall or antivirus software on your PC can interfere with the transfer process. Temporarily disabling or adjusting the settings of your firewall or antivirus software may resolve the issue. Remember to re-enable them after the transfer is complete.
8. TiVo service subscription: Make sure that your TiVo service subscription is active and up to date. Some features, including certain transfer options, may require an active subscription. Contact TiVo customer support if you need assistance with your subscription or account.
By following these troubleshooting tips, you can overcome common issues that may occur during the process of transferring TiVo recordings to your PC. Remember to consult the user manuals or support resources provided by TiVo or the respective hardware and software manufacturers for detailed instructions and additional troubleshooting assistance.