
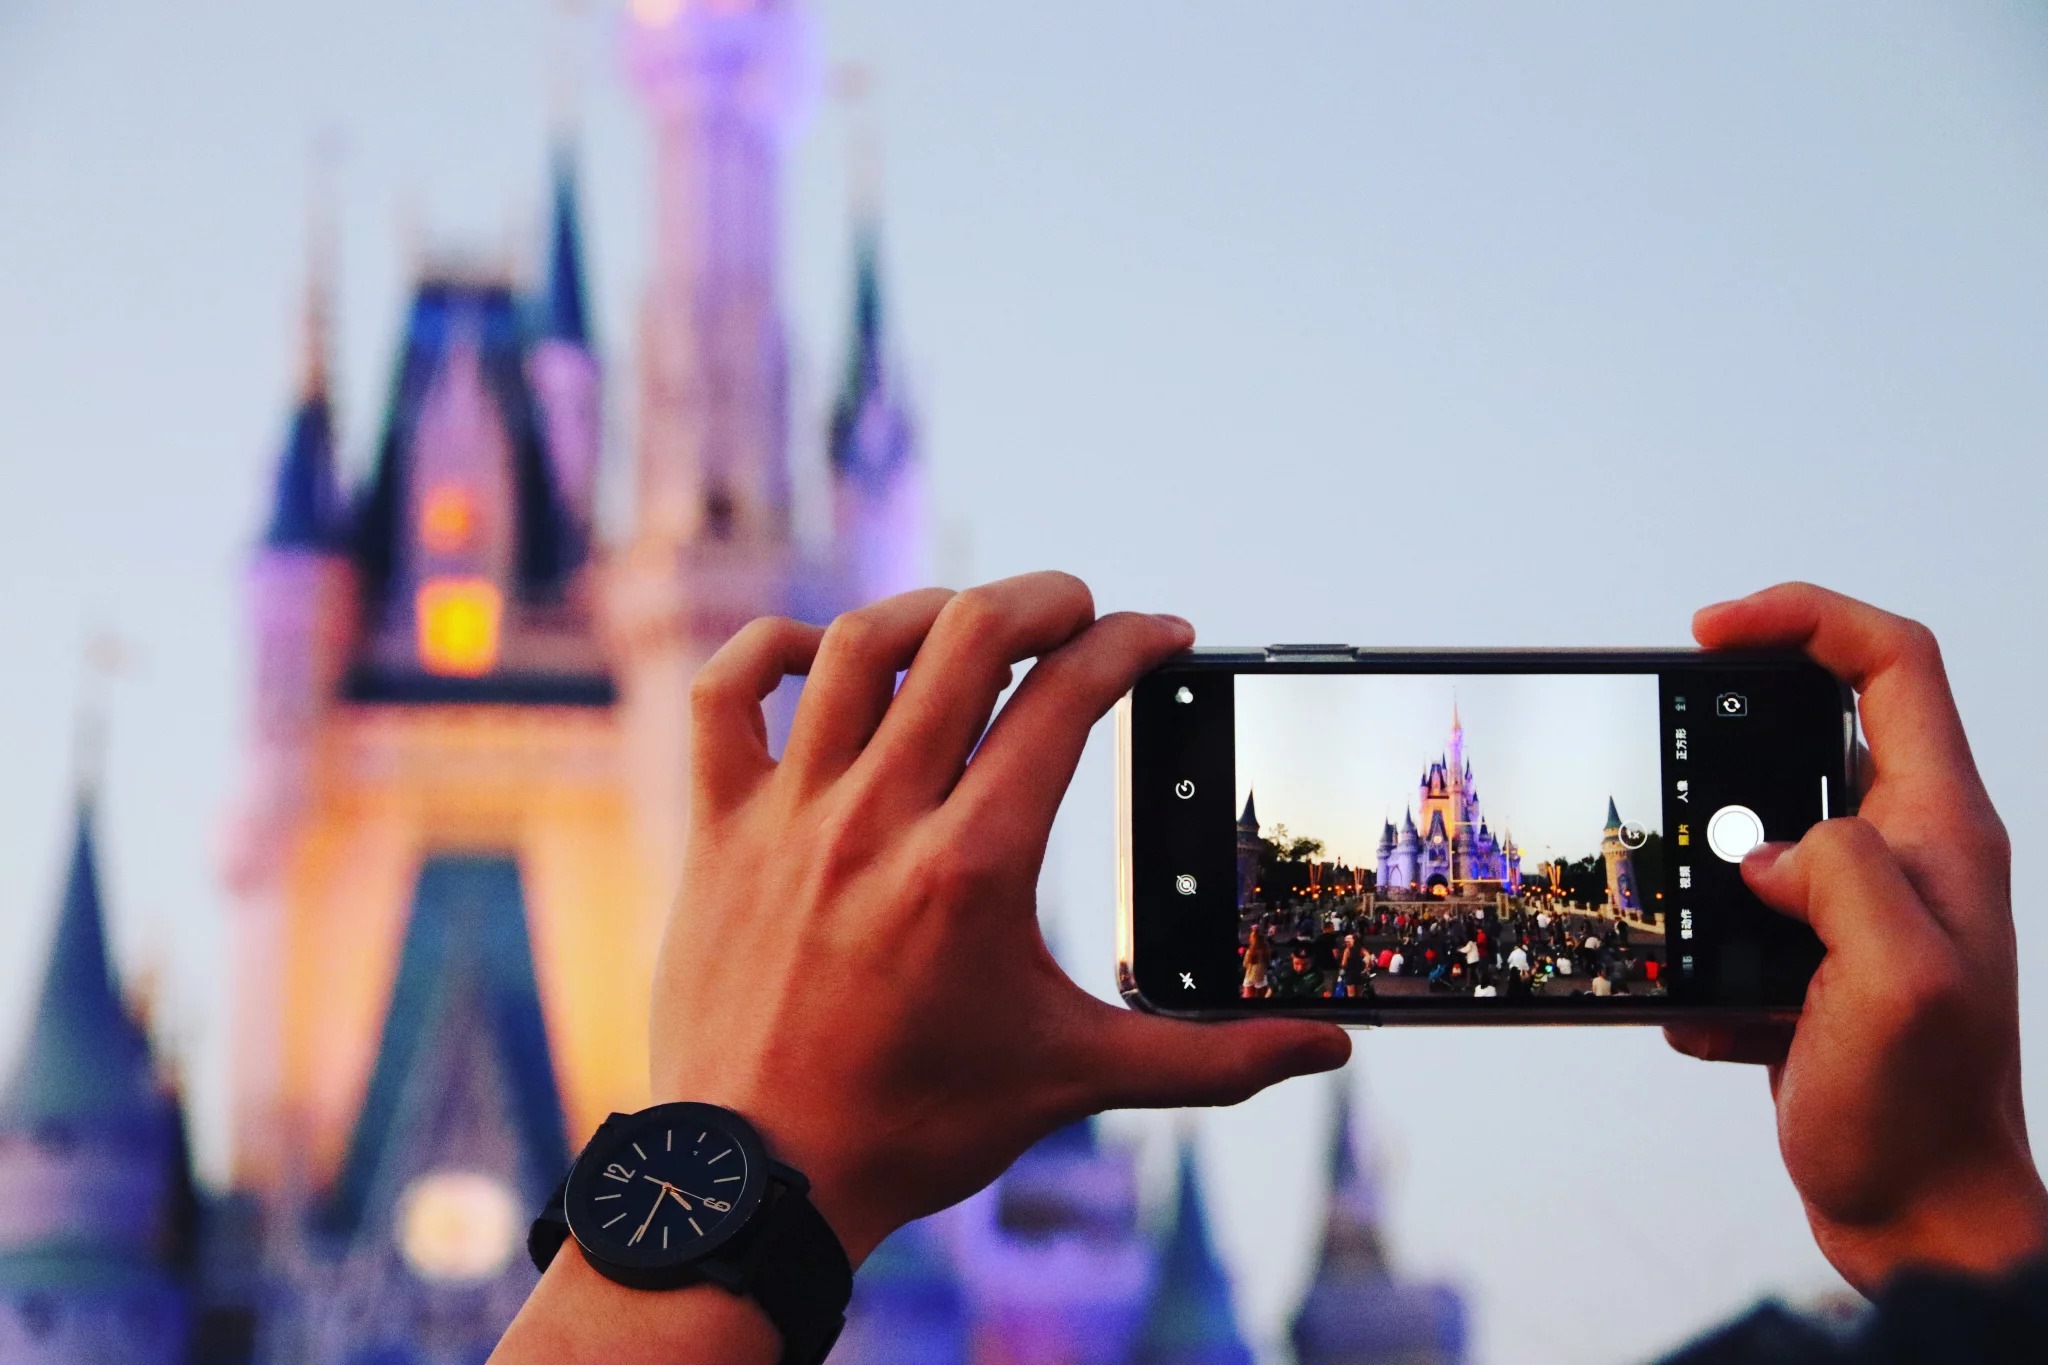
Choosing the Right Camera
When it comes to capturing the magic of Disney World, choosing the right camera is essential. Whether you’re a professional photographer or an enthusiastic amateur, having the right equipment can make all the difference in immortalizing your Disney adventures. Here are some factors to consider when selecting a camera for your trip:
Type of Camera: There are various types of cameras available, including DSLR, mirrorless, point-and-shoot, and even smartphone cameras. Each has its own advantages and disadvantages. If you’re looking for versatility and high image quality, a DSLR or mirrorless camera might be the best choice. For convenience and portability, a point-and-shoot or smartphone camera could be sufficient.
Lens Options: If you’re going with a DSLR or mirrorless camera, consider the availability of interchangeable lenses. Having a versatile lens selection allows you to capture different types of shots, from wide-angle landscape shots to zoomed-in character portraits. A versatile zoom lens is particularly useful for capturing the action from a distance.
Low Light Performance: Disney World is known for its spectacular nighttime illuminations and shows. Make sure your camera performs well in low-light conditions, as this will greatly impact the quality of your photos. Look for cameras with larger image sensors and wider aperture lenses for better low-light performance.
Image Stabilization: In a fast-paced environment like Disney World, where you may be capturing moving subjects or shooting on-the-go, having built-in image stabilization can greatly improve the sharpness of your images. This feature compensates for camera shake and reduces blur caused by shaky hands or movement.
Video Capabilities: If you’re interested in capturing magical moments in motion, consider the video capabilities of your camera. Look for cameras that offer high-resolution video recording, adjustable frame rates, and built-in stabilization for smooth and cinematic footage.
Size and Portability: Consider the size and weight of the camera, especially if you’ll be carrying it around the park all day. A smaller, lightweight camera may be more convenient for long hours of shooting and navigating crowds. However, remember to balance portability with the desired features and image quality you’re looking for.
Research and Test: Before making a final decision, do some research, read reviews, and ideally, get your hands on the camera to test its ergonomics and performance. Familiarize yourself with the camera’s settings and controls to ensure you’re comfortable using it during your Disney World adventure.
Remember, the best camera is the one that suits your needs and preferences. Consider how you’ll be using it, the types of shots you want to capture, and your level of photography experience. Ultimately, the right camera will help you create lasting memories of your magical Disney World experience.
Understanding the Park Photography Guidelines
Before you embark on your photography journey at Disney World, it’s important to familiarize yourself with the park’s photography guidelines. These guidelines are in place to ensure the safety and enjoyment of all guests. Here are some key aspects to understand:
- No Tripods or Selfie Sticks: Disney World prohibits the use of tripods and selfie sticks on rides and attractions due to safety concerns. However, you can use these accessories in designated areas or when taking pictures in stationary locations.
- No Flash Photography on Dark Rides: In order to maintain the magical experience for all guests, flash photography is not allowed on dark rides. These rides rely on carefully controlled lighting to create immersive environments, and flash photography can disrupt the atmosphere and spoil the experience for others.
- Respectful Photography: Disney World encourages guests to be respectful of others when taking photos. Avoid obstructing walkways or blocking other guests’ view while capturing your magical moments. Mindful photography ensures that everyone can enjoy the park without disruption.
- Restrictions on Certain Attractions: Some attractions may have specific photography restrictions due to safety concerns or intellectual property rights. Pay attention to any signage or announcements at each attraction, as well as any guidelines provided by cast members.
- Privacy and Consent: It’s essential to respect the privacy of other guests. Always ask for permission before taking someone’s photo, especially in close-up shots or candid moments. Respecting others’ boundaries ensures a positive and respectful atmosphere at Disney World.
By understanding and following these guidelines, you can navigate the park smoothly while capturing stunning photos. Not only does this ensure a positive experience for yourself, but it also contributes to the overall enjoyment of other guests at Disney World.
Planning for Battery Life and Memory Storage
When capturing the magical moments of your Disney World adventure, it’s crucial to plan ahead for battery life and memory storage. The last thing you want is to run out of power or storage space right when you’re about to capture that once-in-a-lifetime shot. Here are some tips to ensure you can keep snapping away:
- Bring Extra Batteries: Disney World is a place where you’ll likely be taking countless photos throughout the day, from morning until night. To avoid a sudden battery drain, pack extra batteries for your camera. This way, you can easily swap them out when needed and keep capturing the magic.
- Charge Overnight: Before heading out for a day at Disney World, make sure to fully charge your camera’s batteries overnight. This will give you a fresh start and maximum power to start your day of photography.
- Utilize Battery-Saving Mode: Many cameras offer a battery-saving mode that conserves power by dimming the LCD screen or reducing the camera’s functionality. Enable this mode when you’re not actively shooting to extend your battery life.
- Monitor Battery Levels: Keep an eye on your battery levels throughout the day, especially if you’re using power-hungry features like continuous autofocus or Wi-Fi connectivity. This will allow you to gauge how much battery life you have left and plan accordingly.
- Invest in High-Capacity Memory Cards: Disney World is full of magical moments, and you’ll likely want to capture them all. To ensure you have enough storage space, invest in high-capacity memory cards. Consider cards with a large storage capacity and high write speeds to accommodate continuous shooting and video recording.
- Backup Your Photos: As a precaution, consider backing up your photos throughout the day. If your camera supports it, you can transfer your images to a laptop or portable hard drive. Alternatively, consider utilizing cloud storage options to save your precious memories.
By planning for battery life and memory storage, you can ensure that you won’t miss any magical moments during your Disney World adventure. Take the time to prepare and have peace of mind knowing that you’ll be able to capture all the enchantment that awaits you.
Selecting the Best Camera Settings
When it comes to capturing the magic of Disney World, selecting the right camera settings can make a significant difference in the quality of your photos. Here are some tips to help you choose the best settings for your camera:
- Shoot in Manual Mode: While automatic modes can be convenient, shooting in manual mode gives you full control over the exposure, shutter speed, and aperture. This allows you to adjust the settings based on the lighting conditions and the effect you want to achieve.
- Adjust the ISO: The ISO setting determines the camera’s sensitivity to light. In well-lit areas, use a lower ISO to reduce noise and maintain image quality. In darker areas or when shooting at night, increase the ISO to capture more light. Experiment with different ISO settings to find the balance between noise reduction and exposure.
- Select the Appropriate Aperture: The aperture controls the depth of field, which determines how much of the scene is in focus. For capturing wide-angle shots of iconic Disney landmarks, use a smaller aperture (higher f-stop number) to maximize the depth of field. For portraits or close-up shots, use a wider aperture (lower f-stop number) to create a blurred background and emphasize the subject.
- Use the Shutter Priority Mode for Action Shots: Disney World is full of fast-moving attractions and characters. To capture sharp and freeze-frame action shots, switch to the shutter priority mode (Tv or S on your camera dial) and select a fast shutter speed. A speed of 1/500th of a second or faster is recommended to freeze the action and minimize motion blur.
- Consider Exposure Compensation: In challenging lighting situations, such as highly contrasted scenes or backlit subjects, use the exposure compensation feature to adjust the overall exposure. Increase the exposure value (+) for darker scenes and lower it (-) for brighter scenes to maintain proper exposure and preserve details.
- Enable Burst Mode for Continuous Shooting: Burst mode allows your camera to capture a series of images in rapid succession. This is useful for capturing fast action or continuous expressions during character interactions. Use burst mode to increase your chances of getting the perfect shot in dynamic situations.
- Keep White Balance in Mind: Different lighting conditions can affect the color temperature of your photos. Adjust the white balance settings to maintain accurate colors. Use the auto white balance setting for convenience, or experiment with manual white balance presets or custom settings for more precise color reproduction.
Remember, the best camera settings will depend on the specific environment, lighting conditions, and the creative vision you have for your photos. Take the time to experiment and familiarize yourself with your camera’s capabilities before your Disney World adventure. By optimizing your camera settings, you’ll be able to capture the magic in a way that truly reflects the enchantment of the moment.
Considering the Use of Filters
Filters can be a powerful tool for enhancing your Disney World photography and adding creative effects to your images. From polarizing filters to neutral density filters, here are some commonly used filters and how they can enhance your Disney World photos:
- Polarizing Filter: A polarizing filter is great for reducing glare and reflections, particularly when photographing water or glass surfaces. It can also enhance color saturation and contrast, making your images look more vibrant and captivating. Use a circular polarizing filter and adjust the rotation to achieve the desired effect.
- Neutral Density Filter: Neutral density (ND) filters are useful for controlling the amount of light entering your camera, allowing you to achieve longer exposures even in bright conditions. This can be beneficial for capturing motion blur in waterfalls, creating milky-smooth effects in fountains, or capturing the movement of fireworks or parades.
- Graduated Neutral Density Filter: Graduated neutral density (GND) filters are ideal for scenes with a stark contrast between the sky and foreground. These filters have a darkened upper half that gradually transitions to clear or less dense at the bottom. They help balance the exposure between the bright sky and the darker foreground, resulting in a more evenly exposed image.
- UV and Clear Filters: UV and clear filters are primarily used as protection for your camera lens. They block ultraviolet light and protect the lens from scratches, dust, and moisture. While they may not dramatically impact the image quality, they provide added peace of mind for keeping your lens in pristine condition during your Disney World adventure.
- Special Effect Filters: Special effect filters, such as star filters or soft focus filters, can add a whimsical or dreamy quality to your Disney World photos. These filters create unique visual effects by manipulating the way light enters the lens, resulting in ethereal and magical images.
When using filters, it’s important to choose high-quality filters that won’t degrade the image quality. Lower-quality filters may introduce unwanted artifacts or decrease the overall sharpness of your photos. Additionally, certain filters may require special adjustments to your camera settings, so be sure to familiarize yourself with the specific requirements of each filter.
Experiment with different filters and their combinations to discover the effects that align with your creative vision. Keep in mind that while filters can enhance your photos, they should complement your subject, not overpower it. Use filters to enhance the enchantment of Disney World, and let your imagination run wild.
Capturing Iconic Landmarks and Attractions
Disney World is home to numerous iconic landmarks and attractions that have captivated generations of visitors. From Cinderella Castle to Spaceship Earth, each landmark offers a unique opportunity for photography. Here are some tips to help you capture the magic of these iconic attractions:
- Find Unique Perspectives: To capture a fresh and unique image of well-known landmarks, try finding different angles or viewpoints. Experiment with different vantage points, such as shooting from low to the ground or getting up high for an aerial view. Look for interesting leading lines or framing elements that can add depth and visual interest to your composition.
- Utilize Wide-Angle Lenses: Wide-angle lenses are great for capturing the grandeur and scale of Disney World’s landmarks. They allow you to include more of the surrounding environment in your frame, giving a sense of place and emphasizing the immensity of the structures. Be mindful of distortion at the edges of the frame and experiment with different focal lengths to find the right balance for your composition.
- Shoot During Golden Hour: Golden hour, the period shortly after sunrise or before sunset, offers beautiful soft and warm light that can add a magical touch to your photos. The warm hues of the sun during this time can enhance the colors of the landmarks and create a stunning atmosphere. Plan your photography sessions accordingly to make the most of this beautiful light.
- Incorporate People: Including people in your photos can add a sense of scale and bring life to the scene. Capture the joy and excitement of fellow guests as they interact with the landmarks or enjoy the attractions. For a more artistic approach, try including people in silhouette or using long exposure to capture the motion of the crowd.
- Experiment with Night Photography: Disney World’s landmarks become even more enchanting at night when they are beautifully lit up. Set up your camera on a tripod and experiment with long exposures to capture the intricate details and vibrant lights of the attractions. Consider including fireworks or nighttime shows for an extra touch of magic in your photos.
- Pay Attention to Details: Look for interesting details and architectural elements that make each landmark unique. Focus on capturing the intricate designs, textures, and decorations that Disney is known for. Zero in on small details such as statues, mosaics, or ornate carvings to highlight the craftsmanship and artistry behind these iconic structures.
Remember to take your time and fully explore the different perspectives and possibilities each landmark offers. Keep an eye out for interesting compositions, unique lighting, and the magic that surrounds you. By approaching these iconic attractions with creativity and a keen eye, your photographs will showcase the enchantment and wonder of Disney World.
Finding Unique and Less Crowded Photo Opportunities
While Disney World attracts millions of visitors every year, finding unique and less crowded photo opportunities can make your photographs truly stand out. Here are some tips to help you discover hidden gems and capture magical moments away from the crowds:
- Explore Lesser-Known Areas: Disney World is vast, and there are often lesser-known areas that offer unique photo opportunities. Venture beyond the popular attractions and explore the quieter corners of the parks. You might stumble upon hidden pathways, scenic gardens, or charming architectural details that are perfect for capturing magical moments.
- Visit During Off-Peak Times: To avoid crowds and capture more tranquil photos, consider visiting Disney World during off-peak times. Generally, weekdays outside of school holidays and early mornings or late evenings can offer quieter periods. Take advantage of these times to explore the parks when they’re less crowded, allowing you to capture beautiful photos without distractions.
- Utilize FastPass+ and Park Hopping: Take advantage of Disney’s FastPass+ system to minimize wait times for popular attractions. By efficiently planning your FastPass selections, you can allot time for exploring and photographing other areas of the parks. Additionally, consider park hopping to different parks throughout the day to find less crowded attractions and photo opportunities.
- Take Advantage of Extra Magic Hours: If you’re a guest staying at a Disney World resort, make sure to take advantage of Extra Magic Hours. These additional hours can provide opportunities for capturing photos in the parks with fewer people around. Check the schedule for Extra Magic Hours during your stay and plan your photography sessions accordingly.
- Be Patient and Observant: Sometimes, unique photo opportunities present themselves when you least expect them. Stay patient and observant as you explore the parks. Special moments, unique characters, or hidden details may emerge, allowing you to capture photos that reflect the true magic and essence of Disney World.
- Attend Special Events and Seasonal Celebrations: Disney World hosts a range of special events and seasonal celebrations throughout the year. These events often offer unique photo opportunities, including themed decorations, special character appearances, and unique entertainment. Check the Disney World website for event schedules and plan your visit accordingly to capture these unique moments.
Remember, finding unique and less crowded photo opportunities requires a combination of patience, exploration, and creativity. Allow yourself to deviate from the main attractions and embrace the smaller, lesser-known areas. By seeking out these hidden gems, you can capture stunning photos that showcase the magic of Disney World in a way that is truly your own.
Getting Creative with Perspective and Composition
One of the keys to capturing unique and visually captivating photos at Disney World is getting creative with perspective and composition. By experimenting with different angles, viewpoints, and compositional techniques, you can bring a fresh and artistic approach to your photography. Here are some tips to help you unleash your creativity:
- Change Your Perspective: Break away from the typical eye-level perspective and try shooting from low to the ground or getting up high for an elevated view. This can add a sense of depth and drama to your photos, making them more intriguing and engaging.
- Foreground Interest: Incorporate interesting foreground elements into your composition to add depth and visual interest. Look for objects such as flowers, leading lines, or architectural details that can guide the viewer’s eye into the photo and enhance the overall composition.
- Rule of Thirds: Use the rule of thirds to create a balanced and visually pleasing composition. Imagine dividing your frame into a 3×3 grid and place key elements of your photo along the intersection points or along the grid lines. This helps to create a sense of balance and adds interest to your images.
- Leading Lines: Look for natural or man-made lines within the Disney World environment and use them to lead the viewer’s eye into the photo. This could be paths, fences, or architectural elements that guide the eye towards your main subject, creating a sense of depth and movement in your composition.
- Frame Within a Frame: Utilize natural frames within the environment to create a sense of depth and draw attention to your subject. This could be archways, foliage, or other elements that surround your subject and provide a unique and visually appealing frame within your composition.
- Minimalism: Embrace minimalism by simplifying your composition and focusing on a single subject or element. Use negative space to draw attention to your subject, creating a powerful and visually striking image.
- Experiment with Symmetry and Reflections: Seek out symmetrical compositions or reflections in water or glass surfaces. Symmetry adds a sense of balance and harmony to your photos, while reflections can create artistic and dreamlike effects.
- Embrace Creative Angles: Don’t be afraid to tilt your camera or shoot from unconventional angles to create a dynamic and unexpected perspective. This can add a sense of drama and excitement to your photos, making them more visually engaging.
Remember, photography is an art form, and there are no strict rules. Use these tips as a starting point, but don’t be afraid to push your creative boundaries and experiment with different techniques. Allow yourself to think outside the box and let your imagination guide you. By getting creative with perspective and composition, you can capture stunning and visually impactful photos that showcase the magic and wonder of Disney World in a unique way.
Capturing Candid Moments
While posed shots are delightful, capturing candid moments at Disney World adds authenticity and emotion to your photographs. These spontaneous moments capture the true essence of the magical experiences unfolding around you. Here are some tips to help you capture candid moments that will bring your Disney World memories to life:
- Blend In: To capture genuine candid moments, it’s important to blend in with the crowd and be unobtrusive. Act like a regular park-goer, immerse yourself in the Disney magic, and allow the moments to unfold naturally without drawing attention to yourself and your camera.
- Be Patient and Observant: Keep your camera ready and be patient while observing your surroundings. Candid moments can happen in an instant, so being attentive and quick to react is key. Pay attention to interactions between characters and guests, spontaneous reactions to attractions, or moments of joy and laughter.
- Use a Telephoto Lens: A telephoto lens allows you to capture candid moments from a distance without interrupting the moment. This is particularly useful for photographing character interactions, parades, or shows. The longer focal length enables you to capture intimate moments while remaining inconspicuous.
- Focus on Emotion and Expression: Candid moments are all about capturing genuine emotions and expressions. Look for those magical moments when guests are lost in the enchantment of Disney World, when characters are engaging with visitors, or when families and friends share heartfelt reactions. These moments will bring an authentic and emotional touch to your photographs.
- Anticipate the Action: Familiarize yourself with the attractions and shows you plan to photograph, so you can anticipate and be ready for those spontaneous moments of joy, surprise, or awe. By knowing the timing and sequences of these experiences, you can position yourself strategically to capture those candid moments as they unfold.
- Capture Interactions: Look for interactions between guests and characters, as well as interactions among guests themselves. These genuine moments of connection and friendship can make for heartwarming and memorable photos. Whether it’s a child’s excitement at meeting their favorite character or friends sharing a joyful moment, these interactions tell beautiful stories.
- Keep Your Camera Settings Ready: To quickly capture candid moments, set your camera to a fast shutter speed and use continuous shooting mode. This will allow you to capture a burst of photos and increase the chances of capturing the perfect moment. Don’t forget to adjust your focus mode to continuous autofocus to keep your subjects in sharp focus as they move.
- Embrace Imperfection: Candid moments are rarely perfectly composed or timed, and that’s part of their charm. Embrace imperfections and embrace the spontaneous nature of these moments. Sometimes the most beautiful and genuine moments are captured in the midst of chaos or in unexpected surroundings.
Remember, capturing candid moments requires a keen eye, patience, and the ability to anticipate and react quickly. By immersing yourself in the Disney World experience and observing the magical moments unfolding around you, you can capture candid photos that truly embody the spirit and joy of your time at Disney World.
Making Use of Natural Light
Natural light is a powerful tool in photography, and learning to make the most of it can greatly enhance your Disney World photos. With its abundance of outdoor attractions, Disney World offers numerous opportunities to harness the beauty of natural light. Here are some tips to help you utilize natural light and create stunning photographs:
- Golden Hour: The period shortly after sunrise and before sunset, known as the golden hour, offers soft, warm, and golden light that can add a magical quality to your photos. Take advantage of this beautiful light by planning your photography sessions during these times. During the golden hour, the sun is low in the sky, creating long, soft shadows and a warm glow that can transform your images.
- Backlighting: Experiment with backlighting by positioning your subject with the light source behind them. This can create a beautiful halo effect, glowing edges, or an ethereal quality in your photos. Backlighting works particularly well for capturing silhouettes or adding a sense of drama and depth to your images.
- Filters and Diffusers: Consider using filters or diffusers to manipulate natural light. Polarizing filters can help reduce glare and enhance colors, while diffusers can soften harsh light and create a more pleasing and even illumination. These tools can help you achieve the desired look and mood in your photos.
- Open Shade: Look for areas of open shade, such as under trees or structures, to create even and diffused lighting conditions. These areas can also help prevent harsh shadows and minimize contrast, allowing you to capture more detail and balance in your photos.
- Reflective Surfaces: Utilize reflective surfaces like water, glass, or polished floors to bounce and manipulate natural light. These surfaces can create beautiful reflections, leading to unique and visually captivating compositions.
- Cloudy Days: While clear skies can provide stunning light, cloudy and overcast days can offer a soft, diffused light that is perfect for photography. Cloud cover acts as a giant natural diffuser, creating a soft and even illumination that can enhance colors and details in your photos. Take advantage of these conditions to capture a different mood and atmosphere.
- Experiment with Shadows: Shadows can add depth, drama, and visual interest to your photos. Incorporate shadows creatively by positioning your subject in relation to the light source. Experiment with the interplay of light and shadows to create intriguing and dynamic compositions.
- Consider the Direction of Light: The direction of light can dramatically impact the mood and atmosphere of your photos. Side lighting can create dramatic shadows and emphasize texture, while front lighting can provide even illumination. Experiment with different lighting angles to create the desired effect in your photos.
Remember, natural light is constantly changing throughout the day, so be adaptable and open to new opportunities. Take time to observe and appreciate the different qualities of light as you explore Disney World. By learning to effectively utilize natural light, you can bring out the enchantment of the setting and capture stunning photographs that convey the magic of Disney World.
Using Park Parades and Shows to Your Advantage
Park parades and shows at Disney World offer a plethora of magical moments that can be captured through photography. These events provide dynamic backdrops, vibrant colors, and captivating performances, making them perfect opportunities to create stunning images. Here are some tips to help you make the most of park parades and shows in your photographs:
- Scout a Good Location: Arrive early and scout for a prime location to photograph the parade or show. Consider the route, the angles of the floats, and any special effects that will enhance your photos. Choose a spot that offers a clear view and interesting elements in the background for more visually impactful compositions.
- Plan Ahead: Familiarize yourself with the parade or show’s timing and route. This will allow you to plan your shots and anticipate the best moments to capture. Understanding the sequence of events will help you position yourself for the key moments, whether it’s a character’s appearance, a mesmerizing dance routine, or a burst of confetti.
- Use a Fast Shutter Speed: Most parades and shows involve fast-paced movements and vibrant action. To freeze these moments, use a fast shutter speed to capture sharp and crisp images. A shutter speed of 1/500th of a second or faster is recommended to capture the animation and energy of the performances.
- Zoom In: Take advantage of your zoom lens to capture both wide shots and close-ups during parades and shows. Wide shots can showcase the grandeur of the procession, while close-ups allow you to capture the performers’ emotions or intricate details on the floats. Be ready to adjust your focal length and composition as the action unfolds.
- Look for Eye Contact: Try to capture eye contact between the performers and the camera. This can add a personal and engaging element to your photos. Look for moments when characters interact with the audience or when performers connect with your lens. These candid and genuine interactions can make your photos truly come alive.
- Capture the Atmosphere: Don’t just focus on the main action; be sure to capture the overall atmosphere and excitement of the parade or show. This includes the reactions and expressions of the audience, the colorful scenery, and the energy in the air. Including these elements in your photos will help transport viewers into the magical world of Disney.
- Experiment with Different Angles: Get creative with your angles and perspectives when photographing parades and shows. Shoot from different heights, try unique angles, or get closer to the ground for a unique and dynamic perspective. Experimenting with different angles can yield unexpected and visually striking results.
- Consider Nighttime Shows: Some of the most unforgettable experiences at Disney World are the nighttime shows, such as fireworks displays and nighttime extravaganzas. Make sure to use a tripod for stability and longer exposures. Experiment with different shutter speeds to capture the movement of lights and fireworks, and don’t be afraid to include audience reactions to add an extra layer of emotion to your photos.
Remember, parades and shows at Disney World offer a feast for the senses, and your photography can help bring that magic to life. Take advantage of these events to create memorable and captivating images that preserve the enchantment of the moment for years to come.
Tips for Photographing Character Meet-and-Greets
Character meet-and-greets at Disney World are magical opportunities to capture special moments with beloved Disney characters. These encounters offer unique interactions and memorable photo opportunities. Here are some tips to help you make the most of photographing character meet-and-greets:
- Use a Fast Shutter Speed: Characters are often energetic and constantly in motion during meet-and-greets. To capture sharp and crisp images, use a fast shutter speed to freeze the action. A speed of 1/500th of a second or faster is recommended to capture the character’s movements and expressions.
- Focus on Facial Expressions: Facial expressions are key to capturing the essence and personality of the character. Pay close attention to the character’s expressions and emotions, and strive to capture them in your photos. Be ready to react quickly and anticipate the character’s reactions to take the perfect shot.
- Shoot Candid Moments: While posed shots are lovely, candid moments often capture the authentic joy and connection between the character and the guests. Be ready to capture spontaneous hugs, laughter, or playful interactions. These candid shots can bring a sense of magic and genuine emotion to your photos.
- Interact with the Character: Engaging with the character yourself can create unique and memorable photo opportunities. Dance, mimic their gestures, or interact in a playful way to capture fun and candid moments. Allow your own excitement to shine through and let the character’s expressions and reactions become part of the story in your photos.
- Consider Composition: As with any photo, composition plays a crucial role. Frame your shots carefully, considering the poses and interaction between the character and guests. Look for interesting angles, use leading lines, and consider the surroundings to create visually appealing compositions that tell a story.
- Zoom In and Capture Details: Don’t just focus on full-body shots; zoom in to capture close-ups and details. Focus on the character’s expressive eyes, hands, or props, capturing the unique charm in their features. These detailed shots add depth and intimacy to your character meet-and-greet photos.
- Be Aware of Lighting: Character meet-and-greets can take place indoors or outdoors, under various lighting conditions. Be mindful of the lighting and adjust your camera settings accordingly. If possible, position yourself and the character facing the light source to ensure well-lit and properly exposed photos.
- Capture Interactions with Children: Children’s reactions and interactions with the characters are priceless moments to capture. Be ready to capture the wonder and joy on their faces as they meet their favorite characters. These shots are not only heartwarming but also serve as cherished memories for families.
- Be Respectful and Courteous: Respect the character’s boundaries and follow any guidelines set by Disney World cast members. Remember that character performers are providing a magical experience, so be courteous and abide by any restrictions they may have in place to ensure a safe and enjoyable encounter for everyone.
Character meet-and-greets are magical experiences that allow you to create lasting memories through photography. By following these tips and immersing yourself in the joy and excitement of the moment, you’ll be able to capture enchanting photos that showcase the spirit and wonder of Disney World’s character encounters.
Storing and Protecting Your Camera Gear
When visiting Disney World, it’s vital to properly store and protect your camera gear to ensure its safety and longevity. Proper care and protection will allow you to focus on capturing the magic without worrying about potential damage or loss. Here are some tips to help you store and protect your camera gear:
- Invest in a Camera Bag or Backpack: A camera bag or backpack specifically designed for camera gear is an essential investment. Look for one that offers padded compartments, adjustable dividers, and secure closures. This will protect your gear from impacts, dust, and moisture during travel and while you’re in the park.
- Use Lens Caps and Filters: When not in use, always put lens caps on your lenses to protect them from scratches, moisture, and dust. Additionally, consider using lens filters, such as UV or clear filters, as an extra layer of protection for your lenses. Filters can take the brunt of potential damage, leaving your lenses unharmed.
- Carry a Lens Cleaning Kit: Dust and smudges can degrade the quality of your photos. Carry a lens cleaning kit that includes a microfiber cloth, lens cleaning solution, and a blower brush. Regularly clean your lenses and filters to ensure clear and sharp images throughout your Disney World adventure.
- Be Mindful of Weather Conditions: Protect your camera gear from extreme weather conditions. If it starts to rain, seek shelter or use a protective rain cover for your camera. In hot and humid weather, be cautious of condensation when transitioning between temperature extremes, as it can adversely affect your camera’s functionality.
- Secure Your Gear: Disney World can be a crowded and busy place. Ensure your camera and lenses are secure by using a strap or sling. This will help prevent accidental drops or theft, providing peace of mind as you explore the park.
- Use a Tripod Safely: If you plan to use a tripod for stability or longer exposures, be conscious of your surroundings and park guidelines. Tripods are not allowed on rides, and they can obstruct walkways if not used responsibly. Always be aware of your surroundings and respect the safety and experience of other park guests.
- Backup Your Photos: Protect your precious photos by regularly backing them up to another storage device, such as a laptop, portable hard drive, or cloud storage. This ensures that even if your camera gear gets lost or damaged, your irreplaceable memories are still safe and accessible.
- Consider Equipment Insurance: Camera gear is a significant investment, so consider obtaining equipment insurance for added security. Research your options and choose a comprehensive policy that covers accidental damage, loss, and theft. This will provide financial protection and peace of mind during your Disney World adventure.
- Follow Park Regulations: Familiarize yourself with Disney World’s park regulations regarding photography and camera equipment. Observe any restrictions on the use of tripods, selfie sticks, or flash photography. Respecting and adhering to the park’s rules ensures a positive experience for yourself and fellow guests.
By implementing these practices, you can confidently store and protect your camera gear during your Disney World visit. Remember to prioritize the safety and longevity of your equipment, allowing you to focus on capturing the magical moments that await you.
Editing and Organizing Your Disney World Photos
After capturing countless magical moments at Disney World, the next step is to edit and organize your photos to bring out the best in each image. Whether you’re a seasoned photographer or just getting started, these tips will help you make your Disney World photos shine:
- Start with Backup: Before diving into the editing process, make sure to create a backup of your photos. Transfer them to a separate storage device or utilize cloud storage to ensure their safety.
- Delete Unwanted Photos: Take the time to go through your photos and delete any duplicates, blurry shots, or photos that didn’t turn out as expected. This step will help declutter your collection and make it easier to focus on the best images.
- Organize by Theme or Location: Create folders or albums to organize your photos based on themes, locations within the park, or specific attractions. This will make it easier to find and work with specific images during the editing process.
- Utilize Editing Software: Use photo editing software to enhance and refine your Disney World photos. Adjust elements like exposure, contrast, colors, and sharpness to bring out the magic captured in each shot. Experiment with different editing techniques, but remember to maintain a natural and authentic look.
- Enhance Colors: Disney World is known for its vibrant colors, so pay attention to color correction and enhancement during the editing process. Adjust saturation, vibrancy, or individual color channels to make the colors pop and accurately represent the magical atmosphere.
- Crop and Straighten: Crop your photos to remove any distracting elements and improve composition. Straighten any crooked horizons or alignment issues to ensure a balanced and visually pleasing image.
- Apply Filters or Presets: Experiment with filters or presets to add a unique look or style to your Disney World photos. This can help create a consistent and cohesive aesthetic across your collection.
- Retouch and Remove Imperfections: Use retouching tools to remove any unwanted objects, blemishes, or distractions from your photos. This can include removing people or objects that may have ended up in the frame unintentionally.
- Create a Story with Photo Collages: Compile your favorite Disney World photos into collages to tell a story or capture different aspects of your experience. Experiment with different layouts and arrangements to create visually appealing compositions.
- Share and Preserve: Share your edited photos with friends and family to relive the enchantment of your Disney World adventure. Consider printing and framing your favorite shots to display in your home or create a photo book to preserve the memories for years to come.
Remember, editing is a personal process, and there are no right or wrong choices. Trust your creative instincts and bring out the elements that resonate with the magic of Disney World in your photos. Take the time to organize and edit your collection, and enjoy the process of reliving the enchantment through your edited images.