
Check Phone Compatibility
Before making the switch, it's crucial to ensure that the new phone you intend to use with your MetroPCS SIM card is compatible with the carrier. Not all phones are universally compatible due to differences in network technology and frequency bands. Here are the steps to check the compatibility:
-
Check MetroPCS Website: Visit the MetroPCS website and navigate to the "Bring Your Own Device" or "Compatibility" section. Here, you can enter the IMEI number of the new phone to verify if it's compatible with the MetroPCS network. The IMEI number can usually be found in the phone's settings or by dialing *#06#.
-
Contact MetroPCS Customer Service: If you're unable to find the compatibility information on the website, reach out to MetroPCS customer service. You can do this by calling their support line or visiting a local store. Provide them with the IMEI number of the new phone, and they will confirm whether it's compatible with their network.
-
Research Online: There are various online resources and forums where users share their experiences with different phone models on the MetroPCS network. Look for discussions or articles about using the specific phone model you have with MetroPCS. This can provide valuable insights into compatibility and any potential issues.
It's essential to verify the compatibility of the new phone before proceeding with the SIM card switch to avoid any inconvenience or connectivity issues. If the new phone is not compatible, you may need to consider alternative options or obtain a phone that is supported by MetroPCS.
Ensuring compatibility will set the stage for a smooth transition, allowing you to make the most of your MetroPCS service on your new device.
Back Up Data
Prior to switching your MetroPCS SIM card to another phone, it’s essential to safeguard your data by backing it up. This ensures that your personal information, contacts, photos, and other important content are preserved and easily transferable to the new device. Here’s how to back up your data effectively:
- Cloud Storage: Utilize cloud storage services such as Google Drive, iCloud, or Dropbox to securely store your data. Upload your photos, videos, documents, and any other relevant files to the cloud, allowing you to access them from the new device once the SIM card switch is complete.
- Sync Contacts: Ensure that your contacts are synced with your Google or iCloud account. This will automatically back up your contacts, making them readily available when you sign in on the new phone.
- Transfer Media: If you have media files saved directly on your phone, consider transferring them to a computer or an external storage device. This extra layer of backup ensures that your cherished photos and videos remain safe during the transition.
- App Data: Certain apps offer built-in backup options. Check if the apps you use have the capability to back up your data, including app settings and preferences, to the cloud or an external storage location.
By diligently backing up your data, you can seamlessly migrate to the new phone without the risk of losing important information. This proactive approach provides peace of mind and ensures that your digital content remains intact throughout the SIM card transfer process.
Power Off Both Phones
Before proceeding with the SIM card switch, it’s important to power off both the current and new phones to ensure a smooth transition. This step is crucial in preventing any potential data or connectivity issues during the process. Here’s how to power off both phones effectively:
- Save and Close Apps: Begin by saving any unsaved data and closing all open applications on both phones. This ensures that no vital information is lost during the power-off and SIM card transfer.
- Power Off Current Phone: Press and hold the power button on your current phone until the power-off menu appears. Select "Power Off" or a similar option to shut down the device completely. Once powered off, remove the SIM card from the current phone if it’s accessible.
- Power Off New Phone: If the new phone is already powered on, follow the same procedure to turn it off completely. Press and hold the power button, then select the "Power Off" option to shut down the device.
Ensuring that both phones are powered off before proceeding with the SIM card transfer minimizes the risk of data corruption and network complications. This preparatory step sets the stage for a successful transition to the new device, allowing you to seamlessly activate your MetroPCS service on it.
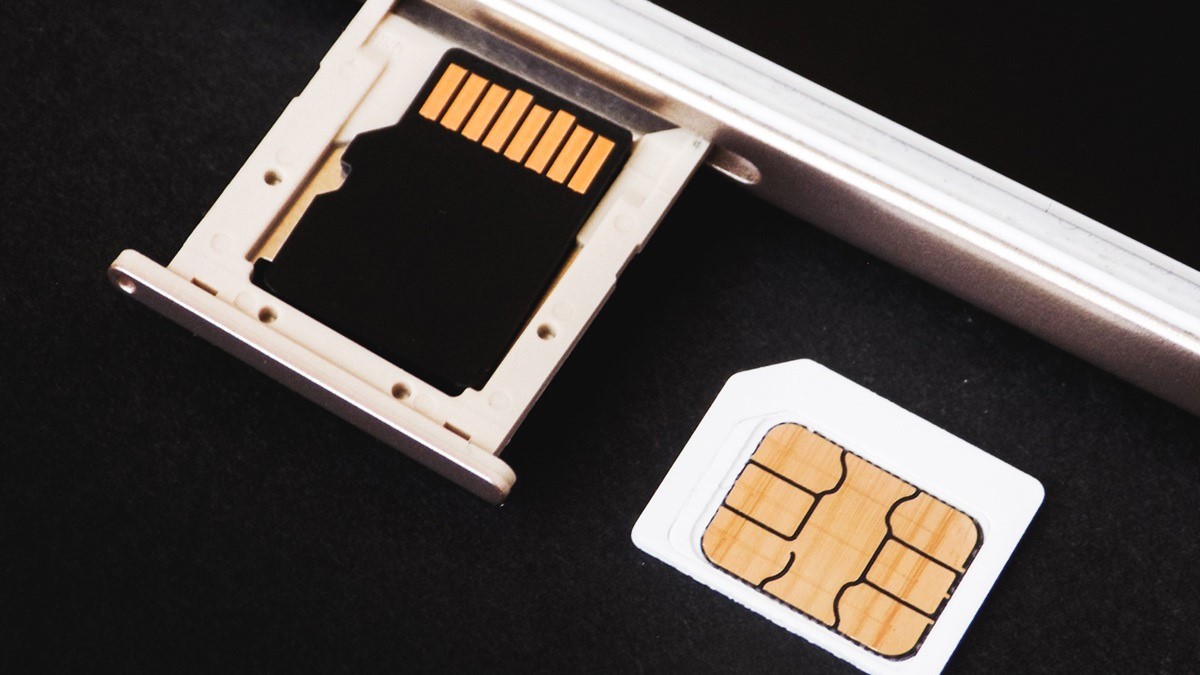
Remove SIM Card
With both phones powered off, the next step in switching your MetroPCS SIM card to another phone is to carefully remove the SIM card from your current device. The SIM card, or Subscriber Identity Module, contains essential information that allows your phone to connect to the mobile network. Here’s how to remove the SIM card:
- Locate the SIM Card Tray: Depending on the phone model, the SIM card tray may be located on the side or top of the device. Some phones have a removable back cover, under which the SIM card is situated. Refer to the phone’s manual or online guides to identify the SIM card tray’s location.
- Eject the SIM Card Tray: Use the SIM eject tool that came with your phone or a small paperclip to gently press into the pinhole located near the SIM card tray. This will release the tray, allowing you to remove it from the phone.
- Remove the SIM Card: Carefully take out the SIM card from the tray, ensuring that it’s handled with care to avoid any damage to the delicate circuitry. Note the orientation of the SIM card, as it needs to be inserted in the same manner into the new phone.
- Inspect for Damage: Before proceeding, inspect the SIM card for any signs of damage, such as scratches or dents. If the SIM card appears to be damaged, it’s advisable to contact MetroPCS for a replacement SIM before continuing with the switch.
Removing the SIM card from your current phone sets the stage for its transfer to the new device, enabling you to seamlessly transition your MetroPCS service without any hiccups.
Insert SIM Card into New Phone
Once the SIM card has been safely removed from your current phone, the next step in the process of switching your MetroPCS SIM card to another phone is to insert the SIM card into the new device. This straightforward procedure allows you to seamlessly transfer your MetroPCS service to the new phone. Follow these steps to insert the SIM card:
- Locate the SIM Card Tray: Similar to removing the SIM card, you need to identify the location of the SIM card tray on the new phone. It may be situated on the side, top, or under the back cover, depending on the phone model.
- Insert the SIM Eject Tool: If the SIM card tray is covered by a removable slot, use the SIM eject tool or a paperclip to gently press into the pinhole near the tray, allowing it to pop out for access.
- Place the SIM Card: Carefully position the SIM card into the tray, ensuring that it aligns with the designated area and follows the correct orientation. The SIM card should fit snugly into the tray without any forceful pressure.
- Insert the Tray: Once the SIM card is in place, carefully slide the tray back into the phone, ensuring that it is securely inserted without any resistance. Be mindful of the proper alignment to avoid any potential damage to the SIM card or the phone’s internal components.
By successfully inserting the SIM card into the new phone, you are one step closer to activating your MetroPCS service on the device. This simple yet crucial process paves the way for a seamless transition, allowing you to enjoy the full functionality of your MetroPCS service on your new phone.
Power On New Phone
With the SIM card securely inserted into the new phone, the next step in the process of switching your MetroPCS SIM card to another device is to power on the new phone. This pivotal step initiates the activation process, allowing you to connect to the MetroPCS network and begin using your service on the new device. Here’s how to power on the new phone effectively:
- Press the Power Button: Locate the power button on the new phone, typically situated on the side or top of the device. Press and hold the power button until the screen lights up, indicating that the phone is powering on.
- Initial Setup: Upon powering on, the new phone may prompt you to complete the initial setup, including language selection, Wi-Fi network connection, and other preferences. Follow the on-screen instructions to configure the basic settings as required.
- Network Connection: Once the phone is powered on, it will attempt to connect to the MetroPCS network using the newly inserted SIM card. Allow the phone a few moments to establish the network connection and acquire the necessary settings for your MetroPCS service.
- Activation Process: In some cases, the new phone may require activation, especially if it’s a brand-new device. Follow any activation prompts that appear on the screen, and if necessary, contact MetroPCS customer support for assistance in activating your service on the new phone.
By powering on the new phone and facilitating the initial setup and network connection, you are on the verge of seamlessly transitioning your MetroPCS service to the device. This crucial step brings you closer to enjoying the full functionality of your MetroPCS service on your new phone.
Test New Phone
After powering on the new phone and initiating the activation process, it’s essential to thoroughly test the device to ensure that your MetroPCS service is fully functional and that all features are operational. This step allows you to confirm that the SIM card switch has been successful and that the new phone is ready for everyday use. Here’s how to effectively test the new phone:
- Make Test Calls: Place a test call to verify that the phone can successfully connect to the MetroPCS network and that the call quality is clear and reliable. Test both incoming and outgoing calls to ensure seamless communication.
- Send Text Messages: Send and receive text messages to confirm that the messaging functionality is working as expected. Check for prompt message delivery and ensure that there are no issues with sending or receiving texts.
- Test Data Connection: Access the internet and use apps that require a data connection to ensure that the phone can connect to the internet via the MetroPCS network. Verify that data services such as web browsing and app usage are functioning without any interruptions.
- Check Voicemail and Other Features: Test additional features such as voicemail, visual voicemail, and other MetroPCS services to ensure that they are accessible and fully operational on the new phone.
Thoroughly testing the new phone allows you to confirm that the SIM card switch has been successful and that your MetroPCS service is seamlessly integrated with the device. By ensuring that all essential features are working as expected, you can proceed with confidence, knowing that your new phone is ready for everyday use.
Contact MetroPCS if Issues Arise
Despite careful execution, issues may occasionally arise during the process of switching your MetroPCS SIM card to another phone. In such instances, it’s important to promptly reach out to MetroPCS for assistance in resolving any connectivity or service-related issues. Here’s how to effectively contact MetroPCS if issues arise:
- Customer Support Hotline: Utilize the customer support hotline provided by MetroPCS to directly speak with a representative who can offer guidance and troubleshooting assistance. The hotline is an efficient way to address immediate concerns and seek real-time support.
- Visit a MetroPCS Store: If feasible, consider visiting a nearby MetroPCS store where knowledgeable staff can assess the situation and provide hands-on assistance. Store visits allow for in-person troubleshooting and potential resolution of issues.
- Online Support Resources: Explore the online support resources available on the MetroPCS website, including FAQs, troubleshooting guides, and community forums. These resources may offer valuable insights and solutions to common issues.
- Technical Support Chat: Engage in a live chat with MetroPCS technical support representatives through the official website or mobile app. This interactive support channel enables real-time communication and issue resolution.
By promptly contacting MetroPCS when issues arise, you can expedite the resolution process and ensure that any unexpected challenges are addressed effectively. The dedicated support channels provided by MetroPCS are designed to assist customers in overcoming obstacles and optimizing their service experience.