
Gather Necessary Tools and Materials
Before starting the process of removing a heater hose connector in your Ford vehicle, it’s essential to gather the required tools and materials. Having the right equipment at your disposal will ensure a smooth and safe removal procedure. Here are the tools and materials you will need:
- Socket Set: A set of sockets, ratchet, and extension bars will be necessary for accessing and loosening the hose clamps and fasteners.
- Pliers: Long-nose pliers and hose clamp pliers will aid in disconnecting the hose and manipulating the clamps.
- Container: Have a container or drip pan ready to catch any coolant that may spill during the process.
- Protective Gear: Wear safety goggles and gloves to protect yourself from coolant and ensure a secure grip on the tools.
- New Connector: Obtain the correct replacement heater hose connector for your specific Ford vehicle model.
- Coolant: If a significant amount of coolant is lost during the procedure, you may need to top up the coolant reservoir with the appropriate type of coolant for your vehicle.
- Cleaning Supplies: Have a rag or paper towels on hand to clean any spilled coolant and to wipe down the area after the removal process.
By gathering these tools and materials beforehand, you’ll be well-prepared to safely and effectively remove the heater hose connector without encountering unnecessary delays or complications.
Allow the Engine to Cool Down
Prior to beginning any work on the cooling system of your Ford vehicle, it is crucial to allow the engine to cool down completely. The cooling system contains hot pressurized coolant, and attempting to manipulate the heater hose connector while the engine is still hot can lead to serious burns and other safety hazards. Here are the steps to follow:
- Turn off the Engine: Park your vehicle in a safe, well-ventilated area and switch off the engine. Allow it to sit idle for at least an hour to dissipate the heat.
- Open the Hood: Once the engine has been turned off for a sufficient period, carefully open the hood of the vehicle to begin the cooling process.
- Check the Temperature: Before proceeding, cautiously touch the radiator and hoses to ensure that they have cooled down to a safe temperature.
- Monitor the Coolant Reservoir: If the coolant reservoir is still hot, avoid opening it until the engine has cooled down further.
By allowing the engine to cool down adequately, you reduce the risk of burns and injuries while working on the heater hose connector, ensuring a safer and more controlled removal process.
Locate the Heater Hose Connector
Before you can remove the heater hose connector in your Ford vehicle, it’s essential to locate its position within the engine compartment. The heater hose connector is a crucial component that allows hot coolant to flow from the engine to the heater core, providing warmth to the vehicle’s interior. Here’s how you can locate the heater hose connector:
- Refer to the Vehicle Manual: If you’re unfamiliar with the location of the heater hose connector in your specific Ford model, consult the vehicle manual for detailed diagrams and descriptions.
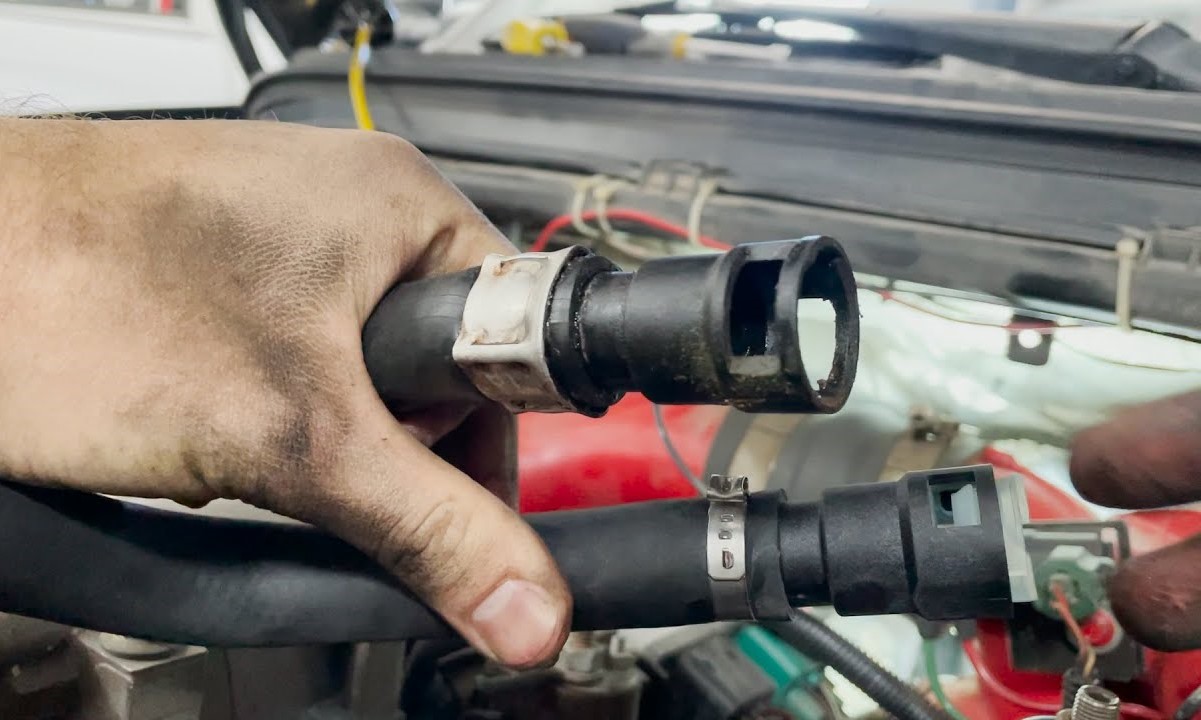
- Identify the Heater Hoses: Trace the heater hoses from the firewall of the vehicle to the engine. The heater hose connector is typically positioned along these hoses, connecting them to the heater core and the engine’s cooling system.
- Recognize the Connector Shape: The heater hose connector may appear as a plastic or metal component with hose clamps securing the hoses at each end. It’s often situated near the firewall or the engine block.
- Inspect for Coolant Leakage: Look for any signs of coolant leakage around the connector, as this may indicate a deteriorating or damaged connector that needs to be replaced.
By successfully locating the heater hose connector, you’ll be well-prepared to proceed with the removal process, ensuring that you can access it safely and efficiently.
Prepare for Removal
Before initiating the removal of the heater hose connector in your Ford vehicle, it’s crucial to prepare the surrounding area and ensure that you have the necessary tools at hand. Proper preparation will contribute to a smooth and efficient removal process. Here are the steps to prepare for the removal:
- Secure the Vehicle: Park the vehicle on a level surface and engage the parking brake to prevent any unexpected movement during the procedure.
- Allow the Engine to Cool: If you haven’t already allowed the engine to cool down, ensure that it has reached a safe temperature to avoid any risk of burns from hot coolant.
- Identify Coolant Drainage Points: Place a suitable container or drip pan beneath the area of the heater hose connector to catch any coolant that may spill during the removal process.
- Gather Necessary Tools: Ensure that you have the required tools, including a socket set, pliers, and a container for coolant, readily available for the removal process.
- Wear Protective Gear: Put on safety goggles and gloves to shield your eyes and skin from coolant and to provide a secure grip on the tools during the removal procedure.
- Refer to Vehicle Manual: If needed, consult the vehicle manual for specific instructions or diagrams related to the removal of the heater hose connector in your Ford model.
By adequately preparing for the removal process, you can mitigate potential risks, ensure a safer working environment, and streamline the overall procedure for removing the heater hose connector from your Ford vehicle.
Disconnect the Hose from the Connector
Once you have prepared the area and gathered the necessary tools, it’s time to disconnect the hose from the heater hose connector in your Ford vehicle. This step is vital in the removal process and requires careful attention to ensure that the hose is disconnected safely and efficiently. Here’s how you can disconnect the hose from the connector:
- Identify the Hose Clamps: Locate the hose clamps securing the heater hose to the connector. Depending on the type of clamps used, you may need to use pliers or a screwdriver to manipulate and release them.
- Position the Container: Place the container or drip pan beneath the hose connection point to catch any residual coolant that may spill during the disconnection.
- Use Pliers or Clamp Pliers: If the hose clamps are of the squeeze type, utilize long-nose pliers or dedicated hose clamp pliers to compress and slide the clamps away from the connector. For screw-type clamps, use a suitable screwdriver to loosen and remove them.
- Twist and Pull: Gently twist and maneuver the hose to break the seal between the hose and the connector. Avoid using excessive force to prevent damaging the hose or the connector.
- Inspect for Damage: After disconnecting the hose, inspect both the hose and the connector for any signs of wear, deterioration, or damage that may necessitate replacement.
By successfully disconnecting the hose from the connector, you will have completed a crucial step in the removal process, setting the stage for the subsequent removal of the connector itself from the heater core in your Ford vehicle.
Remove the Connector from the Heater Core
With the hose disconnected, the next step in the process of removing the heater hose connector from your Ford vehicle involves detaching the connector from the heater core. This task requires precision and care to avoid damaging the heater core or surrounding components. Here’s how you can remove the connector from the heater core:
- Access the Heater Core Area: Depending on the vehicle model, you may need to remove additional components or access panels to reach the heater core and the connector.
- Inspect for Fasteners: Check for any fasteners, bolts, or retaining clips securing the connector to the heater core. Use a socket set or appropriate tools to loosen and remove these fasteners.
- Gently Wiggle and Pull: With the fasteners removed, gently wiggle the connector to loosen it from the heater core. Avoid applying excessive force to prevent any damage to the heater core or the surrounding components.
- Inspect for Sealant or Debris: Upon removing the connector, inspect the area around the heater core for any sealant, debris, or corrosion that may need to be addressed before installing the new connector.
- Clean the Heater Core Connection: Use a clean rag or paper towels to wipe the connection point on the heater core, ensuring that it is free from any contaminants or residue before installing the new connector.
By carefully removing the connector from the heater core, you are one step closer to completing the removal process and preparing the area for the installation of the new heater hose connector in your Ford vehicle.
Inspect and Clean the Area
After removing the heater hose connector from the heater core, it’s essential to thoroughly inspect and clean the surrounding area to ensure optimal conditions for installing the new connector in your Ford vehicle. This step involves careful examination and meticulous cleaning to address any issues and prepare the area for the replacement. Here’s how you can inspect and clean the area:
- Inspect for Damage: Examine the exposed area around the heater core for any signs of damage, corrosion, or wear. Address any issues that may affect the proper installation and function of the new connector.
- Check for Sealant Residue: Look for remnants of sealant or debris on the heater core and the surrounding components. Clean off any residue using a suitable solvent or cleaner to ensure a clean and secure connection for the new connector.
- Verify Heater Core Integrity: Ensure that the heater core, as well as the inlet and outlet ports, is free from obstructions and damage that could impede the proper flow of coolant through the new connector.
- Clean the Connection Point: Use a clean rag or lint-free cloth to wipe the connection point on the heater core, removing any remaining debris or contaminants to create a clean and smooth surface for the new connector.
- Address Any Issues: If any components show signs of deterioration or damage, consider addressing these issues before proceeding with the installation of the new heater hose connector to prevent potential complications in the future.
By meticulously inspecting and cleaning the area surrounding the heater core, you can ensure that the installation of the new connector will proceed smoothly and that the cooling system in your Ford vehicle will function optimally after the replacement.
Install the New Heater Hose Connector
After completing the inspection and cleaning of the area around the heater core, the final step in the process of replacing the heater hose connector in your Ford vehicle is to install the new connector. This step requires precision and attention to detail to ensure a secure and effective installation. Here’s how you can install the new heater hose connector:
- Prepare the New Connector: Ensure that the new heater hose connector is the correct replacement for your Ford vehicle model and that it is compatible with the heater core and hoses.
- Apply Sealant (If Necessary): If recommended by the vehicle manual or the connector manufacturer, apply a suitable sealant to the connection point on the heater core to create a secure and leak-free seal.
- Align the Connector: Position the new connector at the inlet or outlet port of the heater core, aligning it with the corresponding connection point to ensure a proper fit.
- Secure the Fasteners: If the new connector includes fasteners or retaining clips, carefully secure them to the heater core according to the manufacturer’s specifications.
- Reconnect the Hose: Reattach the heater hose to the new connector, ensuring a snug and secure fit. Use pliers or hose clamp pliers to reposition and secure the hose clamps in place.
- Double-Check the Installation: Verify that the new connector is firmly attached to the heater core and that the hose connection is secure, with no signs of leakage or misalignment.
- Refill the Coolant: If a significant amount of coolant was lost during the removal process, refill the coolant reservoir with the appropriate type of coolant for your Ford vehicle model.
- Test the System: Start the engine and allow it to reach operating temperature while monitoring the coolant system for any signs of leaks or irregularities.
By methodically installing the new heater hose connector and performing a thorough system check, you can ensure that the cooling system in your Ford vehicle is restored to optimal functionality, providing reliable heat and efficient coolant circulation.