
Choosing the Right Tools and Materials
Before embarking on the process of pinning a Deutsch connector, it’s crucial to gather the necessary tools and materials. Ensuring that you have the right equipment will streamline the entire procedure and contribute to a successful outcome.
Here’s a step-by-step guide to help you select the essential tools and materials:
- Deutsch Connector Kit: Acquire a Deutsch connector kit containing all the components needed for the assembly process. The kit typically includes the connector body, pins, sockets, wedgelocks, and seals. It’s advisable to opt for a reputable brand to guarantee the quality and compatibility of the components.
- Wire Strippers: Invest in a high-quality pair of wire strippers capable of cleanly and accurately removing the insulation from the wires. This tool is essential for preparing the wires before inserting them into the connector.
- Crimping Tool: A reliable crimping tool is indispensable for securing the pins onto the wires. Look for a tool specifically designed for Deutsch connectors to ensure precise and secure crimps.
- Heat Gun or Torch: A heat gun or torch is necessary for heat-shrinking the seals onto the wires, providing a watertight and secure seal. Ensure that the heat source is suitable for the specific type of seal included in the connector kit.
- Wire and Contacts: Use high-quality wires and contacts that are compatible with the Deutsch connector. It’s crucial to select the appropriate gauge of wire based on the electrical requirements of the application. Additionally, ensure that the contacts are designed for use with the specific connector model.
- Wire Cutters: Reliable wire cutters are essential for cleanly and accurately trimming the wires to the required length. Precision in wire cutting is vital for achieving a secure and reliable connection.
- Electrical Tape: While not directly involved in the pinning process, electrical tape can be useful for temporarily securing wires and providing additional insulation during the assembly process.
By gathering these essential tools and materials, you’ll be well-prepared to proceed with the subsequent steps of preparing and assembling the Deutsch connector.
Preparing the Wires and Contacts
Once you have assembled the necessary tools and materials, the next crucial step in pinning a Deutsch connector is preparing the wires and contacts. Proper preparation is essential for ensuring a secure and reliable connection. Here’s a detailed guide to preparing the wires and contacts:
- Strip the Wires: Utilize the wire strippers to carefully strip the insulation from the ends of the wires. It’s important to strip an appropriate length of insulation to accommodate the insertion of the wires into the connector.
- Verify Wire Length: Ensure that the wires are trimmed to the correct length, allowing for a proper fit within the connector. Precision in wire length is vital for achieving a secure connection and preventing any strain on the wires.
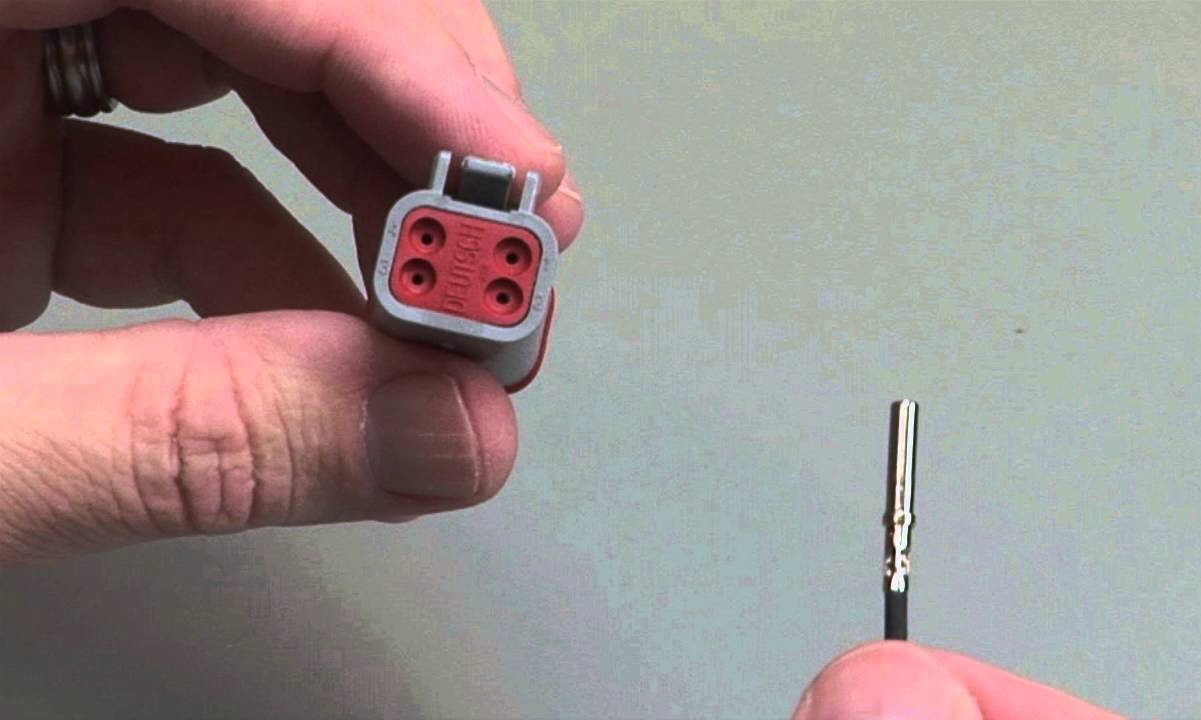
- Insert Contacts: Insert the contacts into the appropriate positions on the wires. It’s crucial to verify that the contacts are securely attached to the wires to prevent any potential loosening during the assembly process.
- Apply Seals: Slide the seals onto the wires, positioning them close to the insulation. The seals are vital for providing a waterproof and secure seal once the wires are inserted into the connector.
- Crimp the Contacts: Utilize the crimping tool to securely crimp the contacts onto the wires. Ensure that the crimping process is executed with precision to create a reliable electrical connection.
- Heat-Shrink Seals: Apply heat to the seals using a heat gun or torch to shrink them onto the wires. This process creates a watertight seal, safeguarding the connection from moisture and environmental factors.
- Inspect the Prepared Wires: Thoroughly inspect the prepared wires and contacts to verify that they are correctly stripped, trimmed, and assembled. Attention to detail during this stage is crucial for the success of the subsequent assembly process.
By meticulously preparing the wires and contacts, you establish the foundation for a secure and reliable connection within the Deutsch connector. This meticulous preparation ensures that the subsequent steps of assembling and crimping the connector proceed smoothly and result in a robust electrical connection.
Assembling the Deutsch Connector
With the wires and contacts meticulously prepared, the next critical step in pinning a Deutsch connector is the assembly process. Proper assembly ensures that the connector functions reliably and provides a secure electrical connection. Here’s a comprehensive guide to assembling the Deutsch connector:
- Prepare the Connector Body: Begin by examining the connector body to identify the insertion points for the wires. Familiarize yourself with the structure of the connector to facilitate the seamless insertion of the prepared wires.
- Position the Wires: Carefully insert the prepared wires into the designated positions within the connector body. Ensure that each wire is correctly aligned and fully inserted to establish a reliable electrical connection.
- Verify Contact Alignment: Confirm that the contacts within the connector body align correctly with the inserted wires. Proper alignment is crucial for the effectiveness and reliability of the electrical connection.
- Secure the Connector Body: Once the wires are inserted and aligned, securely fasten the connector body to prevent any movement or dislodging of the wires. This step ensures the stability and integrity of the assembled connector.
- Double-Check the Assembly: Thoroughly inspect the assembled connector to verify that all wires are securely positioned and aligned within the connector body. Attention to detail at this stage is essential for identifying and rectifying any potential issues before proceeding to the crimping process.
By meticulously following these steps, you can effectively assemble the Deutsch connector, setting the stage for the subsequent crimping process. The precision and care applied during the assembly process contribute to the reliability and functionality of the connector, ensuring a robust electrical connection for the intended application.
Crimping the Pins onto the Wires
After successfully assembling the Deutsch connector, the next critical step in the pinning process involves crimping the pins onto the prepared wires. Proper crimping is essential for establishing a secure and reliable electrical connection within the connector. Here’s a detailed guide to effectively crimping the pins onto the wires:
- Select the Correct Crimping Tool: Ensure that you have the appropriate crimping tool designed specifically for Deutsch connectors. Using the correct tool is crucial for achieving precise and secure crimps.
- Position the Connector: Secure the assembled connector in a stable position to facilitate the crimping process. This ensures that the connector remains steady and aligned during the crimping of the pins.
- Insert the Pins: Carefully insert the pins into the crimping tool, ensuring that they are positioned securely and ready for crimping onto the wires.
- Align the Pins with the Wires: Position the crimping tool with the inserted pins over the exposed wire ends within the connector. Verify that the pins align accurately with the wires to facilitate a secure and reliable crimping process.
- Execute Precise Crimps: Apply consistent and controlled pressure on the crimping tool to securely attach the pins onto the wires. It’s essential to maintain precision during this process to prevent any potential damage to the wires or unreliable crimps.
- Inspect the Crimps: Thoroughly examine the crimped pins to ensure that they are securely attached to the wires without causing any damage or deformation. Attention to detail during this inspection is vital for confirming the integrity of the crimped connection.
By meticulously following these steps, you can effectively crimp the pins onto the wires, establishing a robust and reliable electrical connection within the Deutsch connector. The precision and care applied during the crimping process contribute to the functionality and longevity of the connector, ensuring its suitability for the intended application.
Inserting the Pins into the Connector
Once the pins have been securely crimped onto the wires, the subsequent step in the process of pinning a Deutsch connector involves inserting the pins into the connector body. This critical step ensures that the electrical connection is properly established within the connector, setting the stage for the subsequent securing and testing processes. Here’s a detailed guide to effectively inserting the pins into the connector:
- Prepare the Connector Body: Ensure that the connector body is readily accessible and positioned securely to facilitate the insertion of the prepared pins. Familiarize yourself with the layout of the connector to streamline the insertion process.
- Align the Pins: Carefully align the crimped pins with the corresponding slots or receptacles within the connector body. Precision in alignment is crucial for establishing a secure and reliable electrical connection.
- Apply Gentle Pressure: With the pins aligned, apply gentle and consistent pressure to insert the pins into the connector body. Avoid excessive force to prevent any potential damage to the pins or the connector body.
- Verify Secure Insertion: After inserting the pins, verify that they are securely positioned within the connector body. Ensure that each pin is fully seated and engaged to establish a reliable electrical connection.
- Double-Check Alignment: Thoroughly inspect the inserted pins to confirm that they are aligned correctly within the connector body. Attention to detail at this stage is essential for identifying and rectifying any potential issues before proceeding to the securing process.
By meticulously following these steps, you can effectively insert the crimped pins into the connector, ensuring a secure and reliable electrical connection. The precision and care applied during this process contribute to the functionality and integrity of the connector, setting the stage for the subsequent steps of securing the pins in place and testing the connection.
Securing the Pins in Place
Once the pins have been inserted into the connector body, the next crucial step in the process of pinning a Deutsch connector involves securing the pins in place. Properly securing the pins ensures the stability and integrity of the electrical connection within the connector, safeguarding it against potential disruptions. Here’s a comprehensive guide to effectively securing the pins in place:
- Utilize Wedgelocks: If your Deutsch connector includes wedgelocks, carefully position them to secure the inserted pins within the connector body. Wedgelocks provide additional stability and prevent the pins from dislodging due to vibration or movement.
- Engage the Locking Mechanism: If the connector features a locking mechanism, ensure that it is engaged to securely hold the pins in place. Verify that the locking mechanism effectively prevents any unintended movement or disconnection of the pins.
- Inspect the Secured Pins: Thoroughly examine the connector to confirm that the pins are securely held in place by the wedgelocks or locking mechanism. Attention to detail during this inspection is vital for ensuring the stability and reliability of the secured pins.
- Double-Check Alignment: Verify that the inserted pins remain aligned within the connector body and that the securing mechanisms do not cause any misalignment or strain on the pins. Proper alignment is essential for maintaining a reliable electrical connection.
By meticulously following these steps, you can effectively secure the pins in place within the Deutsch connector, ensuring the stability and reliability of the electrical connection. The precision and care applied during this process contribute to the functionality and longevity of the connector, making it suitable for the intended application.
Testing the Connection
Following the completion of the pinning process for a Deutsch connector, it is imperative to conduct thorough testing to ensure the integrity and functionality of the electrical connection. Proper testing provides assurance that the connector operates as intended and delivers a reliable electrical pathway. Here’s a detailed guide to effectively testing the connection:
- Conduct Continuity Testing: Utilize a multimeter or continuity tester to verify the continuity of the electrical connection established by the pins and contacts within the Deutsch connector. This test confirms that the electrical pathway is continuous and free from interruptions or faults.
- Check for Short Circuits: Conduct a comprehensive inspection to ensure that there are no unintended short circuits within the connector. Verify that each pin is electrically isolated from the others, preventing any undesirable electrical interference.
- Perform Insulation Resistance Testing: Assess the insulation resistance of the connector to confirm that it meets the specified electrical standards. This test ensures that the connector effectively isolates the electrical conductors and prevents leakage currents.
- Verify Environmental Sealing: If the Deutsch connector is designed for use in challenging environments, such as those with exposure to moisture or dust, conduct a sealing test to ensure that the connector effectively safeguards the electrical connection from environmental factors.
- Subject the Connector to Mechanical Stress: Apply controlled mechanical stress to the connector to simulate real-world conditions and assess its resilience. This step ensures that the connector maintains its electrical integrity even under mechanical strain or vibration.
- Inspect for Visual Anomalies: Thoroughly examine the connector for any visual anomalies, such as loose wires, damaged seals, or misaligned pins. Visual inspection complements the electrical testing and provides a comprehensive assessment of the connector’s condition.
By meticulously conducting these tests, you can effectively evaluate the integrity and functionality of the Deutsch connector’s electrical connection. Thorough testing provides the confidence that the connector meets the required electrical standards and is suitable for the intended application, ensuring reliable and consistent performance.