
Why Sign Up for Steam?
Steam is an expansive digital gaming platform that offers a multitude of benefits for its users. Whether you are a casual gamer or a dedicated enthusiast, creating a Steam account unlocks a world of possibilities and enhances your gaming experience. Here are some compelling reasons why signing up for Steam is a great decision.
- Access to a vast library of games: When you sign up for Steam, you gain access to an extensive collection of games spanning various genres – from action-packed shooters to immersive role-playing adventures. With over thousands of titles available, there is something for every type of gamer.
- Convenience and flexibility: Say goodbye to physical game discs and hello to the convenience of digital downloads. With Steam, you can purchase and download games directly to your computer, eliminating the need for physical copies and allowing for instant access to your favorite titles.
- Regular sales and discounts: Steam is renowned for its frequent discounts and seasonal sales, offering significant savings on popular games. With Steam, you can expand your game library without emptying your wallet, thanks to their attractive pricing and regular promotional offers.
- Community and multiplayer features: Steam provides a thriving community of gamers where you can connect with friends, join groups, and interact with like-minded individuals. The platform offers multiplayer functionality for many games, allowing you to enjoy cooperative or competitive gaming experiences with others.
- Easy game management: With Steam, managing your game library becomes effortless. The platform keeps track of your purchased games, allows you to install, update, and uninstall titles with just a few clicks. It also offers cloud storage for saved games, enabling you to access your progress from any device.
- Built-in social features: Steam’s built-in social features allow you to chat with friends, share screenshots and videos of your gameplay, and even live-stream your gaming sessions. It adds an interactive and social element to your gaming experience, fostering connections and enhancing the fun.
Signing up for a Steam account not only opens up a world of gaming possibilities but also unlocks a range of features and benefits that contribute to an immersive and enjoyable gaming experience. Whether you are looking to explore new games, connect with friends, or participate in the vibrant Steam community, joining Steam is a step towards enhancing your gaming adventures.
Creating a Steam Account
To take advantage of all the features and benefits Steam has to offer, you’ll need to create an account. Follow these simple steps to get started:
- Visit the Steam website: Open your preferred web browser and navigate to the official Steam website (https://store.steampowered.com/).
- Click on “Join Steam”: Look for the “Join Steam” option located at the top right corner of the website’s homepage. Click on it to begin the account creation process.
- Fill out the registration form: You’ll be presented with a registration form that asks for your email address and password. Fill in the required fields, making sure to choose a strong and unique password.
- Complete the human verification process: In order to prevent automated bots from creating accounts, you will need to complete a simple human verification task. Follow the on-screen instructions to verify your humanity.
- Verify your email address: After completing the registration form, Steam will send a verification email to the address you provided. Check your email inbox and click on the verification link to confirm your email address.
- Agree to the terms and conditions: Before finalizing your account creation, you’ll need to agree to Steam’s terms and conditions. Take the time to read through the terms and click on the checkbox to indicate your acceptance.
- Choose a display name: Steam allows you to choose a display name that will be visible to other users. This name can be different from your login username and can be changed at any time.
- Complete your profile: You can customize your Steam profile by adding a profile picture, writing a brief bio, and selecting your preferred privacy settings. This will help personalize your account and enhance your interactions within the Steam community.
Congratulations! You have successfully created a Steam account. Now you can start exploring the vast array of games, connecting with friends, and immersing yourself in the vibrant Steam community. Remember to keep your account details secure and enjoy all the exciting features Steam has to offer.
Choosing a Username
When creating your Steam account, one of the important decisions you’ll need to make is choosing a username. This is the name that will represent you within the Steam community and will be visible to other users. Here are some tips to consider when selecting your username:
- Uniqueness: Aim for a username that is unique and stands out. Avoid common names or combinations of numbers and letters that may already be in use by other players. A distinctive username will make it easier for your friends and other users to find and identify you.
- Memorability: Choose a username that is memorable and easy to remember. Avoid complex or lengthy usernames that might be difficult for others to recall. A simple and catchy username will make it easier for your friends to locate and add you on Steam.
- Relevance: Consider selecting a username that reflects your gaming interests or personality. It could be a reference to a favorite game, a character, or a gaming-related passion. A relevant username helps create a connection with other gamers who share similar interests.
- Avoid offensive or inappropriate content: Steam has community guidelines that prohibit the use of offensive, vulgar, or discriminatory language. When choosing a username, make sure it adheres to these guidelines and is suitable for a diverse audience. Maintaining a respectful and inclusive environment is crucial within the gaming community.
- Flexibility and longevity: Keep in mind that your chosen username will represent you across multiple games and interactions on Steam. Therefore, it’s essential to select a username that can stand the test of time and won’t limit you to a specific game or genre.
Remember, once you have chosen your username, it can be difficult to change it later. While Steam does allow for username changes, there are some limitations and restrictions in place. So, take your time to consider different options and choose a username that you will be happy with in the long run.
Choosing the right username is an exciting part of creating your Steam account. It allows you to express your individuality and connect with others who share your gaming interests. So, get creative, find a unique and memorable username, and start making your mark within the vibrant Steam community.
Adding a Profile Picture
One of the ways to personalize your Steam account and make it more visually appealing is by adding a profile picture. Your profile picture serves as a representation of your gaming identity and can help others recognize you within the Steam community. Here’s how you can add a profile picture to your Steam account:
- Choose an image: Before adding a profile picture, find an image that you would like to use. It can be a photo of yourself, a custom artwork, or even a picture related to your favorite game or character.
- Prepare the image: Ensure that the image you have chosen meets Steam’s guidelines. The image should be in a supported format (such as JPEG or PNG) and have a resolution of at least 184×184 pixels to ensure clarity. Avoid using images that are copyrighted or violate any intellectual property rights.
- Access your profile settings: Log in to your Steam account and click on your username located at the top right corner of the Steam client or website. From the dropdown menu, select “Profile” to access your profile settings.
- Upload the image: Look for the “Edit Profile” button and click on it. Then, locate the “Avatar” section and click on the “Upload” button. Choose the image file you have prepared and upload it to your profile.
- Adjust the image: After uploading the image, you may have the option to adjust its alignment or crop it to fit the designated space. Use the provided tools to make any necessary adjustments and ensure that the profile picture looks the way you want it to.
- Save the changes: Once you are satisfied with the chosen image and its adjustments, click on the “Save Changes” button to apply the profile picture to your Steam account.
- View your profile: Go back to your profile and refresh the page to see the new profile picture displayed. It will now be visible to others when they visit your profile or interact with you on Steam.
Adding a profile picture to your Steam account can help you personalize your online presence and make connections within the gaming community. It allows others to easily identify you and adds a touch of individuality to your profile. So, choose an image that represents you and your gaming interests, and let your personality shine on Steam.
Verifying Your Email Address
Verifying your email address on Steam is an essential step to ensure the security and functionality of your account. It is also required to access certain features and settings within the Steam platform. Here’s how you can verify your email address:
- Check your inbox: After creating your Steam account, an email will be sent to the address you provided during the registration process. Open your email inbox and look for the verification email from Steam.
- Click on the verification link: Open the verification email and click on the provided verification link. This link is unique to your account and will direct you to a verification page on the Steam website.
- Verify your email: On the verification page, you will be prompted to confirm your email address by clicking on a button or entering a verification code. Follow the instructions provided to complete the verification process.
- Confirmation message: After successfully verifying your email address, you may receive a confirmation message indicating that the verification process is complete. This message serves as confirmation that you can now fully access and utilize the features of your Steam account.
Verifying your email address is crucial for several reasons. Firstly, it helps protect your account against unauthorized access and ensures that only you have control over your Steam account. Secondly, it enables you to receive important notifications from Steam, such as security alerts, account updates, and promotional offers. Additionally, verifying your email address may grant you access to additional features and settings, such as trading and Steam Community Market participation.
If you encounter any issues during the email verification process, double-check that you have entered the correct email address during account registration. If the verification email does not appear in your inbox, check your spam or junk folders. In case you still cannot find the email or are experiencing technical difficulties, Steam provides support channels to help resolve any verification-related problems you may encounter.
By taking the time to verify your email address on Steam, you ensure the security and integrity of your gaming account. It allows you to fully explore and enjoy the wide range of features and benefits that Steam offers, providing you with a seamless and safe gaming experience.
Setting Up Your Privacy Settings
When using any online platform, including Steam, it’s important to have control over your privacy settings. Steam provides various options to customize your privacy preferences, ensuring that you have a safe and enjoyable gaming experience. Here’s how you can set up your privacy settings on Steam:
- Access your profile settings: Log in to your Steam account and click on your username located at the top right corner of the Steam client or website. From the dropdown menu, select “Profile” to access your profile settings.
- Navigate to the “Privacy Settings” section: Look for the “Edit Profile” button and click on it. Scroll down to find the “Privacy Settings” section and click on the “Privacy Settings” button to access the privacy options.
- Customize your profile visibility: Steam provides options to control who can view your profile, including your friends, the public, or only you. Select the desired visibility setting that aligns with your comfort level.
- Manage your game details: Choose what information about your game activity and achievements you want to share with others. You can set your preferences to display game playtime, owned games, and achievements either to your friends or to the public.
- Control friend requests: Decide who can send you friend requests on Steam – whether it’s open to everyone, restricted to friends of friends, or limited to only those with whom you have participated in a recent game.
- Configure comments and community contributions: Steam allows you to control who can leave comments on your profile and who can post screenshots, artwork, guides, and other contributions to your profile. Adjust these settings based on your preferences.
- Set up trade offers and inventory privacy: Determine who can send you trade offers and view your Steam inventory. You can choose to allow trades from anyone, only from friends, or limit trades to those initiated by you.
- Save your privacy settings: After adjusting your privacy preferences, click on the “Save Changes” button to apply the updated settings to your Steam account.
By customizing your privacy settings on Steam, you have the power to regulate what information is visible to others, ensuring a safe and enjoyable online experience. Take the time to review and adjust these settings to your comfort level, balancing your desire for privacy with your willingness to connect and interact with other gamers.
It’s important to note that while setting up privacy settings is crucial, it is equally essential to exercise caution when accepting friend requests or sharing personal information online. Be mindful of your interactions, report any suspicious activity, and familiarize yourself with Steam’s guidelines and community policies to uphold a positive gaming environment.
With the ability to customize your privacy settings on Steam, you can enjoy the benefits of the platform while maintaining control over your personal information and interactions within the gaming community.
Adding Friends on Steam
One of the most exciting aspects of Steam is the ability to connect and play games with friends. Adding friends on Steam allows you to expand your gaming community, engage in multiplayer sessions, and stay connected with like-minded individuals. Here’s how you can add friends on Steam:
- Search for friends: To add a friend on Steam, you can search for their username directly or import your contacts from other platforms like Facebook or your email address book. Alternatively, you can add friends by accepting their friend requests or joining Steam groups together.
- Using the Steam client: If you are using the Steam client on your computer, click on the “Friends & Chat” button located at the bottom right corner. This will open the Friends List. From there, click on the “Add a Friend” button to initiate the friend request process.
- Using the Steam website: If you prefer to use the Steam website, log in to your account and click on your username at the top right corner. From the dropdown menu, select “Friends” to open your Friends List. Then, click on the “Add a Friend” button to start adding friends.
- Enter username or email address: In the friend request popup, enter the username or email address of the person you want to add as a friend. Steam will then search for the user and display the results.
- Select the correct user: If multiple users match the search criteria, carefully select the correct user based on their profile information, including their profile picture, gaming library, and other details.
- Send a friend request: Once you have identified the correct user, click on the “Add Friend” button next to their name. This will send a friend request to the selected user.
- Wait for the friend request to be accepted: After sending a friend request, the user will receive a notification and friend request invitation. They can choose to accept, decline, or ignore the request. You will be notified once your friend request is accepted.
- Managing your friends list: Once your friend request is accepted, the user will be added to your friends list. From there, you can chat with them, invite them to games, and see their online/offline status. You can also organize your friends into different groups for easier management.
Adding friends on Steam is an excellent way to build a gaming community, foster connections, and enhance your multiplayer experiences. Remember to respect others’ privacy settings and be mindful of online interactions, ensuring a positive and respectful gaming environment.
Keep in mind that having a large friends list is not necessary to enjoy Steam fully. Quality of connections matters more than quantity. Focus on building long-lasting friendships with individuals who share your gaming interests, and enjoy the camaraderie that Steam has to offer.
So, start adding friends on Steam, expand your gaming network, and embark on exciting multiplayer adventures together.
Joining Steam Groups
Steam groups provide a fantastic opportunity to connect with like-minded individuals, join discussions, and participate in various activities within the gaming community. Joining Steam groups allows you to expand your network, discover new games, and engage in shared experiences. Here’s how you can join Steam groups:
- Explore the Steam Community: Launch the Steam client on your computer or visit the Steam website and navigate to the “Community” section. This is where you can discover and join different Steam groups.
- Search for groups: Use the search bar or browse through the various categories and tags to find Steam groups that align with your interests. You can search for groups based on game genres, specific games, fan communities, or other shared hobbies.
- Read group descriptions: Click on a group that catches your interest to view its description, objectives, and community guidelines. Reading through the group’s description helps you understand its focus and activities, giving you a better idea of whether it is a good fit for you.
- Join the group: If you decide to join a group, click on the “Join Group” button. Some groups may require additional information or have an approval process in place before joining. Follow the instructions provided by the group to complete the joining process.
- Engage with the group: Once you are a member of a Steam group, get involved in the community. Start by introducing yourself, engaging in discussions, sharing your thoughts and experiences, and participating in group activities and events.
- Customize your group profile: Some Steam groups allow members to customize their profiles within the group. Take the time to personalize your group profile with a unique avatar, custom information, or showcase your achievements and game statistics.
- Manage group notifications: It’s essential to manage your group notifications to avoid being overwhelmed with updates. You can customize your notification settings within each group to control how and when you receive notifications about group activities, discussions, and events.
- Leave a group: If you no longer wish to be a part of a Steam group, you can leave the group at any time. Visit the group’s page, click on the “Leave Group” button, and confirm your decision to leave.
Joining Steam groups is a fantastic way to connect with other gamers who share similar interests, gather valuable insights, and expand your gaming horizons. Engaging with Steam groups allows you to meet new people, discover great games, and become an active member of the vibrant Steam community.
Remember to adhere to the group’s rules and guidelines, be respectful towards others’ opinions, and contribute positively to the discussions. Steam groups thrive when members engage in constructive conversations, share knowledge, and create a welcoming environment for everyone.
So, go ahead, explore the diverse range of Steam groups, find the ones that resonate with your interests, and embark on an engaging journey of community and camaraderie within the Steam platform.
Installing the Steam Client
To fully enjoy the features and benefits of Steam, you will need to install the Steam client on your computer. The Steam client serves as a hub for accessing and managing your game library, connecting with friends, and exploring the vibrant Steam community. Here’s how you can install the Steam client:
- Visit the official Steam website: Open your preferred web browser and go to the official Steam website at https://store.steampowered.com.
- Download the Steam client: On the Steam website, locate the green “Install Steam” button at the top right corner of the page. Click on it to initiate the download process.
- Choose your operating system: Once the download page appears, you will be presented with the option to download Steam for Windows, Mac, or Linux. Select the appropriate option based on the operating system of your computer.
- Run the installer: After downloading the Steam client, locate the installer file in your Downloads folder or the specified folder where your downloads are saved. Double-click on the installer file to run it.
- Follow the installation prompts: The installer will guide you through the installation process. Follow the on-screen instructions to select the installation location, agree to the terms and conditions, and choose any additional optional features you may want to install. Once you have made your selections, proceed with the installation.
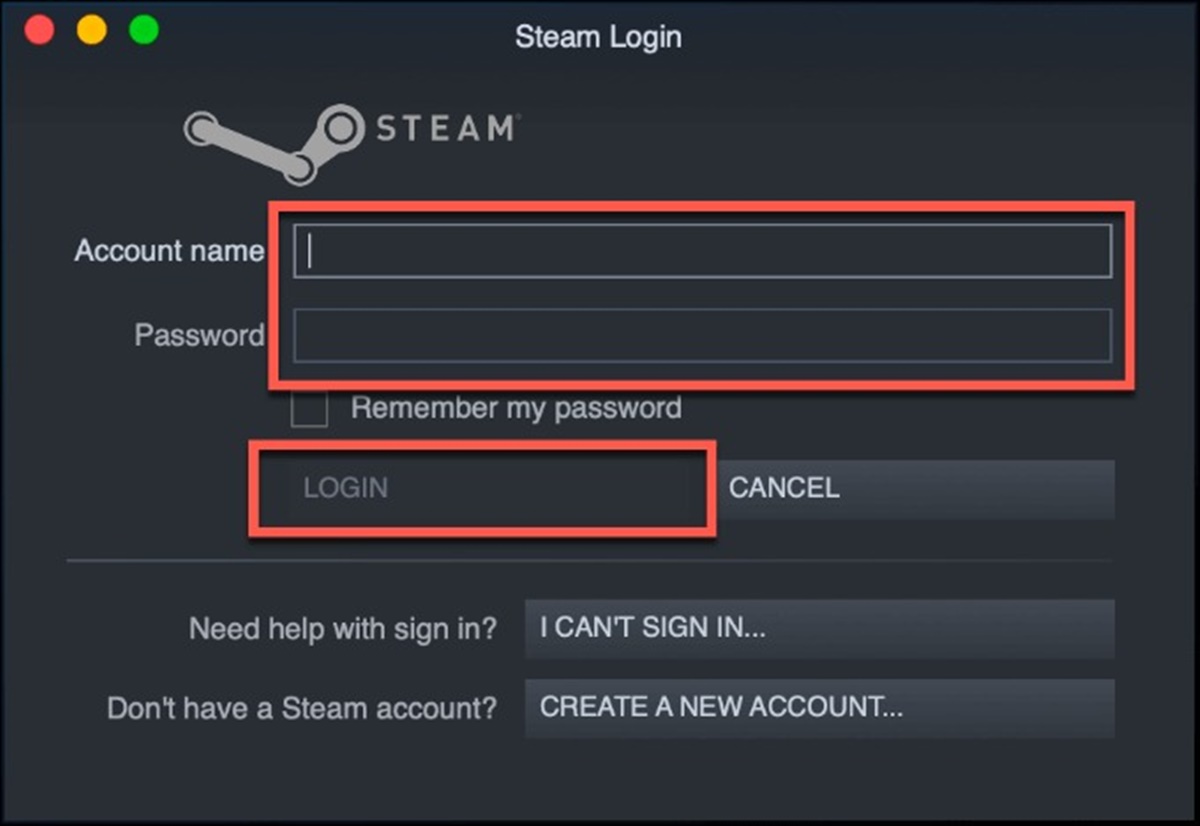
- Log in to your Steam account: After the installation is complete, launch the Steam client from your desktop or Start menu. If you already have a Steam account, enter your login credentials (username and password) and click on “Login.” If you don’t have a Steam account yet, click on the “Create a new account” button to proceed with the account creation process.
- Set up your preferences: Once you are logged in, you can customize your Steam client preferences. Choose your desired language, adjust display options, and configure any other settings to personalize your Steam experience.
- Access your game library: With the Steam client installed and your account logged in, you can now access your game library, browse the Steam Store, connect with friends, and explore the various features and functionalities of the Steam platform.
Installing the Steam client opens up a world of gaming possibilities and provides you with a centralized platform to manage and enjoy your gaming experience. It is the gateway to a vast collection of games, multiplayer features, and a vibrant gaming community found within the Steam platform.
Keep in mind that the installation process may vary slightly depending on your operating system. However, the overall steps and principles remain the same regardless of the platform you are using.
So, download and install the Steam client on your computer, log in to your account, and embark on an exciting journey through the vast realm of games and gaming experiences Steam has to offer.
Exploring the Steam Store
The Steam Store is a treasure trove of games, software, and downloadable content. It offers an extensive collection of titles across various genres, providing endless possibilities for gamers. Exploring the Steam Store allows you to discover new and exciting games and access a wealth of entertainment options. Here’s how you can make the most out of your exploration:
- Launch the Steam client: Open the Steam client on your computer by double-clicking the Steam icon or searching for it in your applications folder. If you haven’t already installed the client, refer to the previous section on how to install the Steam client.
- Access the Steam Store: Once the Steam client is open, click on the “Store” tab located at the top left corner of the window. This will take you to the main page of the Steam Store, where you can begin your exploration.
- Browse through featured and recommended content: The Steam Store homepage showcases featured and recommended games, software, and special promotions. Take your time to scroll through this section to discover popular titles, new releases, and deals that might pique your interest.
- Explore different categories: The Steam Store offers an extensive range of categories to help you narrow down your search. Browse sections such as “Top Sellers,” “New Releases,” “Upcoming,” “Specials,” and more, to discover games that align with your preferences.
- Utilize filters and tags: Refine your search by using filters and tags available on the left-hand side of the Steam Store page. You can filter results by genre, price range, operating system compatibility, and more. Additionally, tags assist in finding games with specific themes, features, or gameplay elements.
- Read game descriptions and reviews: Click on a game or software title to view its detailed description, screenshots, videos, system requirements, reviews, and other relevant information. Take the time to read user reviews and ratings to gather insights about the game’s quality and suitability for your preferences.
- Watch trailers and gameplay videos: Many game listings on the Steam Store include trailers and gameplay videos. Watching these videos can give you a glimpse into the game’s graphics, mechanics, and overall gameplay experience, helping you make informed decisions.
- Complete your purchase: Once you have found a game or software title that interests you, click on the “Add to Cart” or “Buy” button to proceed with the purchase. Follow the on-screen prompts to complete the transaction, choosing your preferred payment method.
- Manage your wishlist: If you come across a game that captures your attention but you’re not ready to purchase it yet, use the “Add to Wishlist” option. This allows you to keep track of games you are interested in and receive notifications when they go on sale or have updates.
Exploring the Steam Store is a thrilling experience that opens up a vast world of gaming possibilities. Whether you are searching for popular AAA titles, indie gems, or niche genre games, the Steam Store offers an expansive selection to cater to every gamer’s taste.
Remember to do your research, read reviews, and watch gameplay videos to ensure that the games you choose align with your preferences and expectations. Steam provides a platform for you to explore and discover new games, fostering memorable gaming experiences.
So, dive into the Steam Store, immerse yourself in its offerings, and unleash the excitement of exploring a vast digital marketplace for games and software.
Purchasing and Downloading Games
One of the key attractions of Steam is its vast library of games that cater to various interests and preferences. Purchasing and downloading games from Steam is a straightforward process that allows you to access and enjoy the titles in your game library. Here’s how you can purchase and download games on Steam:
- Search for a game: Use the search bar on the top right corner of the Steam client or website to find a specific game you want to purchase. Alternatively, browse through the Steam Store’s various categories and tags to discover new and exciting games.
- Select the game: Click on the game title to access its store page. Here, you will find detailed information about the game, including its description, system requirements, screenshots, reviews, and more.
- Add the game to your cart: If you decide to purchase the game, click on the “Add to Cart” or “Buy” button on the store page. This will add the game to your shopping cart.
- Review your cart: Once you have added all the desired games to your cart, click on the shopping cart icon at the top right corner of the client or website. Review the games in your cart to ensure accuracy.
- Proceed to checkout: Click on the “Proceed to Checkout” or “Purchase for Myself” button in your cart to proceed with the payment process. Steam offers various payment methods, including credit cards, PayPal, and Steam Wallet funds.
- Complete the transaction: Follow the instructions to enter your payment information, billing address, and any additional details required. Make sure to review the details before finalizing the purchase.
- Download the game: After the payment is processed successfully, you will be redirected to a confirmation page. Click on the “Install” or “Play” button to begin the download process.
- Monitor the download progress: The Steam client will display the download progress of the game in your library. You can view and manage your downloads by navigating to the “Library” tab or “Downloads” section of the client.
- Launch and play the game: Once the game is fully downloaded, you can launch it from your library by clicking on the “Play” button. Enjoy your newly purchased game and delve into its immersive world of entertainment.
Purchasing and downloading games from Steam offers a seamless and convenient experience. With a wide range of payment options, a vast selection of titles, and a user-friendly interface, Steam provides an accessible platform for gamers to build their digital library.
Remember to regularly check for game updates and patches, as developers often release improvements and additional content for games post-launch. Steam will automatically update your games, ensuring you have the latest version at all times.
So, browse the diverse catalog of games on Steam, purchase your desired titles, and embark on countless hours of gaming pleasure.
Managing Your Game Library
Once you start building your collection of games on Steam, it’s important to know how to effectively manage and organize your game library. Steam provides several features and tools to help you navigate and optimize your gaming experience. Here’s how you can manage your game library on Steam:
- Accessing your game library: Launch the Steam client on your computer and click on the “Library” tab located at the top of the window. This will display all the games you own.
- Sorting and categorizing: Steam allows you to sort your game library by various criteria such as name, recently played, install size, and more. You can also create custom categories or use default categories like “Favorites” or “Recently Played” to keep your games organized.
- Installing and uninstalling games: To install a game from your library, simply click on its title and select the “Install” button. The game will begin downloading and installing onto your computer. If you want to uninstall a game, right-click on its title and choose “Manage” and then “Uninstall” from the dropdown menu.
- Managing updates: Steam automatically checks for updates to your games. When updates are available, they will be downloaded and installed automatically, ensuring you have the latest versions of your games.
- Backing up game files: Steam provides a built-in feature called “Backup and Restore” that allows you to create a backup of your game files. This can be helpful in case of hardware failures or when switching to a new computer.
- Optimizing storage: If you have limited storage space on your computer, you can choose to move games to external drives or different storage locations. Right-click on a game, select “Properties,” and then navigate to the “Local Files” tab to find options for moving the game files.
- Managing DLC and additional content: Steam makes it easy to manage downloadable content (DLC) for your games. From the game’s library page, you can view and access any DLC associated with the game.
- Discovering new games: Within your library, Steam provides recommendations based on your play history and preferences. Explore these recommendations and discover new games that you may enjoy.
- Enabling Family Library Sharing: If you have family or friends who share the same computer or have their own Steam accounts, you can enable Family Library Sharing. This allows them to access your game library and play your games on their own accounts.
- Adding non-Steam games: Steam also allows you to add non-Steam games to your library. This feature enables you to have all your games, whether purchased through Steam or not, in one convenient location.
Effectively managing your game library on Steam ensures a well-organized and enjoyable gaming experience. By utilizing the features and tools provided by Steam, you can easily navigate through your collection, keep your games up to date, and optimize storage space on your computer.
Remember to regularly explore and discover new games, keep track of updates and DLC for your existing games, and take advantage of the options available to back up and optimize your game files.
So, take control of your gaming library on Steam, and experience the ease and convenience of managing your collection of games.
Participating in the Steam Community
One of the most engaging aspects of Steam is its vibrant and active community of gamers. Participating in the Steam Community allows you to connect with like-minded individuals, share your gaming experiences, and discover new content. Here’s how you can get involved:
- Join discussions and forums: Steam offers a variety of discussion forums where you can engage in conversations about specific games, genres, or other gaming-related topics. Participate in discussions, ask questions, share tips, and connect with fellow gamers who share your interests.
- Write reviews and rate games: Share your thoughts and opinions on games you have played by writing reviews and rating them on their store pages. Your reviews can help other users make informed decisions and provide valuable feedback to developers.
- Contribute to the Steam Workshop: The Steam Workshop allows users to create and share mods, custom maps, and other user-generated content for supported games. Get creative and contribute your own creations or explore and download content made by others.
- Give and receive Steam Community badges: Participate in various Steam activities like playing games, writing reviews, participating in events, and completing tasks to earn badges. These badges can be displayed on your profile and showcase your achievements and involvement within the Steam community.
- Organize and join Steam groups: Join or create Steam groups based on your gaming interests, communities, or friends. Engage in group discussions, participate in events, and connect with other members who share common gaming preferences.
- Share and view screenshots and videos: Capture and share your favorite gaming moments by uploading screenshots and videos to your Steam profile or the Steam Community. Explore the screenshots and videos shared by others, sparking conversations and inspiring new gaming experiences.
- Participate in events and competitions: Keep an eye out for community events and competitions organized by Steam or game developers. Participating in these events can be a fun way to challenge yourself, interact with others, and potentially win prizes.
- Interact with friends: Utilize Steam’s social features to connect with friends, chat, voice chat, and even join each other’s games. Steam provides a platform for staying connected and making gaming experiences more enjoyable with friends.
- Explore user-curated content: Discover games, artwork, game soundtracks, and other content recommended by fellow community members through Steam’s user curators. Follow curators whose preferences align with yours to receive personalized recommendations.
- Report and provide feedback: If you come across inappropriate content or encounter any issues within the Steam Community, report them to the appropriate channels. Additionally, provide feedback to Steam or game developers to help improve the overall experience.
Participating in the Steam Community allows you to connect with other gamers, share your passion for games, and contribute to a thriving ecosystem. Embrace the opportunities to engage in discussions, showcase your creativity, and explore the diverse content created and shared by the community.
Remember to maintain a respectful and inclusive attitude, follow community guidelines, and treat others with kindness and empathy. The Steam Community thrives on positive interactions, and your contributions play a significant role in fostering a welcoming and supportive environment.
So, dive into the Steam Community, connect with fellow gamers, share your experiences, and contribute to the dynamic and lively world of gaming on Steam.
Customizing Your Steam Profile
Your Steam profile serves as your digital representation within the Steam community and offers a chance to express your personality and gaming preferences. Customizing your Steam profile allows you to make it unique, visually appealing, and a reflection of your gaming identity. Here’s how you can customize your Steam profile:
- Profile picture and background: Choose a profile picture that represents you or your favorite game. Additionally, you can add a profile background to enhance the visual appeal of your profile. Steam offers a wide range of profile backgrounds for you to select from.
- About section: Write a brief bio or description in the “About” section of your profile. Share your gaming interests, favorite genres, or any other information you feel comfortable sharing. It gives other users insights into your gaming preferences.
- Showcase favorite games: Utilize the showcase section to display your favorite games. You can choose to highlight specific games by adding them to the “Favorite Games” showcase or create custom showcases for different themes, genres, or achievements.
- Custom artwork: Steam allows you to showcase custom artwork on your profile. Express your creativity by uploading custom artwork related to your favorite games, original designs, or fan art that represents your gaming identity.
- Profile privacy settings: Customize your profile’s privacy settings based on your preferences. Steam offers options to adjust the visibility of your profile, including who can view your game library, inventory, comments, and more.
- Featured showcase: Use the “Featured Showcase” to display important information, achievements, or milestones. It is a prominent section that appears at the top of your profile and can be used to highlight significant gaming accomplishments or current interests.
- Customizable profile URL: Personalize your profile URL with a unique identifier. Steam allows you to create a custom URL if it is available, making it easier for others to find and remember your profile.
- Badges and achievements: Steam provides badges and achievements that you can display on your profile. These badges are earned through gaming activities and can showcase your commitment and progress in specific games or events.
- Custom URL and custom info boxes: Optimize your profile by adding links to your social media accounts or other websites you wish to share. Additionally, Steam allows you to create custom info boxes where you can share additional information or links.
- Showcasing workshop contributions: If you have created mods, artwork, or other workshop content for games on Steam, you can showcase your contributions on your profile. It allows other users to discover and appreciate your creative work.
Customizing your Steam profile provides an opportunity to showcase your personality and share your gaming interests with others. Express your creativity, select visuals that resonate with you, and curate the content you want to highlight on your profile.
Remember to respect the guidelines and terms of service provided by Steam while customizing your profile. Keep in mind that inappropriate or offensive content is not allowed, and maintaining a positive and respectful presence is crucial within the Steam community.
So, take the time to customize your Steam profile, make it your own, and let it reflect the unique gaming identity that makes you who you are.
Enabling Steam Guard for Added Security
Protecting your Steam account from unauthorized access is crucial in maintaining the security of your gaming experience. Steam Guard provides an additional layer of protection by adding an extra step in the login process. Enabling Steam Guard helps ensure that only you have access to your account. Here’s how you can enable Steam Guard:
- Launch the Steam client: Open the Steam client on your computer by double-clicking the Steam icon or searching for it in your applications folder.
- Access the account settings: Once the Steam client is open, click on your username located at the top right corner of the window. From the dropdown menu, select “Account Details” or “Manage Account.”
- Navigate to Steam Guard settings: In the account settings, navigate to the “Steam Guard” or “Account Security” section. Click on it to access the Steam Guard settings.
- Enable Steam Guard: In the Steam Guard settings, click on the option to enable Steam Guard. You will be presented with two options: “Receive Steam Guard codes by email” or “Get Steam Guard codes from the Steam Mobile App.”
- Choose the desired option: Select the option that suits your preference and click on the corresponding button to proceed with the setup.
- Verification process: Depending on the option you selected, Steam will guide you through a verification process. If you chose email verification, Steam will send a verification code to the registered email address. If you chose the mobile app, you will be prompted to download and set up the Steam Mobile App.
- Enter the verification code: Once you have received the verification code, enter it in the required field provided by Steam to complete the Steam Guard setup process.
- Confirmation: After successfully setting up Steam Guard, you will receive a confirmation message, indicating that Steam Guard is now enabled for your account.
Enabling Steam Guard adds an extra layer of security to your Steam account. With Steam Guard activated, whenever you or anyone else attempts to log in from an unrecognized device or computer, you will receive a verification code that needs to be entered before accessing your account. This helps prevent unauthorized access and protects your valuable gaming library and personal information.
It is important to note that enabling Steam Guard through the Steam Mobile App offers enhanced security. The app generates time-sensitive verification codes on your mobile device, providing an additional layer of protection against potential threats.
Take the necessary steps to enable Steam Guard for your account, choose the option that best suits your needs, and ensure that your Steam gaming experience remains safe and secure.