
Check Compatibility of Micro SD Card
Before inserting a micro SD card into your Sony Xperia 1, it's crucial to ensure that the card is compatible with the device. Not all micro SD cards are designed to work seamlessly with every smartphone, and using an incompatible card could lead to performance issues or data corruption. To check the compatibility of your micro SD card with the Sony Xperia 1, follow these steps:
-
Review Sony Xperia 1 Specifications: Start by reviewing the official specifications provided by Sony for the Xperia 1. This information can typically be found on the Sony website or in the user manual. Look for details regarding the supported micro SD card capacities and types. The Xperia 1 may support micro SD cards up to a certain capacity, such as 256GB or 512GB, and may also specify the compatible types, such as micro SDHC or micro SDXC.
-
Check Card Type and Capacity: Examine the micro SD card itself to determine its type and capacity. The type of the card, whether micro SD, micro SDHC, or micro SDXC, should be clearly labeled on the card. Additionally, the capacity of the card, such as 32GB, 64GB, or 128GB, is often indicated on the front.
-
Research Online Resources: If you're uncertain about the compatibility of your micro SD card, consider researching online resources such as forums, tech websites, or user reviews. Many users share their experiences with specific micro SD cards and smartphones, including the Sony Xperia 1. Look for any reported issues or successful usage of the same micro SD card model with the Xperia 1.
-
Consult Sony Support: If you're still unsure about the compatibility of your micro SD card, consider reaching out to Sony support for clarification. The official support channels can provide accurate information regarding the compatibility of various micro SD card models with the Xperia 1.
By taking these steps to check the compatibility of your micro SD card with the Sony Xperia 1, you can ensure a smooth and trouble-free experience when using the card with your device. This proactive approach can help prevent potential issues that may arise from using an incompatible micro SD card, allowing you to fully enjoy the expanded storage capacity it provides.
Backup Data from Micro SD Card
Before proceeding with any changes to the micro SD card, it's essential to safeguard the data stored on it. Backing up the data ensures that valuable photos, videos, documents, and other files are protected in case of accidental loss or corruption during the formatting process. Here's a comprehensive guide on how to backup data from a micro SD card:
-
Connect to a Computer: Use a compatible micro SD card adapter or a card reader to connect the micro SD card to a computer. If your computer has a built-in card reader, insert the micro SD card directly into the appropriate slot. Alternatively, use an external card reader that connects to the computer via USB.
-
Copy Files to Computer: Once the micro SD card is connected, navigate to its storage location on the computer. This can typically be accessed through the "File Explorer" on Windows or the "Finder" on macOS. Select the files and folders you want to back up, then copy and paste them to a designated location on the computer's hard drive. It's advisable to create a new folder specifically for storing the backed-up data, making it easier to locate and transfer the files back to the micro SD card later.
-
Verify Data Integrity: After copying the files, it's essential to verify that the data has been successfully transferred and is accessible on the computer. Open a few files from the backup location to ensure that they can be opened without any issues. This step helps confirm that the backup process was completed accurately and that the data is intact.
-
Cloud Backup (Optional): For an additional layer of protection, consider uploading the backed-up data to a cloud storage service, such as Google Drive, Dropbox, or OneDrive. Cloud storage provides a secure off-site backup solution, guarding against data loss in the event of hardware failure or damage to the computer and the micro SD card.
By following these steps to backup data from the micro SD card, you can ensure that your valuable files are safely preserved before proceeding with any changes to the card. This proactive approach minimizes the risk of data loss and provides peace of mind throughout the formatting process.
Insert Micro SD Card into Sony Xperia 1
Inserting a micro SD card into your Sony Xperia 1 is a straightforward process that expands the device's storage capacity, allowing you to store more photos, videos, music, and other types of files. Follow these steps to seamlessly insert a micro SD card into your Sony Xperia 1:
-
Locate the SIM Card/Micro SD Card Tray: The Sony Xperia 1 features a combined SIM card and micro SD card tray, typically located on the side of the device. Use the provided SIM card removal tool or a small, pointed object to gently eject the tray from the Xperia 1. Ensure that the device is powered off before proceeding with this step to prevent any potential data loss or damage to the micro SD card.
-
Position the Micro SD Card: Once the tray is ejected, carefully place the micro SD card onto the designated slot within the tray. Ensure that the card is positioned correctly, aligning it with the guides or markings to prevent any potential misalignment or damage during the insertion process. It's important to handle the micro SD card with care, avoiding any forceful movements that could potentially cause damage to the card or the device.
-
Insert the Tray Back into the Device: After placing the micro SD card onto the tray, gently slide the tray back into the Sony Xperia 1 until it securely clicks into place. Take care to avoid applying excessive force, as this could lead to damage to the tray or the device. Once the tray is fully inserted, ensure that it sits flush with the device's frame, maintaining a seamless and uniform appearance.
-
Power On the Device: With the micro SD card successfully inserted, power on your Sony Xperia 1 to initiate the recognition and configuration of the newly inserted card. The device should detect the micro SD card and prompt you to set it up for use. Follow any on-screen instructions to complete the setup process, customizing the storage preferences and options according to your preferences.
By following these steps, you can effortlessly insert a micro SD card into your Sony Xperia 1, expanding the device's storage capabilities and unlocking the potential for enhanced multimedia storage and usage. This simple process empowers you to seamlessly integrate additional storage into your Xperia 1, providing flexibility and convenience for managing your digital content.
Format Micro SD Card on Sony Xperia 1
Formatting a micro SD card on your Sony Xperia 1 is a fundamental process that prepares the card for use with the device, ensuring optimal performance and compatibility. Whether you're setting up a new micro SD card or reformatting an existing one, the Xperia 1 provides a user-friendly interface to facilitate this essential task. Here's a detailed guide on how to format a micro SD card on your Sony Xperia 1:
-
Access the Settings Menu: Begin by unlocking your Sony Xperia 1 and navigating to the home screen. From there, locate and tap on the "Settings" icon, typically represented by a gear or cogwheel symbol. This action opens the device's settings menu, where you can manage various aspects of the Xperia 1's configuration.
-
Select Storage: Within the settings menu, scroll down and select the "Storage" option. This section provides a comprehensive overview of the device's storage settings, including internal storage and any connected external storage devices, such as a micro SD card.
-
Choose the Micro SD Card: If your micro SD card is inserted and recognized by the Xperia 1, it should be listed under the storage options. Tap on the micro SD card to access its specific settings and management options.
-
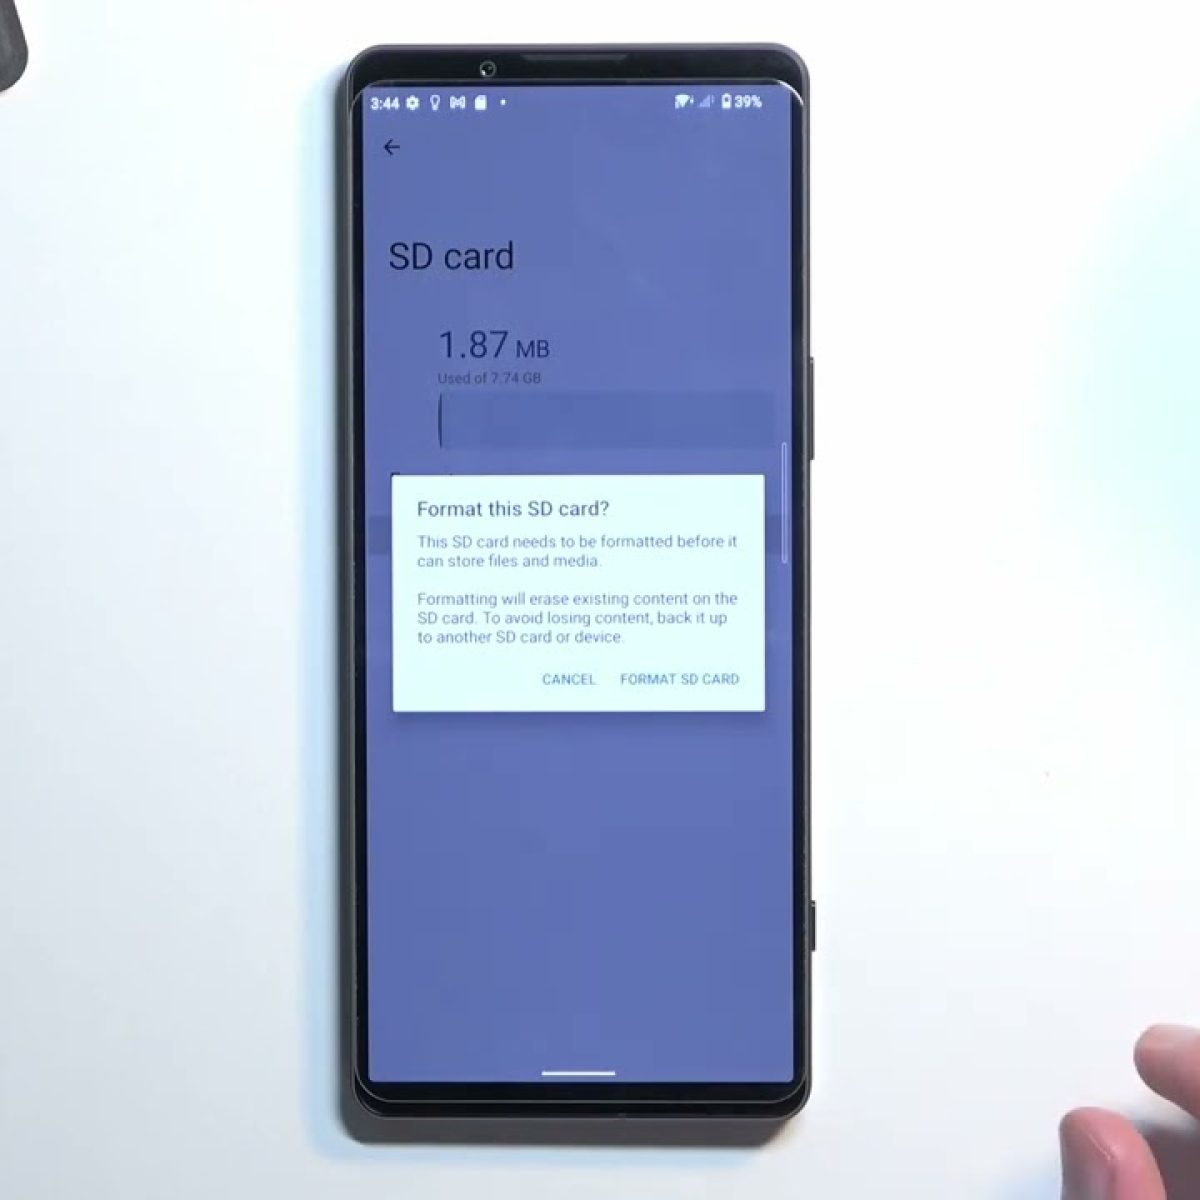
Initiate the Format Process: Within the micro SD card settings, look for the option to format the card. This may be labeled as "Format" or "Erase" and is typically accompanied by a warning about data loss. Tap on this option to initiate the formatting process.
-
Confirm the Format: A confirmation prompt will appear, informing you that formatting the micro SD card will erase all data stored on it. It's crucial to double-check that you have backed up any important data from the card before proceeding. If you're certain that you want to format the card, confirm the action to start the formatting process.
-
Wait for Completion: The Xperia 1 will begin formatting the micro SD card, a process that may take a few moments to complete depending on the card's capacity. It's important to avoid interrupting the formatting process, so ensure that your device has sufficient battery life or is connected to a power source during this operation.
-
Format Success: Once the formatting process is finished, a confirmation message will be displayed, indicating that the micro SD card has been successfully formatted and is ready for use with your Sony Xperia 1.
By following these steps, you can effectively format a micro SD card on your Sony Xperia 1, preparing it for seamless integration and optimal performance within the device's storage ecosystem. This process ensures that the micro SD card is configured to meet the Xperia 1's specifications, providing a reliable and efficient storage solution for your digital content.
Eject Micro SD Card from Sony Xperia 1
Ejecting a micro SD card from your Sony Xperia 1 is a crucial step before physically removing the card from the device. Properly ejecting the micro SD card ensures that all ongoing read and write operations are completed, minimizing the risk of data corruption and safeguarding the integrity of the stored information. Here's a detailed guide on how to safely eject a micro SD card from your Sony Xperia 1:
-
Access Storage Settings: Begin by unlocking your Xperia 1 and navigating to the home screen. From there, access the device's settings menu by tapping on the "Settings" icon, typically represented by a gear or cogwheel symbol.
-
Select Storage: Within the settings menu, locate and tap on the "Storage" option. This section provides a comprehensive overview of the device's storage settings, including internal storage and any connected external storage devices, such as a micro SD card.
-
Locate the Micro SD Card: If the micro SD card is inserted and recognized by the Xperia 1, it should be listed under the storage options. Tap on the micro SD card to access its specific settings and management options.
-
Eject the Micro SD Card: Within the micro SD card settings, look for the option to eject or safely remove the card. This action notifies the device that the micro SD card will be removed, allowing it to conclude any ongoing processes and prepare for safe removal.
-
Wait for Confirmation: After initiating the eject process, the Xperia 1 will finalize any pending operations related to the micro SD card. It's important to wait for the device to confirm that the card can be safely removed before physically proceeding with the ejection.
-
Physically Eject the Micro SD Card: Once the Xperia 1 provides the confirmation that the micro SD card can be safely removed, gently press the micro SD card tray to partially eject it from the device. Carefully grasp the tray and remove it entirely from the Xperia 1.
By following these steps, you can safely eject a micro SD card from your Sony Xperia 1, ensuring that all data operations are completed and the card is ready for physical removal. This process minimizes the risk of data corruption and hardware damage, allowing you to manage external storage with confidence and ease.