
Step 1: Locate the SIM card tray
Before you can remove the SIM card from your Motorola Razr, you need to locate the SIM card tray. The SIM card tray is a small, rectangular slot typically located on the side of the phone. On the Motorola Razr, the SIM card tray is usually positioned on the upper edge of the device. It's important to note that the exact location of the SIM card tray may vary slightly depending on the specific model of the Razr, so it's a good idea to refer to the user manual for precise instructions.
To locate the SIM card tray, you can start by gently examining the edges of your Motorola Razr. Look for a small pinhole or a tiny slot that is designed to accommodate the SIM card removal tool. Once you've identified the SIM card tray, you're ready to proceed to the next step in the process of removing the SIM card.
Locating the SIM card tray is the first and crucial step in the process of removing the SIM card from your Motorola Razr. By familiarizing yourself with the location of the SIM card tray, you can ensure that you approach the subsequent steps with confidence and precision. This initial step sets the stage for a smooth and successful SIM card removal process, allowing you to seamlessly transition to the next phase of the procedure.
With the SIM card tray located, you're now ready to move on to the next step, which involves using the SIM card removal tool to eject the SIM card tray from your Motorola Razr. This will pave the way for the safe and proper removal of the SIM card from your device, ensuring that you can carry out the process without any hassle or risk of damage to the phone or the SIM card itself.
In summary, locating the SIM card tray is the pivotal first step in the process of removing the SIM card from your Motorola Razr. By identifying the precise location of the SIM card tray, you set the stage for a seamless and successful SIM card removal process, laying the groundwork for the subsequent steps that will ultimately lead to the safe extraction of the SIM card from your device.
Step 2: Insert the SIM card removal tool
Once you have located the SIM card tray on your Motorola Razr, the next step in removing the SIM card involves using the SIM card removal tool. This tool is typically provided by the manufacturer and is specifically designed to facilitate the safe and effortless removal of the SIM card from the device.
To begin, retrieve the SIM card removal tool from its storage location, which is often found within the packaging of your Motorola Razr. The SIM card removal tool is a small, pointed instrument, usually with a thin, elongated shape. It is designed to fit perfectly into the pinhole or slot on the SIM card tray, allowing you to eject the tray without causing any damage to the device.
With the SIM card removal tool in hand, carefully insert the pointed end of the tool into the pinhole or slot located near the SIM card tray. Apply gentle pressure to ensure that the tool is securely inserted, as this will enable you to effectively engage the mechanism that releases the SIM card tray.
As you insert the SIM card removal tool, you may feel a slight resistance, which is normal. Continue to exert gentle pressure, maintaining a steady hand as you navigate the tool into the designated slot. It's important to exercise caution and precision during this step to avoid any accidental damage to the SIM card tray or the surrounding components of your Motorola Razr.
Once the SIM card removal tool is fully inserted into the pinhole or slot, you will need to apply a small amount of force to activate the mechanism that ejects the SIM card tray. This action will cause the tray to pop out slightly, allowing you to grasp it and proceed to the next phase of the SIM card removal process.
By following these steps, you can effectively utilize the SIM card removal tool to initiate the ejection of the SIM card tray from your Motorola Razr. This sets the stage for the subsequent step, which involves carefully removing the SIM card tray to access the SIM card itself.
With the SIM card removal tool successfully inserted and the SIM card tray partially ejected, you are now prepared to proceed to the next step in the process of removing the SIM card from your Motorola Razr. This seamless transition from one step to the next ensures that you can carry out the SIM card removal process with confidence and precision, ultimately leading to the safe extraction of the SIM card from your device.
Step 3: Eject the SIM card tray
With the SIM card removal tool successfully inserted into the pinhole or slot near the SIM card tray on your Motorola Razr, the next crucial step in the process of removing the SIM card is to eject the SIM card tray from the device. Ejecting the tray will grant you access to the SIM card, allowing for its safe and proper removal.
To proceed with ejecting the SIM card tray, gently apply pressure to the exposed edge of the tray that has been partially released by the SIM card removal tool. Using your fingertips, carefully push against the edge of the tray, guiding it out of the device. It's important to exercise caution and precision during this step to avoid any unnecessary force that could potentially damage the SIM card tray or the phone itself.
As you apply pressure to eject the SIM card tray, you may feel a slight resistance, which is normal. It's essential to maintain a steady hand and a gentle touch, ensuring that the tray is smoothly and evenly released from the device. By doing so, you can avoid any abrupt movements that may lead to unintended damage or disruption to the SIM card and the tray.
Once the SIM card tray has been fully ejected from your Motorola Razr, carefully remove it from the device, taking care to handle it with delicacy and precision. The SIM card will be securely housed within the tray, and it's important to avoid any unnecessary jostling or abrupt movements that could potentially dislodge or damage the SIM card during this process.
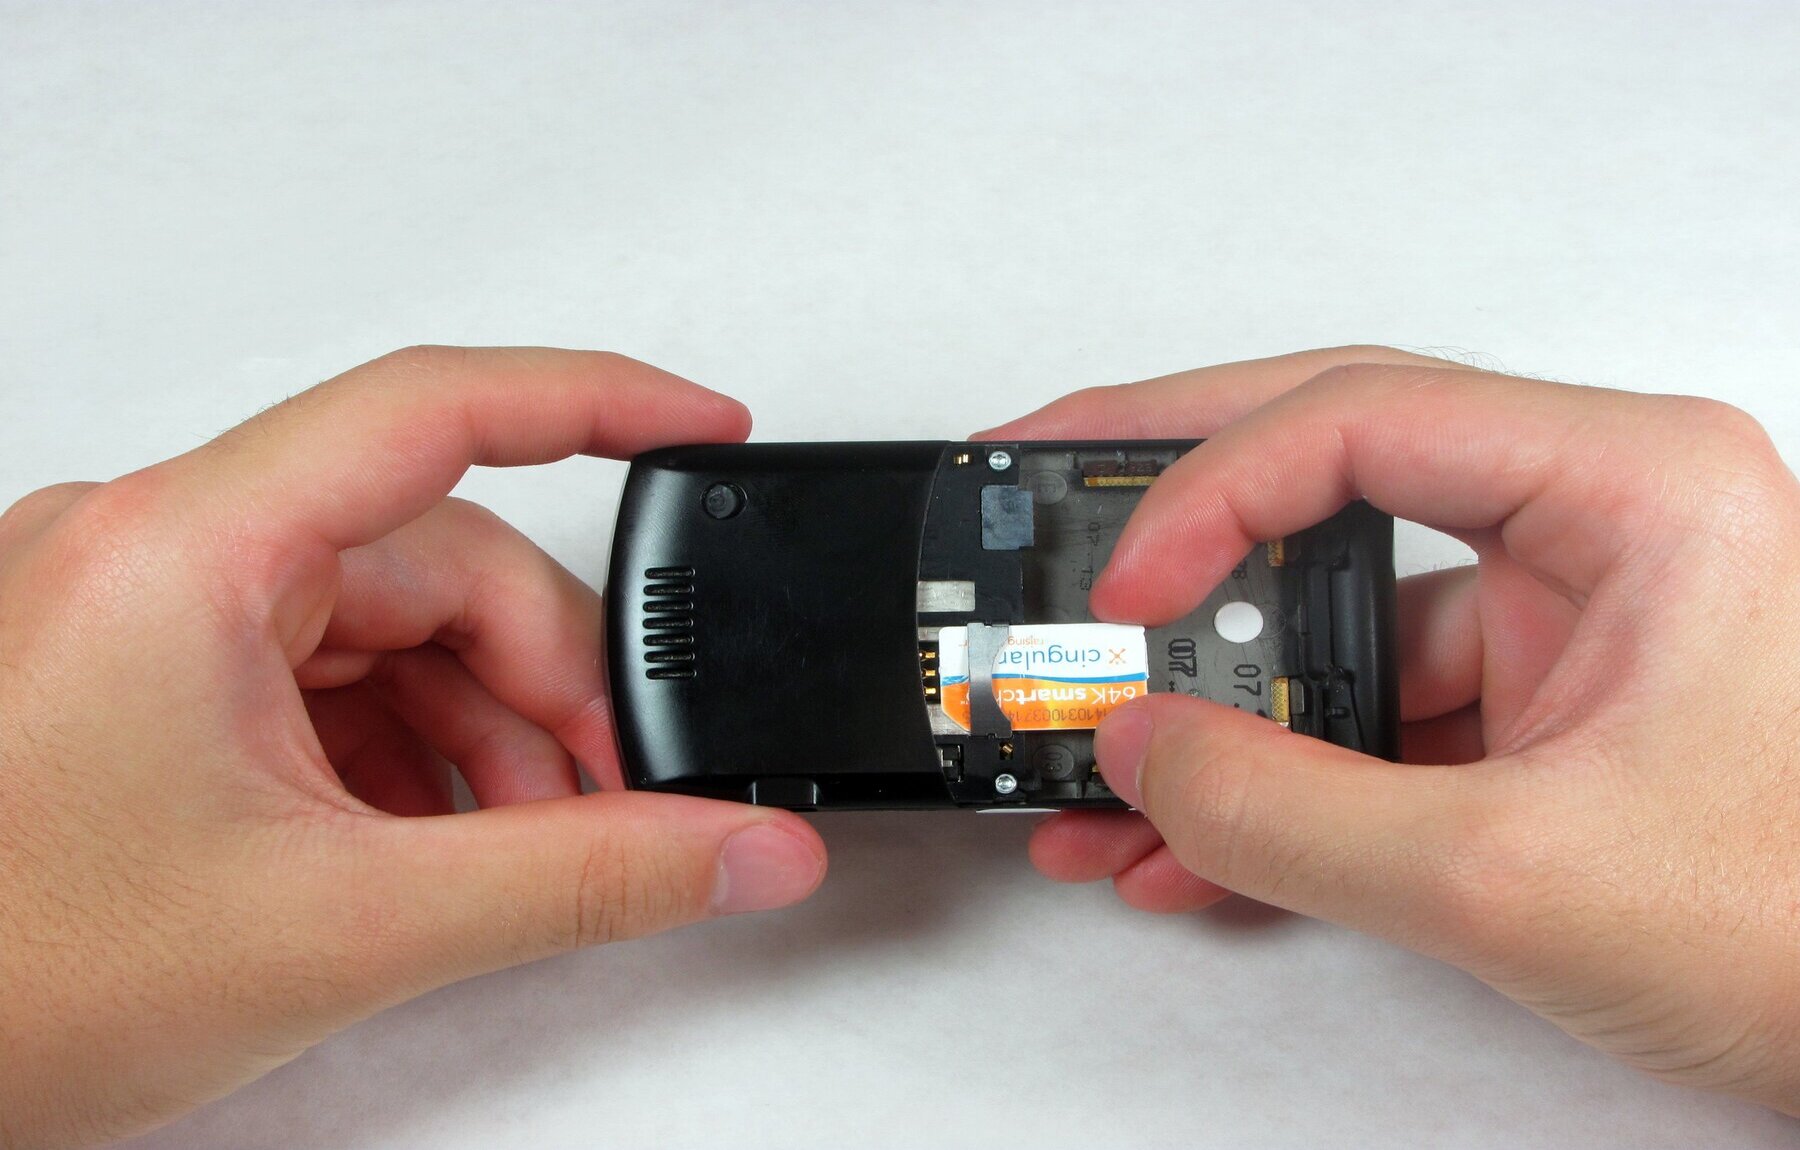
With the SIM card tray in hand, you can now access the SIM card, which is nestled within a designated slot on the tray. Take a moment to inspect the SIM card and ensure that it is securely in place, free from any visible damage or irregularities. This visual inspection will allow you to verify the condition of the SIM card before proceeding with its removal from the tray.
Ejecting the SIM card tray from your Motorola Razr marks a pivotal stage in the process of removing the SIM card from the device. By carefully and methodically guiding the tray out of the phone, you pave the way for the safe and proper extraction of the SIM card, setting the stage for the final step in the SIM card removal process.
With the SIM card tray successfully ejected and in your possession, you are now prepared to proceed to the next and final step, which involves removing the SIM card from the tray. This seamless transition from one step to the next ensures that you can carry out the SIM card removal process with confidence and precision, ultimately leading to the safe extraction of the SIM card from your Motorola Razr.
Step 4: Remove the SIM card
With the SIM card tray successfully ejected from your Motorola Razr and in your possession, the final step in the process of removing the SIM card entails carefully extracting the SIM card from the tray. This step is crucial in ensuring the safe and proper removal of the SIM card, allowing you to proceed with any necessary actions, such as replacing the SIM card or transferring it to another device.
To remove the SIM card from the tray, gently examine the designated slot where the SIM card is housed. The SIM card is typically secured within the tray by a small mechanism or frame, designed to hold it in place during normal usage. Using your fingertips, carefully maneuver the SIM card to release it from the slot, applying delicate pressure to ease it out of its position.
As you handle the SIM card, it's important to exercise caution and precision, ensuring that you avoid any abrupt movements or excessive force that could potentially damage the card. The SIM card is a delicate component that contains vital information and must be handled with care to prevent any damage or disruption to its functionality.
Once the SIM card has been gently removed from the tray, take a moment to inspect it closely. Check for any signs of damage, such as scratches or dents, and ensure that the metallic contacts on the card are clean and free from any debris. This visual inspection allows you to verify the condition of the SIM card, ensuring that it remains in optimal shape for future use.
If you intend to replace the SIM card with a new one, carefully store the removed SIM card in a safe location, such as a protective case or a designated SIM card holder. This will help prevent any loss or damage to the SIM card and ensure that it remains readily accessible for future use, should the need arise.
With the SIM card successfully removed from the tray and its condition verified, you have completed the process of removing the SIM card from your Motorola Razr. Whether you are replacing the SIM card, transferring it to another device, or performing any other necessary actions, the safe and proper removal of the SIM card sets the stage for seamless transitions and continued functionality of your device.
By following these steps with precision and care, you can effectively remove the SIM card from your Motorola Razr, allowing you to carry out any subsequent actions with confidence and ease. This marks the successful completion of the SIM card removal process, ensuring that you can proceed with your desired course of action, whether it involves replacing the SIM card, transferring it to another device, or any other related tasks.