
Choosing the Right Ring Light Stand
Choosing the Right Ring Light Stand
When it comes to setting up your ring light, choosing the right stand is crucial for achieving the perfect lighting setup. The stand not only supports the ring light but also plays a significant role in determining the overall stability and flexibility of your lighting arrangement. Here are some key factors to consider when selecting a ring light stand:
1. Height and Adjustability: Look for a stand that offers adjustable height settings to cater to various shooting scenarios. Whether you are capturing seated interviews or standing portraits, having the flexibility to adjust the height of the ring light can make a significant difference in achieving the desired lighting effect.
2. Stability and Durability: A stable and durable stand is essential for ensuring the safety of your equipment and the people around it. Consider the material and build quality of the stand to ensure it can support the weight of the ring light and any additional accessories you may attach to it.
3. Portability: If you intend to use the ring light in different locations or for on-the-go shoots, portability is a key factor to consider. Look for a stand that is lightweight and easy to transport without compromising on stability.
4. Compatibility: Ensure that the stand is compatible with your ring light model. Some stands may come with specific mounting options designed for certain ring light brands, so it's important to check for compatibility to avoid any compatibility issues.
5. Additional Features: Consider any additional features that may enhance the functionality of the stand, such as a tilting mechanism, swivel mount, or built-in power outlets for convenience.
When choosing the right ring light stand, it's essential to assess your specific needs and shooting requirements to make an informed decision. By considering factors such as height adjustability, stability, portability, compatibility, and additional features, you can select a stand that complements your ring light setup and facilitates a seamless lighting experience.
Remember, the stand forms the foundation of your ring light setup, so investing time in selecting the right one can significantly impact the quality and versatility of your lighting arrangement.
Assembling the Ring Light Stand
Assembling the ring light stand is a fundamental step in preparing your lighting setup for use. While the process may vary slightly depending on the specific model of the ring light and stand, the following general steps can guide you through the assembly process:
1. Unpack the Components: Start by unpacking the components of the ring light stand, including the stand itself, mounting brackets, screws, and any additional accessories that may come with it. Lay out all the parts in an organized manner to ensure nothing is missing.
2. Attach the Mounting Brackets: Depending on the design of the ring light stand, you may need to attach the mounting brackets to the stand’s top section. Secure the brackets using the provided screws, ensuring they are firmly in place to support the weight of the ring light.
3. Secure the Ring Light: Carefully place the ring light onto the mounting brackets, ensuring that it is centered and securely positioned. Some ring lights may feature a quick-release mechanism for easy attachment, while others may require manual fastening using screws or knobs.
4. Adjust the Height: If the stand offers height adjustability, set it to the desired position based on your shooting requirements. Whether you prefer a higher placement for full-body shots or a lower position for close-up portraits, adjusting the height is crucial for achieving the desired lighting effect.
5. Power Up the Ring Light: Once the ring light is securely mounted, connect it to a power source using the provided power cable. Depending on the model, you may also need to connect any additional control panels or accessories to activate the ring light.
6. Test the Stability: Before using the ring light for your photography or videography session, ensure that the stand is stable and the ring light is securely attached. Gently nudge the stand to check for any wobbling or instability, making any necessary adjustments to ensure a solid and safe setup.
By following these steps, you can effectively assemble your ring light stand, preparing it for immediate use in your creative projects. Proper assembly not only ensures the safety and stability of your lighting setup but also sets the stage for achieving professional-quality lighting in your photography and videography endeavors.
Adjusting the Height and Angle of the Ring Light
Once you have assembled your ring light stand, the next crucial step is to adjust the height and angle of the ring light to achieve the desired lighting effect for your photography or videography projects. Properly positioning the ring light can significantly impact the overall look and feel of your visuals. Here’s how you can effectively adjust the height and angle of the ring light:
1. Height Adjustment: Begin by assessing the shooting scenario and determining the ideal height for the ring light. If you are capturing full-body shots, consider positioning the ring light at a higher level to ensure even illumination across the subject. For close-up portraits or tabletop photography, a lower placement may be more suitable to create focused and flattering lighting.
2. Angle Alignment: Once you have set the height, it’s essential to align the angle of the ring light to complement the subject and achieve the desired lighting effect. Tilting the ring light slightly downward can create gentle, flattering illumination for facial features, while angling it upward may produce a more dramatic, shadow-enhancing effect.
3. Test the Lighting Effect: After adjusting the height and angle, take test shots or conduct a brief video recording to evaluate the lighting effect. Assess how the light interacts with the subject and the overall ambiance of the scene. Make any necessary adjustments to the height and angle based on the visual feedback you observe.
4. Consider Ambient Lighting: Take into account any ambient lighting present in the environment and how it interacts with the ring light. Adjust the height and angle to effectively balance the artificial and natural light sources, ensuring a harmonious and visually appealing result.
5. Fine-Tune for Different Scenarios: As you explore various shooting scenarios, such as portrait photography, product shots, or video content creation, remember to adapt the height and angle of the ring light accordingly. Each scenario may require nuanced adjustments to achieve the desired lighting effect.
By carefully adjusting the height and angle of the ring light, you can harness its full potential to enhance the visual impact of your creative projects. Whether you seek soft, diffused lighting for a beauty shoot or dramatic, shadow-casting effects for artistic portraits, the flexibility of the ring light stand allows you to tailor the lighting setup to your specific creative vision.
Securing Your Camera to the Ring Light Stand
When setting up your ring light stand for photography or videography, securing your camera to the stand is essential for achieving stable and professional-looking shots. Whether you are capturing portraits, product images, or video content, properly attaching your camera to the ring light stand ensures steady support and precise framing. Here’s how you can effectively secure your camera to the ring light stand:
1. Select a Compatible Mount: Begin by choosing a camera mount or bracket that is compatible with your specific camera model. Some ring light stands come with universal mounts, while others may require specialized adapters to accommodate different camera designs. Ensure that the mount securely fits your camera to prevent any wobbling or instability during use.
2. Positioning the Camera: Once you have the mount in place, carefully position your camera on the mount, ensuring that it is securely attached and aligned with the center of the ring light. Proper positioning is crucial for achieving balanced and well-composed shots, especially when utilizing the ring light for portrait photography or video content creation.
3. Adjusting the Camera Angle: Depending on the shooting scenario, you may need to adjust the angle of the camera to capture the desired framing and composition. Whether you are aiming for head-and-shoulder portraits or full-body shots, the flexibility of the ring light stand allows you to fine-tune the camera’s angle for optimal results.
4. Securing the Camera Mount: Once the camera is positioned and angled appropriately, securely fasten the camera mount to the ring light stand, ensuring that it is firmly in place. Double-check the stability of the camera mount to prevent any potential shifting or movement during the shooting process.
5. Testing Stability and Alignment: Before commencing your photography or video session, test the stability and alignment of the camera on the ring light stand. Gently nudge the camera to ensure it remains steady and well-supported. Additionally, verify that the camera’s alignment with the ring light is optimal for achieving the intended lighting effect.
By effectively securing your camera to the ring light stand, you can confidently focus on capturing stunning visuals without concerns about stability or positioning. Whether you are conducting professional photo shoots or creating engaging video content, the seamless integration of the camera with the ring light stand enhances the overall quality and precision of your creative endeavors.
Adding Accessories to the Ring Light Stand
Enhancing your ring light setup with carefully selected accessories can elevate the versatility and functionality of your lighting arrangement, catering to a diverse range of creative needs. Whether you are aiming to modify the light output, streamline your workflow, or expand your creative possibilities, incorporating accessories into your ring light stand can significantly enhance your photography and videography projects. Here’s how you can effectively add accessories to the ring light stand:
1. Diffusion and Color Filters: Attach diffusion and color filters to the ring light to modify the quality and tone of the light output. Diffusion filters help create soft, flattering illumination for portrait photography, while color filters allow you to introduce creative color effects or correct color temperature to suit different shooting conditions.
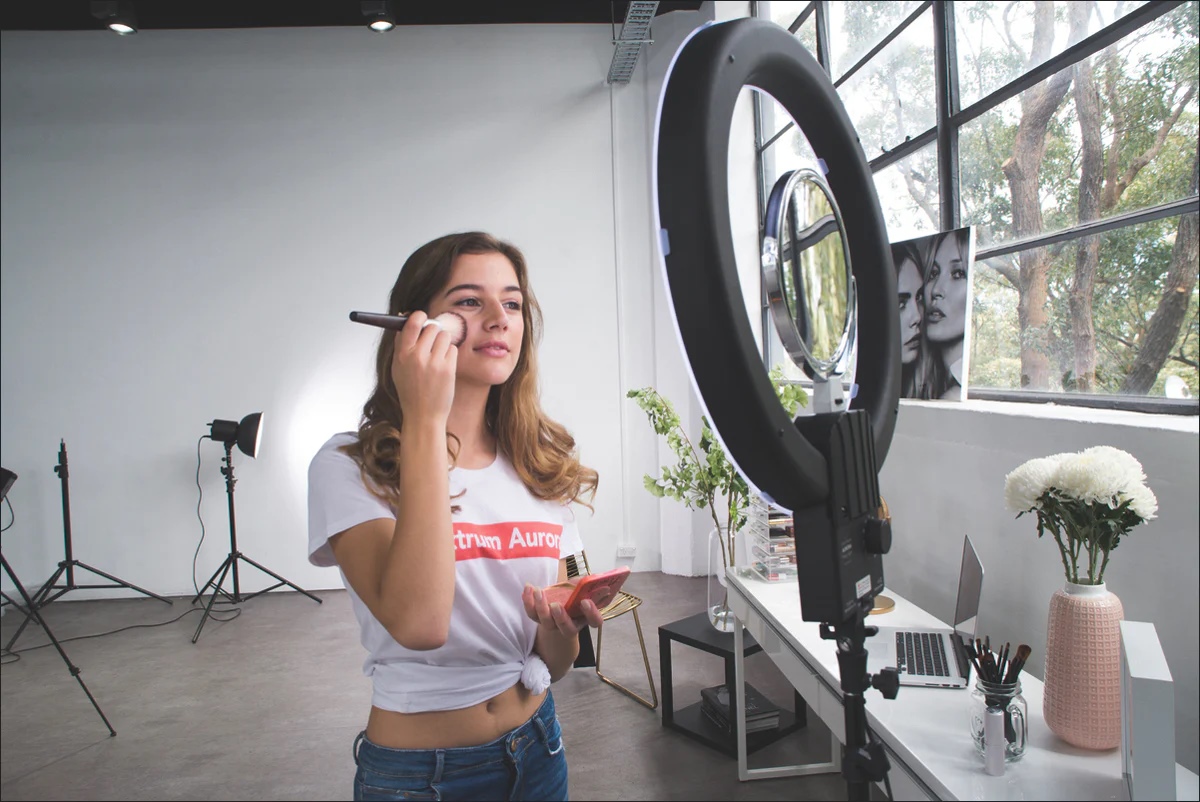
2. Smartphone Holders: Integrate a smartphone holder onto the ring light stand to facilitate hands-free live streaming, video calls, or content creation using a mobile device. This accessory enables seamless integration of smartphones into your lighting setup, expanding your capabilities for social media content and live broadcasting.
3. Remote Shutter Releases: Incorporate remote shutter releases or wireless camera triggers to the ring light stand, allowing for convenient control of your camera’s shutter without physically touching the device. This accessory is particularly useful for self-portraits, group shots, and long-exposure photography, enhancing your creative flexibility and shooting convenience.
4. Articulating Arms and Mounts: Utilize articulating arms and mounts to attach additional lighting sources, such as compact LED panels or accent lights, to the ring light stand. This setup enables you to create custom lighting configurations, add fill or accent lighting, and experiment with multi-source illumination for dynamic visual effects.
5. Mounting Adapters for Accessories: Explore mounting adapters and brackets designed to accommodate various accessories, such as microphones, action cameras, or compact monitors, onto the ring light stand. By integrating these additional tools, you can expand your creative toolkit and seamlessly incorporate supplementary devices into your production setup.
By thoughtfully adding accessories to the ring light stand, you can customize your lighting setup to align with your specific creative vision and technical requirements. Whether you seek to refine the quality of light, streamline your workflow, or expand your creative possibilities, the integration of accessories contributes to a versatile and tailored lighting solution that enhances the overall impact of your photography and videography endeavors.