
Assessing the Battery Life of Your Apple TV Remote
As a dedicated Apple TV user, ensuring the optimal performance of your Apple TV remote is essential for an uninterrupted entertainment experience. The first step in reviving your Apple TV remote is to assess the battery life. A dwindling battery can lead to unresponsive buttons, delayed responses, or even complete malfunction of the remote. Here’s how to determine if your Apple TV remote’s battery needs replacement:
- Check the Indicator Light: When you press a button on your Apple TV remote, observe the indicator light. If it flickers or fails to illuminate, it’s a clear sign that the battery is running low and needs to be replaced.
- Unresponsive Buttons: If you notice that some buttons on the remote are becoming unresponsive or require multiple presses to function, it’s likely that the battery is losing its charge.
- Intermittent Functionality: Does the remote work intermittently, responding unpredictably to button presses? This erratic behavior often indicates a weakening battery.
- Duration of Use: Consider the duration for which you’ve been using the current battery. If it has been over a year or more, it’s advisable to proactively replace the battery to avoid sudden failure.
Regularly assessing the battery life of your Apple TV remote is crucial for uninterrupted usage. By recognizing the signs of a fading battery, you can take proactive steps to maintain the seamless functionality of your Apple TV remote.
Purchasing a Replacement Battery for Your Apple TV Remote
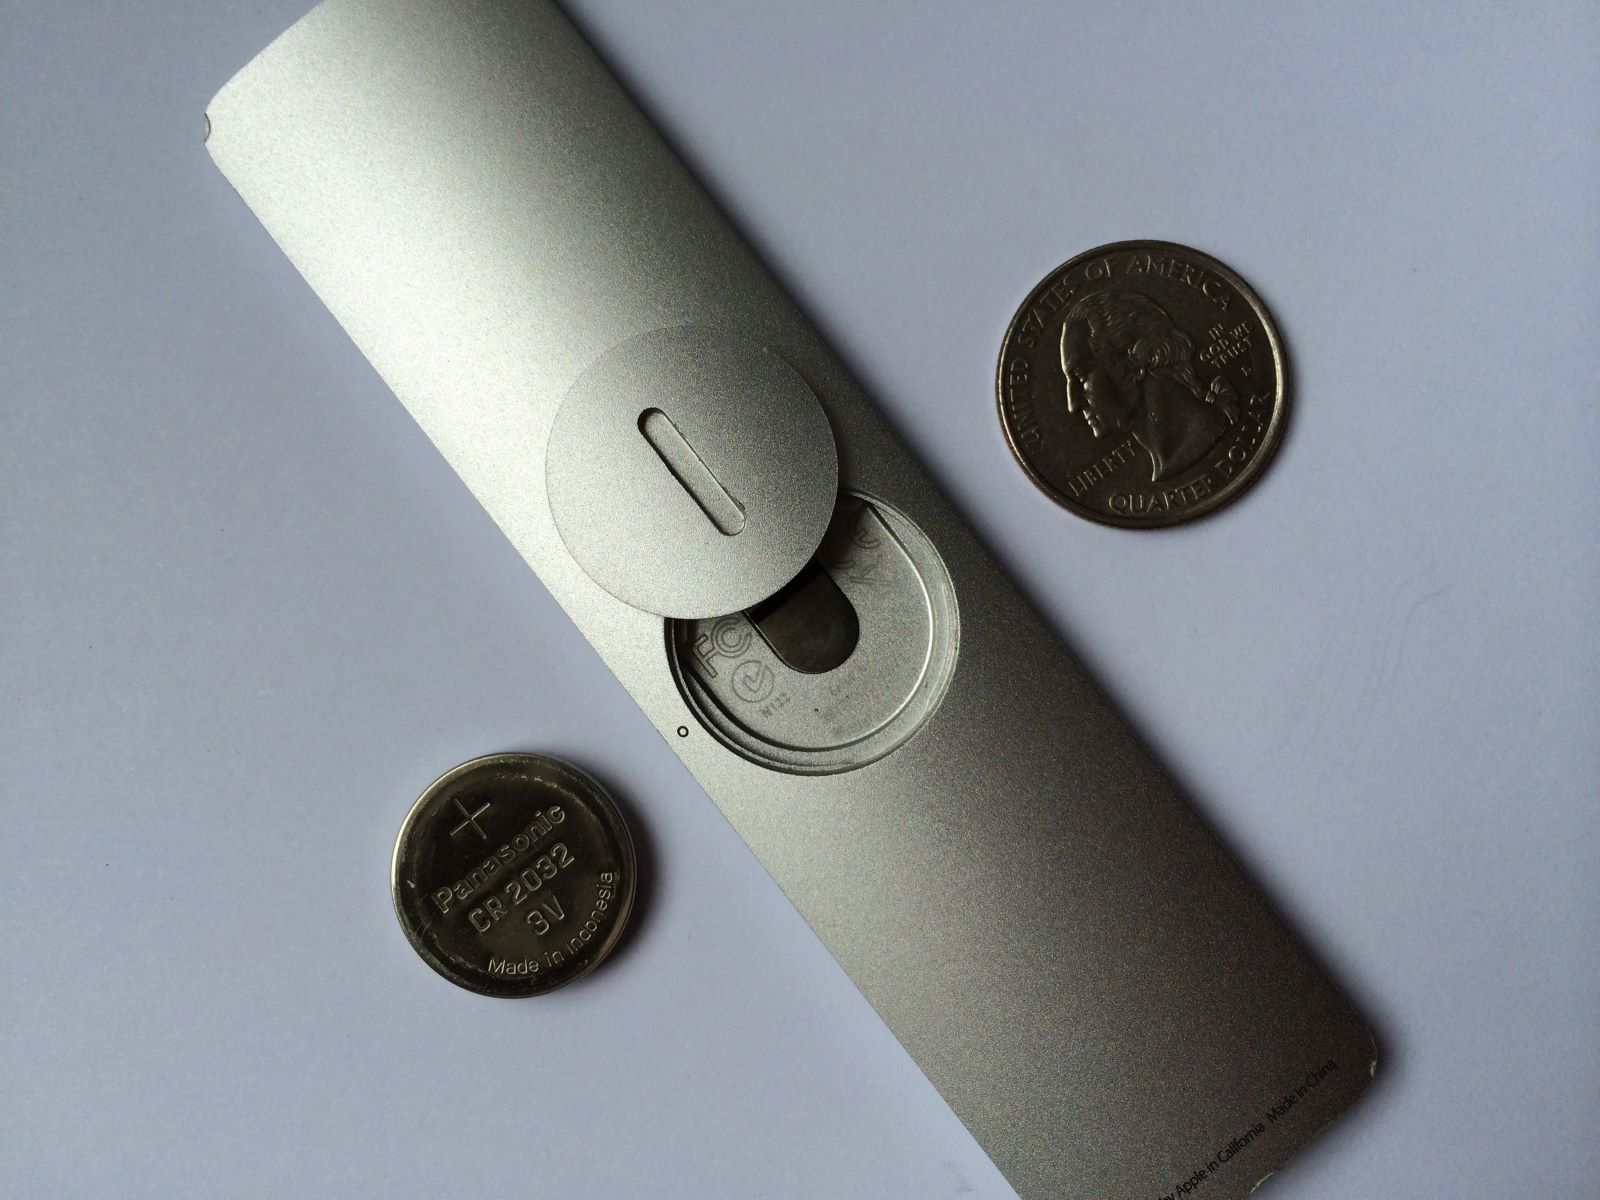
When it comes to reviving your Apple TV remote, purchasing the right replacement battery is paramount. The Apple TV remote typically uses a CR2032 lithium coin battery, which is widely available and can be found at most electronics or hardware stores. Here’s what you need to know when purchasing a replacement battery:
- Authenticity: To ensure optimal performance and compatibility with your Apple TV remote, it’s recommended to purchase the replacement battery from a reputable source. Authentic Apple-certified batteries or high-quality alternatives are the best choices to guarantee reliability.
- Battery Type: The CR2032 battery is a standard coin cell battery widely used in small electronic devices. When purchasing a replacement, verify that it is indeed a CR2032 lithium battery to ensure compatibility with your Apple TV remote.
- Quality and Longevity: Opt for batteries from trusted brands known for their quality and longevity. While generic brands may offer cost savings, they may not provide the same level of performance and longevity as reputable brands.
- Convenience: Consider purchasing multiple batteries to have spares on hand. This ensures that you won’t experience any interruptions in the functionality of your Apple TV remote due to a depleted battery.
By investing in a high-quality replacement battery, you can prolong the life of your Apple TV remote and ensure consistent performance. Additionally, keeping spare batteries on hand eliminates the inconvenience of a sudden battery failure, allowing you to enjoy uninterrupted entertainment with your Apple TV.
Opening the Apple TV Remote to Access the Battery Compartment
Before replacing the battery in your Apple TV remote, it’s essential to access the battery compartment. The process involves carefully opening the remote to reveal the internal components. Here’s a step-by-step guide to opening the Apple TV remote:
- Gather the Necessary Tools: To open the Apple TV remote, you will need a small, flat-head screwdriver or a similar prying tool. Ensure that the tool’s tip is thin enough to fit into the seam between the two halves of the remote.
- Identify the Seam: Examine the perimeter of the remote to locate the seam where the two halves of the casing meet. This is where you will insert the screwdriver or prying tool to gently separate the two halves.
- Insert the Tool: Carefully insert the tip of the screwdriver or prying tool into the seam, applying gentle pressure to pry the two halves apart. Start at one corner and work your way around the remote, gradually separating the casing. Take your time to avoid damaging the remote or causing the casing to crack.
- Work Around the Remote: As you progress along the seam, you will hear the faint clicks of the plastic tabs disengaging. Continue separating the casing until the two halves are completely detached. Be mindful of any ribbon cables or delicate components inside the remote as you open it.
- Inspect the Interior: Once the remote is open, take a moment to inspect the interior for any dust or debris that may have accumulated. This is an opportune time to gently clean the internal components if necessary.
By following these steps, you can safely open the Apple TV remote to access the battery compartment. Proceed with caution and patience to avoid causing any damage to the remote during the opening process.
Removing the Old Battery from Your Apple TV Remote
Once you have successfully accessed the battery compartment of your Apple TV remote, the next step is to remove the old battery. It’s important to handle this process with care to avoid damaging the remote or the battery. Here’s a detailed guide on removing the old battery:
- Identify the Battery: Locate the battery inside the compartment. The CR2032 lithium coin battery is typically secured in a holder or slot within the remote. Take note of its orientation, ensuring that you can insert the new battery correctly later.
- Use Caution: Handle the battery with care, especially if it’s nearing the end of its life. Avoid using excessive force or sharp objects to pry the battery out, as this can lead to damage or injury.
- Remove the Battery: Depending on the design of the battery compartment, you may need to use your fingers or a small, non-metallic tool to gently push the battery out of its holder. Apply even pressure to release the battery without bending or damaging it.
- Dispose of the Old Battery Properly: Once the old battery is removed, it’s important to dispose of it responsibly. Lithium batteries should be recycled in accordance with local regulations to minimize environmental impact. Many electronic retailers and recycling centers accept used batteries for proper disposal.
By following these steps, you can safely remove the old battery from your Apple TV remote without causing any damage to the device or the battery itself. Proper handling and disposal of the old battery contribute to a seamless and environmentally conscious battery replacement process.
Inserting the New Battery into Your Apple TV Remote
With the old battery removed, the next crucial step in reviving your Apple TV remote is to insert the new battery. Proper installation ensures optimal functionality and longevity for your remote. Follow these steps to seamlessly insert the new battery:
- Verify the Battery Orientation: Before inserting the new battery, ensure that you have the correct orientation. The positive (+) and negative (-) symbols on the battery should align with the corresponding markings inside the battery compartment.
- Gently Place the Battery: Carefully position the new CR2032 lithium coin battery into the designated slot or holder within the remote. Apply gentle pressure to ensure that the battery sits securely in place without forcing it into position.
- Ensure a Snug Fit: Confirm that the new battery fits snugly and securely within the compartment. It should not be loose or rattling, as this can lead to intermittent connectivity issues or premature battery failure.
- Close the Battery Compartment: If the battery compartment features a cover or lid, carefully close and secure it to protect the battery. Ensure that the cover snaps into place without excessive force, maintaining the integrity of the remote’s casing.
By following these steps, you can successfully insert the new battery into your Apple TV remote, setting the stage for enhanced functionality and prolonged usage. Attention to detail during the installation process ensures that the new battery operates seamlessly within the remote.
Closing the Battery Compartment of Your Apple TV Remote
Once the new battery is securely in place, the final step in the battery replacement process for your Apple TV remote is to close the battery compartment. Properly sealing the compartment ensures the safety of the battery and the integrity of the remote. Here’s a detailed guide on closing the battery compartment:
- Align the Components: If the battery compartment features a cover or lid, ensure that it is correctly aligned with the remote’s casing. The edges should fit seamlessly together without any gaps or misalignment.
- Gently Secure the Cover: Apply gentle pressure to the cover or lid, securing it in place over the battery compartment. Take care to avoid excessive force, as this can damage the casing or the cover itself.
- Listen for Clicks: As you press the cover into place, listen for the reassuring clicks that indicate the cover’s tabs are locking securely into the remote’s casing. This ensures a snug and secure closure.
- Verify the Closure: After securing the cover, visually inspect the battery compartment to confirm that it is fully closed. The cover should sit flush with the remote’s casing, with no gaps or unevenness.
By following these steps, you can confidently close the battery compartment of your Apple TV remote, safeguarding the new battery and ensuring the seamless operation of the remote. Attention to detail during the closure process contributes to the overall longevity and reliability of your Apple TV remote.
Testing the New Battery in Your Apple TV Remote
With the new battery securely in place and the battery compartment closed, it’s time to test the functionality of your Apple TV remote. Ensuring that the new battery is operating effectively is the final step in the battery replacement process. Here’s how to test the new battery in your Apple TV remote:
- Press Buttons to Verify Responsiveness: Begin by pressing various buttons on the remote to test their responsiveness. Check for consistent feedback and smooth operation, ensuring that each button functions as expected.
- Observe the Indicator Light: Pay attention to the indicator light on the remote when buttons are pressed. The light should illuminate promptly with each button press, indicating that the new battery is providing sufficient power.
- Test from Various Distances: Move to different locations within the room and test the remote from varying distances to confirm that the signals are transmitted reliably. A well-functioning battery ensures consistent performance across different distances.
- Verify Signal Range: Test the remote’s functionality from different angles and orientations relative to the Apple TV to confirm that the signals are reaching the device effectively. A reliable battery contributes to consistent signal transmission.
By following these steps, you can effectively test the new battery in your Apple TV remote, ensuring that it operates seamlessly and facilitates uninterrupted control of your Apple TV. A successfully replaced battery revitalizes the remote, allowing you to enjoy a responsive and reliable entertainment experience.