
Choosing the Right Paracord
When embarking on a paracord crafting project, selecting the appropriate type of paracord is crucial. With a multitude of options available, it's essential to understand the variations and their respective applications to ensure the success of your project. Here's a comprehensive guide to help you make an informed decision when choosing the right paracord for your crafting endeavors.
Understanding Paracord Types
1. Type III 550 Paracord
This type of paracord, also known as 550 cord, is one of the most popular choices due to its versatility and strength. Comprising seven inner strands and a durable outer sheath, it can withstand a minimum breaking strength of 550 pounds, hence the name. Type III 550 paracord is ideal for crafting neck lanyards as it offers both durability and flexibility.
2. Type II 425 Paracord
Slightly thinner than the Type III 550 paracord, the Type II 425 paracord is suitable for projects requiring a lighter and more flexible material. It consists of four inner strands and is designed for applications that don't demand the same level of strength as the Type III 550 paracord. If you're crafting a decorative or lightweight neck lanyard, the Type II 425 paracord could be the perfect choice.
3. Type IV 750 Paracord
For projects that necessitate a higher tensile strength, the Type IV 750 paracord is an excellent option. With eleven inner strands and a robust outer sheath, this paracord boasts a minimum breaking strength of 750 pounds. If you're crafting a heavy-duty neck lanyard or a project that requires enhanced durability, the Type IV 750 paracord is the way to go.
Color and Aesthetics
In addition to considering the type of paracord, it's important to contemplate the color and design elements. With a wide array of colors and patterns available, you can personalize your neck lanyard to suit your style and preferences. Whether you opt for a vibrant, eye-catching hue or a more subdued, classic tone, the color choice can significantly impact the overall aesthetic appeal of your crafted neck lanyard.
Environmental Considerations
When selecting paracord, it's essential to factor in the intended usage environment. If your neck lanyard will be exposed to outdoor elements or harsh conditions, choosing a paracord with UV resistance and water repellent properties is advisable. This ensures that your crafted neck lanyard remains resilient and visually appealing, even in challenging environments.
By carefully evaluating the type, color, and environmental suitability of paracord, you can make an informed decision that aligns with your crafting objectives. With the right paracord at your disposal, you're ready to embark on the next phase of crafting a unique and personalized neck lanyard.
Understanding Basic Paracord Knots and Weaves
Mastering basic paracord knots and weaves is essential for creating a sturdy and visually appealing neck lanyard. By familiarizing yourself with fundamental techniques, you can elevate the craftsmanship of your project and imbue it with a touch of artistry. Here’s a comprehensive overview of some essential paracord knots and weaves to guide you through the crafting process.
Cobra Knot (Solomon’s Knot)
The Cobra knot, also known as the Solomon’s knot, is a foundational weaving technique that forms the basis for many paracord projects. By mastering this knot, you can create a robust and visually striking foundation for your neck lanyard. The Cobra knot entails interlacing the paracord strands in a repetitive pattern, resulting in a tightly woven and durable structure.
King Cobra Knot
Building upon the foundation of the Cobra knot, the King Cobra knot adds an additional layer of intricacy and strength to the weave. This advanced technique involves weaving a secondary layer of Cobra knots over the initial weave, creating a thicker and more substantial design. The King Cobra knot is ideal for crafting neck lanyards that require heightened durability and a distinctive appearance.
Fishtail Weave
The fishtail weave, characterized by its elegant and intricate pattern, adds a touch of sophistication to paracord projects. This weaving technique involves intertwining the strands in a specific manner, resulting in a visually captivating and sturdy weave. By incorporating the fishtail weave into your neck lanyard, you can infuse it with a sense of artistry and intricacy.
Square Knot
The square knot, a fundamental knotting technique, offers versatility and structural integrity. By mastering the square knot, you can create a stable and visually appealing foundation for your neck lanyard. This classic knotting method is renowned for its simplicity and reliability, making it an essential skill for paracord crafting enthusiasts.
By acquainting yourself with these basic paracord knots and weaves, you can elevate the craftsmanship of your neck lanyard and imbue it with a unique sense of artistry and durability. These fundamental techniques serve as the building blocks for creating intricate and visually captivating designs, allowing you to embark on your crafting journey with confidence and creativity.
Preparing the Paracord for Crafting
Prior to delving into the intricate process of crafting a neck lanyard with paracord, it’s essential to prepare the paracord to ensure optimal usability and visual appeal. Preparing the paracord involves several crucial steps that lay the groundwork for a successful crafting endeavor. Let’s explore the essential aspects of preparing the paracord for your neck lanyard project.
Measuring and Cutting the Paracord
The initial step in preparing the paracord involves accurately measuring and cutting the strands to the desired length. Whether you’re crafting a standard-length neck lanyard or customizing the dimensions to suit your preferences, precise measurements are fundamental. Utilizing a reliable measuring tool, such as a ruler or tape measure, ensures that the paracord strands are cut to the exact specifications, setting the stage for a well-proportioned and visually appealing neck lanyard.
Sealing the Paracord Ends
After cutting the paracord to the required length, it’s imperative to seal the ends to prevent fraying and maintain the integrity of the strands. This can be achieved using a variety of methods, such as employing a flame to carefully melt the ends or utilizing specialized paracord end seals. By sealing the ends of the paracord, you safeguard against unravelling and ensure a professional and polished finish for your neck lanyard.
Untwisting and Straightening the Paracord
Paracord strands often exhibit a degree of natural twisting and coiling, which can detract from the overall appearance and structural integrity of the crafted lanyard. Prior to commencing the weaving and knotting process, it’s beneficial to untwist and straighten the paracord strands. This simple yet crucial step enhances the pliability and visual appeal of the paracord, facilitating a seamless crafting experience and yielding a refined end result.
Organizing the Paracord Strands
Organizing the paracord strands in a systematic and orderly manner streamlines the crafting process and minimizes potential entanglements or complications. Whether you’re working with a single color or incorporating multiple hues into your neck lanyard design, arranging the paracord strands methodically fosters efficiency and precision throughout the crafting journey.
By meticulously preparing the paracord for your crafting endeavor, you establish a solid foundation for creating a visually stunning and durable neck lanyard. These preparatory steps not only enhance the practicality of the paracord but also contribute to the overall aesthetic appeal and craftsmanship of the finished product.
Crafting the Base of the Neck Lanyard
As you embark on the creative journey of crafting a paracord neck lanyard, the initial phase involves constructing the sturdy and visually appealing base. This foundational element serves as the backbone of the lanyard, providing structural integrity and a canvas for intricate embellishments. Let’s delve into the essential steps for crafting the base of the neck lanyard, laying the groundwork for a captivating and durable end product.
Initiating the Cobra Knot Weave
The Cobra knot weave, also known as the Solomon’s knot, forms the fundamental building block of the neck lanyard. To initiate the weave, carefully align the prepared paracord strands and begin interlacing them in a repetitive pattern, creating a tightly woven and resilient foundation. By mastering the Cobra knot weave, you establish a robust base that sets the stage for further embellishments and decorative elements.
Ensuring Consistent Tension and Alignment
As you progress with the Cobra knot weave, maintaining consistent tension and alignment of the paracord strands is paramount. This meticulous attention to detail ensures that the base of the neck lanyard exhibits uniformity and structural integrity, laying the groundwork for a visually appealing and well-crafted foundation. Consistent tension and alignment contribute to the overall durability and aesthetic appeal of the lanyard base.
Incorporating Additional Weaving Techniques
While the Cobra knot weave forms the core of the lanyard base, incorporating additional weaving techniques, such as the King Cobra knot or fishtail weave, can enhance the intricacy and strength of the base. These advanced weaving methods add layers of complexity and durability, elevating the craftsmanship of the neck lanyard and imbuing it with a distinctive and refined appearance.
Customizing the Length and Proportions
Throughout the crafting process, customizing the length and proportions of the lanyard base to align with your preferences is key. Whether you opt for a standard length or seek to personalize the dimensions, this customization ensures that the neck lanyard perfectly complements your individual style and functional requirements. Adhering to precise measurements and proportions results in a well-balanced and visually appealing base for the neck lanyard.
By meticulously crafting the base of the neck lanyard, you establish a resilient and visually captivating foundation that forms the cornerstone of the crafting endeavor. This meticulously constructed base paves the way for the addition of decorative knots, beads, and finishing touches, culminating in a personalized and durable paracord neck lanyard that reflects your unique style and craftsmanship.
Adding Decorative Knots and Beads
As the foundational base of the neck lanyard takes shape, the opportunity arises to infuse the crafting process with creative flair and personalization by incorporating decorative knots and beads. These embellishments not only enhance the aesthetic appeal of the lanyard but also contribute to its individuality and character. Let’s explore the art of adding decorative knots and beads to elevate the visual allure and craftsmanship of the paracord neck lanyard.
Embracing Decorative Knotting Techniques
Integrating decorative knots, such as the snake knot or lanyard knot, introduces an element of intricacy and artistry to the neck lanyard. These knots not only serve as visually captivating embellishments but also contribute to the overall structural integrity of the lanyard. By mastering decorative knotting techniques, you can impart a touch of sophistication and uniqueness to your crafted neck lanyard.
Selecting and Incorporating Beads
Choosing the right beads to adorn the neck lanyard offers an opportunity for personal expression and customization. Whether opting for vibrant and eye-catching beads or subtle and elegant ones, the selection process allows you to align the lanyard’s aesthetic with your individual style. Carefully incorporating beads into the weave adds a tactile and visual dimension, transforming the lanyard into a personalized and visually captivating accessory.
Balancing Symmetry and Proportion
As you add decorative knots and beads, maintaining symmetry and proportion is essential for achieving a harmonious and visually appealing result. Careful consideration of the placement and spacing of decorative elements ensures that the neck lanyard exudes a balanced and refined aesthetic. By striking a harmonious equilibrium, the decorative knots and beads complement the foundational weave, elevating the lanyard’s overall craftsmanship.
Infusing Personalized Touches
Infusing the crafting process with personalized touches, such as incorporating initials or meaningful symbols through decorative knots or beads, adds a sentimental and individualized dimension to the neck lanyard. These personalized elements imbue the lanyard with a unique narrative, making it not only a functional accessory but also a meaningful keepsake or gift that resonates with personal significance.
By skillfully integrating decorative knots and beads into the crafting process, you transform the neck lanyard into a bespoke and visually captivating accessory that reflects your craftsmanship and personal style. These embellishments not only enhance the lanyard’s aesthetic appeal but also infuse it with a sense of artistry and individuality, elevating it from a functional item to a personalized and meaningful creation.
Finishing and Securing the Neck Lanyard
As the intricate craftsmanship of the paracord neck lanyard nears completion, the final phase involves meticulously finishing and securing the lanyard to ensure both durability and aesthetic appeal. This crucial stage not only enhances the overall presentation of the lanyard but also reinforces its structural integrity, culminating in a meticulously crafted and resilient accessory. Let’s explore the essential steps for finishing and securing the neck lanyard, elevating it to a refined and enduring creation.
Trimming Excess Paracord
Upon completing the weaving and knotting process, carefully trimming any excess paracord ensures a polished and tidy appearance for the neck lanyard. Precision in trimming is paramount, as it contributes to the lanyard’s overall aesthetic and prevents any potential snagging or unraveling. By meticulously trimming the paracord, you achieve a clean and professional finish, setting the stage for the final securing steps.
Securing the End Knots
Securing the end knots, such as the concluding Cobra knot or lanyard knot, is essential for fortifying the lanyard’s structure and preventing unraveling. This step involves meticulously tightening and fastening the end knots to ensure their resilience and longevity. By securing the end knots with precision and care, you bolster the durability of the neck lanyard, safeguarding against wear and tear during everyday use.
Applying Heat Shrink Tubing (Optional)
For added reinforcement and a professional finish, applying heat shrink tubing to the end knots and trimmed paracord ends can elevate the lanyard’s durability and visual appeal. This optional step involves carefully heating the tubing to create a snug and protective seal around the knots and ends, enhancing the lanyard’s resilience and refined presentation. Heat shrink tubing serves as a practical and aesthetic enhancement, ensuring the longevity and professional finish of the neck lanyard.
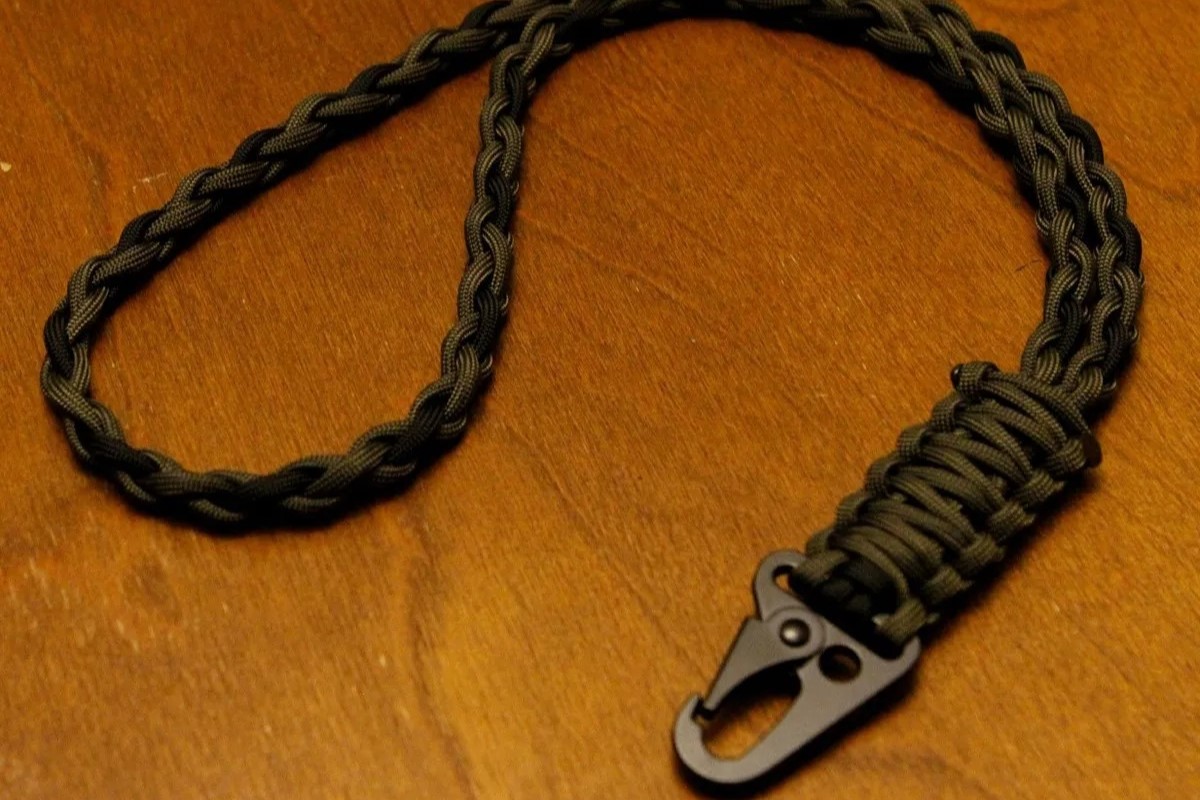
Attaching the Lanyard Clasp
Attaching the lanyard clasp, such as a swivel hook or carabiner, marks the final step in completing the neck lanyard. This pivotal component not only facilitates the lanyard’s functionality but also contributes to its overall aesthetic and usability. Ensuring a secure and reliable attachment of the clasp to the lanyard reinforces its practicality and marks the culmination of the crafting process.
By meticulously executing the finishing and securing steps, you transform the paracord neck lanyard into a meticulously crafted, durable, and visually appealing accessory. These essential measures not only contribute to the lanyard’s structural integrity and longevity but also elevate its aesthetic allure, resulting in a refined and enduring creation that reflects your dedication to craftsmanship and attention to detail.