
Prerequisites for Redoing the First Oculus Rift Tutorial
Before diving into the process of redoing the first Oculus Rift tutorial, it’s important to ensure that you have a few prerequisites in place. These prerequisites will help you start fresh and have a smooth experience throughout the tutorial. Here are the essential things you’ll need:
1. Computer specifications: Ensure that your computer meets the minimum system requirements for using the Oculus Rift. These requirements typically include a powerful processor, a sufficient amount of RAM, and a compatible graphics card. Be sure to check the official Oculus website for the specific requirements.
2. Stable internet connection: Make sure you have a reliable and stable internet connection. This is crucial for downloading and reinstalling the Oculus app, as well as for accessing any updates that might be required.
3. Oculus Rift headset and sensors: Of course, you will need the Oculus Rift headset and the accompanying sensors. Ensure that they are properly connected and functioning before proceeding with the tutorial.
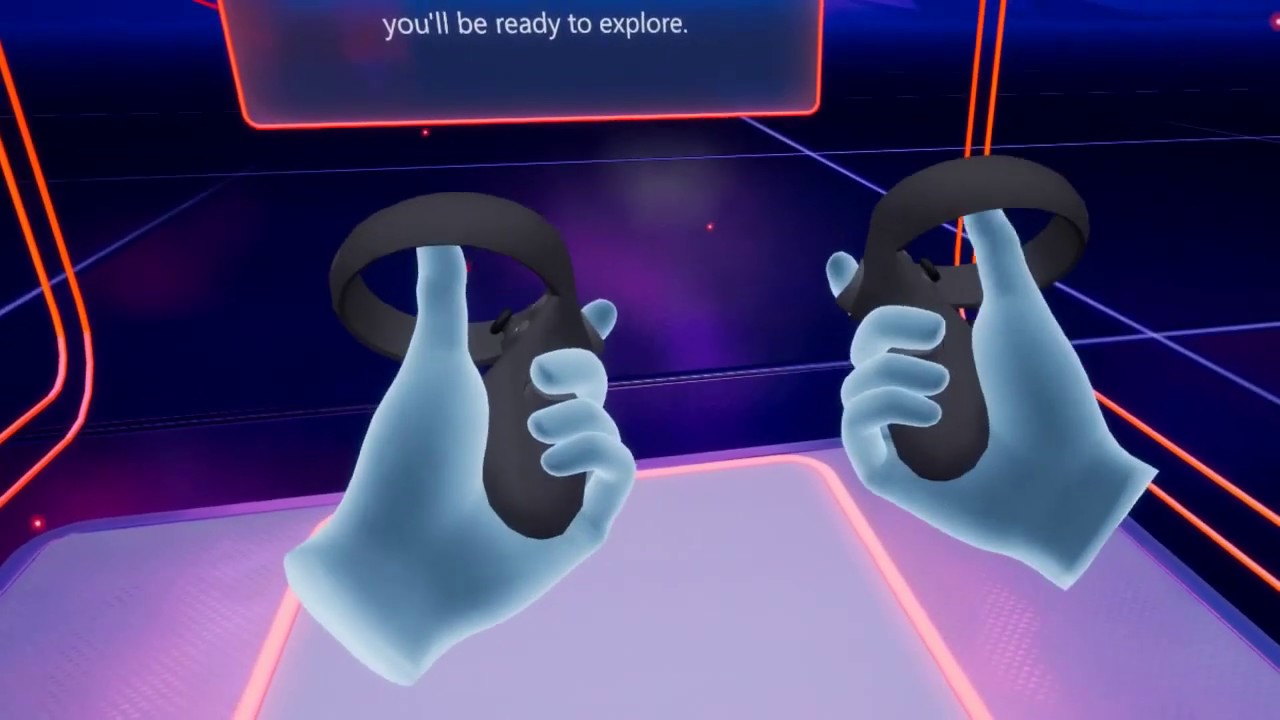
4. Knowledge of basic controls: Familiarize yourself with the basic controls of the Oculus Rift, such as the buttons on the headset and the controllers. Understanding these controls will help you navigate through the tutorial more effectively.
By fulfilling these prerequisites, you’ll have a solid foundation for redoing the first Oculus Rift tutorial. With everything in place, you’ll be ready to embark on a truly immersive virtual reality experience!
Step 1: Resetting the Oculus Rift
Resetting the Oculus Rift is the first step in redoing the first tutorial. This process ensures that all previous settings and configurations are cleared, allowing you to start fresh. Follow these steps to reset your Oculus Rift:
- Make sure your Oculus Rift is connected to your computer and turned on.
- Open the Oculus app on your computer. If you don’t have the app installed, you can download it from the official Oculus website and follow the installation instructions.
- Click on the “Settings” option located at the lower-right corner of the app window.
- In the Settings menu, click on the “Devices” tab.
- Under the “Devices” tab, select your Oculus Rift headset.
- Scroll down until you see the “More Settings” section.
- Click on the “Reset” button.
- A confirmation dialog will appear. Click on “Reset” again to confirm the reset process.
Once you have completed these steps, your Oculus Rift will go through a reset process. This may take a few minutes, so be patient. The headset will turn off and then restart with the default settings.
Resetting the Oculus Rift ensures that any issues or conflicts that may have been affecting the tutorial are resolved. It gives you a clean slate to start the tutorial anew, ensuring a seamless and optimized experience.
Step 2: Clearing Oculus Rift Data
To further prepare your Oculus Rift for redoing the first tutorial, it may be necessary to clear any residual data that could potentially affect the performance or functionality of the headset. Follow these steps to clear Oculus Rift data:
- Ensure that your Oculus Rift is connected to your computer and switched on.
- Launch the Oculus app on your computer.
- In the Oculus app, navigate to the “Settings” menu by clicking on the gear icon located at the lower-right corner of the app window.
- Under the “Settings” menu, select the “General” tab.
- Scroll down until you find the “Delete My Data” section.
- Click on the “Delete…” button.
- A confirmation dialog will appear, warning you about the consequences of deleting your data. Read the message carefully.
- If you understand the implications and want to proceed, click on the “Delete” button to clear your Oculus Rift data.
- Wait patiently while the data deletion process completes.
This process will clear your Oculus Rift data, including game progress, saved settings, and any other stored information. It essentially resets your Oculus Rift to its factory state, ensuring a fresh start for the first tutorial.
Clearing Oculus Rift data can help eliminate any potential conflicts or issues that may have been affecting the tutorial. By starting with a clean slate, you’ll have a better chance of experiencing the tutorial as intended, without any previous data interfering with your progress.
Step 3: Re-Installing the Oculus App
If you’re still experiencing issues with the first tutorial after resetting and clearing the data on your Oculus Rift, the next step is to re-install the Oculus app. Here’s how you can do it:
- Ensure that your Oculus Rift is disconnected from your computer.
- Open the Control Panel on your computer and navigate to the “Programs” or “Programs and Features” section.
- Look for the Oculus app in the list of installed programs.
- Right-click on the Oculus app and select “Uninstall”.
- Follow the prompts to complete the uninstallation process.
- Once the app is uninstalled, restart your computer.
- Visit the official Oculus website and click on the “Download” button to get the latest version of the Oculus app.
- Follow the on-screen instructions to install the app.
- Once the installation is complete, connect your Oculus Rift to your computer.
Re-installing the Oculus app can help resolve any issues with the app itself, ensuring that you have a clean and updated version. This step is crucial if you’ve encountered persistent problems with the tutorial even after resetting and clearing data.
After re-installing the Oculus app, you’ll have the latest version installed on your computer. This should provide a stable platform for running the first tutorial and help eliminate any app-related issues that were hindering your previous attempts.
Step 4: Re-Calibrating the Oculus Rift
Re-calibrating the Oculus Rift is an essential step to ensure accurate tracking and optimal performance. Follow these steps to re-calibrate your Oculus Rift:
- Make sure your Oculus Rift is connected to your computer and turned on.
- Open the Oculus app on your computer.
- Click on the “Settings” option located at the lower-right corner of the app window.
- In the Settings menu, click on the “Devices” tab.
- Under the “Devices” tab, select your Oculus Rift headset.
- Scroll down until you find the “Sensor Setup” section.
- Click on the “Run Full Setup” button.
- Follow the on-screen instructions to complete the re-calibration process.
During the re-calibration process, you may be asked to follow certain steps or move your headset and controllers in specific ways. It’s important to carefully follow the instructions to ensure accurate tracking and alignment of the virtual world with your physical movements.
Re-calibrating the Oculus Rift helps resolve any tracking issues that may have been affecting the tutorial. It ensures that the sensors accurately detect your movements, providing a more immersive and realistic experience.
Remember to perform the re-calibration process in an environment with good lighting and minimal obstructions. This will help improve tracking accuracy and enhance the overall performance of the Oculus Rift.
Step 5: Restarting the Oculus Rift
Restarting your Oculus Rift can often resolve various software-related issues and provide a fresh start for the tutorial. Follow these steps to restart your Oculus Rift:
- Ensure that your Oculus Rift is connected to your computer.
- Locate the Oculus app on your computer and close it if it’s currently running.
- On your computer’s taskbar, click on the “Up Arrow” to expand the notification area.
- Right-click on the Oculus icon and select “Exit” to close any background processes related to the Oculus Rift.
- Once all Oculus processes are closed, disconnect the Oculus Rift from your computer.
- Leave the headset disconnected for at least 10 seconds to ensure a complete restart.
- After the 10-second interval, reconnect the Oculus Rift to your computer.
- Wait for the Oculus app to recognize and establish a connection with the headset.
- Launch the Oculus app and proceed to the next step in the tutorial.
Restarting the Oculus Rift helps refresh the system and clears any temporary glitches or conflicts that may have been hindering your progress. It essentially gives the headset and the app a clean slate and an opportunity to establish a stable connection.
If you were experiencing any issues that were preventing you from successfully completing the first tutorial, restarting the Oculus Rift may be the solution you need. By following these steps, you’ll be ready to dive back into the tutorial experience with a fresh start.
Step 6: Launching the First Tutorial
After completing the previous steps to ensure your Oculus Rift is reset, calibrated, and connected properly, you’re now ready to launch the first tutorial. Follow these steps to start the tutorial:
- Make sure your Oculus Rift is connected to your computer and turned on.
- Open the Oculus app on your computer.
- In the Oculus app, click on the “Library” tab located at the top of the window.
- Browse through your library and locate the first tutorial. It may be named differently, depending on the available content.
- Click on the tutorial to select it.
- An option to “Play” or “Start” the tutorial should appear. Click on this option to begin the tutorial.
Once you’ve launched the first tutorial, follow the on-screen instructions to navigate through the virtual environment. The tutorial is designed to introduce you to the capabilities of the Oculus Rift and guide you through the basic controls and interactions.
Pay close attention to the tutorial’s instructions and take your time to familiarize yourself with the virtual world. Follow the guidance of the tutorial to complete the assigned tasks and objectives.
Remember, the first tutorial serves as an essential foundation for your experience with the Oculus Rift. It will help you understand the fundamental concepts and features of virtual reality and prepare you for more advanced experiences to come.
Enjoy the immersive journey provided by the tutorial and have fun exploring the possibilities of the Oculus Rift!
Step 7: Following the Tutorial Instructions
Once you’ve launched the first tutorial on your Oculus Rift, it’s important to closely follow the instructions provided. The tutorial is designed to guide you through the various features and interactions of the virtual environment. Here are some tips to help you effectively follow the tutorial instructions:
- Read or listen carefully: Pay close attention to the text or audio instructions provided in the tutorial. Understanding the instructions is crucial to successfully completing the tasks and objectives.
- Take your time: Don’t rush through the tutorial. Take the time to fully grasp each step and get comfortable with the controls and interactions. This will ensure a smoother experience throughout the tutorial.
- Try different actions: Experiment with different actions and gestures to fully explore the capabilities of the Oculus Rift. The tutorial may encourage you to interact with objects, move around, or perform specific motions. Feel free to explore and get a feel for the virtual world.
- Ask for help if needed: If you encounter difficulties or have questions during the tutorial, don’t hesitate to seek assistance. Consult the tutorial’s documentation or reach out to the Oculus support team for clarification.
- Stay patient and persistent: Virtual reality experiences can sometimes have a learning curve. If you encounter challenges or struggle with certain tasks, don’t get discouraged. Stay patient, persist, and give yourself time to adapt and improve.
- Don’t hesitate to redo sections: If you feel the need to redo a particular section of the tutorial to better understand or master a specific skill, go ahead and repeat the steps. Practicing and reinforcing your knowledge will help you become more proficient with the Oculus Rift.
By closely following the tutorial instructions, you will gain a better understanding of the capabilities of the Oculus Rift and how to navigate the virtual environment. This will set you up for a more enjoyable and immersive virtual reality experience as you continue to explore other content and games.
Remember, the tutorial is designed to help you get accustomed to the Oculus Rift’s features and controls. Embrace the learning process and have fun as you progress through the tutorial!
Step 8: Troubleshooting Common Issues
While redoing the first tutorial on your Oculus Rift, you may encounter some common issues that can be easily resolved. Here are a few troubleshooting tips to help you overcome these issues:
- Check the connections: Ensure that all connections between your Oculus Rift headset, sensors, and computer are secure. Loose cables can lead to connectivity problems and affect the overall performance.
- Update drivers: Make sure that your graphics card drivers and Oculus app are up to date. Outdated drivers can cause compatibility issues and may prevent the tutorial from running smoothly.
- Adjust the room setup: If your Oculus Rift tracking isn’t accurate or stable, consider adjusting your room setup. Ensure that the sensors are properly positioned and that there are no obstructions that could interfere with the tracking.
- Restart your computer: Sometimes, a simple restart can resolve various software-related issues. Restart your computer and relaunch the Oculus app to see if the problem persists.
- Check for conflicts: Disable any other software or applications that could potentially conflict with the Oculus Rift. Background processes or conflicting software can disrupt the tutorial experience.
- Reinstall Oculus app and drivers: If all else fails, you may need to uninstall and reinstall both the Oculus app and associated drivers. This can help resolve any corrupt or missing files that are affecting the tutorial.
- Consult the Oculus support team: If you’re still experiencing issues after trying these troubleshooting steps, it’s advisable to reach out to the Oculus support team. They have extensive knowledge and resources to assist you with more specific troubleshooting steps.
By troubleshooting common issues, you can ensure a smoother and more enjoyable experience while redoing the first tutorial on your Oculus Rift. It’s important to remember that these issues are part of the learning process, and with the right troubleshooting steps, you’ll be able to overcome them and fully immerse yourself in the virtual world.
Step 9: Final Verifications and Testing
After completing the first tutorial on your Oculus Rift, it’s important to perform some final verifications and testing to ensure everything is functioning as expected. Follow these steps to verify the performance of your Oculus Rift:
- Take note of any issues: During the tutorial, if you encountered any specific issues or challenges, make a note of them for future reference. This will help you in troubleshooting or seeking assistance if similar issues arise later on.
- Test other experiences: Now that you have completed the tutorial, explore other content and experiences available on the Oculus Rift. Test different games or applications to ensure that your headset is working properly and that you can navigate through various virtual environments seamlessly.
- Assess comfort and fit: Pay attention to the comfort and fit of the Oculus Rift during and after the tutorial. Make any necessary adjustments to the straps, lenses, or headset position to ensure a comfortable experience.
- Check audio quality: Verify that the audio output of the Oculus Rift is clear and crisp. Ensure that the headphones or audio device is properly connected and that the sound settings are adjusted to your preferences.
- Examine visual quality: Assess the visual quality of the Oculus Rift display. Check for any issues such as screen tearing, blurriness, or artifacts. Adjust the display settings if required, and ensure that the lenses are clean and free from dirt or smudges.
- Troubleshoot any remaining issues: If you encounter any further issues during the final verification and testing, refer back to the troubleshooting steps mentioned earlier in this guide. Continue to seek assistance from the Oculus support team if necessary.
By performing these final verifications and testing, you can ensure that your Oculus Rift is fully functional and ready for future virtual reality experiences. It’s important to have a smooth and enjoyable experience with your headset, and these steps will help you achieve that.
Keep in mind that the Oculus Rift is a dynamic platform, with ongoing updates and new content being released regularly. Stay connected with Oculus community resources and forums to learn about the latest updates, tips, and tricks to enhance your virtual reality journey.