
What is an MSI File?
An MSI file, short for Microsoft Installer, is a file format used by Microsoft Windows to package and distribute software installations. It serves as a container that contains all the necessary files and instructions needed to install a program on your computer. Think of it as a virtual package that consolidates the application’s binaries, resources, and registry entries into a single file.
MSI files are widely used because they simplify the installation process. They allow software vendors to create a standardized installer that can be easily deployed on multiple systems. This ensures that the installation is consistent and reduces the chances of errors or compatibility issues.
The MSI file format also provides a variety of features that make software installations more flexible. It supports customizable installation options, such as selecting specific components, features, or languages to install. It also allows for silent installations, which enables software to be installed without any user interaction. This is especially useful for deploying software in enterprise environments.
Additionally, MSI files support uninstallation and maintenance actions. When you want to remove a program from your computer, the MSI file carries the necessary instructions to cleanly uninstall the software and remove any associated files or registry entries. This ensures that no remnants of the program are left behind, freeing up disk space and keeping your system clean.
Overall, MSI files are a crucial component of the software installation process on Windows systems. They simplify and streamline the installation process while offering flexibility and ease of use for both developers and end-users. Understanding how to open and work with MSI files is important for managing software installations efficiently on your computer.
Why Use an MSI File?
Using an MSI file for software installations offers several advantages for both software vendors and end-users. Let’s take a closer look at some of the reasons why MSI files are preferred:
1. Standardization: MSI files provide a standardized format for software installations. This ensures consistency and compatibility across different systems, making it easier for software vendors to distribute and deploy their applications.
2. Customization: MSI files allow for customizable installations. Software vendors can include various installation options, such as selecting specific components, features, or languages to install. This allows users to tailor the installation based on their needs, reducing unnecessary clutter on their systems.
3. Silent Installations: MSI files support silent installations, which enable software to be installed without any user interaction. This is particularly useful for system administrators or IT professionals who need to deploy software on multiple machines simultaneously.
4. Uninstallation and Maintenance: MSI files include built-in support for uninstallation. This means that when you want to remove a program, the MSI file carries the necessary instructions to cleanly uninstall the software and remove all associated files and registry entries. This helps keep the system clean and prevents leftover remnants.
5. Compatibility: MSI files are compatible with various versions of the Windows operating system. This compatibility ensures that software installations using MSI files can be easily performed on different Windows machines without any compatibility issues.
6. Security: MSI files can be digitally signed, providing an added layer of security. Digital signatures verify the authenticity and integrity of the file, assuring users that the software they are installing has not been tampered with or modified.
By utilizing MSI files, software vendors can streamline their installation process, reduce support issues, and provide a more user-friendly experience. Users, on the other hand, benefit from standardized installations, customized options, and simplified maintenance.
How to Open an MSI File
Opening an MSI file on your Windows computer is a straightforward process. There are several methods you can use, depending on your preference and the tools available on your system. Here are four common methods:
Method 1: Double-clicking the MSI File: One of the easiest ways to open an MSI file is by double-clicking on it. Locate the MSI file in File Explorer, then simply double-click on it. Windows will automatically launch the Windows Installer, which will guide you through the installation process.
Method 2: Using Command Prompt: If you’re comfortable with using the Command Prompt, you can open an MSI file by running a simple command. Open Command Prompt and navigate to the location of the MSI file using the “cd” command. Once in the appropriate directory, type the command “msiexec /i filename.msi” (replace “filename.msi” with the actual name of the MSI file) and press Enter. This will initiate the installation process.
Method 3: Using Windows Installer: Another way to open an MSI file is through the Windows Installer. Click on the Start Menu, search for “Windows Installer,” and open the program. Once open, go to “File” and select “Open Package.” Locate the MSI file on your computer and click “Open.” The Windows Installer will launch and guide you through the installation process.
Method 4: Using Third-Party Software: If you prefer more advanced options or additional features, you can use third-party software to open MSI files. There are various software options available, such as 7-Zip, WinRAR, or Orca. Install the software of your choice, then right-click on the MSI file, select the software from the “Open With” menu, and follow the prompts to extract or install the program.
These methods should help you open and install MSI files on your Windows system. Choose the method that suits you best based on your comfort level and the options available on your computer. Remember, opening an MSI file initiates the installation process, so be sure to follow the prompts and instructions provided to complete the installation successfully.
Method 1: Double-clicking the MSI File
The easiest and most common method to open an MSI file is by double-clicking on it. This method utilizes the built-in functionality of the Windows operating system to automatically launch the Windows Installer and start the installation process. Here’s how you can open an MSI file using this method:
Step 1: Locate the MSI file on your computer. Typically, MSI files have a .msi file extension and are often stored in the Downloads folder or in the folder where you saved the file.
Step 2: Once you’ve found the MSI file, double-click on it. Windows will automatically recognize the file type and launch the Windows Installer to begin the installation process.
Step 3: The Windows Installer will guide you through the installation process, providing you with options such as selecting the installation location, choosing additional features, or accepting the software’s license agreement. Follow the prompts and instructions displayed on the screen to complete the installation.
Step 4: Once the installation process is complete, you will see a confirmation message indicating that the software has been successfully installed. You may also be prompted to restart your computer for the changes to take effect.
Double-clicking an MSI file is a simple and convenient method to open and install software on your Windows computer. It eliminates the need for additional tools or commands, allowing for a seamless installation process. However, it’s important to note that you should always download MSI files from trusted sources to ensure the safety and authenticity of the software you’re installing.
Method 2: Using Command Prompt
If you’re comfortable using the Command Prompt, you can open an MSI file by running a simple command. This method gives you more control over the installation process and allows you to customize certain options. Here’s how to open an MSI file using Command Prompt:
Step 1: Open the Command Prompt on your Windows computer. You can do this by searching for “Command Prompt” in the Start Menu and selecting the application.
Step 2: Navigate to the directory where the MSI file is located. Use the “cd” command followed by the file path to change the command prompt’s working directory. For example, if your MSI file is located in the Downloads folder, you would type: cd C:\Users\YourUsername\Downloads
Step 3: Once you’re in the appropriate directory, enter the following command: msiexec /i filename.msi. Replace “filename.msi” with the actual name of the MSI file you want to open.
Step 4: Press Enter to execute the command. The Windows Installer will launch and begin the installation process.
Step 5: Follow the prompts and instructions provided by the Windows Installer to complete the installation. This may include selecting the installation location, agreeing to the software’s license agreement, or customizing other installation options.
Using Command Prompt to open an MSI file gives you more control and flexibility over the installation process. You can use additional command-line parameters with the “msiexec” command to further customize the installation, such as specifying a different installation directory or enabling silent installation mode. Refer to the documentation or help resources of the software you’re installing for more information on available command-line options.
Note that using Command Prompt requires familiarity with the command-line interface. If you’re not comfortable using the command line or prefer a more user-friendly approach, you can explore other methods to open MSI files, such as double-clicking the file or using the Windows Installer application.
Method 3: Using Windows Installer
If you prefer a graphical interface for opening MSI files and have the Windows Installer application installed on your computer, you can use the Windows Installer to open and install the software. This method provides a user-friendly approach with additional options for customizing the installation process. Here’s how to open an MSI file using the Windows Installer:
Step 1: Click on the Start Menu button in the bottom-left corner of your screen.
Step 2: In the search bar, type “Windows Installer” and select the Windows Installer application from the search results. If you don’t see the Windows Installer application, it may not be installed on your system.
Step 3: Once the Windows Installer application is open, go to the “File” menu and select “Open Package”.
Step 4: Locate and select the MSI file you want to open from the file browser window, then click “Open”.
Step 5: The Windows Installer will now launch and start the installation process for the selected MSI file. Follow the on-screen prompts and instructions to complete the installation, including selecting the installation location, choosing additional features, or accepting the software’s license agreement.
Using the Windows Installer application offers a visual and intuitive method for opening and installing MSI files. It provides additional options and a graphical interface for managing the installation process. This method is particularly useful if you prefer a more guided approach or if you need to customize specific installation settings.
It’s worth noting that the Windows Installer application may not be available on all Windows systems or versions. If you don’t have the Windows Installer application or if it’s not installed on your computer, you can try alternative methods, such as double-clicking the MSI file or using the Command Prompt.
Method 4: Using Third-Party Software
If you prefer more advanced options or additional features when working with MSI files, you can use third-party software to open and install them. These software tools provide alternative methods for managing MSI files and offer additional functionalities. Here’s how you can open an MSI file using third-party software:
Step 1: Install the third-party software of your choice. There are several options available, such as 7-Zip, WinRAR, or Orca. You can find and download these software tools from their respective websites.
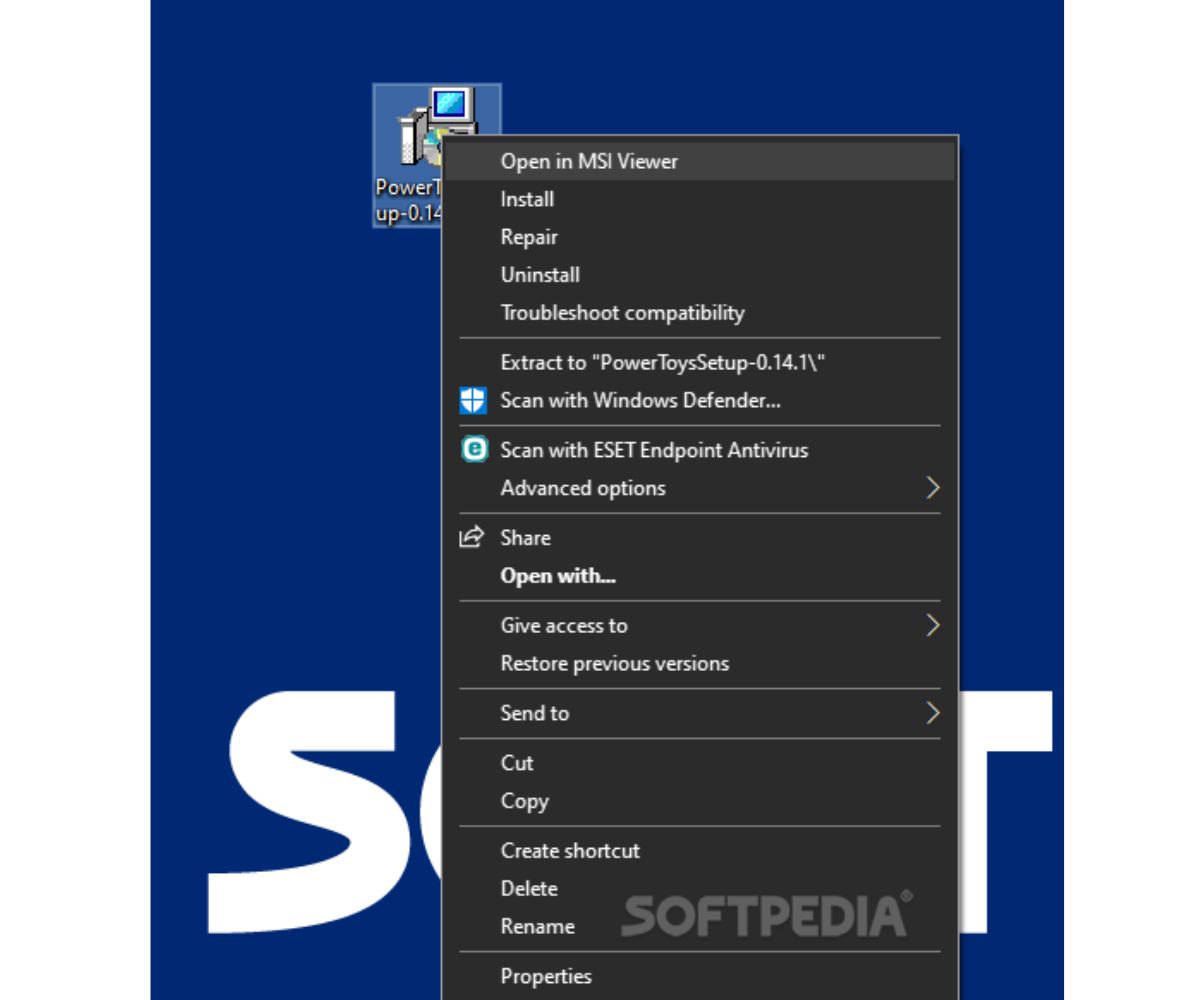
Step 2: After installing the software, locate the MSI file on your computer. Right-click on the MSI file to bring up the context menu.
Step 3: From the context menu, choose the option that allows you to open the MSI file using the third-party software you installed. The specific option may vary depending on the software you’re using, but it’s typically labeled as “Open with [Software Name]” or similar.
Step 4: The third-party software will then launch and display the contents of the MSI file. Depending on the software, you can extract the files from the MSI, view the details of the installation, or perform other actions related to the MSI file.
Step 5: Follow the prompts or options provided by the third-party software to extract or install the program contained in the MSI file. The process may vary depending on the software you’re using, so refer to its documentation or help guide for specific instructions.
Using third-party software to open and work with MSI files gives you more control and additional features compared to the standard Windows methods. These tools often provide advanced options, such as the ability to extract specific files from the MSI package, modify installation parameters, or create customized installations.
It’s important to note that while third-party software can offer more versatility, you should still exercise caution when using unfamiliar tools. Ensure that the software you choose comes from a reputable source and is appropriate for your needs. Additionally, be mindful of any potential compatibility issues between the third-party software and the MSI file you’re working with.
If you’re unsure about using third-party software or if the file you have is a trusted MSI from a reputable source, you can opt for the built-in Windows methods discussed earlier to open and install the MSI file.
What to Do If You Can’t Open an MSI File
If you’re unable to open an MSI file using the standard methods, there are a few troubleshooting steps you can take to resolve the issue. Here are some possible solutions:
1. Verify the File Extension: Double-check that the file extension of the MSI file is correct. It should end with “.msi”. If the file extension is incorrect or missing, rename the file to include the “.msi” extension.
2. Update Windows: Ensure that your Windows operating system is up to date. Sometimes, outdated system components can cause compatibility issues when opening certain files. Go to the Windows Update settings to check for and install any available updates.
3. Check for Software Conflicts: If you have recently installed any new software, it might be conflicting with the Windows Installer or the MSI file itself. Try temporarily disabling or uninstalling any recently installed programs and then attempt to open the MSI file again.
4. Scan for Malware: Run a thorough scan of your computer using reliable antivirus or anti-malware software. Malware infections can sometimes interfere with the proper functioning of system components, including the Windows Installer. Remove any detected threats and try opening the MSI file again.
5. Troubleshoot Windows Installer: If the Windows Installer itself is experiencing issues, you can run the Windows Installer troubleshooter. This built-in tool can help diagnose and fix problems related to the Windows Installer service. Go to the Windows Settings, navigate to “Update & Security”, then choose “Troubleshoot” and select “Windows Installer” under “Additional troubleshooters”. Follow the on-screen prompts to run the troubleshooter.
6. Use Compatibility Mode: Right-click on the MSI file, select “Properties”, and go to the “Compatibility” tab. Check the box that says “Run this program in compatibility mode for” and select a compatible Windows version from the drop-down menu. Click “Apply” and then try opening the MSI file again.
7. Seek Additional Help: If none of the above solutions work, you can seek assistance from online support forums or contact the software vendor directly for troubleshooting guidance specific to the MSI file you’re trying to open.
It’s important to note that if the MSI file is corrupted or invalid, it may not be possible to open it. In such cases, you may need to obtain a new, valid copy of the MSI file from a trusted source.
By following these troubleshooting steps, you should be able to address most common issues preventing you from opening an MSI file. Remember to exercise caution and ensure the safety and legitimacy of the file and the methods you use to open it.