Micro.blog is a unique and innovative social media platform that combines the simplicity of microblogging with the freedom of owning your own content. It was created as an alternative to traditional social media platforms that often prioritize popularity, algorithms, and data mining over the needs of individual users. Micro.blog aims to provide a more personal and empowering experience for users while fostering authentic connections and meaningful conversations.
At its core, Micro.blog is designed to be a microblogging platform, allowing users to share short posts, photos, and other media in a concise and straightforward format. However, it goes beyond typical microblogging by offering features that encourage thoughtful discussions and respectful engagement.
Unlike traditional social media platforms, Micro.blog does not rely on algorithms to curate content. Instead, it encourages users to follow other users directly, creating a more organic and genuine social network. This allows users to have control over the content they see and creates a sense of community where conversations can flourish.
Another crucial aspect of Micro.blog is its commitment to user ownership and control. It provides users with the ability to use their own domain name or a Micro.blog-generated URL, giving them complete control over their content and online presence. This approach ensures that users are not tied to a single platform and can move their content freely if they choose.
Micro.blog also emphasizes ethical and user-focused practices, with a clear commitment to user privacy. The platform does not track users or sell their data, providing a safer and more private environment to engage with others. This commitment to user privacy sets Micro.blog apart from many popular social media platforms.
In essence, Micro.blog is a refreshing and empowering platform that offers a more personal and authentic online experience. Its focus on user ownership, privacy, and meaningful connections sets it apart from traditional social media platforms, making it an appealing choice for those seeking a more genuine online presence.
How does Micro.blog work?
Micro.blog operates on a straightforward and user-friendly system that allows individuals to share their thoughts, photos, and other media with the online community. The platform provides a range of features and tools to facilitate seamless interaction and engagement among users.
Upon signing up for Micro.blog, users are prompted to create their own microblogging account. This involves selecting a unique username, which will serve as their online identity on the platform. Users can then customize their profile by providing a brief bio and uploading an avatar, allowing others to get a glimpse of their personality and interests.
Micro.blog offers a range of themes that users can choose from to personalize the appearance of their microblog. These themes allow users to express their individuality and create a cohesive visual identity for their online presence. Additionally, users have the option to further modify their microblog’s appearance by customizing the CSS to suit their preferences.
One significant advantage of Micro.blog is its ability to cross-post content to other social media platforms. Micro.blog supports cross-posting to platforms like Twitter, allowing users to reach a wider audience without the need to manually share each post. This feature simplifies the process of maintaining an active presence across multiple platforms.
Micro.blog encourages users to discover and connect with others by following their microblogs. By following other users, individuals can see their posts in their timeline and engage in conversations through comments and replies. This creates a supportive and interactive environment where users can share ideas, provide feedback, and build relationships with like-minded individuals.
Micro.blog utilizes Markdown formatting, a lightweight markup language, to allow users to format their posts and add emphasis to their content. Markdown simplifies the process of styling and structuring posts, offering a simple yet effective way to enhance the readability and visual appeal of microblogs.
The platform also provides users with the option to categorize their posts using tags. Tags help organize content and make it easier for others to discover specific topics of interest. By utilizing relevant tags, users can connect with a broader audience and actively participate in discussions related to their areas of expertise or passion.
Understanding the difference between a Micro.blog host and a Microblogging Community
When exploring the world of Micro.blog, it is important to understand the distinction between a Micro.blog host and a Microblogging Community. While both contribute to the overall Micro.blog experience, they serve different purposes and offer unique benefits.
A Micro.blog host refers to the platform itself, which provides the infrastructure and tools necessary to create and maintain a microblog. Micro.blog offers hosting services, allowing users to create their own custom domain or utilize a Micro.blog-generated URL. The host ensures that users have a space to publish their content, customize their microblog’s appearance, and interact with other users on the platform.
On the other hand, a Microblogging Community encompasses the collective network of users on Micro.blog. It is the community aspect that sets Micro.blog apart from traditional social media platforms. The community comprises individuals who share their thoughts, ideas, and experiences through their microblogs and actively engage with others through comments, replies, and conversations.
Micro.blog prioritizes connecting users directly with one another rather than relying on algorithms or popularity metrics. This fosters authentic and meaningful interactions within the community. Users have the freedom to follow other microblogs, discover new voices, and participate in discussions that align with their interests.
By understanding the distinction between a Micro.blog host and a Microblogging Community, users can fully leverage the platform’s potential. The host provides the technical infrastructure and tools, enabling users to create and customize their microblogs. Meanwhile, the community creates a dynamic and interactive environment where users can engage with one another, share ideas, and build connections.
It is important to note that while Micro.blog offers hosting services, users are not limited to solely interacting within the platform. Micro.blog allows users to cross-post their content to other social media platforms, extending their reach beyond the Micro.blog community. This flexibility empowers users to share their thoughts and engage with others on various online platforms while still benefiting from the rich community experience provided by Micro.blog.
Creating a Micro.blog Account
Getting started on Micro.blog is quick and easy. Follow these simple steps to create your Micro.blog account and join the vibrant community of microbloggers:
Visit the Micro.blog website at www.micro.blog and click on the “Sign Up” button.
Choose the hosting option that suits your needs. You can either use your own domain name or opt for a Micro.blog-generated URL.
Enter your desired username. Keep in mind that it should be unique and reflect your online identity.
Provide a valid email address, as it will be used for account verification and communication purposes.
Create a strong password to secure your account. Make sure to follow the recommended guidelines for password strength.
After completing the registration form, click on “Create Account” to proceed.
Check your email for a verification message from Micro.blog. Click on the verification link to confirm your account.
Once your account is verified, you can log in to Micro.blog using your username and password.
Upon login, you will be prompted to set up your profile. Add a brief bio and upload an avatar to give your microblog a personal touch.
Customize the appearance of your microblog by choosing a theme from the available options. You can also further customize the CSS for more advanced styling.
Explore the settings section to configure your preferences, including privacy settings, cross-posting options, and more.
Start connecting with other users by discovering and following their microblogs. Engage in conversations by leaving comments and replies on their posts.
Begin sharing your own thoughts, ideas, and experiences by creating your first microblog post. You can include text, photos, and even Markdown formatting to enhance your content.
Don’t forget to explore and engage with the Micro.blog community by participating in conversations, joining challenges, and discovering new microblogs through the Discover section.
Creating a Micro.blog account is your gateway to a vibrant and supportive community of microbloggers. Join today and start sharing your unique voice with the world.
Setting up your Micro.blog Profile
Your Micro.blog profile is your online identity and serves as a representation of who you are in the Micro.blog community. Follow these steps to set up and customize your Micro.blog profile:
Log in to your Micro.blog account using your username and password.
Click on your profile icon or navigate to the profile section.
On the profile page, you will find options to edit your bio, upload an avatar, and provide additional information about yourself.
Write a concise and engaging bio that showcases your personality, interests, and any other information you’d like to share with the community.
Select a suitable avatar or profile picture that represents you. This could be a photo of yourself, a logo, or any image that you feel best embodies your online presence.
Consider adding additional information in the form of links, such as your personal website, blog, or social media accounts. This allows others to learn more about you and explore your other online platforms.
Review your settings and privacy options to ensure they align with your preferences.
Customizing your Micro.blog profile is an opportunity to make a lasting impression and connect with other users who share similar interests. A well-crafted bio and a thoughtfully chosen avatar can help others understand who you are and what you bring to the community.
Remember, your Micro.blog profile is a dynamic entity. You can update and modify it at any time to reflect changes in your interests, passions, or personal branding. Don’t hesitate to revisit your profile periodically to keep it up to date and ensure that it accurately represents your evolving online presence.
By investing time in setting up your Micro.blog profile, you are taking an important step in building your digital identity within the community. This, in turn, allows others to learn more about you, fosters more meaningful connections, and enhances your overall Micro.blog experience.
Choosing a Micro.blog Username
Your Micro.blog username is a crucial part of your online identity within the Micro.blog community. It is what other users will see and use to identify and connect with you. Here are some tips to consider when choosing your Micro.blog username:
Keep it unique: Select a username that is not already in use by another Micro.blog user. This will ensure that you have a distinct online identity and avoid confusion.
Reflect your identity: Choose a username that reflects your personal or professional identity. It could be your real name, a variation of your name, or a username that aligns with your interests or niche.
Be memorable: Aim for a username that is easy to remember and pronounce. This makes it more likely for other users to easily find and remember your username, facilitating connections and interactions.
Avoid unnecessary characters: While some usernames may contain special characters or numbers, it is generally advisable to keep your username simple and free of complex characters. This makes it easier for others to type and remember your username accurately.
Consider future scalability: If you plan to use your Micro.blog account for professional or business purposes, it is wise to choose a username that can grow with you. Avoid usernames that may limit your future opportunities or pigeonhole you into a specific niche.
Respect copyright and trademarks: Ensure that your chosen username does not infringe on someone else’s copyright or trademark. This helps maintain a respectful and ethical online environment.
Remember, your Micro.blog username represents you in the online community, so choose it wisely. It is an essential part of building your online brand and establishing your digital identity. Take the time to consider various options and find a username that truly resonates with who you are and how you want to be perceived within the Micro.blog community.
Once you have chosen your username, it becomes an integral part of your Micro.blog URL, making it easy for others to find and connect with your microblog. So, take the time to select a username that aligns with your personal or professional goals, and start engaging with the vibrant Micro.blog community today.
Customizing your Micro.blog Theme
Your Micro.blog theme is what gives your microblog its unique visual appeal and sets it apart from others. Customizing your theme allows you to showcase your creativity and personalize your online presence. Here are the steps to customize your Micro.blog theme:
Login to your Micro.blog account using your username and password.
Click on your profile icon or navigate to the profile section.
Select the “Design” or “Themes” tab to access the available theme options.
Browse through the themes and preview them to see how they would look on your microblog.
Once you’ve found a theme you like, click on the “Use this theme” or “Activate” button to apply it to your microblog.
Explore the customization options for the selected theme. Some themes may offer additional settings, such as color schemes, font choices, and layout configurations.
Make changes to the theme settings according to your preferences. Experiment with different combinations until you achieve the desired look and feel for your microblog.
Save your changes and refresh your microblog to see the updated theme in action.
Customizing your Micro.blog theme allows you to create a cohesive and visually appealing online presence. It helps make your microblog a reflection of your style and personality. Whether you prefer a minimalist design, bold and vibrant colors, or a more professional look, Micro.blog provides a range of themes to suit your taste.
In addition to the available theme options, Micro.blog also allows more advanced customization through CSS. If you have knowledge of CSS, you can modify the code to achieve a highly customized and unique theme for your microblog.
Remember, your theme creates a first impression on visitors to your microblog. It is important to choose a theme that aligns with your content and the image you want to portray. Take the time to explore the available options and experiment with different themes and settings until you find the perfect combination for your microblog.
By customizing your Micro.blog theme, you can make your microblog stand out and create an engaging and visually appealing experience for your visitors. So, unleash your creativity and make your microblog a true reflection of your personal brand!
Configuring Cross-Posting Options on Micro.blog
Micro.blog offers a valuable feature called cross-posting, which allows you to automatically share your microblog posts on other social media platforms. This feature saves time and effort by streamlining your social media presence. Here’s how you can configure cross-posting options on Micro.blog:
Log in to your Micro.blog account using your username and password.
Click on your profile icon or navigate to the profile section.
Select the “Account” or “Settings” tab to access your account settings.
Scroll down to the “Cross-posting” section and click on “Configure” or a similar option.
Select the social media platforms where you want to cross-post your microblog posts. Common options include Twitter, Mastodon, Medium, and LinkedIn.
For each platform, you may need to authorize Micro.blog to access your account. Follow the on-screen prompts to grant the necessary permissions.
Once your accounts are authorized, you can customize the cross-posting settings for each platform. This includes options such as post format, hashtags, and destination URL.
Review and save your cross-posting settings.
Configuring cross-posting options on Micro.blog allows you to reach a wider audience and share your microblog posts on multiple platforms simultaneously. Cross-posting simplifies the process of maintaining an active online presence without the need for manual sharing or duplicating efforts.
It is important to note that while cross-posting can greatly enhance your reach, it’s essential to consider the unique characteristics and limitations of each social media platform. Some platforms may have character limits or different formatting requirements, so it’s advisable to tailor your posts accordingly.
Additionally, cross-posting should be used thoughtfully and strategically. While it can help increase visibility, it’s important to ensure that your content is relevant and appropriate for each platform. Be mindful of the specific audience and engagement expectations on each platform to maximize the impact of your cross-posted content.
By configuring cross-posting options on Micro.blog, you can effectively expand your online presence and engage with a wider audience across multiple social media platforms. This feature offers a convenient solution for maintaining an active presence while leveraging the different strengths of each platform.
Discovering and Following Other Users on Micro.blog
One of the key features of Micro.blog is the ability to connect and engage with a diverse community of microbloggers. Discovering and following other users allows you to explore new perspectives, find interesting content, and build meaningful connections. Here’s how you can discover and follow other users on Micro.blog:
Log in to your Micro.blog account using your username and password.
Click on the “Discover” or “Explore” tab in the navigation menu.
Browse through the featured posts and users on the Discover page. This section showcases interesting and popular content from the Micro.blog community.
Use the search functionality to find specific users or topics of interest. Enter keywords or usernames in the search bar and explore the results.
Check out the “Followed by Friends” section to discover users who are followed by the people you already follow. This can be a great way to find like-minded individuals and expand your network.
Explore the “Tags” section to discover posts and users related to specific topics. Click on a tag that interests you to see posts that have been tagged with it.
Interact with posts and users by leaving comments and replies. Engaging in conversations is a fantastic way to connect with others and build relationships within the community.
To follow a user, visit their microblog and click on the “Follow” button. This ensures that you will see their posts in your timeline and have the opportunity to interact with their content.
Discovering and following other users allows you to curate a personalized timeline of content that interests you. It enables you to explore different perspectives, discover new ideas, and engage in conversations with like-minded individuals.
Remember, Micro.blog does not rely on complex algorithms to curate your timeline. Instead, it emphasizes direct connections and interactions. By following other users and engaging with their content, you actively shape your own experience on the platform.
Building a strong network of connections on Micro.blog takes time and effort. Be open to discovering new voices, participating in conversations, and supporting fellow microbloggers. By fostering a supportive and engaged community, you’ll create a fulfilling and enriching experience for yourself and others on Micro.blog.
Posting and Replying on Micro.blog
Micro.blog provides a simple and user-friendly interface for posting your thoughts, ideas, and media, as well as engaging with others through comments and replies. Here’s how you can post and reply on Micro.blog:
Posting on Micro.blog:
Log in to your Micro.blog account using your username and password.
Click on the “New Post” button or the (+) icon to create a new post.
Compose your post in the provided text field. You can add text, images, links, or even use Markdown formatting to enhance your content.
Choose whether you want to publish the post immediately or schedule it for a later time.
If desired, assign categories or tags to your post to make it easier for others to discover.
Once you’re satisfied with your post, click on the “Publish” or “Post” button to make it visible to others.
Replying on Micro.blog:
Navigate to the post you want to reply to, either through your timeline or the Discover section.
Click on the “Reply” or “Comment” button below the post.
Compose your reply in the text field. You can add text, express your thoughts, ask questions, or provide feedback.
Once you’re done, click on the “Reply” or “Comment” button to submit your response.
Posting and replying on Micro.blog allows you to actively engage with the community, share your insights, and participate in conversations. It’s an opportunity to build connections, exchange ideas, and find support within a diverse and supportive network of microbloggers.
When posting and replying, consider fostering a positive and respectful environment. Listen attentively, express your opinions with kindness, and encourage meaningful discussions. Engaging in thoughtful interactions helps create a vibrant and inclusive community on Micro.blog.
Additionally, it’s worth noting that Micro.blog supports Markdown formatting, which allows you to easily add emphasis, headers, lists, and other formatting elements to your posts and replies. This enhances the readability and appearance of your content, making it more engaging for other users.
Take advantage of posting and replying on Micro.blog to share your voice, learn from others, and contribute to the collective knowledge and conversations within the community.
Using Markdown on Micro.blog
Micro.blog supports Markdown formatting, a lightweight markup language that allows you to add formatting elements to your posts and comments. Markdown simplifies the process of styling your text, making it more visually appealing and enhancing the readability of your content. Here are some Markdown features you can use on Micro.blog:
Headers:
To create headers of different levels, use one to six hash (#) symbols followed by a space, with one hash symbol indicating the largest header and six hash symbols indicating the smallest header.
# Heading 1
## Heading 2
### Heading 3
Emphasis:
For emphasizing text, you can use asterisks (*) or underscores (_). Enclose the text you want to emphasize in one or two pairs of these symbols.
*I am emphasized*
_I am also emphasized_
I am strongly emphasized
__I am also strongly emphasized__
Lists:
You can create both ordered (numbered) and unordered (bulleted) lists in Markdown. For unordered lists, use asterisks (*), hyphens (-), or plus symbols (+) followed by a space. For ordered lists, use numbers followed by a period and a space.
Unordered List:
– Item 1
– Item 2
– Item 3
Ordered List:
1. Item 1
2. Item 2
3. Item 3
Links:
To create a hyperlink, use square brackets ([]), followed by the link title or text, and then in parentheses, provide the URL.
[Visit Micro.blog](https://micro.blog)
Images:
To add images to your posts, use an exclamation mark (!), followed by square brackets specifying the alt text, and in parentheses, provide the URL or file path of the image.

Blockquotes:
For block quotes, use a greater-than symbol (>) at the beginning of a line.
> This is a blockquote.
Code:
To display code snippets, use backticks (`) to enclose the code.
`
This is a code snippet
`
Using Markdown on Micro.blog allows you to add emphasis, structure, and visual appeal to your posts and comments. It enhances the readability of your content and ensures a consistent formatting experience across various platforms.
Experiment with different Markdown features to make your content more engaging and visually appealing. The more you familiarize yourself with Markdown, the more efficiently you can communicate your ideas and capture the attention of your readers on Micro.blog.
Using Categories and Tags on Micro.blog
Micro.blog allows you to organize your posts using categories and tags, making it easier for others to discover specific topics of interest. They help create a structured and organized system for navigating and exploring content within the Micro.blog community. Here’s how you can effectively use categories and tags on Micro.blog:
Categories:
Categories are broad labels that you assign to your posts to group them based on subject matter or themes. They provide a high-level overview and help users quickly identify the primary focus of your content. When creating a post, you can assign it to one or multiple categories. To add a category to your post:
While writing a new post, look for the option to add categories.
Enter the name of the category or choose from existing ones if applicable.
Save or publish your post.
Tags:
Tags are more specific labels that you can assign to your posts to add additional context or highlight specific keywords. They offer a more granular way of organizing and categorizing your content. To add tags to your post:
While writing a new post, look for the option to add tags.
Enter relevant keywords or phrases as tags, separated by commas.
Save or publish your post.
Using categories and tags on Micro.blog can help you and others find and navigate through relevant content more efficiently. By categorizing your posts, you provide an overarching theme or subject that users can explore. Tags, on the other hand, offer specific keywords that users can search for or click on to find related posts.
When using categories and tags, it’s important to be consistent and authentic. Choose categories and tags that accurately represent your content and are relevant to your target audience. This will enable others to find your posts and engage with your ideas more effectively.
By utilizing categories and tags effectively on Micro.blog, you can make it easier for users to discover your content, participate in relevant discussions, and foster connections with individuals who share similar interests or passions.
Importing and Exporting Posts on Micro.blog
Micro.blog provides convenient options for both importing and exporting your posts, giving you greater control over your content and the ability to seamlessly migrate to or from the platform. Whether you want to bring in posts from another platform or create a backup of your Micro.blog posts, here is how you can import and export your posts:
Importing Posts:
If you have existing posts on another platform or a separate blogging service, Micro.blog allows you to import them effortlessly. Follow these steps to import your posts:
Log in to your Micro.blog account.
Go to the Micro.blog dashboard or settings section.
Look for the import options or settings.
Choose the import method that best suits your needs. Micro.blog supports various import methods, including RSS or Atom feed, JSON, and even direct import from popular platforms like WordPress.
Follow the instructions for the selected import method to bring in your existing posts.
Review and organize the imported posts, ensuring they appear as desired on your Micro.blog account.
Exporting Posts:
Micro.blog also allows you to export your posts, ensuring you have a backup or the freedom to migrate to another platform if desired. To export your posts, follow these steps:
Log in to your Micro.blog account.
Go to the Micro.blog dashboard or settings section.
Look for the export options or settings.
Choose the export format that suits your needs. Micro.blog supports exporting in JSON format, which is compatible with various platforms and blogging services.
Initiate the export process and wait for the file containing your posts to be generated.
Download the exported file and save it to your desired location for safekeeping or future use.
By offering import and export functionalities, Micro.blog provides flexibility and ensures that you have control over your content. You can seamlessly migrate to Micro.blog or move your posts to other platforms without losing your valuable content or the effort invested in creating it.
It’s worth noting that during the import and export processes, you may need to review and adjust settings to ensure the content is imported or exported accurately. Different platforms and services may have variations in formatting or metadata, so it’s important to double-check the results and make any necessary adjustments.
Whether you are starting fresh with Micro.blog or considering a move to another platform, the import and export features are valuable tools that simplify the process of managing your posts and ensure the portability of your content.
Micro.blog Privacy Settings
Micro.blog prioritizes user privacy and provides various privacy settings to allow you to control the visibility and accessibility of your posts and information. These settings empower you to navigate the balance between sharing your thoughts and maintaining your desired level of privacy. Here are some key privacy settings offered by Micro.blog:
Public and Private Posts:
When creating a post, you can choose whether it is public or private. Public posts are visible to everyone and appear in the public timeline and search results. Private posts, on the other hand, are only visible to your followers and do not appear in public areas of Micro.blog. This allows you to share more personal or sensitive content with a more limited audience.
Account Privacy:
Micro.blog offers additional privacy options for your account. By default, your Micro.blog posts are public. However, you have the option to make your entire account private, making your posts visible only to your followers. This account-level privacy setting provides you with an extra layer of control over who can access your content.
Account Discovery:
You can control how others discover your Micro.blog account through search and recommendations. Micro.blog provides options to enable or disable your account from being discovered in search results or included in suggestions for users to follow. Adjusting these settings allows you to manage the visibility and reach of your account.
Privacy when Replying to Others:
When replying to others’ posts, you can choose whether to make your response visible only to the original poster or to the broader Micro.blog community. This way, you can tailor the visibility of your engagement based on the nature of the conversation and your personal preferences.
Micro.blog understands the importance of privacy and offers a range of customizable settings to align with your desired level of visibility and control. By utilizing these privacy settings, you can feel confident in sharing your thoughts and connecting with others while maintaining privacy boundaries.
It’s essential to regularly review and adjust your privacy settings according to your evolving needs. This ensures that your Micro.blog experience remains aligned with your comfort level and allows you to engage in a way that feels safe and secure.
Remember, your privacy on Micro.blog is of utmost importance, and Micro.blog takes privacy seriously by offering these settings to help protect your personal information and ensure a positive and secure experience on the platform.
Finding and Joining Micro.blog Conversations
Micro.blog is a vibrant platform that encourages conversations and interactions among its users. Engaging in meaningful discussions allows you to connect with others, share ideas, and broaden your perspectives. Here are some ways to find and join conversations on Micro.blog:
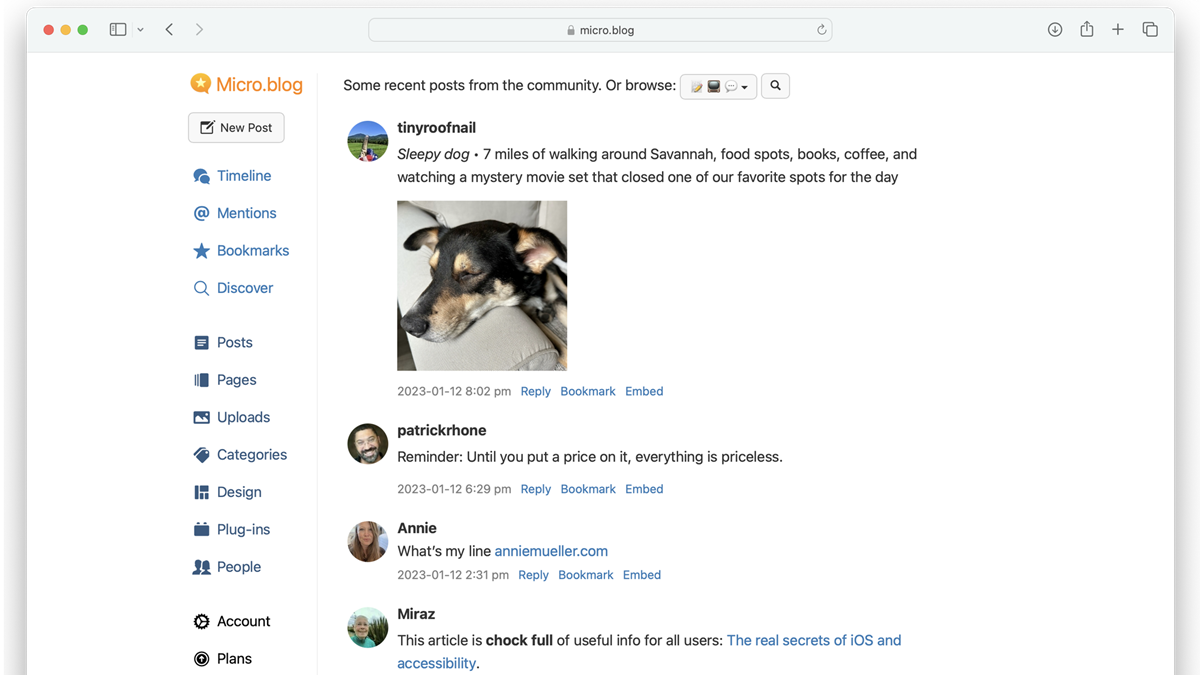
Explore the Timeline:
Browsing through your timeline is a great way to discover ongoing conversations. The timeline displays posts from users you follow, including their replies and comments. By actively scrolling through the timeline, you can find interesting posts and dive into the associated conversations.
Discover Section:
Visit the Discover section on Micro.blog to explore trending posts, popular topics, and recommended users. This section showcases posts that are widely discussed, offering an opportunity to join conversations that are currently trending within the Micro.blog community.
Search for Relevant Tags or Keywords:
Use the search feature on Micro.blog to look for specific tags or keywords related to topics you’re interested in. This allows you to discover posts and conversations that revolve around specific themes. Participating in these discussions can provide valuable insights and connections.
Engage with Comments and Replies:
Interacting with comments and replies is an effective way to join and contribute to ongoing conversations. When you come across a post that sparks your interest, read through the comments and replies, and join in by adding your thoughts, questions, or opinions.
Follow Conversational Threads:
Micro.blog’s conversation threading feature allows you to follow the flow of a conversation easily. When viewing a post and its associated replies, clicking on a reply allows you to expand the thread and see the conversation in context. This helps you stay engaged and aware of different viewpoints within a discussion.
When joining conversations on Micro.blog, it is essential to be respectful, considerate, and open to different perspectives. Micro.blog fosters a supportive and inclusive environment, so ensure your contributions contribute positively to the ongoing discussions.
Participating in conversations on Micro.blog is not only a great way to connect with like-minded individuals but also an opportunity to learn, grow, and share your own unique insights. By actively engaging in discussions, you can forge connections, expand your network, and contribute to the vibrant community on Micro.blog.
Participating in Micro.blog Challenges
Micro.blog challenges are a fun and engaging way to connect with other users and showcase your creativity. Challenges provide prompts or themes to inspire participants to create related posts and share them with the community. Joining a challenge allows you to immerse yourself in the Micro.blog community, gain exposure, and explore new perspectives. Here’s how you can participate in Micro.blog challenges:
Discover Challenges:
Stay up-to-date with ongoing challenges by exploring the Discover section or following relevant tags. Challenges are often announced through posts or hashtags, making them easy to find. Take the time to browse through the available challenges and see which ones align with your interests.
Review Challenge Guidelines:
Each challenge may have specific guidelines or instructions to follow. Read and understand the challenge details to ensure that your posts meet the criteria. Pay attention to any deadlines, recommended tags, or specific rules associated with the challenge.
Create and Share Relevant Content:
Based on the challenge prompt, create content that aligns with the theme. It could be a blog post, a series of photographs, a poem, artwork, or any other form of creative expression. The goal is to interpret the prompt in your unique style and share it on your microblog.
Include Challenge Tags:
Include the challenge tag(s) in your posts to make them easily discoverable by other participants and the wider Micro.blog community. By using the specified tags, you can ensure that your posts are associated with the challenge and increase the chances of others finding and engaging with your content.
Engage with Other Participants:
Explore the other posts tagged with the challenge and engage with fellow participants. Leave encouraging comments, ask questions, or share your appreciation for their contributions. Participating in the conversation surrounding the challenge allows you to connect with others and create a sense of community.
Stay Consistent and Supportive:
If the challenge spans multiple days or weeks, try to stay consistent with your participation. Whether it’s daily or weekly posts related to the challenge, maintaining your involvement shows your commitment and enthusiasm. Additionally, support and encourage other participants by engaging with their posts, creating a positive and encouraging environment.
Participating in Micro.blog challenges is a fantastic way to leverage your creativity, connect with others who share similar interests, and gain exposure within the Micro.blog community. By actively engaging with challenges, you can strengthen your microblogging skills, broaden your perspective, and foster meaningful connections.
So, keep an eye out for challenges, get creative, and immerse yourself in the vibrant world of Micro.blog challenges.
Exploring the Micro.blog Discover section
The Micro.blog Discover section is a valuable resource that allows you to explore and discover new content, users, and conversations within the Micro.blog community. It serves as a hub for finding trending posts, popular topics, and recommended users to follow. Here’s how you can make the most of the Micro.blog Discover section:
Trending Posts:
The Discover section highlights trending posts that are currently gaining attention and engagement within the Micro.blog community. These posts often cover a wide range of topics and can provide a glimpse into the diverse interests and perspectives within the community. Exploring trending posts allows you to stay up-to-date with popular discussions and discover unexpected gems from fellow microbloggers.
Popular Tags:
Discover includes a section dedicated to popular tags on Micro.blog. These tags represent common themes or topics that are frequently used and explored by the community. By clicking on a tag of interest, you can find posts and users who have used that tag, allowing you to explore specific subjects and join related conversations.
Recommended Users:
The Discover section also recommends users to follow based on your interests and the types of content you engage with. These recommendations help you find like-minded individuals, expand your network, and discover new voices and perspectives. Following recommended users can lead to meaningful connections and a more diverse and enriching microblogging experience.
Conversations:
The Discover section highlights ongoing conversations and discussions on Micro.blog. This allows you to see posts that have generated substantial engagement and responses from the community. By exploring these conversations, you can gain insights, participate in the discussion, and connect with other users who share similar interests.
Featured Posts:
Micro.blog occasionally features posts that are particularly noteworthy, thought-provoking, or creatively inspiring. These featured posts showcase exceptional content from the Micro.blog community, offering an opportunity to discover outstanding microbloggers and explore their work.
The Micro.blog Discover section provides a rich platform for exploration and discovery within the community. By regularly visiting this section, you can stay connected with the pulse of Micro.blog, engage with popular discussions, and find inspiring content that resonates with your interests.
Make it a habit to browse through the Discover section, interact with posts and users, and step out of your comfort zone to explore new topics and perspectives. With the diverse and engaging content available, the Micro.blog Discover section serves as a gateway to a world of inspiration, connection, and meaningful conversations.
Troubleshooting Common Issues on Micro.blog
While Micro.blog strives to provide a seamless and user-friendly experience, occasional challenges or issues may arise. Understanding how to troubleshoot common problems can help you resolve issues quickly and get back to enjoying your Micro.blog experience. Here are some common issues you may encounter on Micro.blog and how to troubleshoot them:
Unable to Log In:
If you are having trouble logging into your Micro.blog account, ensure that you have entered the correct username and password. Double-check for any typos or caps lock being enabled. If you have forgotten your password, use the “Forgot password” option to initiate a password reset. If the issue persists, reach out to Micro.blog support for assistance.
Post Not Showing Up:
If you recently published a post but it is not displaying on your microblog or in the Micro.blog timeline, check the visibility settings of your post. Ensure that it is not set to private, as private posts are only visible to your followers. If the visibility settings are correct, try refreshing your microblog or clearing your browser cache to see if the post appears.
Cross-Posting Errors:
If you encounter errors or inconsistencies when cross-posting your Micro.blog content to other platforms, review your cross-posting settings. Ensure that you have authorized the necessary accounts and granted the required permissions. If the issue persists, try disconnecting and reconnecting the affected accounts to refresh the connection.
Images Not Loading:
If images are not loading correctly on your microblog or in your posts, verify that the image URLs are correct and accessible. If you are hosting images on your own platform, ensure that the image file is valid and accessible. If you are using Micro.blog’s image hosting feature and still experiencing issues, reach out to Micro.blog support for further assistance.
API Errors or Integration Issues:
If you are encountering issues with integrating Micro.blog with other platforms or services using the Micro.blog API, refer to the documentation and guidelines provided by Micro.blog for the specific integration. Ensure that you have correctly implemented the required API endpoints and that any API keys or access tokens are accurate.
If you encounter any other issues or problems on Micro.blog that are not addressed here, it is recommended to visit the Micro.blog Help Center or reach out to Micro.blog support for further assistance. They can provide specific guidance and troubleshooting steps tailored to your situation.
By familiarizing yourself with common issues on Micro.blog and the troubleshooting steps outlined above, you can resolve any challenges that may arise more efficiently, ensuring a smooth and enjoyable microblogging experience.
Getting Help and Support on Micro.blog
Micro.blog provides a range of resources and avenues for getting help and support whenever you encounter issues or have questions about using the platform. Whether you need assistance with technical difficulties, understanding features, or clarifying policies, Micro.blog is dedicated to ensuring your microblogging experience is smooth and enjoyable. Here are some ways to seek help and support on Micro.blog:
Micro.blog Help Center:
The Micro.blog Help Center is a comprehensive resource that offers articles, guides, and FAQs covering a wide range of topics. It is a valuable starting point for finding answers to common questions, troubleshooting steps for known issues, and understanding various features and functionalities on Micro.blog. Visit the Help Center at [micro.blog/help](https://micro.blog/help) to access the wealth of information available.
Micro.blog Community:
The Micro.blog community is an active and supportive group of microbloggers who are eager to assist and share their knowledge. Engaging with the community through comments, replies, and discussions can help you find answers, exchange ideas, and learn from the experiences of others. You can find the community by exploring posts, joining conversations, and following users who share similar interests.
Direct Support:
If you have specific concerns or need personalized assistance, you can reach out to the Micro.blog support team directly. To contact support, visit the Help Center and look for the dedicated support section or email address. Describe your issue or question in detail, providing any relevant information or screenshots that may assist the support team in understanding and resolving your concern.
Micro.blog Blog and Podcast:
Micro.blog maintains an active blog and podcast where updates, announcements, and helpful tips are regularly shared. Checking the blog ([micro.blog/blog](https://micro.blog/blog)) and subscribing to the podcast can keep you informed about new features, platform enhancements, and community highlights. These resources often provide valuable insights and information that can assist you in effectively using Micro.blog.
If you are facing challenges or require support on Micro.blog, rest assured that there are numerous avenues available to assist you. From the Help Center to the vibrant community and direct support, Micro.blog prioritizes helping you make the most of your microblogging experience. Embrace the resources and reach out for support when needed, taking advantage of the wealth of knowledge and assistance available to you.
Leaving Micro.blog and Exporting Your Content
While Micro.blog offers a compelling platform for microblogging and connecting with others, circumstances may arise where you decide to leave the platform. Micro.blog enables you to easily export your content, providing the freedom to retain and migrate your posts to another platform. Here’s how you can leave Micro.blog and export your content:
Exporting Posts:
To export your posts from Micro.blog, follow these steps:
Log in to your Micro.blog account.
Go to the Micro.blog dashboard or settings section.
Look for the export options or settings.
Choose the export format that suits your needs. Micro.blog typically supports exporting posts in JSON format, which is compatible with many platforms and blogging services.
Initiate the export process and wait for the file containing your posts to be generated.
Download the exported file and save it to your desired location for safekeeping or future use.
Migrating to Another Platform:
If you plan to migrate your microblog to another platform, research the import options available on the new platform. Most platforms provide methods for importing posts from external sources like Micro.blog. Check if the platform supports importing posts in JSON format or any other compatible format. Follow the instructions provided by the new platform to import your exported Micro.blog posts and retain your content seamlessly.
Closing Your Micro.blog Account:
If you wish to close your Micro.blog account entirely, you can do so by following these steps:
Log in to your Micro.blog account.
Go to the Micro.blog dashboard or settings section.
Look for the account closure or delete options.
Review any warnings or implications associated with closing your account.
Confirm your decision to close the account as instructed.
Before closing your account, ensure that you have exported and safely stored your content, as the closure process is irreversible and will permanently delete your posts and other account-related information.
By allowing you to easily export your content, Micro.blog acknowledges the importance of maintaining your ownership and control over your posts. Whether you decide to migrate your content to another platform or store it for personal reasons, Micro.blog provides the necessary tools and flexibility to facilitate a smooth transition and preservation of your microblogging journey.