
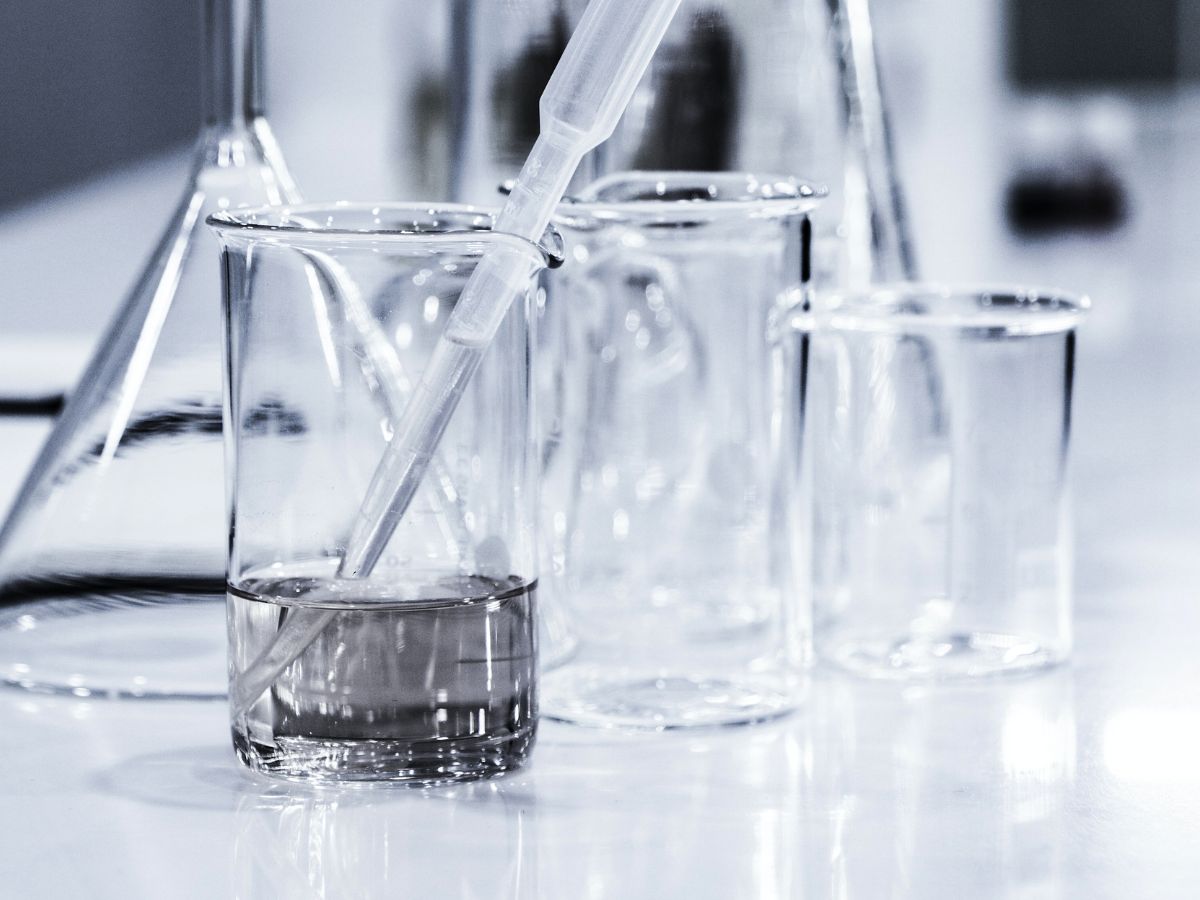
Safety Precautions
When it comes to making ethanol and biodiesel at home, it’s important to prioritize safety. While these processes can be rewarding and cost-effective, they also involve handling potentially hazardous materials. To ensure your well-being and the well-being of others, it’s crucial to follow proper safety precautions.
Here are some important safety guidelines to keep in mind:
- Wear protective gear: Always wear appropriate protective clothing, such as gloves, goggles, and a lab coat or apron, when handling chemicals or working with equipment.
- Work in a well-ventilated area: Ethanol and biodiesel production can release fumes and gases that may be harmful when inhaled. Make sure to work in a well-ventilated space or use a fume hood to minimize exposure.
- Keep an extinguisher nearby: Have a fire extinguisher readily available in case of accidents or emergencies. Make sure you know how to use it properly.
- Store chemicals properly: Store all chemicals and flammable materials in a cool, dry place. Keep them away from heat sources, open flames, and incompatible substances.
- Work with caution: Be mindful of the risks involved when handling chemicals or operating equipment. Follow the instructions carefully and avoid rushing or taking shortcuts.
- Handle waste responsibly: Dispose of waste materials according to local regulations. Do not pour chemicals down the sink or discard them in regular waste bins.
- Keep children and pets away: Ensure that children and pets are kept at a safe distance from your work area to prevent accidental exposure or injury.
- Educate yourself: Before you start making ethanol or biodiesel, educate yourself on the processes involved. Understand the potential hazards and how to mitigate them.
Remember, safety should always be your top priority. By taking the necessary precautions and staying informed, you can enjoy the process of making ethanol and biodiesel at home while minimizing any risks involved.
Making Ethanol
Ethanol, also known as grain alcohol or ethyl alcohol, is a renewable fuel that can be produced at home using simple equipment and ingredients. It can be used as a fuel for vehicles, as a solvent, or even for making homemade spirits. Here is a step-by-step guide on how to make ethanol at home:
Equipment and Ingredients:
- A fermentation vessel: This can be a glass carboy, a food-grade plastic container, or a stainless steel drum.
- Yeast: Choose a yeast strain that is suitable for ethanol production, such as champagne yeast or distillers yeast.
- Sugar: Use a fermentable sugar source like cane sugar, corn sugar, or molasses.
- Water: Use clean, filtered water without chlorine or other chemicals.
- Airlock: This device allows gas to escape during fermentation but prevents oxygen from entering the vessel.
- Hydrometer: A hydrometer is used to measure the specific gravity of the liquid during fermentation.
Fermentation Process:
- Sanitize all the equipment to ensure a clean and sterile environment.
- Dissolve the sugar in warm water in the fermentation vessel, following the recommended ratio of sugar to water.
- Once the sugar has dissolved, let the mixture cool to room temperature.
- Add the yeast to the mixture and stir gently to ensure even distribution.
- Seal the fermentation vessel with an airlock to allow gas to escape while preventing oxygen from entering.
- Place the vessel in a warm and dark location with a consistent temperature of around 70-80°F (21-27°C).
- Allow the mixture to ferment for 7-10 days, or until the bubbling activity subsides and the specific gravity stabilizes.
- At this point, the liquid should have converted most of the sugar into ethanol.
Distillation Process:
- Pour the fermented liquid into a still or distillation apparatus.
- Heat the liquid slowly to evaporate the ethanol, leaving behind any impurities.
- Collect the vapor and condense it back into a liquid using a cooling system.
- The resulting liquid is ethanol, which can be further purified through additional distillation if desired.
Filtering and Conditioning:
- Filter the distilled ethanol to remove any remaining impurities.
- Store the ethanol in a clean and tightly sealed container.
- You can also add activated carbon or other filtering agents to improve the quality and taste of the ethanol.
With these steps, you can successfully produce ethanol at home. Remember to research and follow any legal requirements or permits necessary for ethanol production in your area. Enjoy the process, but always remember to handle ethanol with care due to its flammability.
Equipment and Ingredients
Before embarking on the journey of making ethanol at home, it’s essential to gather the necessary equipment and ingredients. Having the right tools and materials will ensure a smooth and successful ethanol production process. Here’s a list of the equipment and ingredients you’ll need:
Equipment:
- Fermentation vessel: This can be a glass carboy, food-grade plastic container, or a stainless steel drum. Make sure it is clean and suitable for holding the liquid during fermentation.
- Airlock: An airlock is a device that allows gas to escape during fermentation while preventing oxygen from entering the fermentation vessel. It helps maintain the integrity of the process and prevents contamination.
- Hydrometer: A hydrometer is a tool used to measure the specific gravity of the liquid during fermentation. It helps monitor the progress of the fermentation process and determine when it’s complete.
- Still or distillation apparatus: This equipment is necessary for distilling the fermented liquid and separating ethanol from impurities. There are various types of stills available, including pot stills, reflux stills, and column stills.
- Heat source: Depending on the type of still you’re using, you’ll need a heat source to provide energy for the distillation process. This can be an electric element, gas burner, or even a stovetop.
- Cooling system: To condense the vapor produced during distillation back into a liquid, you’ll need a cooling system. This can be a condenser coil, water jacket, or a separate cooling unit.
- Filtering equipment: After distillation, it’s important to filter the ethanol to remove any remaining impurities. This can be done using activated carbon filters, filter papers, or other suitable filtration methods.
- Storage containers: Once the ethanol has been distilled and filtered, it’s crucial to store it in clean and tightly sealed containers. Glass bottles or food-grade plastic containers are commonly used for this purpose.
Ingredients:
- Sugar: The primary ingredient for ethanol production is a fermentable sugar source. This can include various types of sugar, such as cane sugar, corn sugar, or molasses. The choice of sugar can affect the flavor and yield of the ethanol.
- Yeast: Yeast plays a vital role in the fermentation process as it converts sugar into ethanol and carbon dioxide. Different strains of yeast can be used, such as champagne yeast or distillers yeast, depending on the desired final product.
- Water: Clean and filtered water is essential for creating the fermentation mixture. Avoid using water with high mineral content or chlorine, as it can negatively impact the fermentation process and the quality of the ethanol.
By gathering the appropriate equipment and ingredients, you’ll be well-prepared to embark on your ethanol-making adventure at home. Remember to maintain a clean and controlled environment throughout the process to ensure the best results.
Fermentation Process
The fermentation process is a crucial step in making ethanol at home. During fermentation, yeast converts the fermentable sugars into ethanol and carbon dioxide through a natural metabolic process. This section will outline the key steps involved in the fermentation process:
- Sanitize equipment: Before starting fermentation, it’s essential to properly sanitize all equipment to create a clean and sterile environment. This helps prevent the growth of unwanted bacteria or wild yeast that could affect the fermentation process.
- Dissolve sugar: In a fermentation vessel, dissolve the desired amount of sugar in warm water. The ratio of sugar to water will depend on the recipe and the desired strength of the ethanol. Stir the mixture until the sugar is completely dissolved.
- Cool the mixture: Allow the sugar-water mixture to cool to room temperature before proceeding. Rapid temperature changes can shock and harm the yeast, so ensure the mixture is within the recommended temperature range for yeast activation.
- Add yeast: Once the mixture has cooled, add the chosen yeast to the fermentation vessel. Different yeast strains have different temperature and pH requirements, so follow the instructions provided by the yeast manufacturer for optimal results.
- Mix the contents: Gently stir the mixture to ensure thorough distribution of the yeast and to introduce oxygen into the mixture. Yeast requires oxygen to carry out the initial metabolic processes before transitioning into anaerobic fermentation.
- Seal the vessel: Fit the fermentation vessel with an airlock, which allows carbon dioxide-produced during fermentation to escape while preventing oxygen from entering the vessel. This helps maintain a controlled and anaerobic environment ideal for yeast activity.
- Choose a suitable location: Place the fermentation vessel in a warm area with a consistent temperature between 70-80°F (21-27°C). Yeast thrives in this temperature range and fermentation will occur more efficiently.
- Monitor the fermentation: Keep an eye on the activity in the fermentation vessel. As the yeast consumes the sugar, it will produce carbon dioxide bubbles and release alcohol aroma. This visible bubbling is a sign of an active fermentation process.
- Timing and completion: Fermentation typically takes around 7-10 days, though it may vary depending on factors like temperature, sugar content, and yeast strain. To determine the completion of fermentation, monitor the specific gravity using a hydrometer. When the specific gravity no longer changes over a few days, fermentation is likely complete.
The fermentation process is a vital stage in producing ethanol, as it converts sugar into alcohol. It’s important to monitor and maintain optimal conditions to ensure a successful fermentation. Once the fermentation process is complete, the liquid is ready for the distillation stage to separate the ethanol from impurities.
Distillation Process
The distillation process is a crucial step in making ethanol at home as it allows for the separation of ethanol from other substances and impurities. Through careful heating and condensation, the distilled liquid becomes purified ethanol. Here are the key steps involved in the distillation process:
- Transfer the fermented liquid: After the fermentation process is complete, transfer the fermented liquid into a still or distillation apparatus. Ensure that the equipment is clean and capable of withstanding the heat of the distillation process.
- Heat slowly: Gradually apply heat to the still, using a heat source such as an electric element or gas burner. It’s important to heat the liquid slowly to prevent boiling or splashing, which could result in the loss of ethanol or contamination from impurities.
- Evaporation and condensation: As the liquid heats up, ethanol will evaporate first due to its lower boiling point compared to other substances. The vapors rise into the still’s neck and pass through a cooling system, which condenses the ethanol vapors back into liquid form.
- Collect the distilled ethanol: Set up a collection vessel to capture the condensate. The condensed liquid that is collected is now purified ethanol, free from most impurities.
- Multiple distillations: If you desire a higher level of purity, you can perform multiple distillations. This involves repeating the heating and condensation process to further separate the ethanol from any remaining impurities.
- Discard the initial and final portions: During distillation, there may be initial and final portions of the distillate that contain higher concentrations of undesirable substances. These portions are often discarded to ensure the final product is of the highest quality.
It’s crucial to note that distillation involves the use of heat and open flames, making safety precautions essential. Make sure the distillation equipment is stable and suitable for the task at hand, and take the necessary measures to prevent accidents or fires.
Additionally, it’s important to comply with local regulations and obtain any necessary permits for distillation and ethanol production. Laws and regulations surrounding home distillation can vary, so familiarize yourself with the rules and limitations in your area.
Once the distillation process is complete, you will have successfully obtained purified ethanol, ready to be used for various purposes, such as fuel or for creating homemade spirits. Properly store the distilled ethanol in containers suitable for its intended use.
Filtering and Conditioning
After the distillation process, it’s essential to filter and condition the distilled ethanol to ensure its quality and remove any remaining impurities. This step helps enhance the taste, clarity, and overall purity of the ethanol. Here’s what you need to know about filtering and conditioning:
- Filtering the ethanol: To remove any remaining impurities, pass the distilled ethanol through a filtration system. One common method is to use activated carbon filters, which effectively absorb impurities and improve the taste and odor of the ethanol. Alternatively, you can use filter papers or other suitable filtration materials.
- Choosing the right filtration method: The choice of filtration method will depend on the desired level of purity and the resources available. Experiment with different methods to find the one that suits your needs and produces the desired results.
- Conditioning the ethanol: Conditioning involves giving the ethanol time to rest and mellow. Allow the filtered ethanol to sit in a clean, airtight container for a period of time, usually a few weeks or longer, depending on personal preference. Conditioning helps improve the overall flavor and smoothness of the ethanol.
- Additional steps for higher purity: If you are aiming for an even higher level of purity, consider using additional techniques such as redistillation or carbon filtering for a second time. These additional steps can further refine the ethanol and remove any remaining impurities.
- Storage considerations: Store the filtered and conditioned ethanol in a clean, tightly sealed container to maintain its quality. Choose containers made of glass or food-grade plastic to prevent any contamination from other materials. Keep the containers in a cool, dark place away from direct sunlight or heat sources.
- Testing quality and performance: Before using the ethanol, consider testing its alcohol content using an alcohol hydrometer. This will ensure that it meets the desired strength and consistency for its intended use. Moreover, you can also perform taste tests to determine the flavor and quality of the finished product.
Remember, the filtering and conditioning process will vary depending on personal preference and the desired final product. Take the time to experiment and adjust the filtration and conditioning methods to achieve the desired outcome.
By filtering and conditioning the distilled ethanol, you can ensure its purity, remove impurities, and enhance its overall quality. Whether you’re using the ethanol for fuel, solvents, or other purposes, these steps will help produce a superior final product.
Making Biodiesel
Biodiesel is an environmentally friendly alternative to traditional diesel fuel, and you can make it at home from renewable sources such as vegetable oil or animal fats. This section will guide you through the process of making biodiesel:
- Equipment and Ingredients:
Before starting the biodiesel production process, gather the necessary equipment and ingredients. Here are the essentials:
- Vegetable oil or animal fats: Choose a high-quality, filtered vegetable oil or animal fat as the base material for your biodiesel.
- Methanol: This alcohol acts as a reactant in the transesterification process, converting the oil or fat into biodiesel.
- Catalyst: A catalyst, typically sodium hydroxide or potassium hydroxide, is necessary to speed up the transesterification reaction.
- Reaction vessel: Use a container suitable for holding the oil and methanol mixture during the reaction, such as a glass or stainless steel container.
- Stirring equipment: Ensure you have a means of stirring the mixture, such as a mechanical stirrer or a hand-held immersion blender.
- Drying apparatus: A method for removing excess water from the biodiesel, such as a separating funnel or water-absorbing material, will be necessary.
- Transesterification Process:
The transesterification process involves converting the vegetable oil or animal fat into biodiesel. Here are the steps involved:
- Measure the desired quantity of vegetable oil or animal fat and transfer it into the reaction vessel.
- Add the necessary amount of methanol to the reaction vessel.
- Slowly add the catalyst (sodium hydroxide or potassium hydroxide) to the mixture and stir well. Exercise caution, as these substances can be hazardous.
- Maintain the mixture at a suitable temperature, typically around 120-150°F (49-66°C), for a specific period of time. Stir periodically to ensure proper mixing.
- Allow the mixture to settle, allowing the biodiesel to separate from any glycerin or other byproducts formed during the reaction.
- Washing and Drying Process:
After the transesterification process, it’s important to remove impurities and excess water from the biodiesel. Follow these steps:
- Fill a separating funnel with warm water or a water-absorbing material, such as anhydrous sodium sulfate.
- Add the biodiesel to the separating funnel and allow it to separate from any remaining impurities or water.
- Drain off the water or water-absorbing material from the separating funnel.
- Repeat the washing process if necessary to achieve the desired purity of the biodiesel.
- Transfer the washed biodiesel to a suitable container for storage. Ensure the container is clean and sealed tightly.
With these steps, you can successfully make biodiesel at home. Remember to follow safety guidelines when working with chemicals and consider local regulations regarding biodiesel production.
Equipment and Ingredients
Before you embark on the process of making biodiesel at home, it’s important to gather the necessary equipment and ingredients. Having the right tools and materials will ensure a smooth and successful biodiesel production process. Here’s what you’ll need:
Equipment:
- Mixing containers: You’ll need containers made of glass or stainless steel to hold the ingredients and facilitate the mixing process. Avoid using containers made of reactive materials like aluminum or copper, as they can interfere with the chemical reactions.
- Stirring equipment: Depending on the scale of your production, you can use a mechanical stirrer, a hand-held immersion blender, or simply manual stirring tools like a spoon or whisk.
- Heating equipment: A heat source such as an electric hot plate or a gas burner will be needed to heat the mixture during certain stages of the biodiesel production process.
- Separating funnel: This cone-shaped funnel with a stopcock at the bottom is used to separate biodiesel from byproducts and impurities.
- Measuring tools: Accurate measuring tools like graduated cylinders or syringes are necessary to measure the quantity of ingredients and ensure precise ratios.
- Filtration equipment: To filter the biodiesel and remove any remaining impurities, you’ll need filtration equipment such as filter papers, filter bags, or a filtration system specifically designed for biodiesel.
Ingredients:
- Vegetable oil or animal fats: The primary ingredient for making biodiesel is a high-quality vegetable oil or animal fat. Common choices include soybean oil, sunflower oil, waste cooking oil, or animal fats like tallow or lard.
- Methanol: Methanol is used as the alcohol component in the transesterification process, where it helps to convert the vegetable oil or animal fats into biodiesel.
- Catalyst: A catalyst, such as sodium hydroxide or potassium hydroxide, is necessary to speed up the transesterification process. The catalyst helps break down the triglycerides present in the oil or fats to produce biodiesel and glycerin.
- Optional additives: Depending on your specific requirements, you may choose to add certain additives like antioxidants, detergents, or stabilizers to enhance the quality and performance of the biodiesel.
It’s important to ensure that all equipment used is clean and free from contaminants that could affect the quality of the biodiesel. Additionally, follow safety precautions when handling chemicals and always store them properly.
By gathering the appropriate equipment and ingredients, you’ll be well-prepared to start the biodiesel production process at home. Remember to review local regulations and safety guidelines before starting to ensure compliance and a safe working environment.
Transesterification Process
The transesterification process is a key step in converting vegetable oil or animal fats into biodiesel. By reacting these fats or oils with an alcohol and a catalyst, such as sodium hydroxide or potassium hydroxide, the triglycerides are broken down into biodiesel and glycerin. Here’s a breakdown of the transesterification process:
- Measure the ingredients:
Begin by measuring the desired amount of vegetable oil or animal fats and transferring them into a suitable mixing container. Ensure that the container is clean and free from any contaminants that could affect the quality of the biodiesel.
- Add the alcohol:
Next, add the alcohol component – usually methanol – to the mixing container. The alcohol will react with the fats or oils to break down the triglycerides and form esters, which are the basis of biodiesel.
- Add the catalyst:
Introduce the catalyst, typically sodium hydroxide or potassium hydroxide, to the mixture. The catalyst helps speed up the transesterification reaction by increasing the rate of esterification and reducing the production of unwanted byproducts.
- Mix and heat the reaction:
Thoroughly mix the ingredients together to ensure a homogenous mixture. Apply gentle heat to the mixture, typically between 120-150°F (49-66°C), to speed up the reaction. Stir the mixture periodically to ensure even distribution of heat and enhance the reaction rate.
- Allow the reaction to proceed:
Let the mixture react for a sufficient amount of time. The duration will vary depending on the specific recipe and the type of catalyst used. Typically, the reaction takes a few hours to complete, but it’s essential to monitor the process to ensure optimal conversion.
- Separate the glycerin:
After the reaction is complete, the mixture will have separated into two layers: biodiesel and glycerin. Use a separating funnel or another suitable method to separate the glycerin layer from the biodiesel layer, allowing for further processing of the biodiesel.
It’s important to note that the transesterification process requires caution and proper handling of chemicals. Follow safety guidelines and wear protective gear, such as gloves and goggles, throughout the process to ensure personal safety.
Once the transesterification process is complete, the resulting biodiesel can be further washed and dried to remove impurities and excess alcohol. These additional steps help improve the quality and purity of the biodiesel, resulting in a cleaner and more efficient fuel.
Washing and Drying Process
The washing and drying process is a critical step in the production of biodiesel as it helps remove impurities and excess alcohol from the biodiesel. By effectively washing and drying the biodiesel, its quality, stability, and performance can be improved. Here’s a breakdown of the washing and drying process:
- Prepare the washing solution:
Start by preparing a washing solution that will help remove impurities from the biodiesel. A common washing solution is warm water, although other alternatives like a water and vinegar mixture or water and an emulsifier can be used.
- Add the washing solution:
Add the prepared washing solution to the biodiesel. The amount of washing solution used will depend on the volume of biodiesel being washed. It’s essential to have an appropriate ratio of washing solution to biodiesel for effective purification.
- Mix thoroughly:
Gently agitate or stir the mixture to ensure thorough mixing of the washing solution and the biodiesel. This allows for the removal of water-soluble impurities and any remaining alcohol that may be present in the biodiesel.
- Allow separation:
After mixing, let the mixture sit undisturbed, allowing the impurities to settle at the bottom. This separation process may take several hours to complete, depending on the specific wash solution used and the nature of impurities present.
- Drain the lower layer:
With the impurities settled at the bottom, carefully open the valve at the bottom of the container or use a separating funnel to drain the lower layer, which contains most of the impurities. Be cautious not to disturb the settled layer while draining.
- Repeat the washing process:
If necessary, repeat the washing process using fresh washing solution to further purify the biodiesel. Multiple washes may be required depending on the initial quality of the biodiesel and the desired purity level.
- Drying the biodiesel:
After washing, the biodiesel may still contain a small amount of water. To remove any remaining water, transfer the biodiesel to a clean, dry container and allow it to sit undisturbed for a period of time. This process allows the water to separate and settle at the bottom of the container. Alternatively, the biodiesel can be passed through a filter medium that effectively removes the water droplets.
Properly dried biodiesel should have a low water content, as excess water can lead to performance issues and affect its stability. It’s crucial to ensure that the biodiesel is thoroughly dried before storage or use.
By following the washing and drying process, you can improve the overall quality and purity of your biodiesel, ensuring it meets the necessary standards for efficient fuel usage.
Testing Quality and Performance
After producing biodiesel at home, it’s essential to test its quality and performance to ensure that it meets the necessary standards and performs optimally. By conducting appropriate tests, you can gauge the effectiveness of your production process and make necessary adjustments. Here are some key tests to consider:
- Flash point test:
The flash point test measures the lowest temperature at which the biodiesel vapor can ignite when exposed to an open flame. This test helps determine the safety and flammability of the biodiesel produced. It’s crucial to ensure that the flash point meets the required safety standards and is suitable for its intended use.
- Viscosity test:
Viscosity refers to the thickness or flowability of the biodiesel. A viscosity test helps assess the fuel’s ability to flow through the fuel system and combust efficiently. It’s important to ensure that the viscosity falls within the appropriate range to prevent clogging of filters and injectors and enable proper fuel atomization.
- Water content test:
Biodiesel should have a low water content as excess water can cause issues such as microbial growth, fuel instability, and decreased energy content. Conduct a water content test to determine if there is any residual moisture present in the biodiesel. If the water content exceeds the recommended limit, consider implementing better drying techniques or refining your production process.
- Acid value test:
The acid value test determines the amount of free fatty acids in the biodiesel. High acid values can lead to fuel system corrosion and increased formation of deposits. Testing the acid value helps ensure that the biodiesel meets the quality standards and remains compatible with engines and fuel systems.
- Cetane number test:
The cetane number is an indicator of the ignition quality of the biodiesel. A higher cetane number indicates better combustion efficiency and smoother engine operation. Testing the cetane number can help assess the fuel’s ignition properties and overall performance.
- Performance tests in engines:
For a comprehensive evaluation, consider conducting performance tests by running the biodiesel in a suitable engine or equipment. Observe factors such as engine power, emissions, combustion characteristics, and overall performance. These tests provide valuable insights into the effectiveness of your biodiesel and can guide further improvements.
Keep in mind that standards and regulatory requirements for biodiesel quality may vary depending on your location. Familiarize yourself with these standards and ensure that your biodiesel meets the necessary criteria.
Regularly testing the quality and performance of your biodiesel enables you to make necessary adjustments to your production process, ensuring a consistent and reliable fuel supply. It also helps maintain the performance and longevity of engines and fuel systems that use biodiesel as a fuel source.