
Why Use Your Computer to Record TV Shows?
Recording TV shows has become increasingly popular as people want more flexibility in their viewing habits. Rather than being tied to a fixed schedule, recording TV shows allows you to watch them at your convenience. While many cable and satellite providers offer DVR services, using your computer to record TV shows provides even more advantages.
Firstly, recording TV shows on your computer allows for a greater level of control and customization. You can choose the specific shows you want to record and set preferences such as the recording quality and format. Moreover, you can easily create playlists or organize your recordings in a way that best suits your viewing needs.
Secondly, using your computer as a recording device eliminates the need for additional hardware. Unlike traditional DVRs or set-top boxes, which require separate devices and cables, all you need is a TV tuner or capture card for your computer. This not only frees up space but also reduces clutter in your entertainment setup.
Furthermore, recording TV shows on your computer offers the flexibility of recording from different sources. Whether you have an antenna or cable subscription, your computer can capture and save TV shows from various channels. This is especially beneficial if you want to record shows from networks that may not be available through your cable or satellite provider.
Another advantage is the ability to record multiple shows simultaneously. With the right hardware and software, you can set up your computer to record multiple channels at the same time, allowing you to capture all your favorite shows without missing a single episode. This is particularly convenient for households with different viewing preferences or when popular shows air at the same time.
Finally, using your computer to record TV shows opens up a world of possibilities for managing and sharing your recordings. You can easily transfer recorded shows to other devices or stream them to your smart TV, smartphone, or tablet. This gives you the freedom to watch your favorite shows on different screens, whether you’re on the go or relaxing at home.
All in all, recording TV shows on your computer offers flexibility, customization, and convenience that traditional DVRs often can’t match. Whether you want to watch your favorite shows on your own time or share recordings with family and friends, using your computer as a recording device is a smart choice.
What You Need to Get Started
Before you can start recording TV shows on your computer, there are a few essential requirements you need to fulfill. Here are the key things you’ll need:
1. TV Tuner or Capture Card: To capture TV signals and convert them into a digital format, you’ll need a TV tuner or capture card. These devices can be either internal or external and come in different types such as digital TV tuners, external USB tuners, or PCIe capture cards. The choice depends on your computer’s available slots and your desired level of functionality.
2. Antenna or Cable Connection: Depending on how you receive your TV signal, you’ll need either an antenna or a cable connection. If you use an antenna, ensure it’s properly connected to your TV tuner or capture card. If you have a cable subscription, connect the cable line to the input port of your TV tuner or capture card.
3. Computer with Adequate Specs: Your computer needs to meet certain specifications to handle the recording and storage of TV shows. A decent processor (preferably multi-core), sufficient RAM (at least 4GB), and ample storage space (preferably a dedicated hard drive) are essential for smooth recording and playback.
4. Good Internet Connection: While not mandatory for recording TV shows, a stable and reliable internet connection is highly recommended. This allows you to access program guides, download software updates, and stream your recorded shows to other devices if desired.
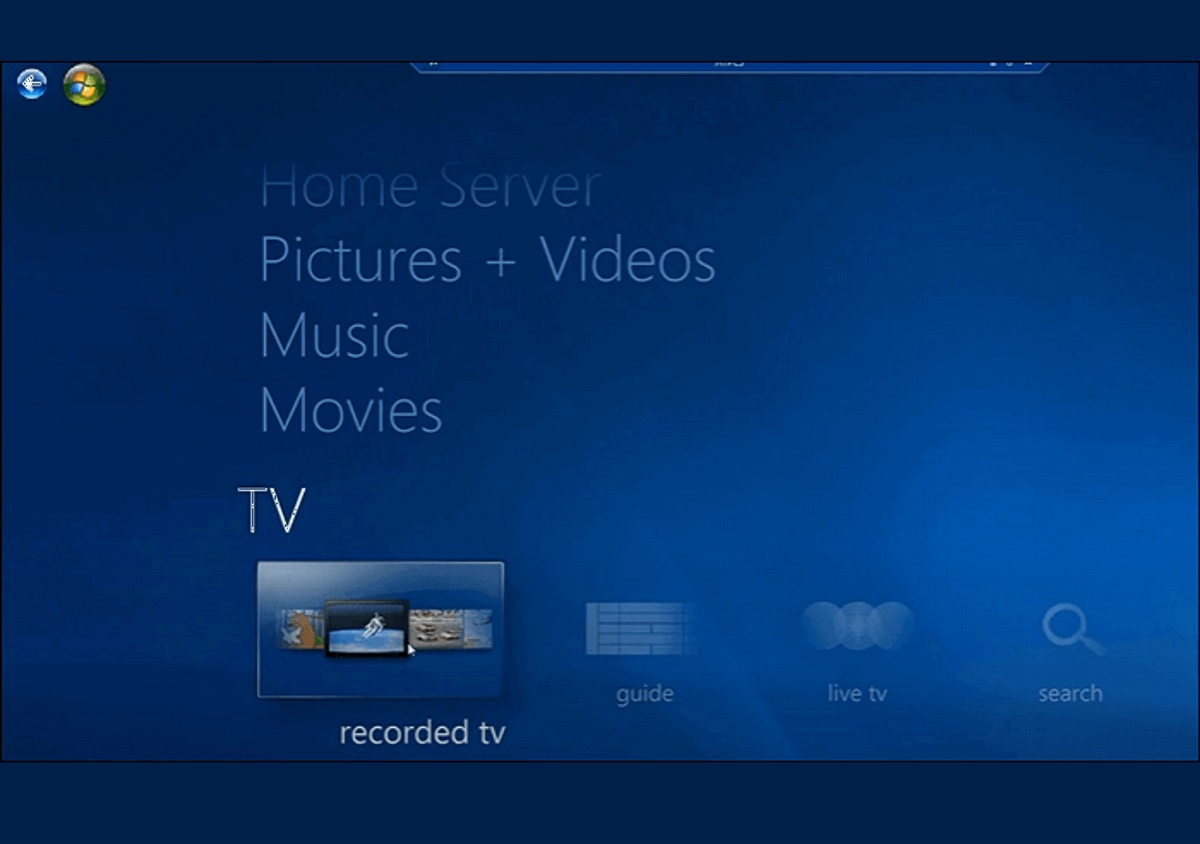
5. Compatible Recording Software: To record TV shows on your computer, you’ll need compatible recording software. There are numerous options available, both free and paid, with varying features and functionalities. Some popular choices include Windows Media Center, Kodi, NextPVR, and OBS Studio. Choose one that suits your needs and is compatible with your TV tuner or capture card.
6. Optional: Remote Control or App: If you prefer a seamless TV viewing experience, consider getting a remote control or installing a remote control app on your smartphone or tablet. These allow you to easily navigate through the recording software and control playback without needing to be physically near your computer.
Having these essential components in place will ensure a smooth recording experience and enable you to make the most of your TV shows. With the right hardware and software, you’ll be ready to start recording your favorite programs and enjoying them at your convenience.
Option 1: Using a Digital TV Tuner
A digital TV tuner is a popular choice for recording TV shows on your computer. It allows you to capture TV signals directly from broadcast channels and convert them into a digital format that can be saved on your computer. Here’s how you can get started with a digital TV tuner:
1. Choose the Right TV Tuner: There are different types of digital TV tuners available, such as internal PCI or PCIe cards, external USB tuners, or even network-based tuners. Select one that is compatible with your computer and offers the features you need, such as support for HD channels or multiple tuners for simultaneous recordings.
2. Install the TV Tuner: If you have chosen an internal TV tuner, you’ll need to open your computer case and install the tuner card in an available PCI or PCIe slot. Ensure you follow the manufacturer’s instructions and secure the card properly. For external USB tuners, simply plug it into an available USB port on your computer.
3. Connect the Antenna: If you’re using an antenna to receive TV signals, connect it to the input port of your TV tuner. Ensure the antenna is properly positioned to receive a strong signal. If you have a cable subscription, connect the cable line directly to the input port of your TV tuner.
4. Set Up the Software: Install the software that comes with your digital TV tuner or download compatible recording software from the manufacturer’s website. Follow the on-screen instructions to configure the software and scan for available channels. This will ensure that your computer recognizes the TV tuner and allows you to select and record specific channels.
5. Schedule and Record TV Shows: Once your digital TV tuner is set up and the software is configured, you can start scheduling and recording your favorite TV shows. Most TV tuner software allows you to set up recurring recordings based on a specific time or channel. You can also manually start and stop recording at any time, or use the software’s electronic program guide to select shows for recording.
6. Manage and Playback Recordings: After recording TV shows, you can manage and playback your recordings using the software. You can organize them by name, date, or genre, and delete or archive the recordings as needed. The software often provides playback controls, allowing you to fast forward, rewind, pause, and skip through commercials.
7. Transfer and Stream Recordings: If you want to watch your recorded shows on other devices, you can transfer them to a USB drive or network-attached storage (NAS) device for playback on other computers or smart TVs. Additionally, some software may allow you to stream your recordings over your home network to compatible devices like smartphones or tablets.
Using a digital TV tuner is a convenient and cost-effective way to record TV shows on your computer. With the right hardware and software, you can enjoy the flexibility of recording your favorite programs and watching them at your convenience.
Option 2: Using an External TV Tuner
If you don’t want to install a TV tuner card inside your computer, using an external TV tuner is a great alternative. External TV tuners offer the convenience of easy setup and portability, allowing you to record TV shows on your computer without the need for hardware modifications. Here’s how you can get started with an external TV tuner:
1. Choose the Right External TV Tuner: There are various external TV tuners available in the market, ranging from USB-connected devices to network-based tuners. Look for one that is compatible with your computer’s operating system and offers the features you need, such as support for HD channels or multiple tuners for simultaneous recordings.
2. Connect the External TV Tuner: Plug the external TV tuner into an available USB port on your computer. Make sure the connection is secure, and if required, connect the power adapter to the tuner as well. Some external tuners may have additional connectors for antennas or cable lines, so follow the manufacturer’s instructions to make the necessary connections.
3. Install the Software: Most external TV tuners come with their own software for configuring and controlling the tuner. Insert the provided installation disc or download the software from the manufacturer’s website. Follow the on-screen prompts to install the software on your computer.
4. Scan for TV Channels: Once the software is installed, open it and scan for available TV channels. The software will search for signals and populate a list of channels that you can receive. Depending on the tuner and software, you may have options to filter channels or manually add channels if necessary.
5. Schedule and Record TV Shows: With the external TV tuner and software set up, you can start scheduling and recording your favorite TV shows. The software typically provides options to set up recurring recordings based on time or channel selection. You can also manually initiate recordings for specific shows that you want to capture.
6. Manage and Playback Recordings: After recording TV shows, you can manage and playback your recordings within the software. You can organize them by name, date, or genre, and delete or archive recordings as needed. Playback controls are usually available, allowing you to skip commercials or jump to specific parts of the recorded content.
7. Transfer and Stream Recordings: If you want to enjoy your recorded shows on other devices, you can transfer the recordings to a USB drive or network-attached storage (NAS) device. This allows you to watch your favorite shows on other computers or smart TVs. Some software may also provide streaming options, allowing you to stream your recordings over your home network to compatible devices.
Using an external TV tuner provides a flexible and portable solution for recording TV shows on your computer. With the right external tuner and software, you can enjoy the convenience of capturing your favorite programs at your own convenience.
Option 3: Using a Capture Card
If you’re looking for a professional-grade solution for recording TV shows on your computer, using a capture card is an excellent choice. Capture cards provide advanced features and high-quality video capture capabilities, making them ideal for capturing and recording TV shows with superior clarity and performance. Here’s how you can get started with a capture card:
1. Choose the Right Capture Card: There are several capture card options available on the market, each with different features and specifications. Look for a capture card that suits your needs, such as one with support for high-definition (HD) or 4K video capture, multiple input options, and the necessary connections for your computer.
2. Install the Capture Card: To install the capture card, you’ll need to open your computer case and locate an available PCI or PCIe slot. Insert the capture card into the slot carefully, making sure it is securely seated. Follow the manufacturer’s instructions for the specific installation steps and ensure all necessary connections are made.
3. Connect the Video Source: Depending on your setup, determine whether you will be connecting your cable box, satellite receiver, or another video source directly to the capture card. Use the appropriate cables, such as HDMI or component cables, to connect the video source to the capture card’s input ports. Follow the manufacturer’s instructions for the correct setup.
4. Install the Software: Most capture cards come with their own software for video capture, editing, and playback. Insert the provided installation disc or download the software from the manufacturer’s website. Follow the on-screen instructions to install the software on your computer.
5. Configure the Capture Settings: Open the capture card software and navigate to the settings or preferences section. Here, you can customize various recording options, such as video quality, resolution, frame rate, and audio settings. Adjust these settings according to your preferences and the specifications of your computer and capture card.
6. Schedule and Record TV Shows: With the capture card properly installed and configured, you can start scheduling and recording TV shows. The software typically allows you to set up recurring recordings based on specific channels and time slots. You can also manually start and stop recordings as needed, giving you full control over the recordings.
7. Manage and Edit Recordings: After capturing TV shows, you can manage and edit your recordings within the capture card software. You can organize your recordings into folders or playlists, trim the footage, add captions or watermarks, and apply other editing effects to enhance the viewing experience.
8. Export and Share Recordings: Once you’ve finished editing your recordings, you can export them to various formats or upload them to video-sharing platforms. The capture card software usually provides options for exporting your recordings in popular formats such as MP4, AVI, or MOV, making them compatible with different devices and media players.
Using a capture card offers professional-level video capture capabilities for recording TV shows on your computer. With the right capture card and software, you can enjoy high-quality recordings with enhanced customization and editing options.
Setting Up Your TV Tuner or Capture Card
Setting up your TV tuner or capture card is an essential step in recording TV shows on your computer. Proper installation and configuration ensure that your hardware is recognized and optimized for capturing and storing video content. Here’s a step-by-step guide to help you set up your TV tuner or capture card:
1. Prepare your computer: Ensure that your computer is powered off and disconnected from the electrical outlet. This will prevent any electrical mishaps during the installation process.
2. Choose the right slot: If you are installing a TV tuner card, identify an available PCI or PCIe slot inside your computer. For capture cards, follow the manufacturer’s instructions to determine the appropriate slot type required for installation.
3. Open your computer case: Depending on your computer model, you may need to remove one or both side panels of the computer case. Follow the manufacturer’s documentation to understand the specific steps to open your case safely.
4. Insert the card: Carefully align the TV tuner or capture card with the selected slot and gently push it into place. Apply even pressure until the card is fully seated in the slot. Take caution not to force the card into the slot, as it may cause damage.
5. Secure the card: Once inserted, use the retaining screw or bracket provided with your card to secure it to the computer case. This step ensures that the card stays firmly in place and does not move during operation.
6. Connect the necessary cables: Depending on the type of TV tuner or capture card, there may be cables that need to be connected. For TV tuners, connect the antenna or cable input to the appropriate port on the card. For capture cards, connect the video source (e.g., cable box, satellite receiver) to the card using the appropriate cables (e.g., HDMI, component).
7. Close the computer case: Replace the side panels of your computer case and secure them using the appropriate screws or latches. Ensure that all cables are properly routed and not pinched or obstructed by any components.
8. Power on your computer: Connect your computer to the electrical outlet and power it on. Wait for the operating system to start up.
9. Install the drivers: Insert the driver installation disc that came with your TV tuner or capture card into your computer’s optical drive. Follow the prompts to install the necessary drivers and software. Alternatively, you can download the latest drivers and software from the manufacturer’s website.
10. Configure the settings: Open the software associated with your TV tuner or capture card. Follow the on-screen instructions to configure and optimize the settings for your specific setup. This may include selecting your region, scanning for available channels, and adjusting video quality options.
11. Test and verify: Once the installation and configuration are complete, test your TV tuner or capture card by tuning into a TV channel or capturing video from your video source. Verify that the signal is being received and processed correctly. Make any necessary adjustments to the settings to ensure optimal performance.
By following these steps, you will set up your TV tuner or capture card effectively, allowing you to begin recording TV shows on your computer and enjoying the convenience of capturing your favorite programs.
Choosing the Right Software
Choosing the right software is crucial when it comes to recording TV shows on your computer. The software you select will determine the features, functionality, and overall user experience of the recording process. Here are some factors to consider when choosing the right software for your needs:
1. Compatibility: Ensure that the software you choose is compatible with your operating system. Whether you use Windows, macOS, or Linux, make sure the software supports your specific platform to avoid any compatibility issues.
2. Recording Capabilities: Look for software that offers the recording capabilities you require. Consider features such as the ability to schedule recordings, record from multiple channels simultaneously, and specify recording quality and format.
3. User Interface: Evaluate the user interface of the software to ensure it is intuitive and easy to navigate. A cluttered or confusing interface can make the recording process cumbersome and may hinder your overall experience.
4. Electronic Program Guide (EPG): An EPG provides a program schedule, making it easier to select and schedule recordings. Make sure the software supports an EPG that is compatible with your region and TV signal source.
5. Editing and Management Tools: Consider whether you require software with editing and management tools for your recorded TV shows. Some software offers features like trimming, merging, and adding subtitles or watermarks to your recordings, enhancing your overall viewing experience.
6. File Compatibility: Check that the software supports the file formats you prefer for your recordings. This ensures compatibility with other devices or media players to view your recorded shows conveniently.
7. Stability and Reliability: Look for software that is stable and reliable, with a good reputation for performance and minimal crashes or bugs. Reading user reviews and checking ratings can help you assess the software’s stability and reliability.
8. Community Support and Updates: Consider whether the software has an active online community. This can provide valuable resources, including tutorials, troubleshooting guides, and user forums where you can seek assistance from other users. Additionally, regular software updates ensure bug fixes and potential improvements to enhance your recording experience.
9. Price: Evaluate your budget and determine whether you are looking for free or paid software. While free options are available, paid software often offers more advanced features and dedicated customer support. Consider the value for money and features provided by each option.
10. Trial Versions: If available, test out trial versions of different software options before committing to one. This allows you to experience firsthand how the software performs and whether it meets your expectations.
By considering these factors, you can choose the right software that aligns with your requirements and enhances your TV show recording experience. Remember, selecting the right software plays a vital role in ensuring a seamless and enjoyable recording process on your computer.
Recording TV Shows with Software
Once you have set up your TV tuner or capture card and chosen the appropriate software, you can start recording TV shows on your computer. The software you have selected will provide the necessary tools and features to schedule and initiate recordings. Here’s a general guide on how to record TV shows with software:
1. Launch the recording software: Open the software associated with your TV tuner or capture card on your computer. Ensure that your TV tuner or capture card is properly connected and recognized by the software.
2. Set up recording preferences: Configure the recording preferences according to your desired settings. This may include options such as recording quality, resolution, format, and destination folder, where the recorded shows will be saved.
3. Scan for available channels: Depending on your software, there may be an option to scan for available TV channels. This will ensure that the software recognizes all the available channels that can be recorded.
4. Select the TV show to record: Use the software’s electronic program guide (EPG) to browse through the available TV shows and select the ones you want to record. You can often search for shows by name, time slots, or categories.
5. Schedule recordings: If you know the specific time and date of a TV show you want to record, you can schedule it in advance. The software usually provides the option to set up recurring recordings or one-time recordings based on your preferences.
6. Start the recording: If you prefer to start the recording manually, you can initiate the recording for a specific TV show that is currently airing. Simply click on the “Record” or “Start” button in the software interface to begin the recording.
7. Monitor the recording: While the TV show is being recorded, you can monitor the progress within the software. Typically, there will be a visual indicator or a timer that shows the duration of the recording. You can pause, stop, or cancel the recording at any time if needed.
8. Manage your recorded shows: After the recording is complete, the software will save the recorded TV show to the designated destination folder. You can access and manage your recorded shows within the software’s interface. This usually includes features like playback, deletion, organization, and renaming of recorded files.
9. Edit your recordings (if desired): Depending on your software, you may have editing tools available to refine and customize your recorded shows. These tools can include trimming unwanted segments, merging multiple recordings, adding subtitles or watermarks, and adjusting audio or video settings.
10. Transfer or stream your recordings: If you would like to view your recorded shows on other devices, you can transfer the recordings to USB drives or network-attached storage (NAS) devices. Some software may also provide options for streaming your recordings over your home network to compatible devices.
Recording TV shows with software provides flexibility and convenience, allowing you to capture your favorite programs and watch them at your own convenience. Explore the features and options provided by your chosen software to make the most of your TV show recordings on your computer.
Managing and Editing your Recorded TV Shows
Once you have recorded TV shows on your computer using the software, it’s important to effectively manage and edit your recorded content. Proper organization and editing can enhance your overall viewing experience. Here are some tips for managing and editing your recorded TV shows:
1. Organize your recordings: Create a system for organizing your recorded TV shows. This can involve creating folders or playlists based on genres, TV networks, or personal preferences. Keep the file names clear and descriptive to easily identify and locate specific shows.
2. Delete unwanted recordings: Regularly review and delete any recordings that you no longer need or want to keep. This will help free up storage space and make it easier to find the shows you want to watch.
3. Rename recordings: If the default file names assigned by the recording software are not descriptive enough, consider renaming the recordings to something more meaningful. This can be useful when searching for specific shows or creating personalized collections.
4. Trim unwanted segments: Use the editing features of your recording software to remove unwanted segments from your recorded TV shows. This can include cutting out commercials or other parts of the recording that you do not wish to keep.
5. Merge recordings: If you have recorded multiple episodes of the same TV show, you can use the software’s editing options to merge them into a single file. This makes it easier to manage and watch multiple episodes back-to-back.
6. Add subtitles or captions: Some recording software allows you to add subtitles or captions to your recorded TV shows. This can be particularly useful if you have recorded shows in a different language or if you prefer to watch shows with subtitles for improved comprehension.
7. Enhance audio and video settings: If your recording software offers options for adjusting audio and video settings, explore these features to enhance your viewing experience. You can fine-tune aspects such as brightness, contrast, color saturation, and audio levels to suit your preferences.
8. Create highlight reels or compilations: Get creative by creating highlight reels or compilations of your favorite moments from multiple recordings. This can be achieved by selecting and editing specific segments to create a personalized showcase of the best parts of various shows.
9. Backup your recordings: Regularly back up your recorded TV shows to prevent the loss of your valuable content. Consider using external storage devices or cloud-based services to create backups of your recordings. This safeguards against accidental deletions or computer failures.
10. Share your recordings: If you wish to share your recorded TV shows with family or friends, consider options for sharing. You can transfer the recordings to USB drives or network-attached storage (NAS) devices, or use file-sharing platforms to send them digitally.
By effectively managing and editing your recorded TV shows, you can create a well-organized library of your favorite programs and tailor them to your preferences. Explore the editing options provided by your recording software to make the most of your recorded TV show collection.
Transferring and Streaming Recorded TV Shows
Once you have recorded TV shows on your computer, you may want to transfer them to other devices or stream them to enjoy your recorded content on different screens. Transferring and streaming give you the flexibility to watch your favorite shows wherever and whenever you want. Here are the steps to transfer and stream your recorded TV shows:
1. Transfer to USB or External Drive: One option to transfer your recorded TV shows is to copy them to a USB drive or external storage device. Connect the USB drive to your computer and locate the recorded TV shows. Then, simply drag and drop the files to the USB drive. The transferred files can be played on compatible devices, such as smart TVs or media players.
2. Network-Attached Storage (NAS): If you have a network-attached storage device, you can transfer the recorded TV shows to it for centralized storage. Connect the NAS device to your computer and copy the recorded files to the appropriate folder on the NAS. This allows for easy access and playback of the shows on multiple devices within your home network.
3. Cloud Storage: Consider uploading your recorded TV shows to a cloud storage service, such as Google Drive, Dropbox, or OneDrive. This allows you to access and stream your recordings from any device with an internet connection. Ensure that you have sufficient storage space and a stable internet connection for seamless access to your shows.
4. Media Server: Set up a media server software, such as Plex or Kodi, on your computer. This software allows you to stream your recorded TV shows to compatible devices within your home network, including smart TVs, smartphones, or tablets. The media server software provides a user-friendly interface to easily browse and play your recordings on different devices.
5. Streaming Apps and Devices: There are streaming apps and devices available that allow you to stream your recorded TV shows to your smart TV or other devices. Examples of these devices include Chromecast, Apple TV, or Roku. Install the respective app on your computer, connect it to the streaming device, and follow the provided instructions to stream your recorded shows.
6. Mobile Devices: If you want to watch your recorded TV shows on your mobile devices, you can transfer them directly or use streaming apps. Transferring involves transferring the recorded files to your smartphone or tablet using a USB cable or a file transfer app. Streaming apps, such as Plex or Kodi, also have mobile versions that allow you to stream your recorded shows to your mobile device within your home network or even remotely.
7. Offline Viewing: If you want to watch your recorded TV shows when you have no internet connection, ensure that you have transferred the shows to a portable storage device or your device’s internal storage. This way, you can enjoy your favorite shows even when you’re on the go or in areas without internet access.
8. Security Considerations: When transferring or streaming your recorded TV shows, be mindful of the security and privacy of your content. Ensure that your network is secure and encrypt any sensitive recordings if necessary. Additionally, only use trusted cloud storage providers and streaming platforms to protect your recorded shows from unauthorized access.
By transferring and streaming your recorded TV shows, you can enjoy your favorite content on a variety of devices and platforms, whether you’re at home or on the go. Explore the available options and choose the method that best suits your needs and preferences.
Tips for an Optimal Recording Experience
To ensure an optimal recording experience when capturing TV shows on your computer, consider the following tips. These suggestions will help you achieve high-quality recordings and enhance your overall viewing experience:
1. Choose the highest quality settings: When setting up your recording software, select the highest possible quality settings supported by your TV tuner or capture card. This ensures that the recorded TV shows retain their clarity and detail.
2. Consider storage space: Be mindful of the available storage space on your computer. HD or 4K recordings can consume a significant amount of storage, so it’s essential to have sufficient space or external storage options to accommodate your desired recordings.
3. Schedule recordings strategically: Take advantage of the scheduling features in your recording software to avoid conflicts and overlapping recordings. Plan your recording schedule to ensure that you can capture all of your favorite shows without missing any content.
4. Check signal strength: If you’re using an antenna to receive TV signals, ensure that it is properly positioned and the signal strength is strong. Adjust the antenna placement accordingly to optimize signal reception and minimize potential interference.
5. Keep your computer updated: Regularly update your computer’s operating system, drivers, and recording software. These updates often include bug fixes, performance enhancements, and improved compatibility with the latest TV tuners and capture cards.
6. Minimize background processes: Close unnecessary applications and processes running in the background while recording TV shows. This helps ensure that your computer’s resources are dedicated to the recording process, minimizing the chances of interruptions or lag.
7. Avoid interruptions: Ensure that your computer and recording setup are in a quiet and stable environment. Close doors, windows, or other sources of potential background noise that may interfere with the audio quality of your recordings.
8. Maintain a stable power source: Connect your computer and recording setup to a reliable power source. Sudden power outages or fluctuations can lead to data loss or corrupted recordings. Consider using a surge protector to safeguard your equipment.
9. Test recordings: Periodically test your recordings to ensure that the TV tuner or capture card, as well as the recording software, are functioning properly. This helps identify any issues early on, allowing you to make necessary adjustments or seek technical support if needed.
10. Archive and organize your recordings: Develop an archiving system and keep your recorded TV shows organized. Create folders based on genres, dates, or channels to make it easier to locate and manage your recordings. Regularly clean up and delete recordings that you no longer need to free up storage space.
By following these tips, you can optimize your recording experience, ensuring high-quality recordings and hassle-free playback of your favorite TV shows on your computer.
Frequently Asked Questions
Here are some frequently asked questions about recording TV shows on your computer:
1. Can I record TV shows without a TV tuner or capture card?
No, a TV tuner or capture card is required to capture TV signals and convert them into a digital format that can be recorded on your computer.
2. Can I record multiple TV shows simultaneously?
Yes, depending on the capabilities of your TV tuner or capture card and the software you are using, you can record multiple TV shows at the same time. Make sure you have multiple tuners or capture cards and the necessary hardware setup to support simultaneous recordings.
3. Can I record from cable or satellite channels?
Yes, you can record TV shows from cable or satellite channels if you have the appropriate TV tuner or capture card and a valid cable or satellite subscription.
4. What file formats are commonly used for recorded TV shows?
Commonly used file formats for recorded TV shows include MP4, AVI, MKV, and MPEG. The specific file format may vary depending on the recording software and settings you are using.
5. Can I record shows from streaming platforms?
Recording shows from streaming platforms like Netflix or Amazon Prime Video is generally not possible due to digital rights management (DRM) restrictions. These platforms often have their own built-in recording features.
6. Can I edit the recordings after they are saved on my computer?
Yes, many recording software options provide basic editing features that allow you to trim, merge, or adjust the recorded TV shows. For more advanced editing capabilities, dedicated video editing software may be required.
7. Can I transfer and stream my recorded TV shows to other devices?
Yes, you can transfer your recorded TV shows to other devices like USB drives, network-attached storage (NAS), or cloud storage. You can also use media server software or streaming devices/applications to stream your recordings to compatible devices within your home network or remotely.
8. How much storage space do I need for recording TV shows?
The amount of storage space needed depends on various factors such as the recording quality, duration of the shows, and the size of the files. HD or 4K recordings typically require more storage space than standard definition recordings.
9. Is it legal to record TV shows for personal use?
Recording TV shows for personal use is generally considered legal for personal viewing purposes. However, sharing or distributing recorded content may infringe on copyright laws.
10. Can I record TV shows on a laptop or desktop computer?
Yes, you can record TV shows on both laptops and desktop computers as long as you have the necessary hardware (TV tuner or capture card) and software.
These are just some of the common questions related to recording TV shows on your computer. Make sure to check local laws and regulations regarding recordings in your area for a complete understanding of the rules and limitations.