
Choosing the Right Tools and Equipment
Properly terminating a BNC connector requires the use of specific tools and equipment to ensure a secure and reliable connection. Before commencing the termination process, it is crucial to gather the necessary items to facilitate a smooth and efficient procedure. Here are the essential tools and equipment needed:
- BNC Connector: Select a high-quality BNC connector that matches the specifications of the coaxial cable being used. Ensure that the connector is suitable for the cable’s impedance and thickness to prevent signal loss and interference.
- Coaxial Cable: Choose a coaxial cable that aligns with the requirements of the BNC connector. Verify that the cable’s impedance and diameter are compatible with the connector to maintain signal integrity and minimize attenuation.
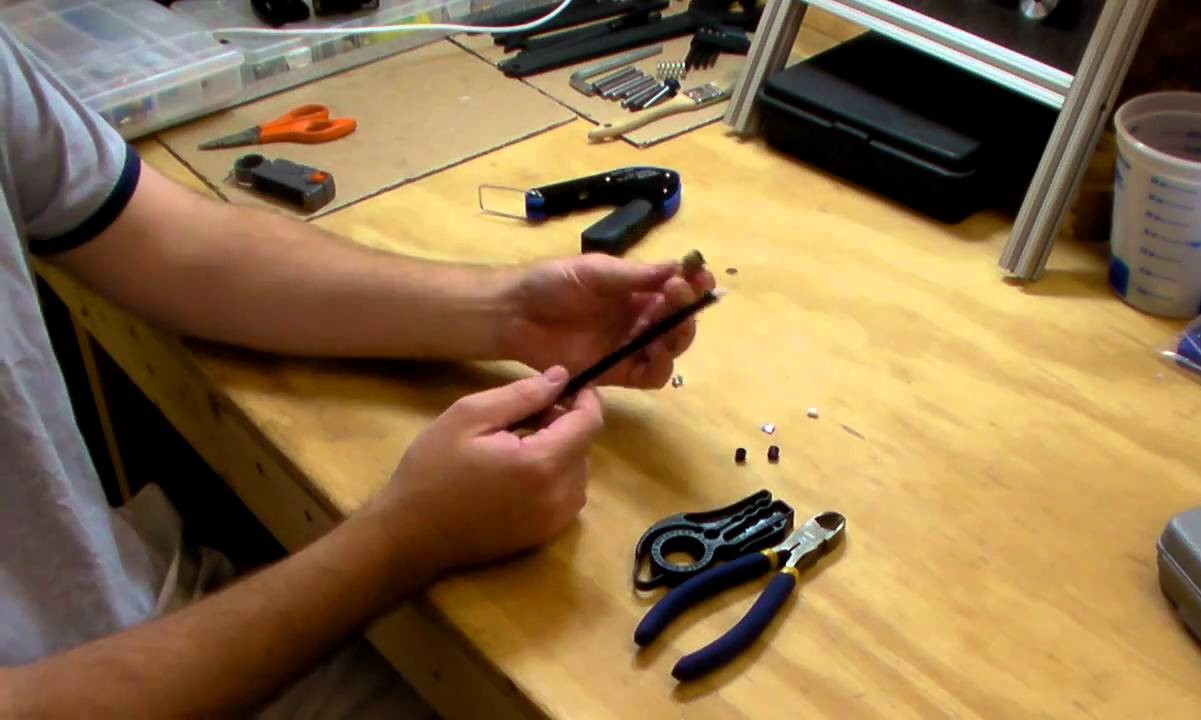
- Wire Strippers: Utilize wire strippers designed for coaxial cables to precisely remove the outer insulation without damaging the inner conductors. Opting for a high-quality, adjustable wire stripper ensures accurate and consistent results.
- Cable Cutter: Employ a cable cutter to cleanly sever the coaxial cable to the required length. A sharp and durable cable cutter facilitates precise cuts, promoting a professional and reliable connection.
- BNC Crimping Tool: Acquire a BNC crimping tool specifically engineered for terminating BNC connectors. The crimping tool should be compatible with the selected BNC connector and capable of producing a secure and durable crimp.
- Connector Insertion and Removal Tool: Obtain a connector insertion and removal tool to facilitate the effortless installation and removal of BNC connectors. This tool simplifies the connector termination process and minimizes the risk of damaging the components.
- Cable Tester: Consider using a cable tester to validate the integrity of the terminated BNC connector. A cable tester aids in identifying any wiring faults or connectivity issues, ensuring a reliable and functional connection.
By ensuring the availability of these essential tools and equipment, individuals can proceed with confidence, knowing they have the necessary resources to effectively terminate a BNC connector. The next step involves preparing the BNC connector for the termination process.
Preparing the BNC Connector
Before initiating the termination process, it is imperative to meticulously prepare the BNC connector to ensure a successful and reliable connection. The following steps outline the preparatory measures required:
- Inspection and Cleaning: Thoroughly examine the BNC connector to check for any signs of damage, corrosion, or foreign particles. Clean the connector using a specialized connector cleaning tool or a gentle solvent to remove any contaminants that could impede the termination process or compromise the connection’s integrity.
- Verification of Compatibility: Confirm that the BNC connector is compatible with the selected coaxial cable in terms of impedance, diameter, and design. Ensuring compatibility is essential for achieving optimal signal transmission and preventing impedance mismatches that could degrade the connection’s performance.
- Connector Orientation: Identify the correct orientation of the BNC connector to align with the coaxial cable’s wiring configuration. Proper alignment is crucial for establishing a secure and functional connection, minimizing the risk of signal loss or poor conductivity.
- Component Assembly: Assemble the BNC connector components, including the outer shell, center pin, insulator, and crimp sleeve, in accordance with the manufacturer’s specifications. Ensuring the correct assembly of these components is vital for achieving a reliable and durable termination.
By meticulously preparing the BNC connector and adhering to the recommended guidelines, individuals can lay the groundwork for a successful termination process. The next crucial step involves stripping the coaxial cable to expose the inner conductors and facilitate the connection with the BNC connector.
Stripping the Coaxial Cable
Properly stripping the coaxial cable is a critical preparatory step that directly impacts the quality and reliability of the BNC connector termination. The following guidelines elucidate the method for accurately stripping the coaxial cable:
- Measurement and Marking: Begin by measuring and marking the precise length of the outer insulation to be removed from the coaxial cable. Utilize a measuring tool to ensure accuracy, and mark the designated stripping point with a non-permanent marker or a piece of tape.
- Secure Clamping: Secure the coaxial cable in a stable and appropriate clamping device to prevent movement or slippage during the stripping process. This ensures consistent and controlled stripping, minimizing the risk of accidental damage to the inner conductors.
- Outer Insulation Removal: Employ a high-quality coaxial cable stripper or a specialized stripping tool to carefully remove the marked section of the outer insulation. Exercise caution to avoid damaging the underlying shielding or inner conductors while ensuring a clean and even cut.
- Shielding Integrity Check: After removing the outer insulation, inspect the integrity of the shielding to verify that it remains undamaged and properly aligned. Any compromise to the shielding can lead to signal interference and degradation, necessitating meticulous examination at this stage.
- Dielectric Exposure: Following the shielding inspection, expose the dielectric material beneath the shielding by gently pushing it back. Take care not to distort or damage the dielectric, as it plays a crucial role in maintaining the cable’s impedance and signal transmission characteristics.
- Inner Conductor Inspection: Verify the condition and alignment of the inner conductor after exposing the dielectric. Ensure that the conductor exhibits no signs of damage, deformation, or irregularities that could impede its proper insertion and connection within the BNC connector.
By meticulously adhering to these guidelines and exercising precision during the coaxial cable stripping process, individuals can effectively prepare the cable for seamless integration with the BNC connector. The subsequent step involves inserting the prepared cable into the BNC connector to initiate the termination process.
Inserting the Cable into the BNC Connector
Inserting the prepared coaxial cable into the BNC connector is a pivotal phase in the termination process, necessitating precision and attention to detail. The following steps delineate the method for seamlessly integrating the cable with the BNC connector:
- Alignment and Orientation: Ensure that the exposed inner conductor and dielectric of the coaxial cable are meticulously aligned with the corresponding components within the BNC connector. Proper orientation is vital for establishing a secure and reliable connection, minimizing signal loss and impedance discrepancies.
- Conductor Insertion: Carefully insert the prepared coaxial cable into the BNC connector, guiding the inner conductor and dielectric into their respective positions within the connector’s interface. Exercise caution to prevent any undue stress or damage to the cable components during insertion.
- Shielding Engagement: Verify that the shielding of the coaxial cable effectively engages with the BNC connector’s shielding interface, ensuring comprehensive coverage and continuity. Proper engagement of the shielding is essential for mitigating signal interference and maintaining signal integrity.
- Dielectric Positioning: Confirm that the dielectric material of the coaxial cable is correctly positioned within the BNC connector, maintaining its integrity and alignment to uphold the cable’s impedance characteristics. Any displacement or distortion of the dielectric could compromise the connection’s performance.
- Connector Securing: Securely fasten the BNC connector onto the coaxial cable, ensuring a snug and stable connection. Adhere to the manufacturer’s recommendations for the appropriate tightening torque to prevent over-compression or insufficient clamping, which could affect the connection’s reliability.
- Visual Inspection: Conduct a visual inspection of the inserted cable and BNC connector assembly to verify the correctness of the integration. Check for any irregularities, misalignments, or visible damage that may necessitate corrective action before proceeding to the crimping phase.
By meticulously following these steps and confirming the proper integration of the coaxial cable with the BNC connector, individuals lay the groundwork for the subsequent crimping process, which is crucial for securing the connection and ensuring its functionality.
Crimping the Connector
After successfully inserting the coaxial cable into the BNC connector, the next pivotal step in the termination process is crimping the connector to establish a secure and durable connection. The crimping process demands meticulous attention to detail and adherence to specific techniques to ensure optimal results. The following guidelines elucidate the method for effectively crimping the BNC connector:
- Positioning in the Crimping Tool: Place the assembled BNC connector and coaxial cable securely into the designated crimping tool, ensuring that the connector is correctly aligned within the tool’s crimping jaws. Proper positioning is crucial for achieving uniform and reliable crimping results.
- Crimp Sleeve Engagement: Confirm that the crimp sleeve of the BNC connector is positioned over the outer insulation of the coaxial cable, ready for crimping. The sleeve should maintain a consistent and stable alignment to facilitate a secure and resilient crimp.
- Application of Crimping Force: Apply controlled and evenly distributed force to the crimping tool, initiating the compression of the crimp sleeve onto the outer insulation of the coaxial cable. Exercise caution to avoid excessive force that could deform the connector or insufficient force that may lead to an insecure crimp.
- Verification of Crimp Integrity: Upon completing the crimping process, visually inspect the crimped section of the BNC connector to ensure a uniform and robust compression of the crimp sleeve. Verify that the crimp exhibits no irregularities, such as gaps or asymmetrical compression, which could compromise the connection’s reliability.
- Tensile Strength Assessment: Assess the tensile strength of the crimped connection by applying gentle tension to the coaxial cable and BNC connector assembly. The crimp should withstand the applied force without exhibiting signs of detachment or deformation, validating its durability and resilience.
- Post-Crimping Inspection: Conduct a comprehensive post-crimping inspection to confirm the overall integrity of the terminated BNC connector. Verify that the crimped connection is free from any visible defects or anomalies that could affect its functionality or long-term reliability.
By meticulously adhering to these guidelines and exercising precision during the crimping process, individuals can ensure the creation of a secure, durable, and high-performance connection. The final step involves testing the terminated BNC connector to validate its functionality and signal integrity.
Testing the Connection
Upon completing the termination process for the BNC connector, it is imperative to conduct comprehensive testing to validate the integrity, functionality, and signal transmission capabilities of the terminated connection. The following steps outline the method for effectively testing the BNC connector:
- Visual Inspection: Begin the testing process with a visual inspection of the terminated BNC connector and the associated cabling. Verify that the connector is securely attached to the cable, with no visible signs of damage, misalignment, or irregularities that could impact its performance.
- Continuity Testing: Utilize a multimeter or continuity tester to assess the continuity of the terminated BNC connector. Confirm that there is a consistent and uninterrupted electrical path through the connector and cable, indicating the absence of any open circuits or discontinuities.
- Impedance Verification: Measure the impedance of the terminated connection using an impedance meter or TDR (Time Domain Reflectometer) to ensure that it aligns with the specifications of the coaxial cable and the BNC connector. Deviations from the expected impedance may indicate potential signal integrity issues.
- Signal Transmission Testing: Transmit test signals through the terminated BNC connector and cable assembly while monitoring the signal quality and integrity. Use appropriate testing equipment to assess the signal strength, fidelity, and absence of any distortion or interference.
- Physical Stress Testing: Subject the terminated connection to controlled physical stresses, such as bending or flexing, to evaluate its resilience and resistance to signal degradation under real-world operating conditions. The connection should maintain its integrity and signal transmission capabilities during and after the stress testing.
- Network Integration Testing: Integrate the terminated BNC connector into its intended network or system environment and verify its seamless compatibility and functionality within the larger infrastructure. Confirm that the connection reliably facilitates signal transmission without introducing any disruptions or performance issues.
By systematically conducting these comprehensive tests, individuals can ascertain the reliability, performance, and suitability of the terminated BNC connector for its intended application. Successful testing validates the efficacy of the termination process and instills confidence in the connection’s ability to uphold signal integrity and transmission quality.