
Tools and Materials Needed
Before embarking on the installation of a threadless headset and fork, it’s essential to gather the necessary tools and materials. Having the right equipment at hand will not only make the process smoother but also ensure the safety and stability of the bicycle. Here’s a comprehensive list of what you’ll need:
- Threadless Headset: The central component of the threadless system, consisting of bearings, races, and a crown race.
- Fork: A compatible fork that matches the specifications of your bicycle frame and wheel size.
- Allen Wrench Set: Various sizes of Allen wrenches to fit the bolts and screws involved in the installation.
- Adjustable Wrench: For tightening and adjusting the headset and stem.
- Grease: High-quality bike grease to lubricate the headset bearings and other contact points.
- Headset Press or Hammer: Depending on the type of headset, a headset press or a mallet and headset setting tool may be necessary for proper installation.
- Crown Race Setting Tool: Specifically designed for installing the crown race onto the fork.
- Fork Cutting Guide and Saw: If the fork steerer tube needs to be cut to the appropriate length, a cutting guide and saw are essential.
- Measuring Tape: For precise measurements, especially when cutting the fork steerer tube.
- Cable Ties: Useful for securing cables and housing during the process.
- Cable Cutter: For trimming brake and shift cables to the required length.
- Work Stand: A stable work stand to elevate the bike and provide easy access to the headset and fork.
- Protective Gear: Safety glasses and gloves to protect yourself during the installation.
Gathering these tools and materials beforehand will ensure a seamless and efficient installation process, allowing you to enjoy the benefits of a properly installed threadless headset and fork.
Removing the Old Headset and Fork
Before installing a new threadless headset and fork, it’s crucial to properly remove the old components. This process involves disassembling the headset, removing the fork, and preparing the frame for the installation of the new parts. Here’s a step-by-step guide on how to remove the old headset and fork:
- Secure the Bike: Begin by placing the bike in a stable work stand, ensuring that it is elevated and secure to facilitate easy access to the headset and fork.
- Remove the Stem: Loosen the stem bolts using an appropriate-sized Allen wrench and carefully slide the stem off the steerer tube. Set the stem and handlebars aside.
- Detach the Front Brake and Cables: Depending on the type of brakes and shifters, disconnect the front brake and shift cables from the frame, allowing the fork to be removed without any obstructions.
- Unthread the Top Cap and Adjusting Bolt: Loosen and remove the top cap using an Allen wrench, followed by the adjusting bolt located atop the stem. Keep these components together for reassembly.
- Remove the Fork: With the top cap and adjusting bolt removed, the fork can be carefully slid out of the head tube. Take note of any spacers or additional components located above the headset.
- Disassemble the Headset: Once the fork is removed, disassemble the headset by carefully extracting the bearings, races, and crown race from the head tube. Keep these components organized for inspection and potential reuse.
- Clean and Inspect: With the old headset and fork removed, thoroughly clean the head tube and inspect it for any signs of wear or damage. Additionally, inspect the removed components for wear and replace any damaged parts as necessary.
By following these steps, you can safely and effectively remove the old headset and fork, preparing the bicycle for the installation of a new threadless headset and fork.
Installing the New Fork
Once the old headset and fork have been removed, the next step in the process of installing a threadless headset and fork is to properly install the new fork. This crucial step requires precision and attention to detail to ensure the stability and functionality of the bicycle. Here’s a detailed guide on how to install the new fork:
- Prepare the Fork: Begin by applying a thin layer of high-quality grease to the crown race seat on the new fork. This will facilitate smooth installation and provide essential lubrication for the bearings.
- Install the Crown Race: Using a crown race setting tool, carefully and evenly press the crown race onto the fork’s steerer tube until it sits flush against the crown race seat. Ensure that the crown race is seated securely and evenly to prevent any wobbling or misalignment.
- Trim the Steerer Tube (if necessary): If the new fork’s steerer tube is longer than needed, measure and mark the appropriate length based on the bike’s head tube. Utilize a cutting guide and a fine-toothed saw to trim the steerer tube to the correct length, ensuring a straight and clean cut.
- Install the Fork: Carefully insert the newly prepared fork into the head tube, ensuring that it is aligned properly and fully seated. Take note of any spacers that need to be placed on top of the headset to achieve the desired handlebar height.
- Reassemble the Headset: Reassemble the headset by placing the bearings and races in the correct order on the head tube, followed by the top bearing cover. Ensure that the bearings are clean and properly greased before reassembly.
- Install the Top Cap and Adjusting Bolt: Thread the top cap onto the steerer tube and tighten it until it makes contact with the bearings. Then, insert the adjusting bolt and tighten it to remove any play in the headset, ensuring smooth rotation without binding.
By following these steps, you can successfully install the new fork, setting the stage for the next phase of installing the threadless headset and completing the assembly of the bicycle’s front end.
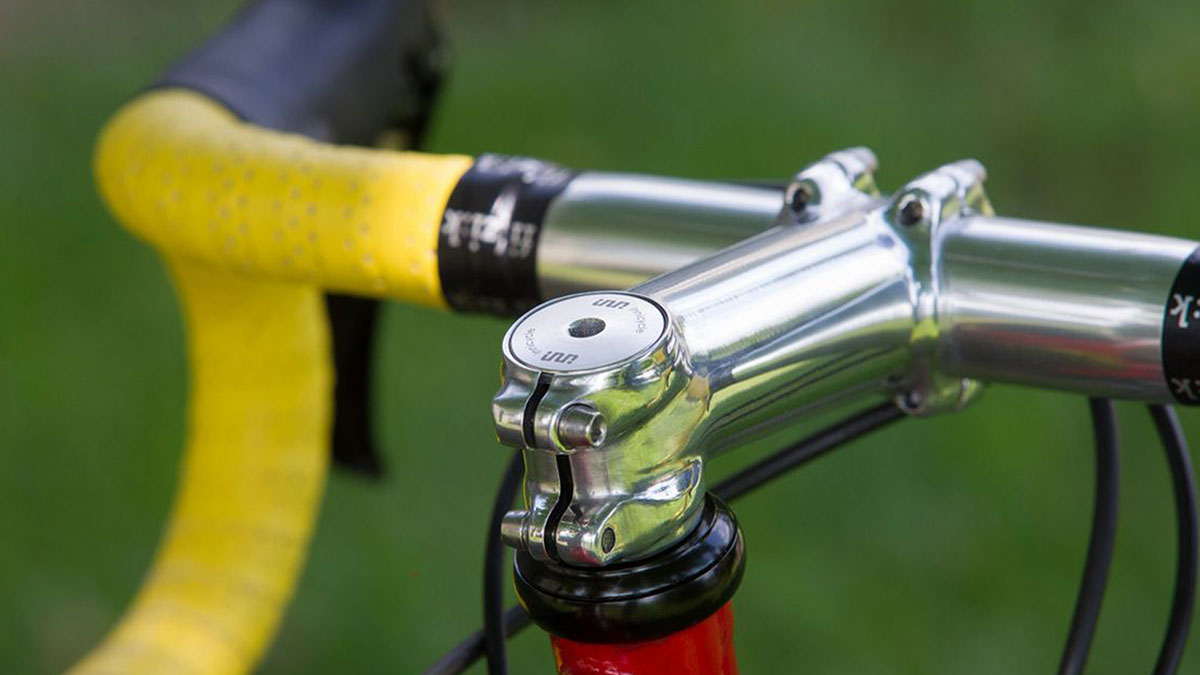
Installing the Threadless Headset
With the new fork successfully installed, the next critical step in the process of upgrading to a threadless headset and fork is the installation of the threadless headset itself. This pivotal component plays a fundamental role in the stability and smooth operation of the bicycle’s steering system. Here’s a detailed guide on how to install the threadless headset:
- Prepare the Headset Bearings and Races: Ensure that the headset bearings and races are clean and generously coated with high-quality bike grease. Proper lubrication is essential for smooth and durable headset operation.
- Place the Lower Headset Race: Carefully position the lower headset race onto the fork’s steerer tube, ensuring that it sits flush against the crown race. Gently tap the race into place if necessary, using a headset setting tool or a mallet to ensure a secure fit.
- Insert the Bearings: Place the prepared headset bearings onto the crown race, ensuring that they are arranged in the correct orientation and alignment. The bearings should fit snugly and be evenly seated on the race.
- Install the Upper Headset Race: Slide the upper headset race onto the steerer tube, positioning it securely against the top set of bearings. Ensure that it is aligned properly and seated evenly to facilitate smooth headset operation.
- Mount the Stem and Handlebars: Carefully position the stem onto the steerer tube, ensuring that it aligns with the front wheel and the desired handlebar position. Secure the stem in place using the appropriate bolts and torque specifications.
- Adjust the Headset: With the stem in place, adjust the headset tension by tightening the top cap bolt. This should remove any play in the headset while allowing for smooth steering motion. Ensure that the headset rotates freely without any binding or resistance.
By following these steps, you can effectively install the threadless headset, setting the stage for the final adjustments and securing of the headset and fork before completing the installation process.
Adjusting and Securing the Headset and Fork
Once the threadless headset and fork are installed, the next crucial phase involves adjusting and securing these components to ensure optimal performance and safety. Proper adjustment of the headset and secure attachment of the fork are essential for smooth steering, stability, and overall functionality of the bicycle. Here’s a detailed guide on how to adjust and secure the headset and fork:
- Check Headset Tension: With the stem and handlebars in place, check the headset tension by gently rocking the bike back and forth while applying the front brake. There should be no play or knocking sensation in the headset. If play is present, adjust the top cap bolt to remove any excess play while maintaining smooth rotation.
- Align the Stem: Ensure that the stem is aligned with the front wheel and that the handlebars are positioned correctly for comfortable and efficient riding. Use a torque wrench to tighten the stem bolts to the manufacturer’s recommended specifications, ensuring a secure connection without over-tightening.
- Secure the Fork: Double-check that the fork is securely installed in the head tube and that the stem and handlebars are properly aligned. Tighten the stem’s pinch bolts evenly to secure the steerer tube in place, preventing any movement or slippage during riding.
- Test Steering and Braking: With the headset and fork adjusted and secured, test the steering and braking functions to ensure smooth operation. The handlebars should turn freely without any binding, and the front brake should engage smoothly without any interference from the headset or fork.
- Inspect and Re-Torque: After a short test ride, inspect the headset, stem, and fork for any signs of movement or loosening. Re-torque the stem bolts and top cap bolt as needed to maintain the proper tension and security of the headset and fork.
By following these steps, you can effectively adjust and secure the headset and fork, ensuring optimal performance and safety before completing the installation process and conducting a final check and test ride.
Final Check and Test Ride
Before considering the installation of the threadless headset and fork complete, it’s crucial to perform a comprehensive final check and conduct a test ride to ensure that the bicycle’s front end is functioning optimally. This step is essential for verifying the stability, smooth operation, and safety of the newly installed components. Here’s a detailed guide on the final check and test ride:
- Inspect All Connections: Thoroughly inspect all the connections, including the headset, stem, and fork, to ensure that they are secure and properly aligned. Check for any signs of movement, play, or misalignment, and address any issues before proceeding.
- Verify Brake and Shifting Functionality: Test the front brake and shifting mechanisms to ensure that they operate smoothly and effectively. Verify that the brake does not interfere with the headset or fork during steering and that the shifting is responsive and accurate.
- Check Handlebar Alignment: Confirm that the handlebars are aligned correctly and are at the desired height and angle for comfortable riding. Make any necessary adjustments to the stem and handlebar position to achieve the optimal riding position.
- Perform a Static Test: With the bike stationary, apply the front brake and gently rock the bike back and forth to check for any movement or knocking in the headset. The headset should feel secure, with no play or unusual sensations during this test.
- Conduct a Test Ride: Take the bike for a short test ride, paying close attention to the steering responsiveness, stability, and overall handling. Test the bike in various conditions, including straight-line riding, turning, and braking, to ensure that the front end performs as expected.
- Listen for Unusual Noises: During the test ride, listen for any unusual noises or sensations coming from the front end of the bike. Any clicking, creaking, or grinding sounds may indicate a problem with the headset or fork that requires immediate attention.
By following these steps and conducting a thorough final check and test ride, you can confidently assess the functionality and safety of the newly installed threadless headset and fork. Address any issues that arise during the test ride to ensure a smooth and reliable riding experience.