Checking the SIM Card Slot Location
Before you can insert a SIM card into your iPhone XR, it's essential to locate the SIM card slot. The iPhone XR features a nano-SIM card slot, which is typically located on the right-hand side of the device. To pinpoint the exact location of the SIM card slot, follow these simple steps:
-
Turn Off Your iPhone XR: Before handling the SIM card slot, ensure that your iPhone XR is powered off. This precautionary step minimizes the risk of any damage to the device or the SIM card.
-
Locate the SIM Card Slot: Once your iPhone XR is turned off, hold the device with the screen facing upwards. On the right-hand side, you'll notice a small, recessed panel with a tiny hole. This is the SIM card slot.
-
Use a SIM Ejector Tool: To access the SIM card slot, you'll need a SIM ejector tool, which is typically provided with your iPhone XR. If you can't find the tool, a paperclip can serve as an alternative. Insert the pointed end of the ejector tool or paperclip into the hole on the SIM card slot panel.
-
Apply Gentle Pressure: Gently press the ejector tool into the hole until the SIM card tray pops out slightly. Be cautious not to apply excessive force, as this may cause damage to the SIM card slot or the device.
-
Remove the SIM Card Tray: Once the SIM card tray is partially ejected, carefully pull it out the rest of the way using your fingertips. The tray will contain the SIM card slot where you'll insert your nano-SIM card.
By following these steps, you can easily locate the SIM card slot on your iPhone XR. This initial stage is crucial for ensuring that the SIM card insertion process proceeds smoothly and without any hitches.
Ejecting the SIM Card Tray
Now that you’ve located the SIM card slot on your iPhone XR, the next step is to eject the SIM card tray. This process requires precision and care to avoid any damage to the device or the SIM card itself. Follow these steps to successfully eject the SIM card tray:
-
Ensure Your iPhone XR is Powered Off: Before proceeding, it’s crucial to confirm that your iPhone XR is turned off. This precautionary measure reduces the risk of any mishaps during the SIM card tray ejection process.
-
Insert the Ejector Tool: Take the SIM ejector tool or a paperclip and insert the pointed end into the small hole on the SIM card slot panel. Apply gentle pressure to engage the internal mechanism that releases the SIM card tray.
-
Eject the Tray: Once the internal mechanism is activated, the SIM card tray will pop out slightly. Carefully grasp the edge of the tray and pull it out using your fingertips. Exercise caution to prevent any bending or damage to the tray.
-
Inspect the Tray and Slot: Before proceeding to insert a SIM card, take a moment to inspect the SIM card tray and the slot within the iPhone XR. Ensure that there is no debris or foreign objects present, as these may interfere with the proper insertion of the SIM card.
Ejecting the SIM card tray from your iPhone XR is a crucial preparatory step before inserting a SIM card. By following these steps with care and attention to detail, you can successfully access the SIM card slot and proceed to the next stage of the process.
Placing the SIM Card on the Tray
With the SIM card tray successfully ejected from your iPhone XR, the next step is to place the SIM card onto the tray. This process requires delicacy and precision to ensure that the SIM card is properly positioned for insertion into the device. Follow these steps to seamlessly place the SIM card on the tray:
-
Inspect the SIM Card: Before placing the SIM card on the tray, take a moment to examine the card itself. Ensure that it is free from any visible damage, such as scratches or bends, as these may affect its functionality when inserted into the iPhone XR.
-
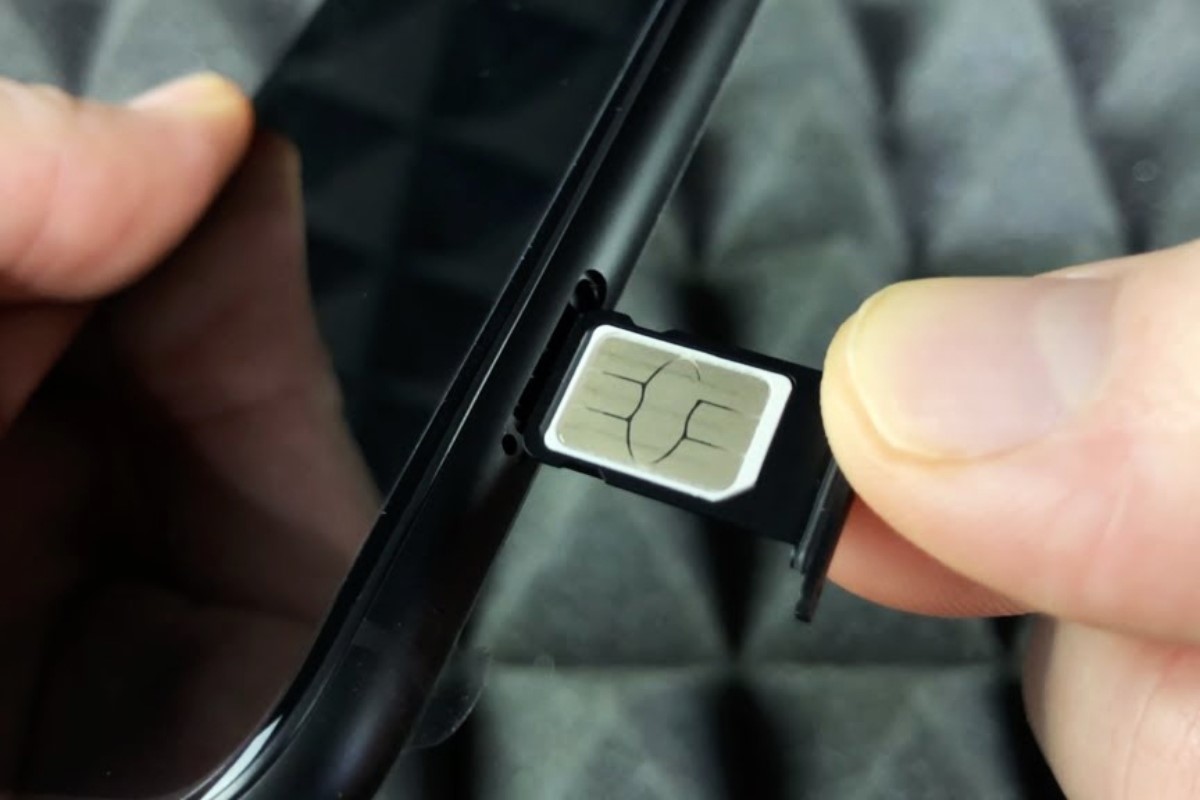
Align the SIM Card with the Tray: On the SIM card tray, you will notice a small, rectangular indentation. This indicates the precise area where the SIM card should be placed. Position the SIM card on the tray in alignment with this indentation, ensuring that the gold contacts on the SIM card are facing downwards.
-
Ensure a Secure Fit: Once the SIM card is positioned on the tray, gently press down to ensure a secure fit. The SIM card should sit flush with the surface of the tray, without any protrusions or misalignments.
-
Double-Check the Alignment: Before proceeding to insert the tray back into your iPhone XR, double-check the alignment of the SIM card. It should be positioned squarely within the designated area on the tray, with the gold contacts facing downwards.
By following these steps, you can effectively place the SIM card onto the tray in preparation for its insertion into your iPhone XR. Taking the time to ensure that the SIM card is correctly positioned will contribute to a smooth and trouble-free insertion process.
Inserting the Tray Back into the iPhone XR
After placing the SIM card onto the tray, the final step in the process is to carefully insert the tray back into your iPhone XR. This step is crucial to ensure that the SIM card makes a secure and functional connection within the device. Follow these steps to successfully insert the tray back into your iPhone XR:
-
Align the Tray with the Slot: Hold the SIM card tray in a position that aligns with the SIM card slot on the side of your iPhone XR. Take care to orient the tray correctly, as forcing it into the slot in the wrong orientation may cause damage to the device or the tray.
-
Gently Insert the Tray: With the tray aligned, gently guide it back into the SIM card slot. Apply light pressure to ensure that the tray slides smoothly into place. Avoid using excessive force, as this may indicate that the tray is not aligned properly.
-
Verify the Tray Position: Once the tray is inserted, take a moment to ensure that it sits flush with the side of the iPhone XR. The tray should be level with the device’s frame, indicating that it is fully inserted and secured in place.
-
Power On Your iPhone XR: After successfully inserting the tray, power on your iPhone XR to initiate the device’s recognition of the SIM card. Once the device is powered on, it should detect the SIM card and establish connectivity, allowing you to make calls, send messages, and access mobile data.
By following these steps with care and attention to detail, you can seamlessly insert the SIM card tray back into your iPhone XR, ensuring that the device recognizes the SIM card and functions as intended. This marks the completion of the SIM card insertion process, allowing you to fully utilize your iPhone XR’s mobile capabilities.