
Checking the SIM Card Slot
Checking the SIM Card Slot
Before you begin the process of inserting a SIM card into your HTC One, it’s essential to locate the SIM card slot. The HTC One features a sleek and sophisticated design, and the SIM card slot is typically situated on the side of the device. Take a moment to carefully examine the edges of your HTC One, looking for a small pinhole or a tray that can be gently ejected. This slot is usually located near the top or bottom of the device, depending on the specific model of the HTC One you own.
Once you’ve identified the SIM card slot, it’s crucial to ensure that your HTC One is powered off before proceeding further. This precaution will prevent any potential damage to the device or the SIM card itself. Additionally, powering off your device reduces the risk of accidentally triggering any functions while handling the SIM card and the SIM card tray.
Checking the SIM card slot also involves examining the size of the slot to determine the type of SIM card compatible with your HTC One. The HTC One typically utilizes a nano-SIM card, which is the smallest SIM card size available. If your current SIM card is not a nano-SIM, you may need to contact your mobile service provider to obtain a compatible SIM card before proceeding.
By taking the time to locate the SIM card slot, power off your device, and identify the appropriate SIM card size, you are laying the groundwork for a smooth and successful SIM card insertion process. This initial step ensures that you are well-prepared to proceed with confidence and precision as you insert the SIM card into your HTC One.
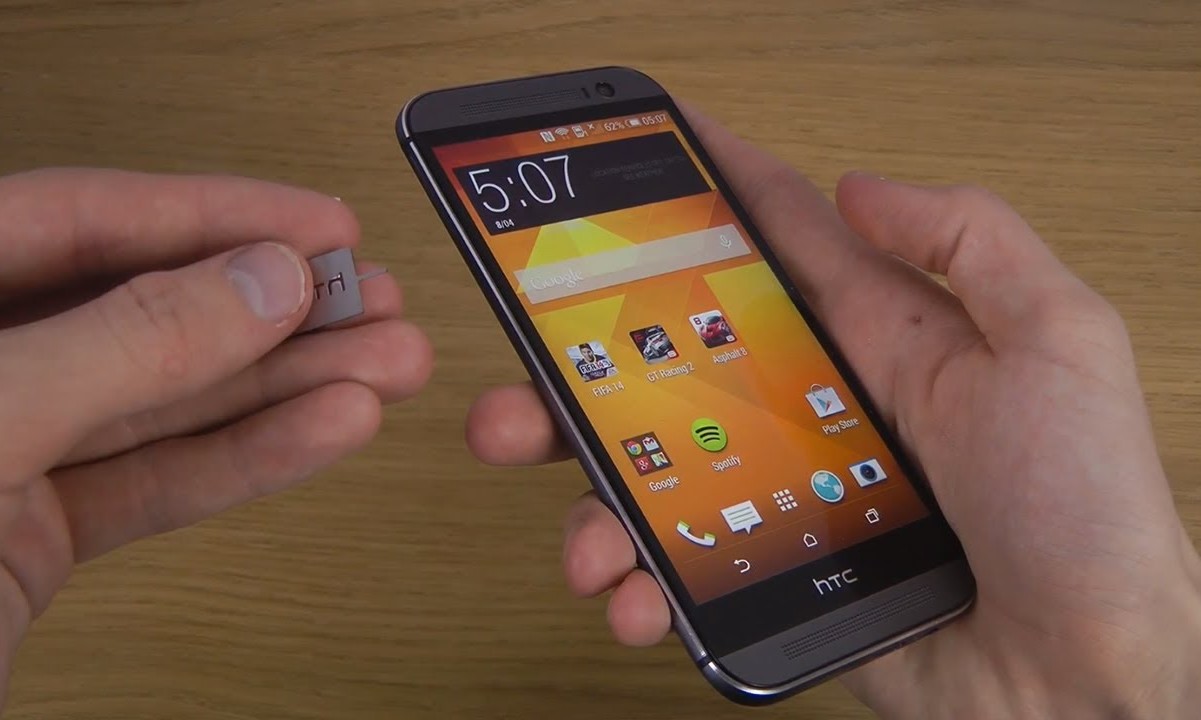
Removing the SIM Card Tray
Removing the SIM Card Tray
Once you have located the SIM card slot and powered off your HTC One, the next step is to remove the SIM card tray. The SIM card tray is a small, slender component that houses the SIM card and allows for its secure placement within the device. To access the SIM card tray, you will need the SIM eject tool that came with your HTC One or a small paperclip.
Begin by identifying the SIM card tray slot, which is typically a small pinhole located adjacent to the SIM card slot. Insert the SIM eject tool or straightened paperclip into the pinhole with gentle pressure. You will feel a slight resistance as the tool engages with the internal mechanism of the device. Apply consistent but cautious pressure until the SIM card tray is partially ejected from the slot.
Once the SIM card tray is partially ejected, carefully grasp the tray and pull it out from the slot. Take care to handle the tray and the SIM card with delicacy, ensuring that they remain free from any damage or debris. The SIM card tray is designed to slide out smoothly, allowing for easy access to the SIM card compartment.
As you remove the SIM card tray, take note of its orientation and the position of the SIM card within the tray. This observation will be valuable when it comes time to insert the SIM card into the tray, ensuring that it is placed correctly to enable seamless functionality within your HTC One.
By successfully removing the SIM card tray, you have completed a crucial step in the process of inserting a SIM card into your HTC One. With the tray in hand and the SIM card ready for placement, you are now prepared to proceed with the next phase of the installation process.
Inserting the SIM Card
Inserting the SIM Card
With the SIM card tray removed from your HTC One, it’s time to proceed with the insertion of the SIM card. Before placing the SIM card into the tray, take a moment to inspect the card and the tray for any dust, debris, or damage. Keeping these components clean and free from any obstructions will ensure optimal performance and connectivity for your HTC One.
Next, carefully position the SIM card within the designated area on the SIM card tray. The SIM card will align with a specific section of the tray, typically marked with a small diagram or outline to indicate the correct placement. Ensure that the SIM card is oriented in the proper direction, matching the shape and size of the designated area to guarantee a secure fit.
Once the SIM card is positioned correctly on the tray, gently slide the tray back into the SIM card slot of your HTC One. Take care to align the tray with the slot and apply even pressure to smoothly insert it into the device. Avoid forcing the tray or allowing it to become misaligned during the insertion process, as this could potentially cause damage to the SIM card or the device itself.
As the SIM card tray slides back into place, you may feel a subtle click or resistance, indicating that the tray is securely seated within the device. This secure placement ensures that the SIM card makes proper contact with the internal components of your HTC One, facilitating reliable network connectivity and communication capabilities.
By successfully inserting the SIM card into your HTC One, you have completed a critical step in preparing your device for seamless functionality. With the SIM card securely in place, you are now ready to proceed with the final phase of the installation process, ensuring that your HTC One is fully equipped to connect with your mobile network.
Replacing the SIM Card Tray
Replacing the SIM Card Tray
After successfully inserting the SIM card into your HTC One, the final step in the process is to replace the SIM card tray. This small yet crucial component plays a key role in securing the SIM card within the device and maintaining a stable connection to your mobile network.
Begin by carefully aligning the SIM card tray with the slot on your HTC One. Take note of the orientation of the tray to ensure that it is positioned correctly for reinsertion. The tray should slide back into place smoothly, without any resistance or misalignment. This seamless reinsertion process is essential for maintaining the integrity of the SIM card and the overall functionality of your device.
Once the SIM card tray is properly aligned, gently push it back into the slot with even pressure. Ensure that the tray moves smoothly and seamlessly into the device, securing the SIM card in its designated compartment. Avoid applying excessive force or causing the tray to become skewed during the reinsertion process, as this could potentially lead to complications with the SIM card and the device’s functionality.
As the SIM card tray returns to its original position within your HTC One, take a moment to verify that it is fully seated and flush with the device’s exterior. A secure and flush fit indicates that the tray is properly aligned and that the SIM card is securely housed within the device, ready to facilitate seamless communication and connectivity.
With the SIM card tray successfully reinserted, you have completed the process of inserting a SIM card into your HTC One. The tray’s secure placement ensures that the SIM card remains firmly positioned within the device, allowing you to enjoy uninterrupted access to your mobile network and communication services.