
Supplies Needed
Before you begin wiring a USB hub into your car, make sure you have the following supplies:
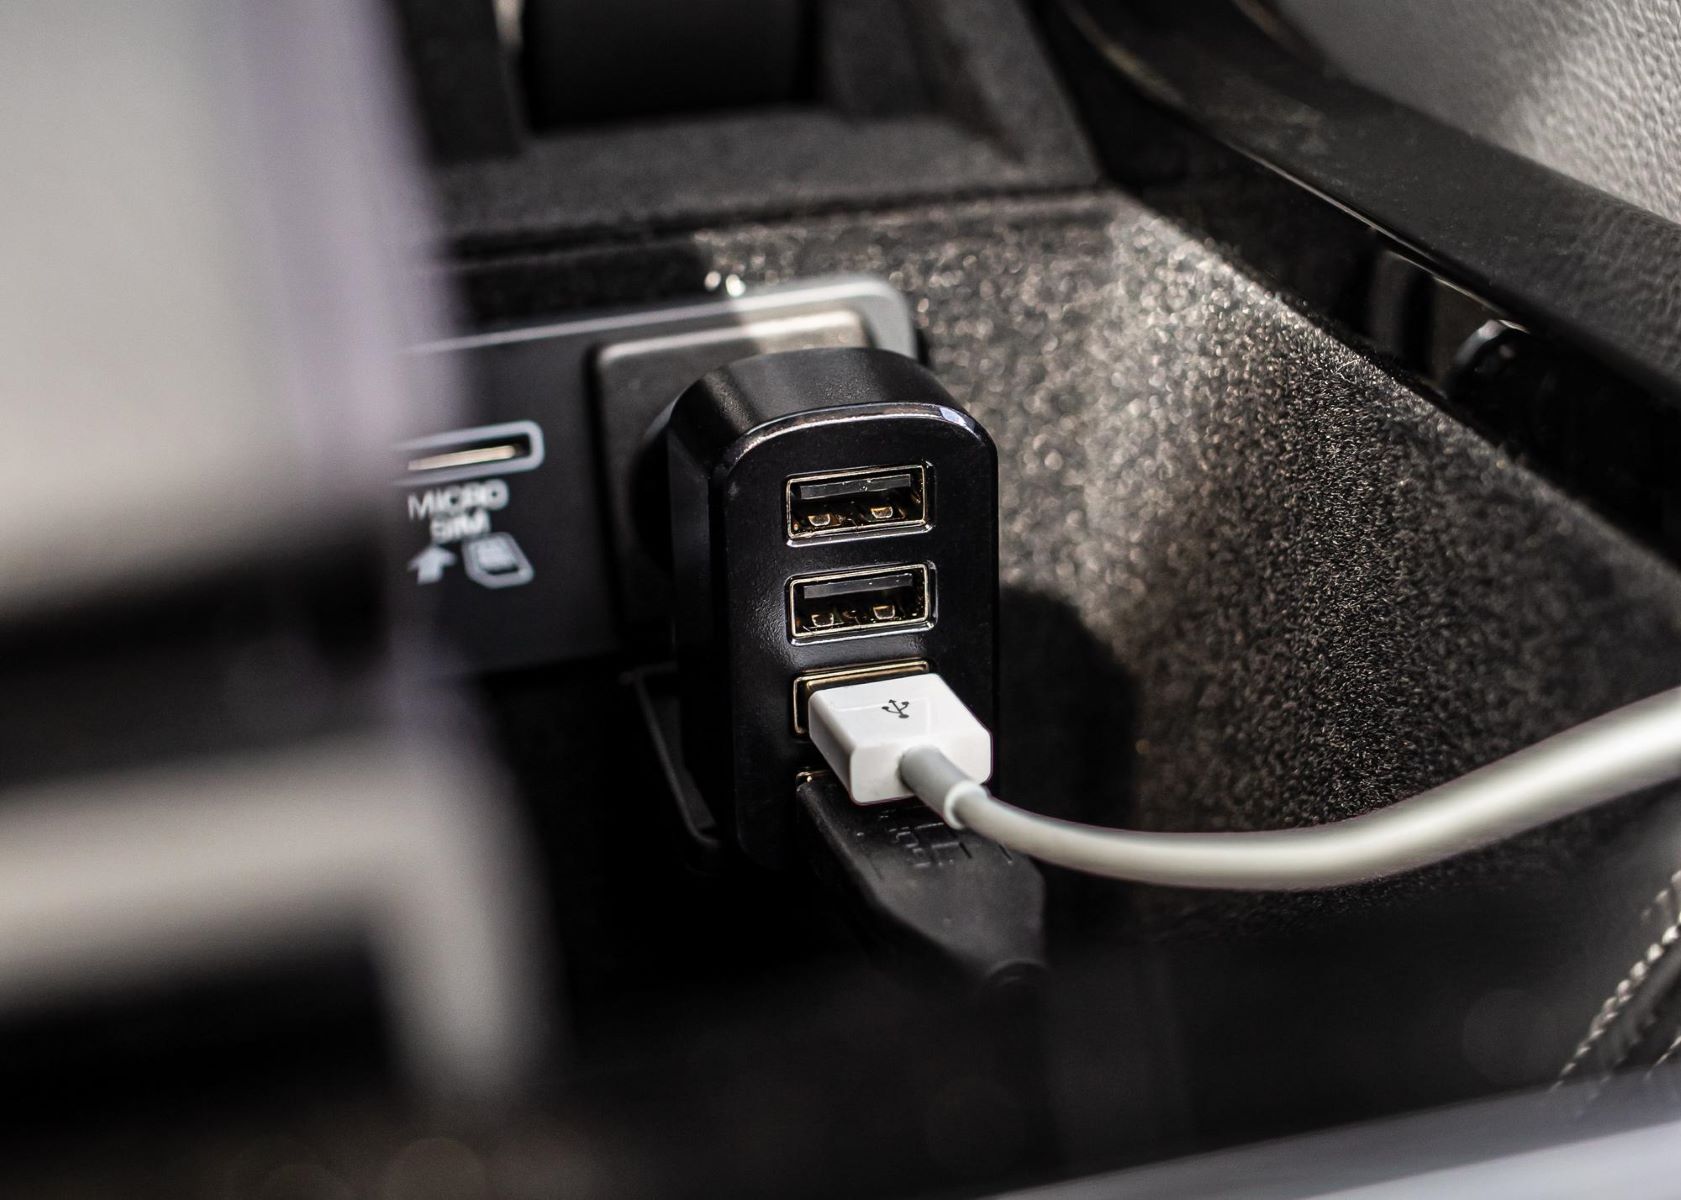
- USB hub – Choose a hub that is compatible with your car’s electrical system and has enough ports for your needs.
- Wire – You will need wires of appropriate gauge to connect the USB hub to your car’s battery and electrical system.
- Fuse holder and fuses – These are essential for protecting your car’s electrical system from overload and short circuits.
- Wire connectors – Use these to make secure connections between the wires and components.
- Electrical tape – This will help insulate and protect the wires.
- Pliers, wire cutters, and wire strippers – These tools will be needed for cutting and stripping the wires.
- Drill and appropriate drill bits – You may need to drill holes to mount the USB hub securely.
- Mounting hardware – Depending on the location you choose, you may need screws or adhesive to mount the USB hub.
- Protective gloves and safety glasses – It’s always good to prioritize safety when working with electrical components.
Having these supplies ready will ensure that you have everything you need to successfully wire a USB hub into your car. It’s important to double-check that you have the correct components and tools to avoid any hiccups during the installation process. Now that you have gathered all the necessary supplies, let’s move on to the steps involved in wiring the USB hub into your car.
Step 1: Disconnect the Car Battery
Before you begin the process of wiring a USB hub into your car, it is crucial to disconnect the car battery to ensure your safety and prevent any electrical mishaps. Follow these steps to disconnect the car battery:
- Locate the car battery – Consult your vehicle’s manual to find the exact location of the battery. In most cases, it is under the hood.
- Identify the negative terminal – The battery terminals are usually marked with a positive (+) and a negative (-) sign. The negative terminal is typically black and labeled with a minus sign (-).
- Put on protective gloves and safety glasses – It is essential to protect yourself from any accidental electrical shocks or corrosive chemicals.
- Loosen the nut or screw on the negative terminal – Use an appropriate sized wrench or pliers to loosen the nut or screw holding the negative terminal in place.
- Carefully remove the negative cable – Once the nut or screw is loose, gently disconnect the negative cable from the battery terminal. Move the cable aside to prevent accidental reconnection.
- Repeat the process for the positive terminal – If necessary, repeat steps 3-5 to disconnect the positive cable. This step may not be required if you only need to disconnect the negative terminal for the wiring process.
By disconnecting the car battery, you are ensuring that no power is flowing through the electrical system, reducing the risk of electrical shocks or damage to the components. Always handle the battery terminals with care and avoid touching both terminals simultaneously to prevent any short circuits. With the battery safely disconnected, you can proceed to the next step of wiring the USB hub into your car.
Step 2: Find a Suitable Location for the USB Hub
Now that you have disconnected the car battery, the next step is to find a suitable location to mount the USB hub in your car. Consider the following factors when choosing a location:
- Accessibility – Select a location that is easily accessible, allowing you to connect and disconnect devices from the USB ports without any hassle.
- Visibility – Choose a spot where the USB hub is visible and within reach, making it convenient to monitor and use.
- Protection – Opt for a location that offers protection to the USB hub from potential damage, such as extreme temperature, liquids, or excessive vibrations.
- Wiring Length – Keep in mind the length of the wires you will require to connect the USB hub to the car’s electrical system. Ensure that the location allows for proper wire routing and connections.
Common suitable locations for mounting a USB hub in a car include:
- Center console – Many vehicles have a center console where you can mount the USB hub for easy access.
- Dash or instrument panel – Mounting the USB hub on the dash or instrument panel keeps it within sight while driving.
- Glove compartment – If you prefer a more discreet location, the glove compartment can be a suitable option.
- Underneath the dash – This location provides a clean look and easy access without obstructing the view.
Remember to choose a location that suits your preferences and the layout of your car. Once you have determined the ideal spot, you can move on to the next step, which is mounting the USB hub securely in place.
Step 3: Mount the USB Hub
After finding a suitable location for the USB hub, the next step is to mount it securely. Follow these steps to mount the USB hub in your car:
- Prepare the mounting area – Clean the surface where you plan to mount the USB hub. Ensure that it is free from dust, dirt, and any other debris that could affect the adhesion or secure attachment of the USB hub.
- Choose the mounting option – Depending on the design of your USB hub, you can either use screws or adhesive to secure it in place. Refer to the manufacturer’s instructions for the preferred mounting method.
- Drill pilot holes (if necessary) – If you opt to use screws, use an appropriate drill bit to create pilot holes in the mounting area. This will help prevent any damage to the surface when you screw in the USB hub.
- Mount the USB hub – Align the USB hub with the mounting area and either screw it in or apply adhesive to ensure it stays in place. Be careful not to overtighten the screws to avoid damaging the USB hub or the mounting surface.
- Double-check stability – Give the USB hub a gentle tug or shake to ensure it is firmly secured. If it moves or feels loose, adjust the mounting or add extra adhesive (if applicable).
It’s important to mount the USB hub securely to prevent it from shifting or falling while driving. A stable mounting ensures that your devices connected to the USB ports remain secure and prevents any potential distractions or hazards while on the road. Once the USB hub is securely mounted, you can proceed to the next step, which involves connecting the USB hub to the car’s battery.
Step 4: Connect the USB Hub to the Car Battery
Now that the USB hub is securely mounted, it’s time to connect it to the car’s battery. Follow these steps to ensure a proper connection:
- Prepare the wires – Measure and cut two lengths of wire: one for the positive connection and one for the negative connection. Make sure the wires are long enough to reach the USB hub from the car battery.
- Strip the wire ends – Use wire strippers to remove a small portion of the insulation from the ends of both wires to expose the bare conductor.
- Connect the positive wire – Attach one end of the positive wire to the positive terminal of the car battery. It is usually marked with a plus (+) sign or red color coding.
- Connect the negative wire – Attach the other end of the negative wire to the negative terminal of the car battery. It is usually marked with a minus (-) sign or black color coding.
- Double-check the connections – Ensure that the connections between the wires and the battery terminals are tight and secure. You can use pliers to tighten any nuts or screws if necessary.
It’s essential to make sure the positive wire is connected to the positive terminal, and the negative wire is connected to the negative terminal of the car battery. Connecting them incorrectly can result in damage to the USB hub or other electrical components.
Keep in mind that the car battery carries electrical current, which can be dangerous if mishandled. Use caution and avoid touching the exposed metal parts of the wires or battery terminals while making the connections. Once the USB hub is properly connected to the car battery, you can proceed to the next step of connecting it to the car’s electrical system.
Step 5: Connect the USB Hub to the Car’s Electrical System
With the USB hub now connected to the car battery, the next step is to establish the connection between the USB hub and the car’s electrical system. Follow these steps to ensure a proper connection:
- Identify a suitable power source – Locate a power source within the car’s electrical system that provides both constant power and a suitable voltage for the USB hub. This could be an existing fuse, a spare fuse location, or directly tapping into a wire.
- Choose the appropriate wire – Select a wire that matches the gauge and type required by the USB hub and the power source you identified. It is recommended to use a wire with an inline fuse for added protection.
- Connect the wire to the USB hub – Strip a small portion of the insulation from the end of the wire, and securely connect it to the power input terminal of the USB hub. Use a wire connector or solder the connection for a reliable and secure fit.
- Route the wire – Carefully route the wire from the USB hub to the power source, ensuring it is hidden or properly secured to prevent it from interfering with the car’s operation or becoming a safety hazard.
- Connect the wire to the power source – Depending on the power source you identified, you may need to use a wire connector or splice the wire into the existing electrical connection. Follow the appropriate method to make a secure and reliable connection.
When connecting the USB hub to the car’s electrical system, it is crucial to choose a suitable power source and use the correct gauge wire. Connecting to the wrong power source or using an inadequate wire can result in electrical problems, damage to the USB hub, or even pose a safety risk.
Double-check all connections to ensure they are secure and conduct a visual inspection to make sure there are no exposed wires or potential hazards. Once the USB hub is successfully connected to the car’s electrical system, you can move on to the next step, which involves testing the USB hub.
Step 6: Test the USB Hub
After connecting the USB hub to the car’s electrical system, it’s important to test it to ensure that everything is functioning correctly. Follow these steps to test the USB hub:
- Reconnect the car battery – Carefully reconnect the negative cable to the negative terminal of the car battery. If you disconnected the positive cable as well, reconnect it to the positive terminal.
- Turn on the car – Start the car and let it run for a moment to ensure that the electrical system is active and providing power.
- Plug in devices – Connect your devices, such as smartphones or tablets, to the USB hub’s ports. Ensure that the devices are charging and being recognized by the car’s audio system or any other device that may be connected to the USB hub.
- Test multiple devices – Plug in different devices to each port of the USB hub to verify that all ports are functioning properly.
- Check for overheating or anomalies – Keep an eye on the USB hub while testing to ensure that it does not overheat or exhibit any unusual behavior. If you notice any issues, immediately disconnect the USB hub from the car’s electrical system.
During the testing process, pay attention to any error messages, charging inconsistencies, or any other signs that may indicate a problem with the USB hub. If everything is functioning correctly, you can proceed to the next step of securing the wiring to ensure a clean and organized installation.
However, if you encounter any issues or find that the USB hub is not working as expected, double-check all the connections and consult the manufacturer’s instructions. In some cases, you may need to troubleshoot or seek professional assistance to resolve the problem.
Testing is a crucial step to ensure that the USB hub is providing proper power and functioning as intended. Once you are satisfied with the results of the testing, you can move on to securing the wiring to complete the installation process.
Step 7: Secure the Wiring
After testing the USB hub and ensuring that it is functioning correctly, the next step is to secure the wiring to ensure a clean and organized installation. Follow these steps to secure the wiring:
- Inspect the wiring – Take a close look at the wiring connected to the USB hub and the car’s electrical system. Check for any loose connections, exposed wires, or potential hazards.
- Use zip ties or cable clips – Bundle the wiring together using zip ties or cable clips to keep them neat and organized. This will help prevent tangles, ensure a clean appearance, and minimize the risk of interference with other car components.
- Use electrical tape – Secure any exposed areas of the wiring with electrical tape to protect them from abrasion and moisture. This will help maintain the integrity of the wires and prevent potential short circuits.
Securing the wiring is crucial to maintain the longevity and reliability of the USB hub installation. It helps prevent accidental disconnections, minimizes the risk of damage, and ensures a professional-looking installation.
Remember to be cautious when working with electrical components, and avoid pinching or damaging the wires during the securing process. Taking the time to properly secure the wiring will provide you with peace of mind and ensure a well-organized and functional installation.
Once you have securely fastened and organized the wiring, you are ready to move on to the next step, which involves reconnecting the car battery to complete the installation process.
Step 8: Reconnect the Car Battery
With the wiring securely in place, it’s time to reconnect the car battery to complete the installation of the USB hub. Follow these steps to reconnect the car battery:
- Double-check the wiring – Before reconnecting the car battery, ensure that all connections are properly secured and there are no exposed wires or potential hazards.
- Put on protective gloves and safety glasses – Prioritize your safety by wearing protective gloves and safety glasses while handling the car battery.
- Reconnect the positive cable – Take the positive cable and securely attach it to the positive terminal of the car battery. This terminal is usually marked with a plus (+) sign or red color coding.
- Reconnect the negative cable – Take the negative cable and firmly attach it to the negative terminal of the car battery. The negative terminal is typically marked with a minus (-) sign or black color coding.
- Tighten the connections – Use pliers or a wrench to tighten the nuts or screws on both the positive and negative terminals. Ensure that the connections are tight and secure but be cautious not to overtighten to avoid damaging the terminals.
- Perform a final inspection – Verify that all connections are properly secured and there are no loose wires or potential hazards.
By reconnecting the car battery, you are restoring the power supply to the car’s electrical system, including the USB hub. It’s important to handle the battery terminals carefully and avoid touching both terminals simultaneously to prevent any short circuits or electrical shocks.
After reconnecting the car battery, it is recommended to perform a final test of the USB hub to ensure that it is functioning properly. Plug in your devices and verify that they are charging and being recognized by the car’s audio system or any other device connected to the USB hub.
With the car battery reconnected and the USB hub successfully installed, you are ready to move on to the final step of testing the USB hub and implementing any necessary safety precautions.
Step 9: Final Testing and Safety Precautions
After completing the installation of the USB hub in your car, it’s important to conduct a final round of testing and implement necessary safety precautions. Follow these steps to ensure proper functionality and safety:
- Test the USB hub – Plug in different devices to each port of the USB hub and verify that they are charging properly and being recognized by any connected devices or the car’s audio system.
- Check for any abnormalities – Monitor the USB hub during the testing process for any signs of overheating, unusual sounds, or other malfunctions. If any issues arise, disconnect the USB hub immediately.
- Secure all panels and components – Ensure that all panels and components in the car are properly secured and back in place after the installation process. Loose panels or exposed wires can pose safety risks or lead to damage in the future.
- Practice safe driving habits – Remember that the USB hub is intended for charging purposes. Avoid using or handling devices while driving to minimize distractions and prioritize road safety.
- Regularly check the connections – Periodically inspect the wiring and connections of the USB hub to ensure they remain secure. Loose or damaged connections may affect the functionality of the USB hub or pose safety hazards.
- Maintain good charging practices – Use devices that are compatible with the USB hub and follow manufacturer guidelines for charging. Avoid overcharging or using devices with faulty charging cables.
By conducting final testing and implementing safety precautions, you can ensure that the USB hub operates efficiently and safely in your car. Regularly check the functionality of the USB hub and address any issues promptly to prevent potential damage to your car’s electrical system or devices.
Remember to adhere to local traffic laws and regulations while using the USB hub in your car. Safe driving practices should always be the priority to ensure a secure and pleasant driving experience.
By following these steps and taking necessary precautions, you can enjoy the convenience of a USB hub in your car while maintaining safety and functionality.