
Requirements
Before you begin using your Trezor hardware wallet on your Android phone, there are a few essential requirements you need to satisfy:
- An Android phone: Ensure that you have an Android phone with a compatible operating system version. Trezor Manager app supports Android 7.0 (Nougat) and above.
- Trezor hardware wallet: You will need to purchase a Trezor hardware wallet. It is a physical device that stores your cryptocurrency private keys offline, protecting them from potential online threats
- OTG (On-The-Go) USB adapter: Trezor hardware wallet requires a USB connection to your Android device. To establish this connection, you will need an OTG USB adapter, which can be purchased separately.
- Trezor Manager app: Download and install the official Trezor Manager app from the Google Play Store. This app acts as a bridge between your Trezor device and your Android phone.
- Internet connectivity: Ensure that your Android phone has internet connectivity, either through Wi-Fi or mobile data, to interact with your Trezor wallet.
By meeting these requirements, you will be ready to set up your Trezor hardware wallet and start securely managing your cryptocurrencies on your Android phone.
Step 1: Download and Install Trezor Manager App
The first step to using your Trezor hardware wallet on your Android phone is to download and install the Trezor Manager app. Follow these instructions:
- Open the Google Play Store on your Android phone.
- Search for “Trezor Manager” in the search bar.
- Locate the official Trezor Manager app and tap on it to open the app page.
- Tap on the “Install” button to begin the download and installation process.
- Once the app is installed, tap on the “Open” button to launch the Trezor Manager app.
Now that you have successfully downloaded and installed the Trezor Manager app, you are one step closer to using your Trezor hardware wallet with your Android phone. Proceed to the next step to learn how to connect your Trezor device to your phone.
Step 2: Connect Trezor to Android Phone
To start using your Trezor hardware wallet with your Android phone, you need to establish a connection between the two. Follow these steps to connect your Trezor device to your Android phone:
- Make sure your Android phone is turned on and unlocked.
- Plug one end of the OTG (On-The-Go) USB adapter into the USB port of your Android phone.
- Connect the other end of the OTG USB adapter to the USB port of your Trezor device.
- Once the connection is made, you should see a notification on your Android phone indicating that a USB device is connected.
- On your Android phone, open the Trezor Manager app that you previously installed.
- The app will automatically detect your connected Trezor device.
- Tap on the name of your Trezor device displayed on the app screen to select it.
Congratulations! You have successfully connected your Trezor device to your Android phone. The next step is to set up your Trezor device and create a new wallet. Move on to the next section to continue.
Step 3: Set Up Trezor Device
Once you have connected your Trezor hardware wallet to your Android phone, it’s time to set up your device. Follow these steps to complete the setup process:
- On the Trezor Manager app, you will be prompted to initialize your device. Tap on the “Initialize Trezor” button.
- Read and carefully follow the instructions displayed on the app screen to ensure a proper setup.
- Set a strong and unique PIN for your Trezor device. Remember, this PIN will be required every time you want to access your wallet.
- Backup your recovery seed. The recovery seed is a list of words that serves as a backup for your wallet. Write down the words in the exact order and keep them in a safe place.
- Confirm that you have correctly written down the recovery seed by selecting the words requested by the app.
- Once the setup is complete, you can proceed to create a new wallet and start managing your cryptocurrencies securely.
By properly setting up your Trezor device, you have taken a crucial step in ensuring the security of your digital assets. In the next section, you will learn how to create a new wallet on your Trezor hardware wallet.
Step 4: Create New Wallet
Now that your Trezor device is set up and ready, it’s time to create a new wallet. Follow these steps to create a new wallet on your Trezor hardware wallet:
- On the Trezor Manager app, tap on the “Create new wallet” option.
- You will be prompted to choose a name for your new wallet. Enter a name that helps you easily identify it.
- Choose the cryptocurrency you want to manage in this wallet. Trezor supports a wide range of cryptocurrencies, so select the one you want to use.
- Set up a spending limit, which will define the maximum amount you can send in a single transaction from this wallet. This is an optional step.
- On your Trezor device, confirm the wallet creation by following the instructions displayed on the device’s screen.
- Wait for the wallet creation process to complete. Once done, you will see your newly created wallet on the Trezor Manager app.
Congratulations! You have successfully created a new wallet on your Trezor hardware wallet. From here, you can start managing your chosen cryptocurrency securely. The next section will guide you on how to backup your recovery seed to ensure the safety of your wallet.
Step 5: Backup Recovery Seed
Backing up your recovery seed is a critical step in safeguarding your Trezor wallet. In case your device gets lost, stolen, or damaged, the recovery seed will enable you to restore your wallet and access your funds. Follow these steps to back up your recovery seed:
- On the Trezor Manager app, navigate to the settings or security section.
- Select the option to backup or write down your recovery seed.
- On the Trezor device, you will be prompted to confirm the backup process.
- Write down the words that appear on the Trezor device screen in the exact order. Be sure to write them down on the recovery seed card or a piece of paper.
- Verify the accuracy of your recovery seed by re-entering the words in the correct sequence when prompted by the app.
- Store your recovery seed in a safe and secure location, preferably in multiple physical copies and offline storage. Avoid digital storage to minimize the risk of unauthorized access.
By backing up your recovery seed, you have taken a crucial step in securing your Trezor wallet. It is essential to keep your recovery seed confidential and inaccessible to unauthorized individuals. In the next section, you will learn how to access your wallet on your Android phone.
Step 6: Access Wallet on Android Phone
Now that you have set up your Trezor device and backed up your recovery seed, you can easily access your wallet on your Android phone using the Trezor Manager app. Follow these steps to access your wallet:
- Open the Trezor Manager app on your Android phone.
- Connect your Trezor device to your phone using the OTG USB adapter.
- On the app screen, you will see a list of wallets associated with your Trezor device. Tap on the wallet you want to access.
- Enter your Trezor PIN on the app screen. This is the PIN you set up during the device initialization.
- Follow the on-screen prompts to authorize the wallet access on your Trezor device.
- Once the authorization is successful, you will have full access to your wallet and the ability to view your balance, send and receive cryptocurrencies, and manage your wallet settings.
With the Trezor Manager app on your Android phone, you can conveniently and securely manage your Trezor wallet on the go. As a security measure, always ensure that your phone is locked when not in use and always keep your PIN confidential. In the next section, you will learn how to send and receive cryptocurrencies using your Trezor hardware wallet.
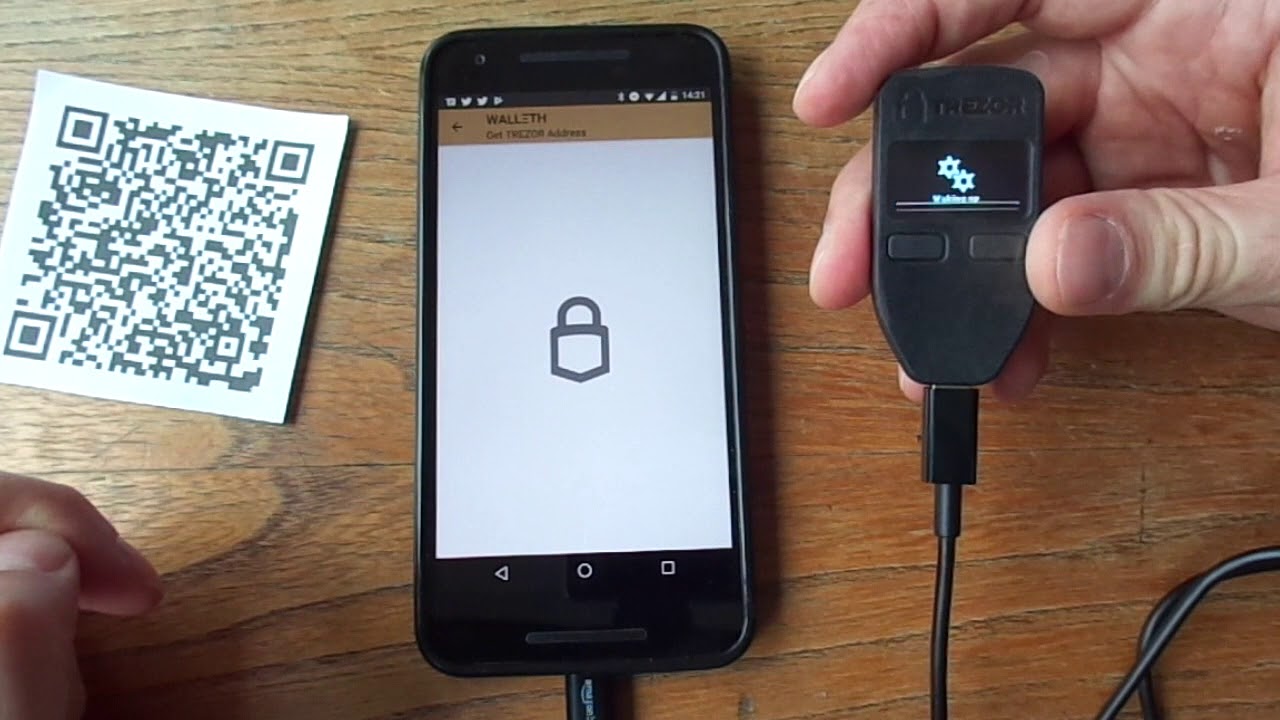
Step 7: Send and Receive Cryptocurrencies
One of the primary functions of your Trezor hardware wallet is to send and receive cryptocurrencies securely. Follow these steps to send and receive cryptocurrencies using your Trezor device and the Trezor Manager app:
- To receive cryptocurrency, ensure that your Trezor device is connected to your Android phone.
- Open the Trezor Manager app and select the wallet associated with the cryptocurrency you want to receive.
- On the app screen, locate the “Receive” or “Receive Funds” option. Tap on it.
- A receiving address will be generated for your wallet. You can either scan the QR code or copy the address manually to share it with the sender.
- To send cryptocurrency, follow a similar process:
- Ensure your Trezor device is connected to your Android phone.
- Open the Trezor Manager app and select the wallet associated with the cryptocurrency you want to send.
- On the app screen, locate the “Send” or “Send Funds” option. Tap on it.
- Enter the recipient’s wallet address and the amount of cryptocurrency you want to send.
- Review the transaction details and confirm the transaction on your Trezor device when prompted.
By following these steps, you can easily and securely send and receive cryptocurrencies using your Trezor hardware wallet and your Android phone. Always verify the receiving address before sending any funds to ensure accuracy. In the next section, you will learn about an optional security feature: passphrase encryption.
Step 8: Enable Passphrase Encryption (Optional)
Passphrase encryption is an additional layer of security that you can enable on your Trezor hardware wallet. It adds an extra passphrase to your recovery seed, providing enhanced protection for your funds. Follow these steps to enable passphrase encryption:
- On the Trezor Manager app, navigate to the settings or security section.
- Look for the option to enable passphrase encryption and tap on it.
- Follow the on-screen instructions to set up your passphrase. Choose a strong and unique passphrase that you can remember.
- Re-enter your passphrase to confirm it and complete the setup process.
- From now on, whenever you connect your Trezor device to your Android phone, you will be prompted to enter your passphrase in addition to your PIN.
Enabling passphrase encryption provides an extra layer of security for your Trezor wallet. It adds an additional step to access your funds, making it more challenging for unauthorized individuals to gain access. Remember to store your passphrase in a secure place, separate from your recovery seed, to prevent potential loss of access to your wallet.
It’s worth noting that if you enable passphrase encryption and forget your passphrase, you will lose access to your funds permanently. Therefore, it is crucial to choose a passphrase that is strong yet memorable.
In the next section, you will learn about an optional but recommended step: updating the firmware of your Trezor hardware wallet.
Step 9: Update Firmware (Optional)
Keeping your Trezor firmware up to date is crucial for ensuring the security and functionality of your hardware wallet. Firmware updates often include bug fixes, performance enhancements, and new features. Follow these steps to update the firmware of your Trezor hardware wallet:
- Connect your Trezor device to your Android phone using the OTG USB adapter.
- Launch the Trezor Manager app and ensure that your wallet is selected.
- Navigate to the settings or firmware section of the app.
- If a new firmware version is available for your device, you will be prompted to update it.
- Follow the on-screen instructions to initiate the firmware update process.
- During the update process, make sure not to disconnect or interrupt the connection between your Trezor device and your Android phone.
- Wait for the update to complete, and your Trezor device will automatically restart with the new firmware version.
By regularly updating your Trezor firmware, you can benefit from the latest security enhancements and features provided by the manufacturer. Firmware updates help protect your funds from potential vulnerabilities and ensure the smooth operation of your device.
It is recommended to stay vigilant and check for firmware updates periodically. You can also enable auto-updates in the Trezor Manager app to receive firmware updates automatically when available.
In the final section, you’ll find some troubleshooting tips to help you address any potential issues or challenges you may encounter when using your Trezor hardware wallet on your Android phone.
Step 10: Troubleshooting Tips
While using your Trezor hardware wallet on your Android phone, you may encounter certain issues or challenges. Here are some troubleshooting tips to help you resolve common problems:
- Connection Issues: If you are having trouble connecting your Trezor device to your Android phone, double-check that the OTG USB adapter is securely plugged in, and ensure that both devices have sufficient power.
- App Compatibility: Make sure you have downloaded the latest version of the Trezor Manager app from the official source, such as the Google Play Store. Outdated or unofficial apps may cause compatibility issues.
- PIN Recovery: If you forget your Trezor PIN, don’t worry. You can try entering an incorrect PIN multiple times, and the device will eventually provide an option to recover it using your recovery seed.
- Blockchain Syncing: Sometimes, wallet balance and transaction history may not appear accurately due to blockchain syncing delays. Wait for the syncing process to complete, or manually refresh the app if available.
- Troubleshooting Guide: If you encounter any other specific issues, consult the official Trezor documentation, support forums, or troubleshooting guides provided by the manufacturer. They offer detailed instructions and solutions for various scenarios.
If you are still unable to resolve the issue or face additional challenges with your Trezor hardware wallet on your Android phone, consider reaching out to the Trezor support team for further assistance. They are available to provide guidance and help you with troubleshooting steps specific to your situation.
By following these troubleshooting tips, you can overcome common challenges and ensure a smooth and secure experience while using your Trezor hardware wallet on your Android phone.