
Overview of the Control Panel
The Control Panel on your iPad is a powerful tool that allows you to easily access and control various settings and features. It provides quick access to commonly used functions, such as adjusting volume, brightness, connectivity, and more. Whether you want to customize your device, manage notifications, or control your home automation system, the Control Panel has got you covered.
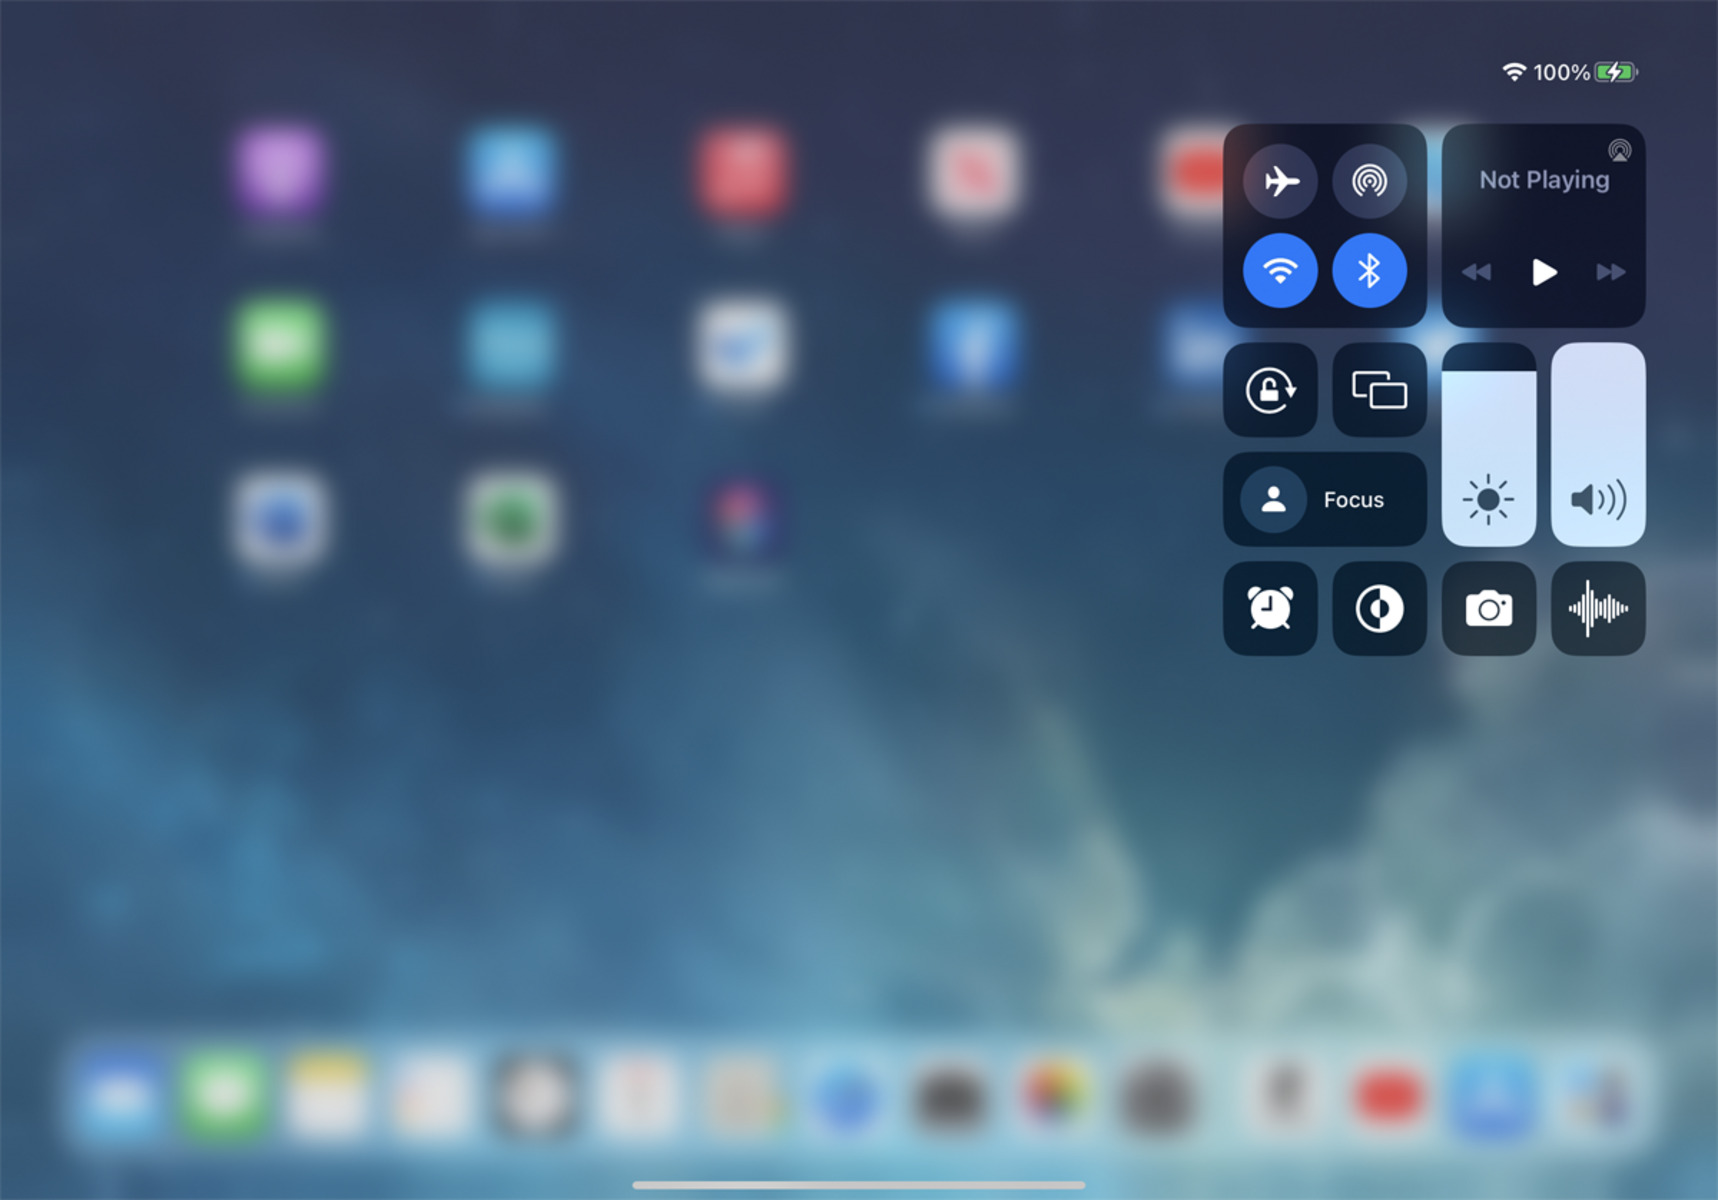
Located at the top right corner of the iPad’s screen, the Control Panel is easily accessible with just a swipe. Simply swipe down from the top right edge of the screen, and the Control Panel will appear, allowing you to quickly toggle through and adjust different settings. It is designed to be intuitive and user-friendly, making it easy for even novice users to navigate.
One of the main advantages of the Control Panel is its customization options. You can customize which controls are displayed in the panel, giving you quick access to the features you use most frequently. To do this, simply go to the Settings app, tap on “Control Center,” and then select “Customize Controls.” From here, you can add or remove controls based on your preferences.
Basic settings such as airplane mode, Wi-Fi, Bluetooth, and cellular data can be easily controlled from the Control Panel. By tapping on the respective icons, you can toggle these functions on or off with just a single tap. This makes it convenient to quickly enable or disable connectivity options as needed.
Controlling the display and brightness of your iPad is another key feature of the Control Panel. You can easily adjust the brightness level by using the slider, allowing you to adapt to different lighting conditions. Additionally, you can enable or disable auto-brightness, which automatically adjusts the brightness based on your surroundings.
The Control Panel also provides quick access to audio settings, making it easy to adjust the volume of your iPad or switch between silent, vibrate, and ring modes. By tapping on the volume icon, you can control the volume level or mute and unmute the device with a simple swipe.
Furthermore, the Control Panel allows you to enable or disable various connectivity options such as AirDrop and AirPlay. With AirDrop, you can easily share files, photos, and more with nearby iOS devices. AirPlay, on the other hand, allows you to wirelessly stream audio and video content to compatible devices, such as Apple TV or AirPlay-enabled speakers.
Managing notifications is also made easier with the Control Panel. By tapping on the notification icon, you can quickly enable or disable Do Not Disturb mode, which prevents incoming notifications from disturbing you. You can also access and clear your notifications from the panel, helping you stay organized and focused.
With the Control Panel, you can also control audio playback and screen mirroring. This allows you to easily play, pause, or skip tracks when listening to music, podcasts, or videos. Additionally, you can mirror your iPad’s screen on compatible devices, such as Apple TV, for a larger viewing experience.
Keyboard settings can also be adjusted from the Control Panel, allowing you to switch between different keyboards, enable or disable predictive text, and more. This makes it convenient and efficient for typing tasks, whether you’re composing an email, texting, or browsing the web.
Finally, the Control Panel offers quick access to accessibility features, enabling users with special needs to easily activate features such as VoiceOver, Zoom, and AssistiveTouch. These features enhance the accessibility and usability of the iPad, ensuring that everyone can enjoy its functionalities.
Accessing the Control Panel
Accessing the Control Panel on your iPad is incredibly easy and convenient. With just a simple swipe, you can have instant access to a range of essential settings and features. Let’s explore the various ways to access the Control Panel.
The primary method to access the Control Panel is by swiping down from the top right edge of the screen. Starting from the top right corner, swipe your finger downwards, and the Control Panel will slide into view. This gesture works on both the home screen and within apps, allowing you to access the Control Panel at any time. It is a quick and efficient way to manage your device’s settings on the go.
If you’re using an iPad with Face ID, you can also access the Control Panel from the Lock screen. Simply swipe down from the top right corner of the screen, and the Control Panel will appear. This allows you to control certain settings without unlocking your iPad, providing quick access to commonly used functions.
In addition to the swipe gesture, you can access the Control Panel from the iPad’s home screen by utilizing the AssistiveTouch feature. AssistiveTouch is a built-in accessibility feature that provides an on-screen virtual button that performs various gestures, including swiping down. To enable AssistiveTouch, go to “Settings,” then “Accessibility,” and tap on “Touch” to find “AssistiveTouch.” Once enabled, a small button will appear on the side of the screen. Tap on the AssistiveTouch button, and a menu will appear. From there, tap on “Device,” then “Control Center,” and the Control Panel will open.
If you prefer a hands-free approach, you can also use Siri to open the Control Panel. Simply activate Siri by holding down the Home button or saying “Hey Siri” (if enabled), then say, “Open Control Panel.” Siri will open the Control Panel for you, saving you the effort of interacting with the screen manually.
It’s important to note that while the Control Panel is easily accessible, it may not be available or function differently in some apps or scenarios. For example, in certain video playback apps, swiping down from the top of the screen might control video playback instead of opening the Control Panel. Additionally, within apps that utilize full-screen mode, the Control Panel may not be accessible.
Customizing the Control Panel
The Control Panel on your iPad can be customized to suit your preferences, allowing you to have quick access to the functions that matter most to you. By personalizing the Control Panel, you can streamline your workflow and make it even more tailored to your specific needs. Let’s explore how you can customize the Control Panel on your iPad.
To begin customizing the Control Panel, navigate to the “Settings” app on your iPad. From there, scroll down and tap on “Control Center.” In the Control Center settings, you will see two sections: “INCLUDE” and “MORE CONTROLS.”
The “INCLUDE” section displays the controls that are currently included in your Control Panel. By default, you’ll find commonly used controls such as Wi-Fi, Bluetooth, Do Not Disturb, and Screen Mirroring. To add more controls to this section, tap the green “+” icon next to the control you want to include. These controls can be rearranged by pressing and holding the three-line icon next to each control and dragging it to the desired position.
If there are controls in the “INCLUDE” section that you don’t use or need, you can remove them by tapping the red “-” icon next to the control name. Keep in mind that removing a control from the “INCLUDE” section does not disable the corresponding feature; it simply removes the control from the Control Panel.
The “MORE CONTROLS” section lists additional controls that are available for customization. These controls are not included in the Control Panel by default but can be added if desired. To add a control from the “MORE CONTROLS” section, simply tap the green “+” next to the control name.
Once you have customized the Control Panel to your liking, you can exit the Settings app and test out your new configuration. Simply swipe down from the top right corner of the screen to open the Control Panel and access your personalized set of controls.
Customizing the Control Panel allows you to have quick access to the features that are most relevant to your daily routine. You can include controls for things like screen recording, magnifier, calculator, notes, and more. By tailoring the Control Panel to your specific needs, you can save time and streamline your interactions with your iPad.
It’s worth noting that some controls, such as Wi-Fi and Bluetooth, cannot be removed or rearranged from the “INCLUDE” section. These controls are essential and are always accessible in the Control Panel for your convenience. Additionally, the “MORE CONTROLS” section may differ based on your iPad model and software version.
Take advantage of the customization options available in the Control Panel and create a setup that works best for you. Whether you want quick access to your favorite apps, system settings, or specific features, customizing the Control Panel allows you to have a more personalized and efficient user experience on your iPad.
Controlling Basic Settings
The Control Panel on your iPad provides a convenient way to control basic settings, allowing you to easily toggle various functions on or off with just a single tap. Let’s explore the basic settings that can be controlled through the Control Panel.
One of the primary functions accessible from the Control Panel is the Airplane Mode. By tapping the airplane icon, you can quickly enable or disable Airplane Mode. When Airplane Mode is turned on, it disables all wireless connections on your iPad, including Wi-Fi, Bluetooth, and cellular data. This is useful when you’re on an airplane or in an area where you need to turn off all wireless transmissions.
Another essential control in the Control Panel is Wi-Fi. Tapping the Wi-Fi icon allows you to enable or disable Wi-Fi connectivity on your iPad. When Wi-Fi is enabled, your iPad will search for available networks, and you can choose the network you want to connect to from the list. This is useful when you want to connect to a Wi-Fi network for faster internet access or to save on cellular data usage.
Bluetooth control is also readily accessible in the Control Panel. By tapping the Bluetooth icon, you can enable or disable Bluetooth connectivity on your iPad. Bluetooth allows you to connect your iPad to other devices such as headphones, speakers, keyboards, and more. Enabling Bluetooth in the Control Panel makes it quick and easy to connect and disconnect from Bluetooth devices.
Control of cellular data on your iPad is another important feature found in the Control Panel. If your iPad has cellular capabilities, tapping the cellular data icon in the Control Panel allows you to enable or disable cellular data usage. This is useful when you want to conserve data usage or when you’re in an area with weak cellular signal and prefer to rely solely on Wi-Fi connectivity.
Do Not Disturb mode is a handy feature that can be controlled from the Control Panel. Tapping the moon icon enables or disables Do Not Disturb mode, which silences incoming notifications and calls. This is useful when you need uninterrupted focus or want to avoid distractions during specific times or activities.
The Orientation Lock control in the Control Panel is particularly useful when you want to lock your iPad’s display orientation. By tapping the Orientation Lock icon, you can quickly toggle between allowing or preventing the iPad’s screen from rotating when the device is tilted or turned. This is handy when you’re reading or watching content and want to maintain a specific orientation.
In addition to these basic settings, you can also control other functions like the flashlight, screen brightness, and the camera. These controls allow you to quickly access and adjust these features without navigating through multiple menus or settings.
By utilizing the Control Panel, you can seamlessly control and toggle various important settings on your iPad with just a few taps. Whether you want to enable or disable connectivity options, activate Do Not Disturb mode, or lock the screen orientation, the Control Panel offers a convenient way to manage these basic settings and enhance your overall user experience on the iPad.
Adjusting Display and Brightness
The Control Panel on your iPad allows you to easily adjust the display and brightness settings, giving you control over how your screen looks and adapts to different lighting conditions. Whether you want to make the screen brighter for optimal visibility or enable auto-brightness for automatic adjustments, the Control Panel has got you covered.
Within the Control Panel, you’ll find a brightness slider that allows you to manually adjust the screen brightness. By simply dragging the brightness slider up or down, you can make the screen brighter or dimmer according to your preferences. This is particularly useful in environments where lighting conditions are either too bright or too dim.
Auto-brightness is another convenient feature that can be easily toggled in the Control Panel. When enabled, your iPad uses the ambient light sensor to automatically adjust the screen brightness based on the surrounding lighting conditions. This ensures that your screen is comfortably visible without being too bright or too dim. To toggle auto-brightness, simply long-press on the brightness slider, and a toggle switch will appear.
Additionally, in the Control Panel, you can enable or disable Night Shift mode, which adjusts the color temperature of your screen to reduce blue light emission. Blue light, especially in the evening or night, can interfere with your sleep patterns. Night Shift mode helps to alleviate this issue by shifting the display’s colors towards the warmer end of the spectrum. This feature can be useful for those who use their iPad at night or in dimly lit environments.
It’s worth noting that certain iPad models may offer additional display-related controls in the Control Panel. For example, if you have an iPad Pro with ProMotion technology, you may see a toggle for ProMotion in the Control Panel. ProMotion allows for a smoother and more responsive viewing experience by dynamically adjusting the screen refresh rate up to 120Hz. Enabling ProMotion can result in smoother scrolling, faster touch response, and improved Apple Pencil performance.
By having quick access to display and brightness controls in the Control Panel, you can easily customize your iPad’s screen to suit your viewing preferences and the current ambient lighting conditions. Whether you need to increase the brightness for outdoor use, activate auto-brightness for adaptive adjustments, or enable Night Shift mode for a more comfortable night-time viewing experience, the Control Panel provides a convenient way to fine-tune and optimize the display settings on your iPad.
Managing Audio Settings
The Control Panel on your iPad provides easy access to manage various audio settings, allowing you to control and adjust the volume, audio playback, and connectivity options. Whether you want to change the volume, switch between audio output sources, or control media playback, the Control Panel makes it convenient to manage your audio settings.
In the Control Panel, you’ll find the volume slider that allows you to quickly adjust the audio level of your device. By dragging the slider up or down, you can increase or decrease the volume to your desired level. This makes it effortless to control the audio output of your iPad, whether you’re listening to music, watching videos, or engaging in other multimedia activities.
Additionally, tapping the volume icon in the Control Panel expands the audio controls, providing you with additional options. You can toggle between Silent Mode, which mutes all sound, Vibrate Mode, which silences incoming calls and notifications but allows for haptic feedback, and Ring Mode, which restores normal sound functionality.
When it comes to audio output sources, the Control Panel allows you to switch between different options. Tapping the audio output icon reveals a list of available audio output devices, such as the iPad’s built-in speakers, Bluetooth headphones, or AirPlay-enabled devices. This gives you the flexibility to seamlessly switch between different audio output sources based on your preference or current requirements.
Controlling media playback is also made easy in the Control Panel. When media is playing on your iPad, you’ll see playback controls such as play/pause, skip forward, and skip backward. These controls allow you to quickly control your music, podcasts, videos, and other media without needing to open the specific app or media player.
In addition to the playback controls, you can also access screen mirroring options in the Control Panel. Screen mirroring enables you to wirelessly display the content of your iPad on a compatible device, such as an Apple TV. By tapping the screen mirroring icon, you can select and connect to the desired screen mirroring devices, enabling a larger screen viewing experience for your content.
Furthermore, the Control Panel provides quick access to audio settings for specific apps. When an app is actively playing audio, you may see dedicated audio controls for that app in the Control Panel. These controls allow you to adjust the app’s audio output independently, providing greater control and customization options for your audio experience.
Enabling and Disabling Connectivity
The Control Panel on your iPad offers convenient options to enable or disable various connectivity features, giving you quick access to manage your device’s wireless connections. With just a simple tap, you can easily control Wi-Fi, Bluetooth, and cellular data settings to suit your needs.
Wi-Fi connectivity can be enabled or disabled directly from the Control Panel. Tapping the Wi-Fi icon allows you to toggle Wi-Fi on or off with just a single tap. When Wi-Fi is enabled, your iPad scans for available networks, allowing you to connect to a Wi-Fi network of your choice. Disabling Wi-Fi, on the other hand, disconnects your iPad from any active Wi-Fi networks, ensuring that your device uses cellular data or remains offline, depending on the availability.
Bluetooth connectivity, another essential connectivity feature, can also be controlled from the Control Panel. Tapping the Bluetooth icon enables or disables Bluetooth on your iPad. Enabling Bluetooth allows you to connect your iPad to other devices, such as headphones, speakers, or keyboards. Disabling Bluetooth disconnects your iPad from any connected Bluetooth devices, conserving battery life and preventing unwanted connections.
If your iPad has cellular capabilities, you can easily enable or disable cellular data usage through the Control Panel. Tapping the cellular data icon allows you to toggle cellular data on or off. Enabling cellular data lets your iPad connect to the internet using your cellular data plan. Disabling cellular data ensures that your iPad uses Wi-Fi for internet connectivity, saving on cellular data usage or conserving battery life when Wi-Fi is available.
It’s important to note that while the Control Panel provides quick access to enable or disable these connectivity options, it does not provide deeper configuration options. For more advanced settings and features related to Wi-Fi, Bluetooth, or cellular data, you may need to navigate to the respective sections within the iPad’s Settings app.
Having the ability to enable or disable connectivity features from the Control Panel brings convenience and efficiency to your iPad experience. It allows you to quickly turn on Wi-Fi when you want to connect to a network, activate Bluetooth when you need to pair your device with other devices, and enable or disable cellular data usage based on your preferences and network availability.
By utilizing the connectivity controls in the Control Panel, you have the power to manage and control your iPad’s wireless connections with just a few taps, ensuring that you stay connected on your terms.
Using AirDrop and AirPlay
The Control Panel on your iPad provides easy access to two powerful connectivity features: AirDrop and AirPlay. AirDrop enables you to quickly share files, photos, and more with nearby iOS devices, while AirPlay allows you to wirelessly stream audio and video to compatible devices, such as Apple TV or AirPlay-enabled speakers.
AirDrop can be easily accessed and enabled from the Control Panel. Simply tap the AirDrop icon to open the AirDrop menu, where you can choose who can discover and send content to your iPad. You can select between “Receiving Off” to disable AirDrop, “Contacts Only” to limit AirDrop to your contacts, or “Everyone” to allow any nearby iOS devices to send content to your iPad.
Once AirDrop is enabled, you can quickly share files, photos, or other content from compatible apps. Simply select the item you want to share, tap the share button (usually represented by a box with an arrow), and choose the recipient’s device from the AirDrop menu. Both devices should have AirDrop enabled and be within close proximity for successful file transfer.
AirPlay, on the other hand, allows you to effortlessly stream audio and video from your iPad to compatible devices. To use AirPlay, ensure that your iPad and the target device are connected to the same Wi-Fi network. Then, tap the AirPlay icon in the Control Panel to display a list of available AirPlay devices. Select the desired device, and your audio or video will wirelessly stream to the chosen device.
With AirPlay, you can enjoy a wireless audio experience by streaming music, podcasts, or other audio content to AirPlay-enabled speakers, home theater systems, or other compatible devices. You can also stream videos from apps that support AirPlay, mirroring your iPad’s screen on a larger display for enhanced viewing pleasure.
It’s important to note that while AirDrop and AirPlay are incredibly useful features, they may have specific requirements for compatibility and functionality. For example, AirDrop requires a newer iPad model with iOS 7 or later, while AirPlay requires compatible devices and apps that support the feature.
By utilizing AirDrop and AirPlay through the Control Panel, you can easily share files with nearby iOS devices and enjoy wireless audio and video streaming to compatible devices. These features add convenience, flexibility, and seamless connectivity to your iPad experience, enhancing the way you share content and enjoy multimedia on your device.
Managing Volume and Display Orientation
The Control Panel on your iPad provides easy access to manage the volume and display orientation settings, giving you control over the audio output and screen rotation on your device. Whether you want to adjust the volume, mute the sound, or lock the screen orientation, the Control Panel makes it convenient to manage these settings at your fingertips.
To control the volume on your iPad, simply use the volume slider in the Control Panel. By dragging the slider up or down, you can increase or decrease the volume to your desired level. Whether you’re listening to music, watching videos, or engaging in other multimedia activities, the Control Panel allows you to easily adjust the volume to suit your preferences.
In addition to adjusting the volume, the Control Panel provides options to mute the sound on your iPad. By tapping on the volume icon, you can toggle between ring mode, silent mode, and vibrate mode. This allows you to quickly switch between different sound settings based on your needs and preferences. When in silent mode, your iPad will not produce any sound, ensuring complete silence when needed.
The Control Panel also offers control over the display orientation of your iPad. By tapping the screen rotation lock icon in the Control Panel, you can enable or disable the screen rotation lock. When the lock is enabled, your screen will remain fixed in the current orientation, regardless of how you hold your iPad. This is particularly useful when you want to read or view content in a specific orientation and prevent the screen from automatically rotating.
Enabling the screen rotation lock is especially handy when using certain apps that are best viewed in a specific orientation, such as reading books or playing games. It allows you to maintain a consistent viewing angle without the screen constantly shifting orientation.
It’s important to note that the screen rotation lock does not affect all apps or functionalities of your iPad. Some apps, such as video playback applications or apps that offer their own orientation preferences, may override the screen rotation lock setting.
By using the volume and display orientation controls in the Control Panel, you can easily manage the audio output and screen rotation on your iPad. Whether you need to adjust the volume for optimal listening, mute the sound for silence, or lock the screen orientation for a consistent viewing experience, the Control Panel provides efficient access to these essential settings, enhancing your overall user experience on the iPad.
Utilizing Do Not Disturb and Night Shift
The Control Panel on your iPad offers two convenient features to enhance your user experience: Do Not Disturb mode and Night Shift. These features allow you to customize your device’s behavior and display to suit your needs, ensuring uninterrupted focus and reduced exposure to blue light during specific times or activities.
Do Not Disturb mode in the Control Panel allows you to prevent incoming calls, notifications, and interruptions from disturbing you. When enabled, Do Not Disturb mode silences all sounds, vibrations, and visual alerts on your iPad. This is particularly useful when you need concentration, privacy, or simply want to avoid distractions during certain activities or times of the day.
To enable Do Not Disturb mode, simply tap the moon icon in the Control Panel. You can choose to activate it for a specific duration, until the next morning, or indefinitely until you manually disable it. While Do Not Disturb mode is active, you can still receive calls and notifications, but they will be silenced and won’t interrupt your current activity.
Night Shift, another feature accessible from the Control Panel, helps to reduce your exposure to blue light during the evening or night. Blue light, emitted by electronic screens like your iPad, can interfere with your sleep patterns and make it harder to fall asleep. Night Shift automatically adjusts the color temperature of your iPad’s display to a warmer tone, reducing the amount of blue light emitted.
To enable Night Shift, simply tap the sun and moon icon in the Control Panel. You can choose to activate it for a specific duration, until the next morning, or indefinitely until you manually disable it. Night Shift can also be scheduled to automatically turn on and off based on your preferred timings or sunset and sunrise times.
By utilizing Do Not Disturb mode and Night Shift, you can have greater control over your iPad’s behavior and display. These features enable you to create a more personalized and productive experience, minimizing distractions during important tasks and reducing the impact of blue light on your sleep quality.
It’s important to note that while Do Not Disturb and Night Shift are powerful features, they may have certain limitations. For example, Do Not Disturb mode does not prevent alarms from sounding or important calls from specific contacts. Additionally, Night Shift is not a complete substitute for a proper sleep routine and healthy sleep environment.
By leveraging Do Not Disturb mode and Night Shift through the Control Panel, you can tailor your iPad’s settings to align with your preferences and create a more comfortable and focused user experience.
Accessing and Managing Notifications
The Control Panel on your iPad provides easy access to notifications, allowing you to stay updated on important information and manage your notifications effectively. With a simple tap, you can access and clear your notifications, enabling you to stay organized and focused on your tasks.
To access your notifications, swipe down from the top right corner of the screen to open the Control Panel. From there, you’ll see a section dedicated to notifications, displaying a summary of your recent notifications. You can simply tap on the notifications to view more details or take action on them.
In the dedicated notifications section, you can also see a “Clear All” button at the top. Tapping this button will clear all your notifications, providing a clean and decluttered view. This is particularly useful when you want to start fresh and remove all notifications at once.
If you want to manage your notifications on an app-by-app basis, you can do so by going to the Settings app and navigating to “Notifications.” From there, you can see a list of installed apps and configure the notification settings for each app individually. This allows you to customize how and when you receive notifications from specific apps.
Within the app notification settings, you can control the notification style, enable or disable sounds, choose the lock screen behavior, and more. This granular control allows you to tailor the notification experience according to your preferences and the specific requirements of each app.
Furthermore, you can also access the “Do Not Disturb” mode directly from the Control Panel to prevent notifications from interrupting you during specific times or activities. This mode, when activated, silences incoming notifications and calls, providing uninterrupted focus.
By utilizing the Control Panel to access and manage your notifications, you can easily stay informed without being overwhelmed. You have the flexibility to view, clear, and customize your notifications, ensuring that you have control over how and when you receive important information on your iPad.
It’s worth noting that while the Control Panel provides a convenient way to access notifications, the settings and behavior of notifications may vary depending on your installed apps and their respective notification settings.
Take advantage of the notifications section in the Control Panel to streamline your notification management, reduce distractions, and stay organized on your iPad.
Controlling Audio Playback and Screen Mirroring
The Control Panel on your iPad offers seamless control over audio playback and screen mirroring, allowing you to easily manage your media and share your screen with compatible devices. With just a few taps, you can play, pause, skip tracks, adjust volume, and even stream your iPad’s screen to a larger display.
When playing audio on your iPad, you’ll find playback controls in the Control Panel. These controls allow you to play, pause, and skip tracks when listening to music, podcasts, or other audio content. You can easily control the playback without needing to open the respective app. This convenience is especially useful when you’re multitasking or using other apps while enjoying your favorite tunes or podcasts.
The Control Panel also provides volume control for your audio playback. The volume slider allows you to increase or decrease the audio level according to your preference. You can easily adapt the volume to your surroundings, ensuring optimal listening experience.
In addition to audio playback control, the Control Panel allows you to mirror your iPad’s screen on compatible devices. By tapping the screen mirroring icon, you can view a list of available AirPlay devices, such as Apple TV or AirPlay-enabled speakers. Select your desired device, and your iPad’s screen will be wirelessly mirrored, providing a larger display for your content.
Screen mirroring is valuable when you want to share photos, videos, presentations, or any other content on a bigger screen. It’s an excellent way to enhance your viewing experience and engage in activities that benefit from a larger display, such as gaming or multimedia presentations.
It’s worth noting that screen mirroring functionality may vary depending on the compatibility and capabilities of the target device. Some devices may offer additional features, such as dual-screen or extended display mode.
By utilizing the audio playback and screen mirroring controls in the Control Panel, you have quick and convenient access to your media playback and the ability to share your screen with compatible devices. Whether you want to control your audio playback, adjust volume, or enjoy content on a larger display, the Control Panel provides a seamless and user-friendly experience on your iPad.
Adjusting Keyboard Settings
The Control Panel on your iPad allows you to easily adjust the settings of your keyboard, enabling you to tailor it to your preferences and enhance your typing experience. Whether you want to switch between different keyboards, enable or disable predictive text, or customize other keyboard functionalities, the Control Panel provides convenient access to these settings.
To access the keyboard settings, open the Control Panel and tap the keyboard icon. This will open the keyboard settings menu, where you can make various adjustments to enhance your typing experience.
One of the key features you can control is the selection of keyboards. If you’ve added multiple keyboards to your iPad, you can quickly switch between them by tapping the globe icon in the keyboard settings menu. This is particularly useful if you use multiple languages or prefer different keyboard layouts for different tasks.
Additionally, in the keyboard settings menu, you can enable or disable predictive text. Predictive text suggests words as you type, making it faster and easier to write. You can choose whether you want to see the suggested words above the keyboard or disable the feature altogether if it doesn’t align with your typing style.
Furthermore, you have the option to customize the keyboard settings with additional options such as auto-capitalization, auto-correction, and spell check. By enabling auto-capitalization, the keyboard automatically capitalizes the first letter of each sentence. Auto-correction helps as it identifies and corrects misspelled words as you type. Spell check underlines misspelled words in red, allowing you to correct them easily.
If you prefer a tactile typing experience, you can toggle on the “Key Tapping” sound, which provides an audible feedback when you tap a key on the keyboard. This can be helpful, especially if you rely on audio cues while typing.
It’s worth noting that the specific keyboard settings available in the Control Panel may vary slightly depending on your iPad model and software version.
By utilizing the keyboard settings in the Control Panel, you can personalize your typing experience on your iPad. Whether you want to switch between keyboards, enable predictive text, customize auto-correct functionality, or use key tapping sounds, the Control Panel offers convenient access to these settings, allowing you to adapt the keyboard to your preferences and improve your productivity on the iPad.
Enabling and Disabling Accessibility Features
The Control Panel on your iPad provides quick and easy access to enable or disable various accessibility features, ensuring that users with special needs can customize their device to meet their specific requirements. From visual enhancements to assistive touch and voice control, the Control Panel allows you to activate and deactivate these accessibility features with just a few taps.
To access the accessibility settings, open the Control Panel and tap the Accessibility icon. This will bring you to a menu where you can enable and configure a wide range of accessibility features.
One of the key accessibility features available is VoiceOver. When enabled, VoiceOver provides spoken feedback, narrating onscreen content and guiding users with vision impairments through gestures and interactions. To activate VoiceOver, simply tap on the VoiceOver option in the accessibility settings menu. And to turn it off, you can triple-press the home button (or the side button on newer iPad models) or return to the Control Panel.
Zoom is another valuable accessibility feature that allows you to magnify the screen to make text and other elements easier to read. By enabling Zoom in the accessibility settings, you can adjust the level of magnification and use gestures to navigate through the magnified interface. When Zoom is no longer needed, you can disable it from the Control Panel or the accessibility settings menu.
AssistiveTouch is an innovative accessibility feature that provides an on-screen virtual button to perform various gestures and functions. By enabling AssistiveTouch in the Accessibility settings, you can access features such as multi-finger gestures, notification center, control center, and more, all with a tap of the virtual button. Disabling AssistiveTouch can be done in the Control Panel or the accessibility settings menu.
The Control Panel also allows you to enable and disable other important accessibility features, including a high contrast display, color filters, closed captions, and switch control, among others. These features are designed to accommodate different visual, auditory, and motor impairments, making the iPad more accessible and inclusive for all users.
It’s worth noting that in addition to enabling and disabling accessibility features, the Control Panel also provides quick access to configuration options for each feature. These options allow users to further customize their experience and adjust settings according to their specific needs and preferences.
By utilizing the accessibility settings in the Control Panel, users with special needs can tailor their iPad’s functionality to fit their requirements. From enhancing visual accessibility to enabling assistive touch and voice control, the Control Panel offers a streamlined and convenient way to enable and disable these critical accessibility features, promoting inclusivity and empowering users with different abilities.
Accessing and Using Home Controls
The Control Panel on your iPad offers easy access to control and manage your smart home devices through the Home app, allowing you to streamline and automate various aspects of your home environment. With just a few taps, you can access and utilize home controls for enhanced convenience, comfort, and security.
To access the home controls, open the Control Panel and make sure that the Home app is added as one of your shortcuts. If not, you can customize the Control Center settings in the iPad’s Settings app to add the Home app. Once added, tap the Home icon in the Control Panel to launch the Home app and access your configured home controls.
In the Home app, you can control a variety of smart home devices, such as lights, thermostats, cameras, door locks, and more. Depending on the devices you have added, you’ll see different control options for each device.
For example, if you have smart lights installed in your home, you can turn them on or off, adjust their brightness, and even change their colors right from the Control Panel. This allows you to easily set the mood, create lighting scenes, or control individual lights without needing to open the dedicated app for each device.
Similarly, if you have a smart thermostat, you can adjust the temperature, set schedules, and control the climate of your home directly from the Control Panel. This makes it convenient to manage your home’s heating and cooling system with just a few taps.
Additionally, you can access and control other smart home devices such as cameras and door locks, allowing you to monitor your home’s security and grant access to authorized individuals directly from the Control Panel. This helps you easily keep an eye on your home and manage its security with minimal effort.
It’s important to note that the devices and functionalities available in the Home app and Control Panel may vary depending on the smart home ecosystem you have set up and the compatible devices you have added. Some features may require additional setup or integration with external services.
By utilizing the home controls in the Control Panel, you can seamlessly manage and control your smart home devices for a more convenient and personalized living experience. The Control Panel offers a central hub for accessing and utilizing home controls, saving you time and effort while providing greater control over your home environment.
Quick Access to Control Center from Lock Screen
The Control Center on your iPad can be accessed swiftly from the lock screen, allowing you to quickly control essential settings and access commonly used features without having to unlock your device. This convenient feature provides instant access to the Control Center, ensuring that you can efficiently manage your iPad even when it’s locked.
To access the Control Center from the lock screen, simply swipe down from the top right corner of the screen. The Control Center will slide into view, displaying the various controls and features available for quick access. This gesture enables you to check important information, control settings, and perform actions without fully unlocking your iPad.
From the Control Center on the lock screen, you can toggle essential settings such as Wi-Fi, Bluetooth, Do Not Disturb, and Airplane Mode, among others. This convenience allows you to quickly enable or disable these functions as needed, even when your device is locked and without entering a passcode or using Touch ID or Face ID.
Moreover, the lock screen Control Center provides accessibility to features like flashlight, calculator, camera, and more, allowing you to perform quick actions without the need to unlock your iPad and search for these apps individually.
However, it’s important to ensure your iPad’s security by adjusting the Control Center access options in your device’s settings. You can customize which controls are accessible from the lock screen by going to “Settings,” selecting “Touch ID & Passcode” (or “Face ID & Passcode” on newer models), and scrolling down to the “Allow Access When Locked” section.
From there, you can choose to enable or disable specific controls such as Today View, Control Center, Siri, Home Control, and more on the lock screen. This gives you control over the level of access and security you prefer for your device.
The ability to access the Control Center from the lock screen enhances the usability and convenience of your iPad by providing quick access to important controls and features, all without needing to unlock your device. It saves you time and allows for efficient management of settings, making your iPad more accessible and user-friendly.
However, it’s important to consider the security implications of accessing the Control Center from the lock screen. Ensure that you strike a balance between convenience and security settings that align with your preferences.
Troubleshooting Control Panel Issues
The Control Panel on your iPad is designed to be a reliable and user-friendly tool, but occasionally you may encounter issues that prevent it from functioning properly. If you experience any difficulties with the Control Panel, there are a few troubleshooting steps you can take to resolve the problem.
First, it’s essential to ensure that your iPad is running on the latest version of iOS. Apple frequently releases updates that address bugs and improve the performance of the operating system. Check for updates by going to “Settings,” then “General,” and selecting “Software Update.” If an update is available, install it and restart your device to see if the Control Panel issue has been resolved.
If updating your iPad didn’t fix the Control Panel problem, try restarting your device. Simply press and hold the power button until the “Slide to power off” slider appears. Slide the slider to turn off your iPad, then press and hold the power button again until the Apple logo appears to restart it. Restarting your device can often resolve minor software glitches and restore normal functionality to the Control Panel.
Another troubleshooting step is to reset your iPad’s settings. This will restore all settings to their default values without affecting your data or media. To do this, go to “Settings,” then “General,” and select “Reset.” Choose “Reset All Settings” and enter your passcode if prompted. It’s important to note that this action will remove any personalized settings you have configured, so you may need to reconfigure them after the reset.
If the issue persists, you can try resetting your iPad’s network settings. This can resolve network-related issues that may impact the Control Panel. To reset network settings, go to “Settings,” then “General,” and select “Reset.” Choose “Reset Network Settings” and enter your passcode if prompted. This process will reset Wi-Fi, Bluetooth, and VPN settings, so you’ll need to reconnect to Wi-Fi networks and reconfigure other network-related settings afterward.
If none of the above steps resolve the Control Panel issue, it may be worthwhile to contact Apple support or visit an authorized service center for further assistance. They can provide more advanced troubleshooting steps or address any potential hardware issues that may be causing the problem.
Remember that the Control Panel is just one part of your iPad’s overall functionality. If you’re experiencing difficulties specific to certain apps or system functions, it’s also worth checking if there are any known issues or updates for those specific apps or features.
By following these troubleshooting steps, you can overcome Control Panel issues and ensure it functions properly on your iPad. It’s important to stay proactive, keeping your device updated and exploring additional resources if any persistent issues arise.