
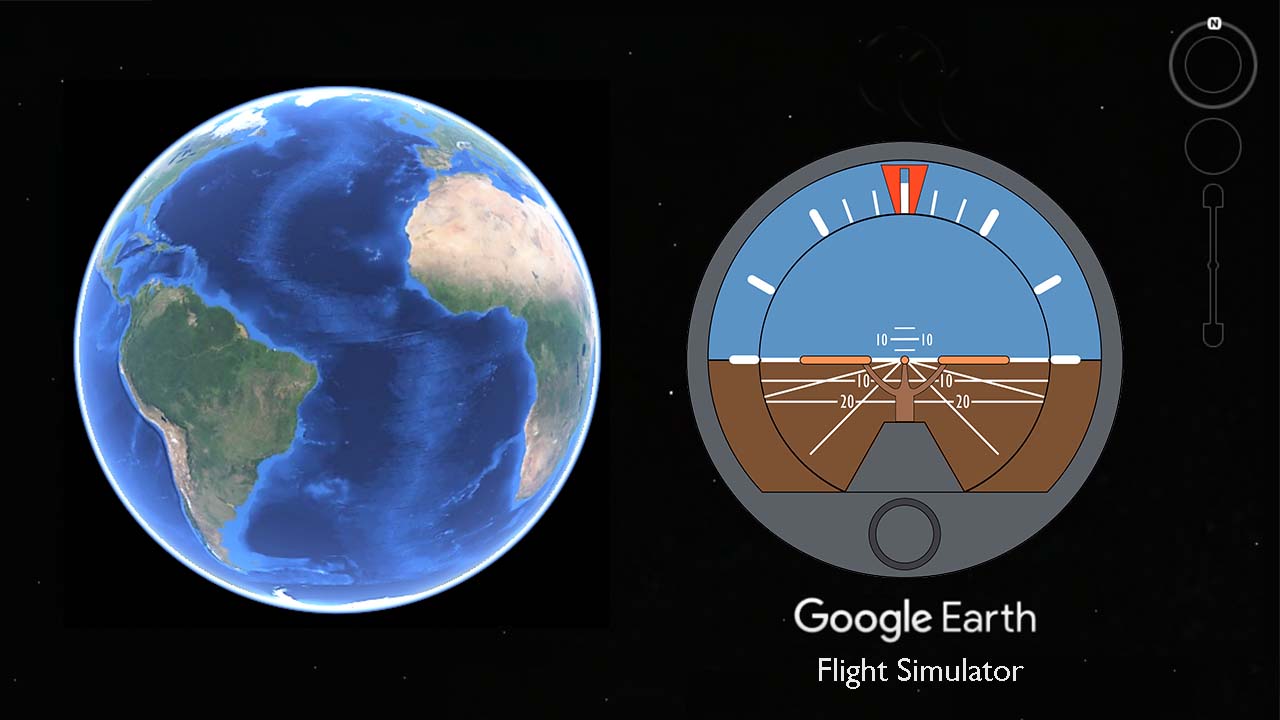
How to Access the Flight Simulator
If you’re a fan of flight simulation or simply curious about experiencing the thrill of flying, Google Earth has a hidden gem – the flight simulator. It’s a virtual flight experience that allows you to control a variety of aircraft and explore the world from the comfort of your own home. Accessing the flight simulator is easy, and in this section, we’ll guide you through the steps to get started.
To begin, make sure you have the latest version of Google Earth installed on your computer. Once you’ve launched the application, follow these steps:
- Click on the Tools menu located at the top of the screen.
- From the dropdown menu, select “Enter Flight Simulator.” You can also use the keyboard shortcut by pressing Ctrl+Alt+A (or Command+Option+A on a Mac).
- A window will pop up asking you to choose an aircraft. You have the option to fly either an airplane or a helicopter. Select your preferred aircraft, and click “Start Flight.”
Once you’ve clicked “Start Flight,” you’ll find yourself on the runway of the airport closest to your current location. The flight simulator offers a variety of controls and navigation options, allowing you to have a realistic flying experience. But before you take off, let’s familiarize ourselves with the basic controls.
With the flight simulator window open, you’ll notice a toolbar at the top. This toolbar contains important features and functions, such as:
- The joystick icon- Clicking on this icon will reveal the control options, including the ability to adjust the sensitivity of the controls.
- The options icon – Located on the right side of the toolbar, this icon allows you to access flight settings, change aircraft, and adjust various parameters.
- The status bar – Located at the bottom of the screen, this bar displays important flight information, including airspeed, altitude, and heading.
Now that you have accessed the flight simulator and familiarized yourself with the basic controls, it’s time to take to the skies! In the next section, we’ll explore how to choose your aircraft and adjust the flight settings to customize your flying experience.
Basic Controls and Navigation
Now that you’re ready to take flight, let’s delve into the basic controls and navigation options available in the Google Earth flight simulator. Familiarizing yourself with these controls will help you maneuver your aircraft with ease and explore the virtual skies.
First and foremost, let’s talk about the controls for aircraft movement:
- Use the arrow keys or the numeric keypad to control the pitch and roll of the aircraft. The up and down arrow keys control the pitch (nose up and nose down), while the left and right arrow keys control the roll (bank left and bank right).
- Pressing the Page Up and Page Down keys will control the throttle, allowing you to increase or decrease the engine power.
- If you’re using a joystick or a gamepad, you can configure and calibrate it by selecting the joystick icon in the toolbar. This will help you have a more precise and realistic flying experience.
In addition to aircraft movement controls, the flight simulator also offers navigation options to help you explore the virtual world:
- Pressing Ctrl + Alt + H (or Command + Option + H on a Mac) will toggle the heads-up display (HUD) on or off. The HUD provides information such as altitude, airspeed, and heading, making it easier for you to keep track of your flight parameters.
- Pressing the “V” key will switch between different camera views, allowing you to see your aircraft from different angles. Experiment with these views to find the one that suits your flying style.
- Use the mouse to click and drag on the screen to change your viewing perspective. This will give you a more immersive experience as you navigate through the virtual environment.
Now that you’re familiar with the basic controls and navigation options, it’s time to practice your flying skills. Take some time to get comfortable with the controls and experiment with different maneuvers. In the next section, we’ll explore how to choose your aircraft and adjust the flight settings to enhance your flying experience.
Choosing Your Aircraft
One of the exciting features of the Google Earth flight simulator is the ability to choose from a variety of aircraft. Whether you prefer the speed and agility of an airplane or the maneuverability of a helicopter, there’s an aircraft for every flying enthusiast. Let’s explore how to choose your aircraft in the flight simulator.
After launching the flight simulator, you’ll be prompted to select your aircraft before taking off. Here’s how you can choose the aircraft that best fits your flying style:
- Click on the “Choose an aircraft” option in the pop-up window.
- A list of available aircraft will appear, including both airplanes and helicopters. Each aircraft comes with its own unique characteristics and flight capabilities.
- Browse through the list and click on the aircraft you want to fly. Instantly, you’ll see a preview of the selected aircraft along with a brief description highlighting its features.
- Once you’ve made your selection, click “Start Flight” to begin your adventure in the chosen aircraft.
Whether you decide to soar through the skies in a sleek jet, experience the nostalgia of flying in a classic propeller plane, or conquer the air in a nimble helicopter, the choice is yours. Each aircraft offers a different flight experience and handling characteristics, allowing you to explore the world from a new perspective.
Furthermore, if you ever feel like changing the aircraft mid-flight or trying out a different model, you can do so within the flight simulator. Simply click on the options icon in the toolbar, navigate to the aircraft section, and select a new aircraft from the list.
Remember, each aircraft has its own unique set of controls, so take some time to get familiar with the specific controls and handling of the aircraft you choose. Practice your takeoffs, landings, and maneuvers to master your chosen aircraft and become a skilled pilot.
Now that you know how to choose your aircraft, let’s move on to the next section where we’ll explore how to adjust the flight settings to personalize your flying experience.
Adjusting Flight Settings
One of the great features of the Google Earth flight simulator is the ability to customize your flying experience by adjusting various flight settings. From atmospheric conditions to the time of day, you have the power to create your ideal flight scenario. Let’s take a look at how to adjust the flight settings in the flight simulator.
Once you’ve launched the flight simulator and selected your aircraft, you can access the flight settings by clicking on the options icon in the toolbar. This will open up a menu where you can make modifications based on your preferences. Here are some of the key flight settings you can adjust:
- Location: You can choose where to start your flight by entering a location or selecting from the list of suggested cities or landmarks. This allows you to explore different parts of the world without leaving your seat.
- Time of day: Adjusting the time of day can significantly impact your flying experience. Whether you want to enjoy a sunrise takeoff or a stunning sunset landing, you can select the desired time to match your preference.
- Weather conditions: Flying in different weather conditions adds a realistic touch to your virtual experience. You can choose from various weather presets, including clear skies, cloudy conditions, rain, fog, and even thunderstorms. Be prepared to navigate through challenging weather conditions as you test your piloting skills.
- Flight training: If you’re new to the flight simulator or want to brush up on your skills, the flight training option is available to help you learn the basics of flying. This mode provides guided tutorials and challenges to improve your piloting abilities.
- Flight preferences: In this section, you can adjust parameters such as visibility range, air traffic density, and the level of realism you want in your flying experience. Customizing these preferences allows you to tailor the flight simulator to your skill level and personal preferences.
Once you’ve made the desired changes to the flight settings, click “Apply” to save and implement the modifications. You’ll then be able to see the effects of your adjustments in the flight simulator.
By adjusting the flight settings, you can create a personalized and immersive flying experience. Experiment with different combinations of settings to challenge yourself, enhance your skills, and discover new perspectives of the world.
Now that you have a grasp of adjusting the flight settings, it’s time to take off and navigate the virtual skies. The next section will guide you on taking off and landing smoothly in the flight simulator.
Taking off and Landing
Mastering the art of taking off and landing is crucial for a successful flight in the Google Earth flight simulator. Whether you’re a beginner or an experienced pilot, understanding the techniques for a smooth takeoff and precise landing is essential. In this section, we’ll guide you through the steps for both of these critical flight maneuvers.
Let’s start with taking off:
- Ensure that your aircraft is properly positioned on the runway. Use the arrow keys or joystick to align the aircraft with the centerline.
- Gradually push the throttle forward to increase engine power. Pay attention to your speed (displayed in the status bar) and aim for a stable acceleration.
- As the speed increases, gently pull back on the joystick or use the arrow keys to raise the nose of the aircraft. This will result in an upward pitch, allowing the aircraft to leave the ground.
- Continue to climb by gradually increasing the pitch and adjusting the throttle as needed. Keep an eye on the airspeed to maintain a safe flying speed.
Now, let’s move on to landing:
- Identify the runway you intend to land on and align your aircraft with the approach path. You can use the HUD or landmarks on the ground to guide your alignment.
- Reduce the throttle to decrease the engine power and gradually descend towards the runway. Monitor your altitude and adjust the pitch as needed to control the descent rate.
- As you approach the runway, aim to establish a stable glide path. Use the throttle and pitch controls to control your rate of descent.
- Just before touchdown, gently flare the aircraft by slightly raising the nose to reduce the rate of descent and ensure a smooth landing.
- Once the main wheels make contact with the runway, gradually reduce the throttle and continue to apply gentle backpressure on the controls to keep the nose wheel off the ground.
- Finally, slowly lower the nose wheel and apply the brakes to bring the aircraft to a complete stop.
Mastery of takeoff and landing comes with practice, so don’t be discouraged if your first attempts are not perfect. Take the time to refine your technique, and soon enough, you’ll be confidently taking off and landing your aircraft in the flight simulator.
Now that you have a good understanding of takeoff and landing techniques, it’s time to explore how to navigate and set waypoints for your flight. The next section will guide you through the process of navigation in the flight simulator.
Navigation and Waypoints
Efficient navigation is key to exploring the vast virtual world of the Google Earth flight simulator. Understanding how to set waypoints and navigate to different destinations will enhance your flying experience and allow you to discover new places from above. In this section, we’ll walk you through the process of navigation and setting waypoints in the flight simulator.
To begin navigating to a specific location or landmark, follow these steps:
- Open the flight simulator and ensure you have selected your desired aircraft.
- In the flight simulator window, click on the “Navigation” icon located in the toolbar. This will open the navigation menu.
- In the navigation menu, you can search for a specific location by entering its name or address in the search bar. Alternatively, you can choose from a list of suggested cities, landmarks, or airports.
- Once you’ve selected your desired destination, click on “Add As Waypoint” to set it as your target location.
Once you’ve set a waypoint, you’ll notice a line on the map indicating your flight path. The navigation information, such as the distance to the waypoint and estimated time of arrival, will also be displayed in the navigation menu. This helps you stay on track and reach your intended destination.
While flying, you have the freedom to deviate from the predefined flight path by selecting a new destination or adding additional waypoints. The flight simulator allows you to explore the world and discover new places according to your preferences.
It’s worth noting that you can also utilize the autopilot feature in the flight simulator to assist with navigation. This feature allows the aircraft to automatically follow the flight path and maintain a set altitude, giving you more time to enjoy the view or focus on other aspects of your flight.
By mastering navigation and setting waypoints, you can plan and execute exciting flights to various destinations. Whether it’s exploring famous landmarks or following a scenic route, the flight simulator provides an immersive experience that allows you to navigate the world from the skies.
Now that you have a solid understanding of navigation and waypoints, let’s move on to the next section where we’ll explore how to fly in different weather conditions and experience the challenges they bring.
Flying in Different Weather Conditions
One of the exciting aspects of the Google Earth flight simulator is the ability to experience flying in various weather conditions. From clear blue skies to stormy thunderstorms, the flight simulator allows you to test your piloting skills and adapt to different weather scenarios. In this section, we’ll explore how to fly in different weather conditions and the challenges that come with each.
When you launch the flight simulator, you have the option to choose the weather conditions for your flight. Here are some of the weather settings you can select:
- Clear skies: Ideal for smooth and unobstructed flights, clear skies provide excellent visibility and make it easier to navigate and enjoy the scenery.
- Cloudy conditions: Flying in cloudy conditions adds a touch of realism to your flight. The reduced visibility challenges you to rely more on instruments and navigation aids.
- Rain and fog: Rainy and foggy conditions pose additional challenges to your flying skills. Reduced visibility and slippery runways require caution and careful maneuvering.
- Thunderstorms: Thunderstorm settings offer the most challenging flying conditions. Turbulence, strong winds, and lightning make it crucial to adjust your flight path and follow weather avoidance procedures.
Each weather condition presents its own set of challenges and requires different flying techniques. Here are some tips to help you navigate through different weather scenarios:
- Clear skies: Enjoy the freedom of unrestricted vision, utilize the VFR (Visual Flight Rules) techniques, and take advantage of the clear visibility to admire the landscape.
- Cloudy conditions: Rely on your instruments and aviation charts to maintain proper navigation. Pay attention to cloud clearance regulations and be cautious when flying through cloud layers.
- Rain and fog: Reduce your airspeed and exercise caution when landing or taking off on wet runways. Make use of aircraft lighting systems and instrument approaches to enhance safety.
- Thunderstorms: Avoid flying directly through thunderstorms. Instead, navigate around them, paying attention to weather radar and ATC (Air Traffic Control) guidance. Respect severe weather warnings and prioritize safety.
Remember, flying in different weather conditions provides an opportunity to challenge your skills and expand your knowledge as a virtual pilot. Be prepared to adapt your flying techniques and make adjustments based on the weather conditions you encounter.
Now that you’re equipped with the knowledge of flying in various weather scenarios, let’s move on to the next section where we’ll explore how to practice advanced maneuvers in the flight simulator.
Practicing Advanced Maneuvers
Once you’ve mastered the basics of flying in the Google Earth flight simulator, it’s time to take your piloting skills to the next level by practicing advanced maneuvers. These maneuvers not only enhance your flying abilities but also add excitement and challenge to your virtual flights. In this section, we’ll explore some of the advanced maneuvers you can practice in the flight simulator.
Here are a few advanced maneuvers you can experiment with:
- Stalls and recoveries: A stall occurs when the aircraft’s angle of attack is too high, and it loses lift. Practice entering a stall, recognizing the signs, and performing the proper recovery techniques to regain control of the aircraft.
- Banked turns: Learn how to perform smooth and coordinated banked turns. Understanding the proper use of ailerons and elevator controls will help you maintain your altitude and trajectory throughout the turn.
- Slip and skid: Experiment with side-slipping or skidding maneuvers to develop a feel for controlling the aircraft in crosswind situations. Understanding these techniques will improve your ability to compensate for wind and perform safe landings.
- Ascending and descending turns: Practice ascending and descending turns while maintaining a specific heading. Mastering these maneuvers will help you stay on course during changes in altitude.
- Aerobatic maneuvers: Once you’re comfortable with the basics, you can try more advanced aerobatic maneuvers such as loops, rolls, and spins. These maneuvers require precise control inputs and careful attention to safety protocols.
It’s important to note that while the flight simulator offers a realistic virtual experience, it’s still essential to follow proper procedures and exercise caution when performing advanced maneuvers. Take the time to research and study the techniques specific to each maneuver, and practice them in a responsible and controlled manner.
Moreover, the flight simulator allows you to review and analyze your flights after the fact. It provides features such as flight replay, which allows you to analyze your maneuvers and identify areas for improvement. Take advantage of these tools to enhance your flying skills and refine your techniques.
Practicing advanced maneuvers not only improves your flying abilities but also adds an element of excitement and challenge to your flights. Continue to push your boundaries, experiment with different maneuvers, and strive to become a skilled and confident virtual pilot.
Now that you’re equipped with knowledge of advanced maneuvers, let’s move on to the next section where we’ll explore how to find and explore landmarks in the flight simulator.
Finding and Exploring Landmarks
One of the exciting aspects of the Google Earth flight simulator is the ability to find and explore famous landmarks from around the world. Whether it’s iconic buildings, stunning natural wonders, or historical sites, the flight simulator allows you to soar above these landmarks and gain a unique perspective. In this section, we’ll guide you on how to find and explore landmarks in the flight simulator.
Here are the steps to find and explore landmarks:
- Launch the flight simulator and ensure you have selected your preferred aircraft.
- Open the navigation menu by clicking on the “Navigation” icon in the toolbar.
- In the navigation menu, you can search for specific landmarks by entering their names or keywords in the search bar. Alternatively, you can choose from a list of suggested landmarks.
- Select the desired landmark from the search results or the list. The flight simulator will automatically set the destination to the chosen landmark.
- Once you’re ready, click on “Start Flight” to begin your journey to the selected landmark.
During your flight to the landmark, take the opportunity to enjoy the breathtaking view from above. Observe the intricate architecture, witness the majesty of natural formations, and immerse yourself in the historical significance of the landmarks you explore.
As you fly over the landmarks, you can adjust your altitude and speed to get a closer look. Utilize the different camera views available in the flight simulator to capture stunning screenshots or record your flight for later viewing.
Remember to pay attention to landmarks that may have specific restrictions, such as airspace limitations or no-fly zones. Respect any regulations and instructions provided by air traffic control or the flight simulator itself to ensure a safe and enjoyable flight experience.
The flight simulator provides a unique opportunity to virtually explore the world’s most famous landmarks from the perspective of a pilot. Take advantage of this feature to enhance your flying experience and appreciate the beauty and grandeur of these renowned locations.
Now that you know how to find and explore landmarks, let’s move on to the next section where we’ll explore how to record and share your flight experiences with others.
Recording and Sharing your Flight
The Google Earth flight simulator provides a fantastic opportunity to capture and share your thrilling flight experiences with others. Whether you want to showcase your amazing aerial maneuvers or simply document your virtual exploration of the world, recording and sharing your flights allows you to relive those moments and inspire others. In this section, we’ll guide you through the process of recording and sharing your flight in the flight simulator.
Here’s how you can record and share your flight:
- Before starting your flight, make sure you have a screen recording software installed on your computer. There are various options available, both free and paid, that allow you to capture your flight in action.
- Launch the flight simulator and configure the settings as desired, such as the aircraft, location, and weather conditions.
- Start your flight and begin recording with your chosen screen recording software. Ensure that the recording captures both the flight simulator window and any desired overlays, such as the status bar and HUD.
- During your flight, showcase your skills, explore landmarks, or simply enjoy the view. Remember to engage in safe flying practices and follow any regulations or restrictions.
- Once you have completed your flight, stop the screen recording and save the video file to your desired location on your computer.
- Now, you can choose how to share your recorded flight. You can upload the video to popular video-sharing platforms like YouTube or Vimeo, or you can share it with friends and fellow aviation enthusiasts through social media or file sharing platforms.
When sharing your recorded flight, consider adding a description or commentary to provide context and share your thoughts and experiences during the flight. This personal touch can engage viewers and make your flight recording more enjoyable to watch.
Furthermore, consider editing the video to enhance its quality and add additional effects or music if desired. Video editing software can help you refine your recording and create a polished final product.
Sharing your flight recordings not only allows you to relive your virtual adventures but also inspires others to explore the world from above. It’s a fantastic way to connect with fellow flight simulator enthusiasts and showcase your passion for virtual aviation.
Now that you know how to record and share your flight experiences, let’s move on to the next section, where we’ll provide some tips and tricks to enhance your overall flight simulator experience.
Tips and Tricks for a Better Flight Experience
To enhance your overall flight simulator experience and take full advantage of the Google Earth flight simulator, consider implementing these tips and tricks. These suggestions are designed to help you improve your flying skills, navigate more effectively, and make the most out of your virtual aviation adventures.
- Practice regularly: Like any skill, practice is crucial for improvement. Take some time each week to dedicate to flying in the flight simulator. Regular practice will help you become more familiar with the controls and enhance your overall proficiency.
- Use real-world charts and navigation aids: If you’re looking for a more realistic experience, consider utilizing real-world aviation charts, such as sectional charts or approach plates, while navigating in the flight simulator. This will give you a better understanding of airspace, navigation aids, and more.
- Experiment with different aircraft: Don’t limit yourself to just one type of aircraft. Experiment with different aircraft models and learn their unique characteristics and performance capabilities. This will broaden your flying experience and add excitement to your flights.
- Explore unfamiliar areas: Step out of your comfort zone and explore new regions and landmarks. The flight simulator covers the entire globe, allowing you to discover hidden gems and explore unfamiliar territories. Expand your horizons and enjoy the diversity of the virtual world.
- Seek community and online resources: Join flight simulator communities, forums, and online groups to connect with fellow enthusiasts. Share your experiences, exchange tips, and learn from others who are passionate about virtual aviation. There is a wealth of knowledge and resources available online that can enhance your flight simulator journey.
- Invest in additional hardware: Consider upgrading your equipment by investing in a flight control system, such as a joystick, yoke, or rudder pedals. These peripherals can greatly enhance your realism and control, providing a more immersive flying experience.
- Read and learn about aviation: Immerse yourself in the world of aviation. Read books, articles, and online resources about flying techniques, aviation history, and general aviation knowledge. This will deepen your understanding of flying principles and add depth to your flight simulator experience.
Remember, the flight simulator is a versatile platform that allows you to tailor your flying experience to your preferences. Whether you’re seeking a realistic simulation or simply want to enjoy an adventure in the virtual skies, these tips and tricks will help you make the most out of your flight simulator journey.
Now that you have these tips and tricks in your arsenal, go ahead and enjoy your flights, explore new horizons, and continue to refine your virtual piloting skills!