
Setting Up Google Messages
Google Messages is a versatile messaging app that allows you to send and receive text messages, multimedia messages, and even use rich communication services (RCS) features. Whether you’re setting up the app for the first time or switching from another messaging platform, here’s a step-by-step guide to getting started with Google Messages.
1. Download and install the app: Google Messages is available for both Android and iOS devices. Simply visit the Google Play Store or the Apple App Store, search for “Google Messages,” and install the app on your device.
2. Set Google Messages as your default messaging app: Once the app is installed, you’ll be prompted to set it as your default messaging app. This will ensure that all your text messages are sent and received through Google Messages.
3. Grant necessary permissions: During the setup process, Google Messages will ask for various permissions, such as access to your contacts and media files. Grant these permissions to ensure the app functions properly.
4. Verify your phone number: After granting permissions, you’ll be prompted to verify your phone number. This step ensures that your Google account is linked with your phone number, allowing you to send and receive messages seamlessly.
5. Customize app settings: Once you’ve completed the initial setup, take some time to explore the app’s settings. You can customize notification preferences, chat features, and even enable dark mode for a more comfortable messaging experience.
6. Sync messages across devices (optional): If you want to access your messages on multiple devices, you can enable the sync feature. This will keep your messages updated and accessible on your smartphone, tablet, and computer.
With these simple steps, you’ll have Google Messages up and running on your device. Now, you can start enjoying the features and convenience that this versatile messaging app has to offer.
Customizing Your Google Messages Settings
Google Messages offers a range of customization options that allow you to tailor the app to your preferences. From chat settings to notification preferences, here’s how you can personalize your Google Messages experience.
1. Chat settings: In the app’s settings, you can adjust the chat settings to suit your needs. For instance, you can choose whether or not to show message snippets in notifications, enable or disable read receipts, and even set up an auto-reply for when you’re unable to respond.
2. Notification preferences: Customize how Google Messages notifies you about new messages. You can modify the sound, vibration, and LED notification settings to ensure that you don’t miss any important messages. Additionally, you can enable or disable message notifications for specific contacts or conversations.
3. Chat features: Google Messages supports rich communication services (RCS), which offers enhanced messaging capabilities. In the chat features settings, you can enable features like typing indicators, read receipts, and high-quality multimedia sharing. Keep in mind that both you and the recipient need to have RCS enabled for these features to work.
4. Dark mode: If you prefer a darker theme, you can enable dark mode in Google Messages. This not only provides a more visually appealing interface, but it can also help reduce eye strain, especially in low-light conditions.
5. Blocked contacts: If you want to block a specific contact from sending you messages, you can easily do so in the app’s settings. This can be helpful for blocking spam or unwanted messages.
6. Passcode lock: Protect your messages and privacy by setting up a passcode lock for the Google Messages app. This can prevent unauthorized access to your conversations and ensure that your messages remain secure.
By customizing your Google Messages settings, you can personalize the app to align with your preferences and communication style. Take advantage of these features to enhance your messaging experience and make the most out of this versatile messaging app.
Sending a Text Message
Google Messages allows you to send text messages to your contacts with ease. Whether you’re sending a quick message or composing a longer text, here’s how you can send text messages using Google Messages.
1. Open the Google Messages app: Launch the app on your device. If it’s your first time using the app, make sure you’ve set it as your default messaging app.
2. Select a conversation: Tap on the conversation of the contact you want to send a text message to. If it’s a new conversation, tap on the compose button (usually represented by a pencil or a message icon) to start a new conversation.
3. Compose your message: In the text input field, type your message. You can include text, emojis, and even multimedia content like photos or videos. Google Messages supports both SMS and MMS, so you can send multimedia messages to contacts who have compatible devices or services.
4. Send the message: Once you’ve composed your message, tap the send button (commonly represented by a paper plane icon) to send the text message to the selected contact or group. The message will be delivered to the recipient, and you’ll see a confirmation that it has been sent.
5. View message history: Google Messages keeps a record of your conversations. You can access previous messages by scrolling through the conversation thread or using the search feature to find specific messages or keywords.
6. Group messaging: To send a text message to multiple recipients, start by opening a conversation with one contact, then tap on the “Add participant” option to add more contacts. This allows you to create group conversations and send text messages to multiple people at once.
With Google Messages, sending a text message is a simple and straightforward process. Take advantage of the app’s features to stay connected with friends, family, and colleagues through quick and convenient text messaging.
Sending a Group Message
Google Messages allows you to easily send group messages to multiple recipients, making it convenient for group discussions or coordination. Here’s how you can send a group message using Google Messages.
1. Open the Google Messages app: Launch the app on your device and make sure you’ve set it as your default messaging app.
2. Start a new group conversation: Tap on the compose button (usually represented by a pencil or a message icon) to create a new message. Instead of selecting a single contact, type the names or phone numbers of the recipients you want to include in the group message. Google Messages will automatically suggest contacts based on the characters you enter.
3. Customize the group message: Once you’ve added the recipients, you can give the group message a name or title by tapping on the group name field. This can help differentiate between different group conversations and make it easier to find them later. You can also add an icon or emoji to further personalize the group message.
4. Compose and send the message: In the text input field, type your message. Similar to sending a text message, you can include text, emojis, and multimedia content. Google Messages supports both SMS and MMS, so you can send multimedia messages to the group if they have compatible devices or services.
5. Additional features: Google Messages offers additional features for group messages. You can react to specific messages by long-pressing on them and selecting a reaction. You can also view the list of group members, add or remove participants, and customize notification settings specifically for the group conversation.
6. Reply individually: If you receive a group message and want to reply to a specific person privately, tap and hold their message, then select “Reply privately.” This opens a separate conversation with that individual while still being connected to the group message.
With Google Messages, sending a group message is a breeze. Stay connected and engage in group conversations with your friends, family, or work colleagues using this convenient feature of the app.
Adding Attachments to Your Messages
Google Messages allows you to enhance your messages by adding various types of attachments. Whether you want to share photos, videos, documents, or even your location, here’s how you can easily add attachments to your messages using Google Messages.
1. Compose a new message or reply to an existing conversation: Open the Google Messages app and start a new message or select an existing conversation to which you want to add attachments.
2. Tap on the attachment icon: Look for the attachment icon (usually represented by a paperclip) in the message input field. Tap on it to access the attachment options.
3. Choose the type of attachment: Google Messages offers various types of attachments, including photos, videos, audio recordings, documents, and your location.
– Photos and videos: If you want to share a photo or video from your device’s gallery, select the respective option. You can then browse your gallery to select the desired media file to attach.
– Audio recordings: If you want to record and send an audio message, choose the audio attachment option. Hold down the record button to start recording your audio message, and release the button once you’re done. The audio file will be attached to your message.
– Documents: To send a document from your device’s storage, select the document attachment option. This will allow you to browse your files and attach documents such as PDFs, spreadsheets, or text files.
– Location: If you want to share your current location with the recipient, select the location attachment option. Google Messages will open a map where you can choose your desired location to attach.
4. Send the message with the attachment: After selecting the attachment, you can include any additional text or comments if desired. Then, tap the send button (usually represented by a paper plane icon) to send the message along with the attached file or location.
With Google Messages, adding attachments to your messages is quick and straightforward. Take advantage of this feature to share photos, videos, documents, and even your location to enhance your communication with friends, family, or colleagues.
Using the Google Messages Web App
In addition to the mobile app, Google Messages also offers a convenient web version that allows you to send and receive messages from your computer. Here’s how you can utilize the Google Messages web app to stay connected across devices.
1. Open the Google Messages web app: On your computer, open a web browser, and navigate to the Google Messages website (https://messages.google.com/web). You may be prompted to scan a QR code with your phone to establish a connection between your mobile app and the web version.
2. Connect your mobile app to the web app: Open the Google Messages mobile app on your phone, tap on the three-dots menu, and select “Messages for web.” Use your phone’s camera to scan the QR code displayed on the web app page. Once scanned, the connection between your mobile app and the web app will be established.
3. Start messaging from your computer: Once the connection is established, you’ll see your recent messages and conversations on the Google Messages web app. You can now send and receive messages directly from your computer. The web app syncs with your mobile app, ensuring that all your conversations and messages are up to date.
4. Use additional features: The Google Messages web app provides access to various features available in the mobile app. You can start new conversations, reply to existing messages, and even send attachments such as photos and documents from your computer. The web app also supports searching for specific messages and archiving conversations, making it easier to manage your messages across devices.
5. Log out and secure your account: When you’re finished using the Google Messages web app, it’s important to log out for security purposes. Simply click on your profile icon in the top-right corner of the web app and select “Sign out.” This will ensure that your messages remain private and accessible only to you.
With the Google Messages web app, you can conveniently access your messages and continue conversations from your computer. This seamless integration between your mobile app and the web app provides a unified messaging experience and allows you to stay connected across devices.
Mute and Archive Conversations
Google Messages offers features that allow you to manage your conversations and keep your messaging app organized. Two commonly used features are muting and archiving conversations. Here’s how you can utilize these features in Google Messages.
1. Muting conversations: If you’re part of a group conversation or receiving messages from a particularly active contact, muting the conversation can help prevent constant notifications and interruptions. To mute a conversation, open the conversation, tap on the three-dot menu, and select “Mute notifications.” You’ll no longer receive notifications for new messages in that specific conversation, but you can still view and participate in it whenever you want.
2. Archiving conversations: Archiving conversations is a useful way to keep your message list tidy without permanently deleting conversations. When you archive a conversation, it is moved to the Archive folder and will no longer be visible in your main message list. However, you can still access archived conversations by tapping on the three-line menu, selecting “Archived,” and choosing the conversation you want to view. To archive a conversation, long-press on the conversation in the message list, tap on the archive icon (usually represented by a box with an arrow pointing down), and the conversation will be moved to the Archive folder.
3. Managing archived conversations: If you want to bring an archived conversation back to your main message list, open the Archive folder by tapping on the three-line menu, selecting “Archived,” and long-pressing on the conversation you want to unarchive. Then, tap on the unarchive icon (usually represented by a box with an arrow pointing up), and the conversation will be restored to the main message list.
4. Clearing archived conversations: If you no longer wish to keep certain conversations in the Archive folder, you can clear them. Open the Archive folder, tap on the three-dot menu, and select “Clear.” This will permanently delete all the conversations in the Archive folder, freeing up storage space on your device.
Muting and archiving conversations in Google Messages can help declutter your messaging app and provide a more organized messaging experience. Utilize these features to manage your conversations according to your preferences and keep your message list streamlined.
Searching for Messages
In Google Messages, searching for specific messages or keywords can save you time and help you find relevant information within your conversations. Here’s how you can easily search for messages using Google Messages.
1. Open the Google Messages app: Launch the app on your device and make sure you’re on the main message list or within a specific conversation where you want to perform the search.
2. Access the search bar: At the top of the screen, you’ll see a search bar with a magnifying glass icon. Tap on the search bar to activate the search function.
3. Enter your search query: Type the keyword or phrase you want to search for in the search bar. As you start typing, Google Messages will display relevant suggestions and auto-complete options based on your previous conversations.
4. View search results: Once you’ve entered your search query, Google Messages will display the search results in real-time. The search results will include relevant messages and conversations that match your search criteria.
5. Filter search results (optional): To narrow down your search results, you can utilize the filter options available in Google Messages. Tap on the Filter icon (usually represented by three horizontal lines with circles) next to the search bar. Here, you can filter messages by different categories, such as inbox, archived, contacts, and more.
6. Scroll through search results: If your search query generates multiple results, you can scroll through the search results to find the specific messages or conversations you’re looking for. Each search result will show a preview of the message and highlight the matching keyword.
7. Tap on a search result to view the message: Once you’ve found the specific message you’re looking for, tap on the search result to open that message within the conversation. You can then read the full content of the message and continue browsing the conversation if needed.
Searching for messages in Google Messages provides a convenient way to locate specific information, recall important details, or retrieve past conversations. Take advantage of the search function to easily find and access the messages you’re looking for within the app.
Blocking Numbers and Reporting Spam
Google Messages offers powerful features to help you manage unwanted calls and messages by allowing you to block numbers and report spam. Here’s how you can effectively block numbers and report spam using Google Messages.
1. Blocking a number: If you receive unwanted calls or messages from a specific number, you can easily block that number in Google Messages. Open the conversation with the unwanted number, tap on the three-dot menu, and select “Block & report spam.” Once blocked, you will no longer receive messages or calls from that number, and they will be moved to the Spam folder.
2. Blocking a conversation: In situations where you want to block an entire conversation with multiple contacts, open the conversation, tap and hold on any message within the conversation, and select “Block & report spam.” This will block all contacts within that conversation and move it to the Spam folder.
3. Reporting spam: If you receive unsolicited or spam messages from unknown numbers, you can report them as spam. Open the message, tap on the three-dot menu, and select “Block & report spam.” Google Messages will analyze the reported spam messages to improve spam detection for all users.
4. Managing blocked numbers: In case you change your mind or need to review your blocked contacts, you can manage them in the Google Messages settings. Open the app’s settings, tap on “Blocked numbers,” and you’ll see a list of all the numbers you have blocked. From there, you can unblock individual numbers if desired.
5. Handling spam messages: Google Messages automatically moves suspected spam messages to the Spam folder, ensuring they don’t clutter your main message list. You can review the messages in the Spam folder to confirm if any legitimate messages were incorrectly marked as spam. If you find any messages that aren’t spam, long-press on the message and select “Not Spam” to move it back to your main message list.
Blocking numbers and reporting spam in Google Messages empowers you to maintain control over your communication and protect yourself from unwanted calls and messages. By utilizing these features, you can create a safer and more enjoyable messaging experience.
Managing Notifications for Google Messages
Google Messages provides flexible options for managing notifications, allowing you to stay informed without being overwhelmed. Here’s how you can customize and manage notifications for Google Messages to suit your preferences.
1. Open the Google Messages app: Launch the app on your device and ensure you’re on the main message list or within a specific conversation.
2. Access the notification settings: Tap on the three-dot menu in the top-right corner of the screen and select “Settings.” From there, choose “Notifications” to access the notification settings for Google Messages.
3. Customize notification preferences: In the notification settings, you can adjust various aspects of how messages are notified to you. You can toggle on or off options such as sound, vibration, and LED light. This allows you to tailor the notification experience based on your preferences and the importance of the messages you receive.
4. Importance level: Adjust the importance level of Google Messages notifications to prioritize or filter messages. The importance level determines how prominently notifications are shown, whether they appear on the lock screen, and if they trigger sound or vibration. You can choose between “Urgent,” “High,” “Medium,” or “Low” for different types of notifications.
5. Preview message snippets: Decide whether you want to see a preview of the message content in the notification itself. If you value privacy and want to keep your messages discreet, you can disable the option to show message snippets in notifications.
6. Notification sound: Choose a specific sound for Google Messages notifications. You can select from the available system sounds or even use a custom sound file if desired.
7. Conversation notifications: Google Messages also allows you to customize notifications for specific conversations. By opening a conversation, tapping on the three-dot menu, and selecting “Notification,” you can define whether you want to receive notifications for that particular conversation or mute it.
8. Do Not Disturb mode: Utilize the Do Not Disturb mode in Google Messages to temporarily silence notifications. This can be helpful during meetings, important tasks, or when you want uninterrupted focus time. Open the notification settings and activate the Do Not Disturb mode as needed.
By managing notifications for Google Messages, you can strike a balance between staying informed and avoiding notification overload. Customize the notification preferences according to your preferences and priorities to ensure a seamless and personalized messaging experience.
Backing Up and Restoring Messages
Google Messages offers a convenient way to back up and restore your messages, ensuring that your important conversations are safely stored and can be accessed even if you switch devices or reinstall the app. Here’s how you can back up and restore your messages using Google Messages.
1. Enable message backup: Open the Google Messages app on your device and tap on the three-dot menu in the top-right corner. Go to “Settings,” then select “Chat features” or “Advanced” depending on your device. From there, enable the option to back up your messages. You may be prompted to verify your phone number and grant necessary permissions.
2. Choose a backup frequency: In the backup settings, you can specify how often you want your messages to be backed up. You can select daily, weekly, or monthly backups, depending on your preferences. It’s advisable to choose a more frequent backup frequency to ensure that your messages are regularly protected.
3. Check the backup status: You can verify if your messages are being backed up by going to the “Chat features” or “Advanced” settings. Look for the backup status, which should indicate if the backup is active and when the last backup was completed.
4. Restoring messages on a new device: If you switch to a new device or reinstall Google Messages, you can easily restore your previously backed-up messages. During the setup process, when prompted to verify your phone number, Google Messages will automatically detect if there’s a backup available. You’ll be given the option to restore your messages, ensuring a seamless transition to your new device.
5. Sync messages across devices: Google Messages also allows you to sync your messages across multiple devices. Once you’ve enabled message backup on your primary device, you can access your messages on other devices by signing in with the same Google account and initiating the setup process. This ensures that your messages are accessible regardless of the device you’re using.
6. Managing storage and deleting backups: If you reach the storage limit for Google Drive backups or want to remove old backups, you can manage your backups by going to the “Chat features” or “Advanced” settings. From there, you can delete specific backups or adjust the backup settings to free up storage space.
By utilizing the backup and restore feature in Google Messages, you can safeguard your important conversations and seamlessly transfer them to new devices. Protect your messages and enjoy a hassle-free messaging experience with the peace of mind that your conversations are securely backed up.
Using Google Messages for RCS (Rich Communication Services)
Google Messages supports Rich Communication Services (RCS), a next-generation messaging protocol that offers enhanced features and capabilities beyond traditional SMS messaging. By using Google Messages for RCS, you can enjoy a more engaging and feature-rich messaging experience. Here’s what you need to know about using Google Messages for RCS.
1. Chat features: RCS enables a range of chat features, including read receipts, typing indicators, and presence status. These features provide a more interactive and real-time messaging experience, making conversations feel more like natural, flowing conversations.
2. High-quality media sharing: With RCS, you can send high-resolution photos and videos without compressing them. This means you can share media files without losing quality, allowing your recipients to enjoy your shared content in its full glory.
3. Group messaging: RCS enhances group messaging by enabling features like group chats with up to 100 participants, customizable group names, and the ability to name group members. This makes coordinating and communicating with groups easier and more organized.
4. Enhanced messaging capabilities: RCS brings additional messaging capabilities that go beyond traditional SMS. You can send and receive messages over Wi-Fi or mobile data, ensuring that your messages are delivered even when you have weak cellular network coverage.
5. Rich media and read receipts: RCS enables the exchange of rich media content, such as high-resolution images, videos, and audio files. Additionally, it provides read receipts, allowing you to know when your messages have been delivered and read by the recipient.
6. Business messaging: Google Messages for RCS supports business messaging, which allows businesses to interact with their customers through messaging. This enables features like verified senders, business profiles, and suggested replies, making it easier for businesses to engage with their customers and provide personalized experiences.
Keep in mind that both you and the recipient need to have RCS enabled in order to fully utilize these enhanced features. RCS compatibility depends on your network carrier and device, so make sure your carrier supports RCS and that your device is compatible with the feature.
Using Google Messages for RCS enhances your messaging experience by providing a host of features and capabilities beyond traditional SMS messaging. Stay connected, share media content, and enjoy a more dynamic messaging experience with Google Messages and RCS.
Tips and Tricks for Maximizing Your Google Messages Experience
Google Messages is a versatile messaging app that offers a range of features to enhance your communication. To make the most out of your Google Messages experience, here are some tips and tricks to explore:
1. Smart Reply: Take advantage of Smart Reply suggestions to quickly respond to messages with just a tap. Google Messages suggests contextually relevant responses based on the content of the message you received, making it faster and easier to reply without typing.
2. Emoji reactions: React to specific messages with emojis by long-pressing on the message and selecting your preferred reaction. Emoji reactions provide a fun and expressive way to engage in conversations.
3. Swipe gestures: Use swipe gestures to manage your messages more efficiently. Swipe a conversation to the right to archive it, or swipe it to the left to delete it. Customize these swipe actions in the app’s settings to align them with your preferences.
4. Pin important conversations: Pinning conversations allows you to keep essential chats at the top of your message list. Long-press on a conversation, tap on the pin icon, and it will be prioritized and always visible, even if you have new messages from other contacts.
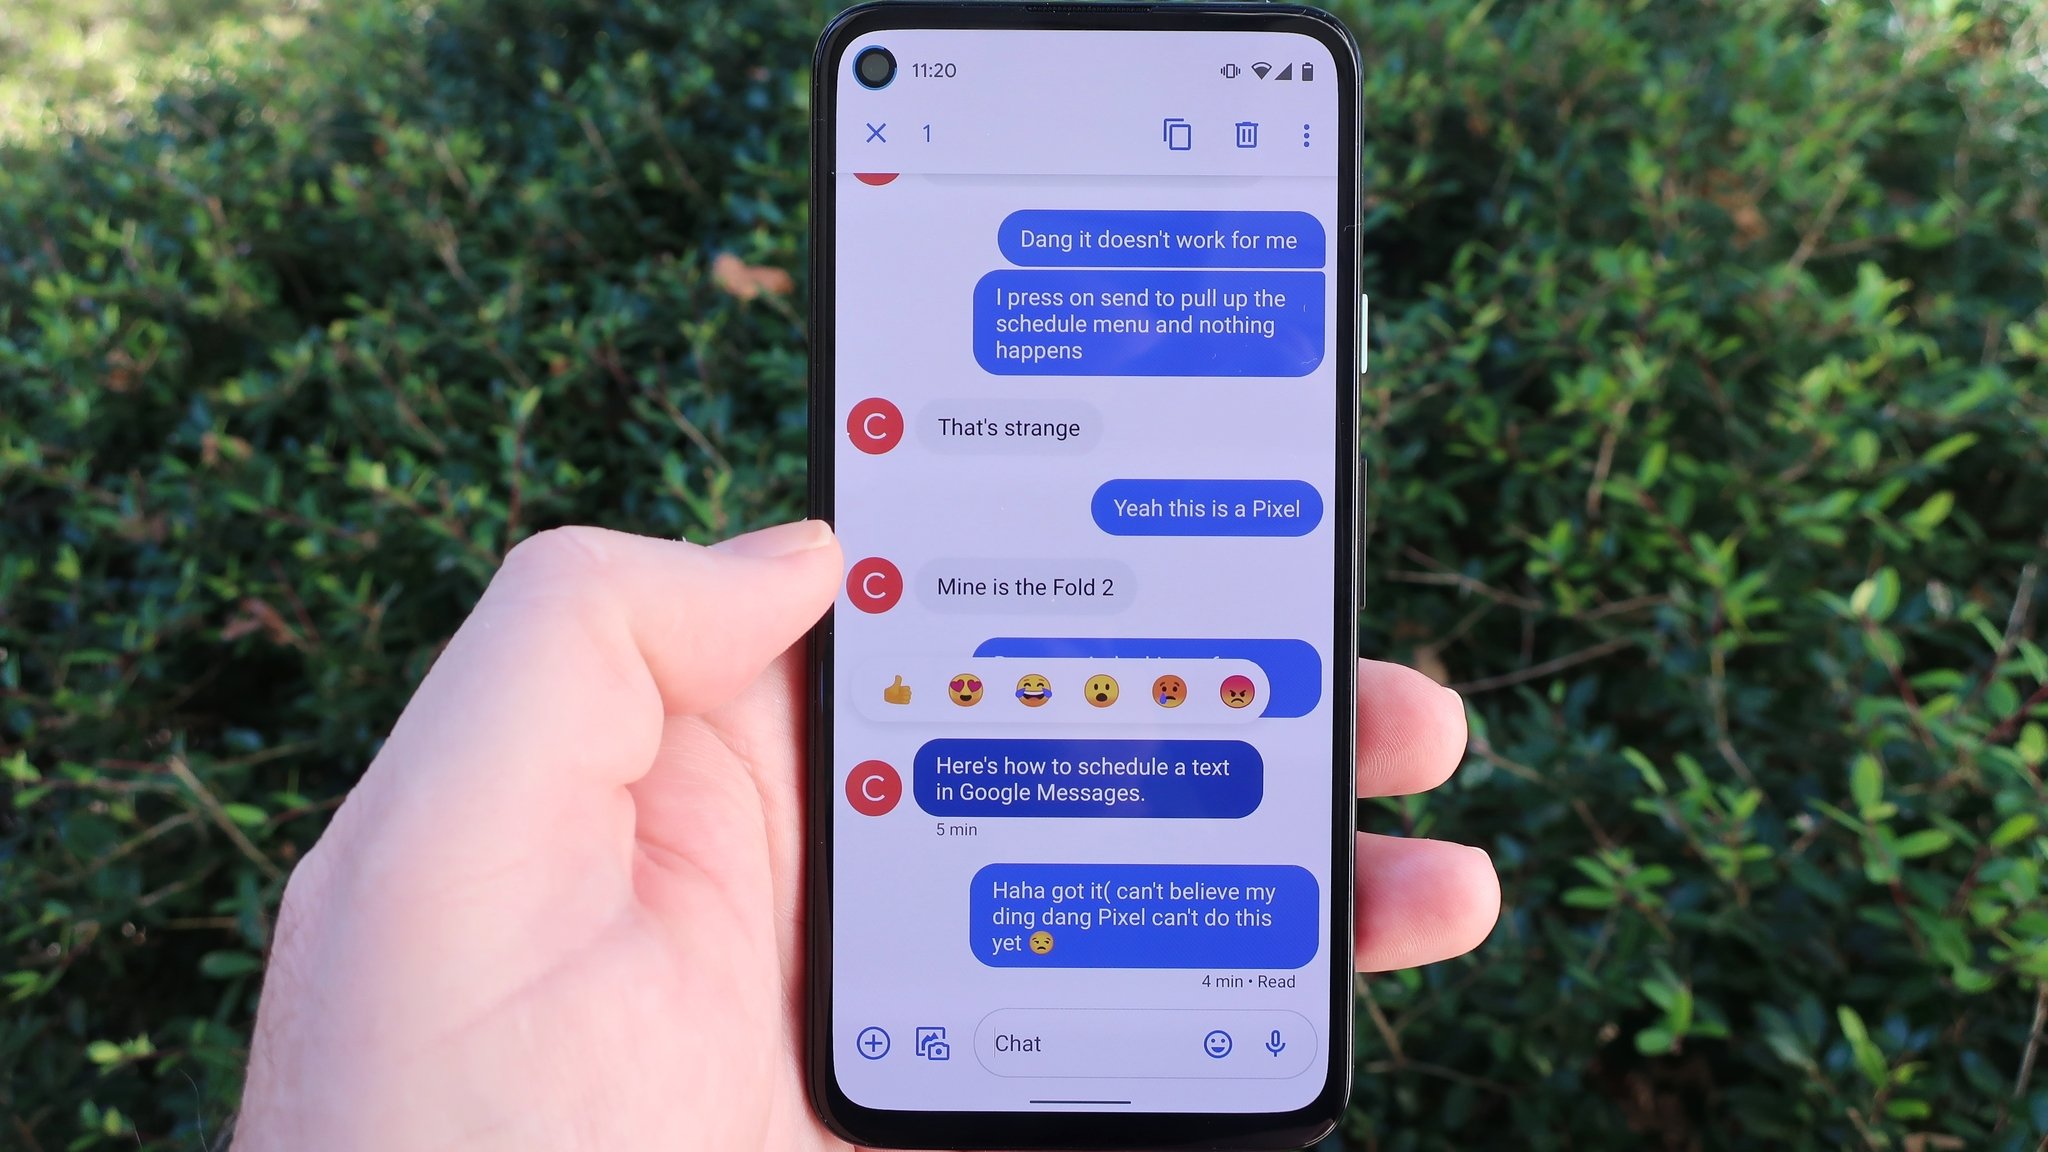
5. Send scheduled messages: Schedule messages to be sent at a specific date and time. Compose your message, long-press the send button, and choose the schedule option. This is helpful for sending birthday wishes or reminders without needing to remember to send them manually.
6. Custom notification sounds: Personalize your Google Messages experience by assigning custom notification sounds to specific contacts or conversations. This allows you to identify who’s messaging you based on the unique sound associated with their messages.
7. Gesture navigation: Enable gesture navigation in your device’s settings for a seamless navigation experience within the Google Messages app. This eliminates the need for traditional buttons and provides a more immersive interface.
8. Compact conversation view: Switch to compact conversation view in the app’s settings to see more messages on your screen at once. This is particularly useful if you have lengthy conversations and want to avoid excessive scrolling.
9. Direct share: Use the direct share feature to quickly share content from other apps directly to a specific conversation in Google Messages. Simply tap on the share option in the app you’re using, select the desired conversation, and the content will be shared instantly.
10. Emoji and GIF search: When composing a message, utilize the emoji and GIF search features to easily find the perfect emoji or GIF to express yourself. Tap on the emoji icon or the GIF icon within the message input field to access the search functionality.
By exploring these tips and tricks, you can maximize your Google Messages experience and enjoy a more efficient, personalized, and enjoyable messaging app. Customize the settings, utilize the various features, and make messaging a seamless and enjoyable part of your daily communication.