
Understanding Program Mode
Program mode is a versatile shooting mode found on DSLR cameras that allows you to let the camera take control of certain settings while still retaining creative control over your photos. In program mode, the camera automatically selects the optimal combination of aperture and shutter speed based on the available light and the focal length of the lens. This mode is perfect for photographers who want a balance between ease of use and creative freedom.
When using program mode, you can still adjust other settings such as ISO, exposure compensation, and white balance to fine-tune your exposure and achieve the desired results. It is worth noting that different camera models may offer slightly different variations of program mode, but the core concept remains the same.
Program mode is particularly useful in situations where you want to capture a scene quickly without needing to manually adjust all the settings. It is an excellent mode for beginners or those who prefer a more automated shooting experience. However, even experienced photographers can benefit from using program mode, especially when shooting in variable lighting conditions or when there is no time for manual adjustments.
One of the advantages of program mode is that it allows you to change lenses without having to worry about adjusting the settings for each lens separately. The camera will automatically adjust the exposure settings based on the information it receives from the lens. This can save you time and effort, especially when working in fast-paced environments or when using multiple lenses during a shoot.
While program mode takes care of the technical aspects of photography, it is important to remember that you still need to focus on composing your shots and finding the right subject. Program mode should be seen as a tool that simplifies the technical side of photography, allowing you to focus on your creative vision.
In summary, program mode is a valuable shooting mode on DSLR cameras that strikes a balance between automation and creative control. By understanding this mode and its capabilities, you can confidently utilize it in various shooting situations, both for convenience and to achieve excellent exposure in challenging conditions.
Controlling Shutter Speed and Aperture in Program Mode
When shooting in program mode, the camera automatically selects the optimal combination of shutter speed and aperture based on the available light and focal length of the lens. However, there may be instances where you want to have more control over these settings for creative purposes. Thankfully, program mode still allows you to adjust the shutter speed and aperture to achieve the desired effects.
To control the shutter speed in program mode, use the camera’s exposure compensation feature. This allows you to make the image brighter or darker by adjusting the exposure. If you want to capture motion blur, such as when photographing a waterfall, utilize a slower shutter speed. Conversely, if you want to freeze action, like capturing a moving subject, increase the shutter speed. By experimenting with different shutter speeds, you can achieve various creative effects and convey a sense of motion or dynamic action.
Similarly, to control the aperture in program mode, you can use exposure compensation. Lowering the exposure compensation value will result in a wider aperture, allowing for a shallower depth of field and selective focus. This technique is perfect for portraits or still life photography where you want to isolate the subject from the background. On the other hand, increasing the exposure compensation value will narrow the aperture, providing a greater depth of field and ensuring everything in the frame is in focus. This is ideal for landscape or architectural photography, where you want to maintain sharpness from the foreground to the background.
Although program mode automatically selects the shutter speed and aperture, understanding how to control these settings gives you the flexibility to fine-tune your exposure to match your creative vision. You can experiment with different combinations of shutter speed and aperture to capture a wide range of photographic styles, from long exposures to high-speed action shots.
In some cases, the camera’s exposure meter may not provide accurate results, especially in challenging lighting conditions. In such situations, you can switch to partial metering, spot metering, or center-weighted metering to ensure proper exposure. These metering modes allow you to measure the light in specific areas of the frame, giving you more control over the exposure values.
In summary, program mode provides a convenient and automatic way to set the shutter speed and aperture, but it also allows you to take creative control by adjusting the exposure compensation. By understanding how to manipulate these settings, you can capture a wide range of captivating and visually appealing photographs in program mode.
Tips for Using Program Mode in Different Lighting Conditions
Program mode is a versatile shooting mode that can handle a variety of lighting conditions. However, there are certain techniques you can employ to maximize its effectiveness in different lighting scenarios. Here are some helpful tips for using program mode in various lighting conditions:
1. Bright Sunny Days: When shooting in bright sunlight, program mode will typically select a fast shutter speed and a smaller aperture. This combination ensures proper exposure and helps prevent overexposed images. However, keep an eye on your camera’s histogram to ensure that highlights are not blown out. You can also use exposure compensation to fine-tune the exposure if necessary.
2. Low Light Situations: In low light conditions, program mode will increase the ISO and select a wider aperture to allow more light into the camera. This helps to capture well-exposed images, but it may introduce some noise. To minimize noise, use a tripod to keep the camera steady and prevent camera shake. You can also experiment with exposure compensation to balance the exposure.
3. Backlit Scenes: When shooting subjects against a bright background, program mode might underexpose the main subject to avoid overexposing the background. In such situations, you can use exposure compensation to increase the exposure and bring out more detail in the subject. Alternatively, you can use the camera’s fill-flash feature to add some light to the subject and balance the exposure.
4. Indoor or Artificial Lighting: Program mode can handle different types of artificial lighting, but it may result in color casts or inaccurate white balance. To address this, you can adjust the white balance settings or use the camera’s custom white balance feature. Another option is to shoot in RAW format, which gives you more flexibility to correct any color issues during post-processing.
5. Mixed Lighting Conditions: In situations where you have a mix of different lighting sources, program mode might struggle to balance the exposure. To overcome this, consider using exposure bracketing, where the camera takes multiple shots at different exposure levels, and you can later choose the best-exposed image. This ensures that you capture the full dynamic range of the scene.
Remember, program mode is a great starting point, but don’t be afraid to experiment and adjust the settings as needed. Understanding how the camera makes exposure decisions in different lighting conditions will help you make the necessary adjustments for optimal results. Keep practicing and refining your skills, and soon you’ll be able to capture stunning images in any lighting situation using program mode.
Using Program Shift to Customize Exposure
Program Shift is a powerful feature in program mode that allows you to override the camera’s automatic exposure settings and customize the exposure according to your preferences. It gives you more control over the shutter speed and aperture combinations selected by the camera, enabling you to achieve your desired exposure for a particular scene.
When using Program Shift, the camera maintains the same metered exposure value, but changes the shutter speed and aperture settings. This feature is especially useful when you want to prioritize a specific aspect of your photo, such as freezing motion or blurring the background, without switching to full manual mode.
To activate Program Shift, you usually need to use a combination of buttons or dials on your camera. It may vary depending on the model, so refer to your camera’s manual for the specific steps. Once activated, you can use the camera’s control dial or other dedicated controls to adjust the exposure settings.
For example, if you want to achieve a shallower depth of field to create a blurred background, you can use Program Shift to increase the aperture value. This will result in a larger aperture, allowing more light to enter the camera and narrowing the depth of field. Conversely, if you want to capture more depth of field for a landscape shot, you can use Program Shift to decrease the aperture value, resulting in a smaller aperture and a larger depth of field.
Program Shift can also be used to control the shutter speed to freeze or blur motion. If you’re photographing a moving subject and want to freeze the action, use Program Shift to increase the shutter speed. This will capture a faster moment, ensuring sharp details. On the other hand, if you want to intentionally create motion blur, such as capturing the movement of a waterfall, use Program Shift to decrease the shutter speed. This will result in a slower shutter speed, allowing for longer exposures and a smooth, flowing effect.
The ability to adjust the exposure settings in Program Shift offers a great level of creativity and flexibility. It allows you to fine-tune the exposure to match your vision for a particular scene without the need to switch to manual mode. However, keep in mind that Program Shift only affects the shutter speed and aperture, while other settings like ISO and white balance remain automatically controlled by the camera.
In summary, Program Shift is a valuable feature in program mode that allows you to take greater control over your exposure settings. By adjusting the shutter speed and aperture while maintaining the camera’s metered exposure, you can customize the exposure to suit your creative vision. Experiment with Program Shift and explore the possibilities it offers to enhance your photography skills.
Overriding Program Mode and Using Manual Settings
While program mode provides convenience and automation, there may be situations where you want complete control over all exposure settings. In such cases, overriding program mode and using manual settings can give you the freedom to make precise adjustments according to your vision and the specific requirements of the scene.
When using manual mode, you have full control over the shutter speed, aperture, ISO, white balance, and other settings. This allows you to tailor the exposure settings precisely to the lighting conditions and the desired creative effect. Manual mode gives you the ability to experiment and achieve unique and personalized results.
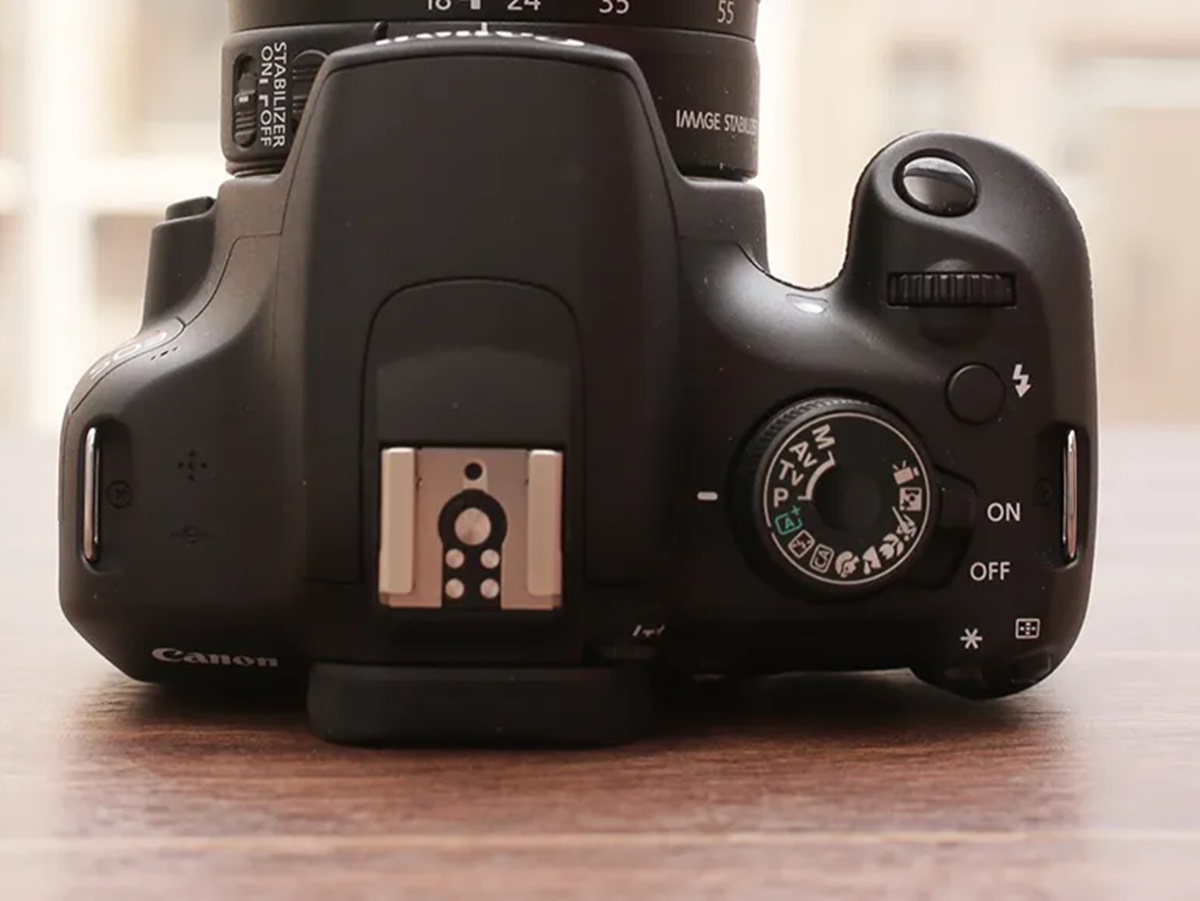
To switch from program mode to manual mode, locate the mode dial on your camera and select the “M” or manual mode option. Once in manual mode, you can adjust the shutter speed and aperture using the camera’s control dials or buttons. Remember that the camera’s light meter still provides guidance to ensure proper exposure. You can use the meter reading as a starting point and make adjustments accordingly.
Using manual mode is particularly advantageous in situations with consistent lighting, such as studio photography or landscapes with even lighting. In these situations, you can set a specific aperture and shutter speed combination to achieve the desired depth of field and motion blur.
Manual mode also empowers you to handle challenging lighting conditions, such as shooting against a bright backlight or when capturing high dynamic range scenes. By manually adjusting the exposure settings, you can balance the exposure and capture all the details in the highlights and shadows.
One of the key benefits of using manual mode is that it provides consistency across your shots. When shooting a series of images for a specific project or to achieve a consistent look, manual mode ensures that the exposure remains the same, resulting in a cohesive set of images.
However, it’s important to note that using manual mode requires a good understanding of exposure and the relationship between shutter speed, aperture, and ISO. It requires more practice and experience to control all the settings effectively. Additionally, the manual mode may not be ideal for fast-moving subjects or situations where you need to quickly capture a fleeting moment.
In summary, overriding program mode and using manual settings gives you total control over the exposure settings. While manual mode requires more expertise, it offers the flexibility to adjust all parameters to achieve your desired results. Experimenting with manual mode will enhance your understanding of exposure and enable you to capture unique and customized photographs.
Understanding Exposure Compensation in Program Mode
Exposure compensation is a valuable tool available in program mode that allows you to override the camera’s automatic exposure settings to adjust the brightness or darkness of your photos. It enables you to make precise adjustments to the exposure without switching to manual mode, giving you more creative control over your images.
In program mode, the camera’s light meter determines the optimal combination of shutter speed and aperture based on the available light and scene conditions. However, the camera’s metering system may not always accurately interpret the scene, especially in challenging lighting situations. This is where exposure compensation becomes useful.
To apply exposure compensation, you can typically use a dedicated button or dial on your camera. By increasing the exposure compensation value, you can make the image brighter, and by decreasing it, you can make the image darker. Each increment of exposure compensation usually corresponds to either 1/3 or 1/2 stops, depending on your camera’s settings.
Exposure compensation is particularly useful in situations with high contrast, such as capturing a subject against a bright background or photographing in backlit conditions. For example, if the camera’s metering system produces an underexposed image in backlit conditions, you can apply positive exposure compensation to brighten the subject and prevent it from appearing too dark. Conversely, if the camera tends to overexpose the image, you can apply negative exposure compensation to darken the scene and retain the highlight details.
It is worth noting that exposure compensation in program mode works in conjunction with the camera’s automatic settings. So, when you adjust the exposure compensation, the camera will still maintain the automatic settings for shutter speed and aperture but modify them to achieve the desired exposure. This provides you with a quick and convenient way to fine-tune the exposure while still benefiting from the program mode’s automation.
Another advantage of exposure compensation is its ability to create a specific mood or effect. By intentionally overexposing or underexposing an image, you can achieve a brighter or darker overall tone, which can enhance the atmosphere of your photographs.
Keep in mind that exposure compensation should be used as a creative tool rather than as a fix for every exposure. It is best to evaluate the scene, consider the lighting conditions and your desired outcome before applying exposure compensation. Experiment with different levels of compensation to find the optimal exposure that aligns with your artistic vision.
In summary, exposure compensation is a powerful feature in program mode that allows you to adjust the exposure to achieve your desired results. By increasing or decreasing the exposure compensation value, you can control the brightness or darkness of your photos, compensate for challenging lighting conditions, and add creative elements to your images. It’s an excellent tool for photographers who want more control over their exposures while still benefiting from the convenience of program mode.
Using Auto ISO in Program Mode
Auto ISO is a feature available in program mode that automatically adjusts the camera’s ISO setting based on the available light, ensuring proper exposure while maintaining the desired shutter speed and aperture. It is a convenient tool that helps to simplify the exposure process and allows you to focus more on composition and capturing the moment.
ISO refers to the sensitivity of the camera’s image sensor to light. A lower ISO value (e.g., ISO 100) is less sensitive to light and is ideal for shooting in bright conditions, while a higher ISO value (e.g., ISO 800 or higher) is more sensitive to light and is required in low-light situations. Auto ISO eliminates the need for manual adjustment of ISO settings by automatically adapting to the lighting conditions.
By enabling Auto ISO in program mode, you allow the camera to select the appropriate ISO value to maintain a balanced exposure while adjusting the shutter speed and aperture. This is particularly useful in situations where the lighting conditions are constantly changing, such as when shooting outdoors during cloudy weather or at a fast-paced event.
One of the advantages of Auto ISO is that it can help prevent camera shake and motion blur. When shooting in low-light conditions, the camera may increase the ISO to ensure a higher shutter speed, reducing the risk of blurry images caused by camera or subject movement. This is especially beneficial when photographing moving subjects or when handheld photography is necessary.
However, it’s important to note that high ISO values can introduce digital noise into the image, resulting in a loss of detail and image quality. With modern cameras, noise levels at higher ISOs are significantly improved, but it’s still advisable to keep an eye on the ISO settings and adjust them manually if required. Additionally, different camera models have varying levels of noise performance, so it’s a good practice to familiarize yourself with your camera’s ISO capabilities.
If you find that the camera is selecting an ISO value that is too high or too low for your liking, you can set a maximum ISO limit in the camera’s settings. This allows you to have more control over the ISO range that the camera will automatically select.
Remember that in program mode, you still have control over other exposure settings such as exposure compensation, white balance, and focus modes. This allows you to fine-tune the exposure and achieve the desired creative look while still benefiting from the automation of ISO adjustments provided by Auto ISO.
In summary, Auto ISO is a useful feature in program mode that automatically adjusts the camera’s ISO setting based on the available light. It simplifies the exposure process, reduces the risk of camera shake, and ensures proper exposure in various lighting conditions. By understanding how Auto ISO works and its limitations regarding noise performance, you can utilize it effectively and capture stunning images in program mode.
Utilizing Exposure Lock in Program Mode
Exposure lock is a valuable tool in program mode that allows you to lock the exposure settings while recomposing your shot. It enables you to maintain the desired exposure for a specific area or subject, even if the lighting conditions change or the composition is adjusted. Utilizing exposure lock gives you greater control over the exposure and ensures consistent results in challenging shooting situations.
To use exposure lock in program mode, locate the exposure lock button on your camera (usually labeled with an asterisk or AE-L/AF-L). Press the button to lock the exposure settings, then recompose your shot while keeping the button pressed. Once you have achieved your desired composition, release the exposure lock button and capture the image.
Exposure lock is particularly useful in situations where the subject is underexposed or overexposed due to the lighting conditions, but you don’t want to switch to manual mode or make exposure compensation adjustments. By locking the exposure on a mid-tone or area of the scene that represents the desired exposure, you can ensure proper exposure for your intended subject while still benefiting from the automation of program mode.
For example, in a backlit scene where the subject is in shadow, the camera’s metering may try to compensate for the bright background by underexposing the subject. By using exposure lock on a mid-tone area or on the subject itself, you can lock the exposure for the subject and capture a well-exposed image while retaining the details in the background.
Exposure lock can also be beneficial when photographing a scene with high contrast, such as a landscape with bright sky and dark foreground. By locking the exposure on a mid-tone area like the grass or a neutral colored object, you can ensure a balanced exposure for both the sky and the foreground, resulting in an image with good detail and tonal range.
It’s important to note that exposure lock is temporary and only applies until you release the button. Once released, the camera will revert to its default metering and adjust the exposure based on the new scene when you half-press the shutter button again. Therefore, it’s essential to verify the exposure after recomposing the shot to ensure it is still suitable for the desired composition.
In summary, exposure lock is a valuable feature in program mode that allows you to lock the exposure settings while recomposing your shot. It offers greater control over the exposure and enables you to capture well-exposed images in challenging lighting conditions. By utilizing exposure lock effectively, you can maintain consistent exposure for your intended subject and produce visually appealing photographs.
Mastering Focus and Metering in Program Mode
Focus and metering are crucial elements of photography that significantly impact the overall image quality. Mastering these aspects in program mode allows you to capture sharp, well-exposed photos while still benefiting from the convenience and automation of this shooting mode.
In program mode, the camera’s autofocus system determines the focus point based on the selected focus area or mode. It is essential to understand and utilize the various autofocus modes available on your camera to ensure accurate focusing. These modes may include single-point autofocus, continuous autofocus, or automatic selection of focus points.
To achieve precise focusing, select the appropriate autofocus mode based on the subject and shooting scenario. For example, if capturing a stationary subject, using single-point autofocus allows you to choose a specific focal point and ensure accuracy. On the other hand, continuous autofocus is ideal for shooting moving subjects, as it continuously tracks the subject’s movement and adjusts focus accordingly.
Metering, on the other hand, refers to how the camera measures the light in the scene to determine the proper exposure settings. In program mode, the camera’s default metering mode is usually evaluative or matrix metering. This mode measures the brightness and color information from multiple areas in the scene to determine the exposure. It is a versatile metering mode that often produces accurate results in a wide range of situations.
However, there may be situations where the camera’s default metering mode is not suitable, such as high contrast scenes or when the subject is poorly lit. In these cases, you can utilize other metering modes, such as spot metering or center-weighted metering, to achieve the desired exposure.
Spot metering allows you to measure the light from a specific area or point in the frame, providing a precise reading of the exposure for that area. This mode is especially useful when the subject has a significant difference in brightness from the surroundings. By using spot metering on the subject and recomposing the shot, you can ensure proper exposure for the intended subject even in challenging lighting conditions.
Center-weighted metering, on the other hand, measures the light from the entire frame but gives more consideration to the center of the frame. This metering mode is suitable for scenes where the subject is centrally located and well-lit, such as portraits or studio shots.
Mastering focus and metering in program mode involves understanding the autofocus modes and metering options available on your camera, as well as knowing when to switch between them to achieve the best results. By utilizing the appropriate focus mode and metering mode for each specific shooting situation, you can ensure accurate focus and proper exposure, resulting in well-crafted images.
Experiment with different focus and metering modes in various shooting scenarios to familiarize yourself with their effects and limitations. Understanding how focus and metering work in program mode will enhance your ability to capture sharp, well-exposed photographs and provide you with more control over the technical aspects of your images. With practice, you can confidently utilize focus and metering techniques to take your photography skills to the next level.
Using Program Mode for Action Shots
Program mode is not typically the first choice for capturing fast-paced action shots. However, with the right techniques and understanding of program mode’s capabilities, it can still be a useful shooting mode for action photography. Program mode allows you to focus on the composition and timing of the shot, while the camera takes care of the technical settings.
One of the benefits of program mode for action shots is its ability to automatically adjust the shutter speed and aperture to freeze motion. The camera will typically select a faster shutter speed to capture the action without motion blur. However, it’s important to ensure that the selected shutter speed is suitable for the specific action and the desired effect. If you find that the camera is selecting a slower shutter speed that is resulting in motion blur, you can increase the ISO or use exposure compensation to achieve a faster shutter speed.
When photographing fast-moving subjects in program mode, it is crucial to utilize the autofocus system effectively. Depending on the shooting scenario, you may choose continuous autofocus mode to track the moving subject or activate focus tracking to ensure accurate focus. This way, your camera will continuously adjust the focus as the subject moves, helping to maintain sharpness throughout the action sequence.
Another useful technique in program mode for action shots is to prefocus on a specific area where you expect the action to occur. By half-pressing the shutter button in advance, you can lock the focus on that area, and when the action happens, you can fully press the shutter button to capture the moment with minimal delay. This technique can be particularly effective when photographing sports, wildlife, or any fast-moving subject.
Additionally, burst or continuous shooting mode is highly beneficial for action photography. This mode allows you to capture a rapid sequence of images with just one press of the shutter button, increasing the chances of capturing the perfect action shot. Combining burst mode with program mode allows you to capture a series of well-exposed shots without worrying about adjusting the settings manually between each frame.
It’s important to note that program mode may not always deliver the intended exposure or capture the precise moment you desire. Hence, it’s crucial to review the images on your camera’s LCD screen and make any necessary exposure adjustments or switch to manual mode if needed. This way, you can ensure that you capture the action with the desired exposure and timing.
In summary, program mode can be a viable option for action photography when combined with the right techniques. By understanding how program mode adjusts settings to freeze motion and utilizing autofocus effectively, you can capture stunning action shots with ease. Remember to experiment, review your results, and make necessary adjustments to achieve your desired outcome. Program mode offers a balance between automation and creative control, making it a useful tool for capturing fast-paced moments.