
Setting Up Parental Controls on Quest Headsets
Quest headsets offer a fantastic virtual reality experience for users of all ages, but as a responsible parent, it’s important to ensure that your children are using the device in a safe and appropriate manner. Luckily, Quest provides robust parental control features that allow you to easily manage and customize your child’s experience on the headset.
To begin setting up parental controls on your Quest headset, follow these simple steps:
- Start by putting on the headset and navigating to the main menu.
- Look for the “Settings” tab and select it.
- Scroll down and click on the “Device” option.
- Under “Device,” you’ll find the “Parental Controls” tab. Click on it to access the parental control settings.
- Here, you’ll have the option to create a new PIN code specifically for parental controls. This ensures that only you have access to modify the settings.
Once you’ve set up the PIN code, you can customize various aspects of your child’s experience on the headset:
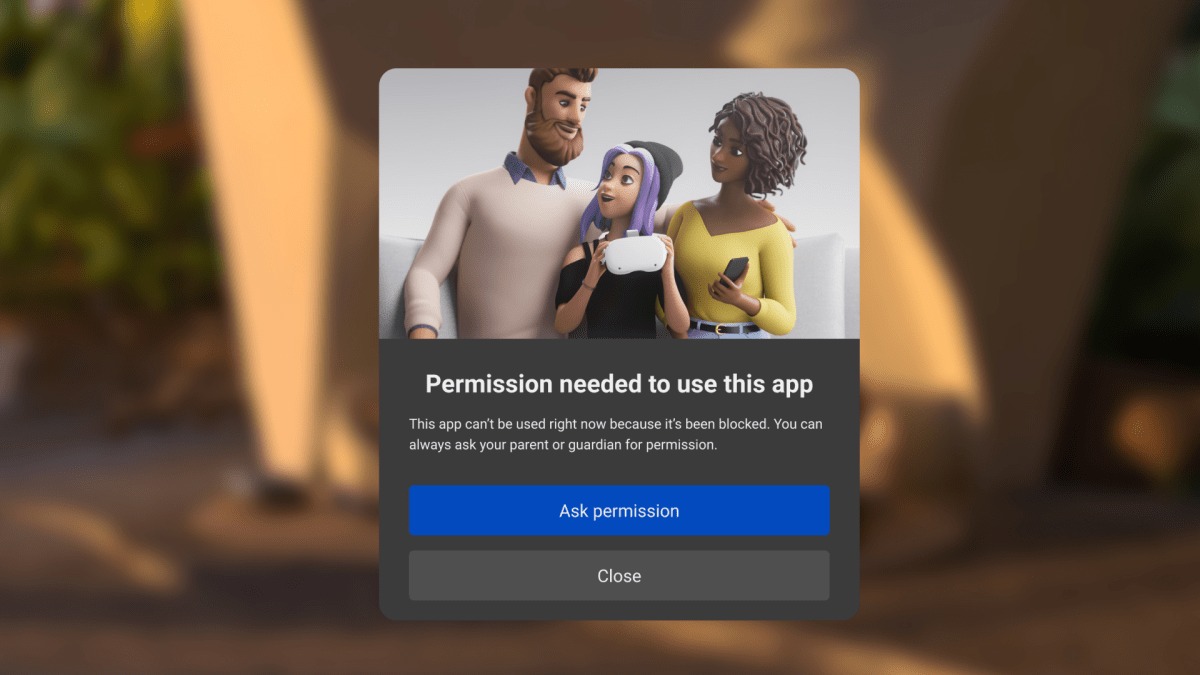
- Content Access: Choose which apps and games your child can access. You can restrict content by age rating or specific titles.
- Time Limits: Manage how much time your child can spend on the headset. Set time limits for daily or weekly play.
- Safety Warnings: Enable safety warnings for VR experiences that may cause discomfort or motion sickness. This ensures your child doesn’t engage in anything that could be harmful.
- In-App Purchases: Put a restriction on in-app purchases, preventing any unauthorized transactions.
- Communication: Manage communication settings to restrict your child from interacting with strangers or even their friends while using the headset.
By utilizing the parental control features on Quest headsets, you can confidently allow your child to explore virtual reality while ensuring their safety and well-being. Keep in mind that parental controls are not foolproof, and it’s essential to have an open dialogue with your child about responsible VR use.
Remember, virtual reality can provide incredible learning and entertainment opportunities, but it’s crucial to create a balance and establish healthy boundaries for your child’s screen time. With Quest’s robust parental control features, you can have peace of mind knowing that your child is enjoying the immersive virtual reality experience in a safe and appropriate manner.
Enabling Guardian and Boundary System
The Guardian and Boundary System on Quest headsets acts as a virtual safety net, allowing users, especially children, to have a clear understanding of their physical surroundings while immersed in the virtual reality experience. Enabling this system provides an added layer of safety and helps prevent accidents or collisions with real-world objects.
To enable the Guardian and Boundary System on your Quest headset, follow these steps:
- Put on your Quest headset and navigate to the main menu.
- Look for the “Settings” tab and select it.
- Scroll down and click on the “Device” option.
- Under “Device,” you’ll find the “Guardian” tab. Click on it to access the Guardian settings.
- Here, you can customize the Guardian boundary to suit your play area. The system uses the built-in sensors to map out your physical space and create a virtual boundary that alerts you when you’re nearing the limits.
Once the Guardian boundary is set up, you’ll be able to see a virtual representation of the boundaries while in VR, ensuring that you don’t accidentally stray too far or collide with objects in your physical environment.
To adjust the Guardian settings, follow these additional steps:
- While in VR, press the Oculus button on your touch controller to access the Universal Menu.
- Select the “Settings” tab.
- Choose the “Guardian” option.
- Here, you can adjust the sensitivity of the Guardian system or even reset the boundary to match changes in your physical environment.
Enabling the Guardian and Boundary System on your Quest headset is crucial to ensure a safer and more enjoyable virtual reality experience, especially for younger users. It provides a sense of spatial awareness and prevents accidentally wandering into dangerous areas or colliding with objects in the real world.
Remember, the Guardian system is not a substitute for proper supervision and maintaining a clear play area. Always encourage your children to use the headset in a safe and open space, free from obstacles and hazards.
Creating a New User Profile for Children
Creating a separate user profile for your children on the Quest headset allows you to personalize their experience and ensure that the content, settings, and restrictions are age-appropriate. This feature provides a tailored VR experience that suits your child’s needs while giving you control over their usage and access to certain features.
To create a new user profile for your child on the Quest headset, follow these steps:
- Put on your Quest headset and navigate to the main menu.
- Locate the “Settings” tab and select it.
- Scroll down and click on the “Accounts” option.
- Under “Accounts,” you’ll find the “Add Account” tab. Click on it to create a new user profile.
- Follow the on-screen instructions to set up a new account specifically for your child.
Once the new user profile is created, you can manage and customize the settings on their account. This includes adjusting content access, setting time limits, enabling safety warnings, and more.
Switching between user profiles on the Quest headset is simple:
- Click on the menu button on your touch controller to access the Universal Menu while in VR.
- Select the “Switch User” option.
- Choose the desired user profile and switch to it.
Creating a new user profile for your child ensures that their VR experience is safe, age-appropriate, and tailored to their needs. It allows you to customize settings specifically for them and gives you peace of mind knowing that they are using the headset under appropriate restrictions.
Remember, as a parent, it’s important to regularly check and review the settings on your child’s profile to ensure they are still appropriate as they grow and mature. Communication with your child about responsible VR use is vital to make the most out of their virtual reality experience while maintaining their safety and well-being.
Managing Content Access with App Restrictions
One of the key aspects of ensuring a safe and age-appropriate VR experience for your child on the Quest headset is managing their content access. With the app restrictions feature, you have the ability to control which apps and games are accessible to your child, allowing you to filter out content that may not be suitable for their age or preference.
To manage content access with app restrictions on the Quest headset, follow these steps:
- Put on your Quest headset and navigate to the main menu.
- Look for the “Library” tab and select it.
- Scroll through the list of apps and games and find the one you wish to restrict.
- Click on the three dots (…) next to the app or game.
- Choose the “Restriction” option to restrict access to the selected app or game.
By setting app restrictions, you can prevent your child from accessing content that may be deemed inappropriate, violent, or mature for their age. This ensures that their virtual reality experience remains within a safe and controlled environment.
If you want to remove app restrictions or change the settings, follow these steps:
- Go to the “Settings” tab from the main menu.
- Select the “Device” option.
- Click on the “Parental Controls” tab.
- Enter your PIN code to access the parental control settings.
- Under the “Content” section, you’ll find the list of restricted apps and games. Toggle off the ones you want to allow your child to access again.
By effectively managing content access with app restrictions, you can ensure that your child’s virtual reality experience on the Quest headset is both safe and suitable for their age and preferences. Regularly review and update these restrictions as your child grows to maintain a controlled and appropriate VR environment.
Keep in mind that while app restrictions are essential, it’s also crucial to have open communication with your child and provide guidance and education about responsible content consumption in virtual reality.
Limiting Playtime with Time Limits
Managing the amount of time your child spends on their Quest headset is important for balancing screen time and ensuring they engage in other activities. The time limits feature on the Quest headset allows you to set specific restrictions on how long your child can use the device, helping to maintain a healthy and balanced virtual reality experience.
To set time limits on your child’s playtime on the Quest headset, follow these steps:
- Put on your Quest headset and navigate to the main menu.
- Locate the “Settings” tab and select it.
- Scroll down and click on the “Device” option.
- Under “Device,” you’ll find the “Parental Controls” tab. Click on it.
- Enter your PIN code to access the parental control settings.
- Look for the “Time Limits” option and click on it.
- Choose the desired time limits for daily or weekly play for your child.
With time limits in place, the Quest headset will automatically notify and prompt your child when their allotted playtime is up. This helps them develop healthy device usage habits and encourages them to engage in other activities.
If you need to make changes to the time limits, follow these additional steps:
- Go back to the “Time Limits” section in the parental control settings.
- Adjust the time limits to your desired settings.
It’s important to strike a balance when setting time limits. While it’s essential to limit excessive screen time, it’s also important to allow your child to enjoy and explore the virtual reality experiences available on the Quest headset. Prioritize open communication and understanding to ensure they have a positive and responsible relationship with their device.
Remember, time limits are just one aspect of managing your child’s virtual reality playtime. Encourage them to engage in other activities, such as physical exercise, reading, or socializing with family and friends, to ensure a well-rounded and balanced lifestyle.
Setting Up Safety Warnings
Virtual reality experiences on the Quest headset can be incredibly immersive and captivating, but it’s important to be aware of potential discomfort or motion sickness that some users may experience. Setting up safety warnings helps ensure that your child is aware of these potential effects and can take necessary precautions while engaging in virtual reality.
To set up safety warnings on the Quest headset, follow these steps:
- Put on your Quest headset and navigate to the main menu.
- Locate the “Settings” tab and select it.
- Scroll down and click on the “Device” option.
- Under “Device,” you’ll find the “Parental Controls” tab. Click on it.
- Enter your PIN code to access the parental control settings.
- Look for the “Safety Warnings” option and click on it.
- Enable the safety warnings for comfort and motion sickness concerns.
By enabling safety warnings, your child will receive notifications and alerts before engaging in VR experiences that may potentially cause discomfort or motion sickness. This allows them to make informed decisions and helps prevent any adverse effects from prolonged exposure to such experiences.
It’s important to note that safety warnings are not intended to prevent your child from enjoying virtual reality, but rather to educate them and make them aware of potential risks and precautions. Encourage open communication with your child about how they are feeling during VR sessions and provide them with guidance on responsible and comfortable use.
If you need to adjust the safety warning settings, you can follow these additional steps:
- Go back to the “Safety Warnings” section in the parental control settings.
- Toggle the safety warnings on or off, depending on your preferences.
Setting up safety warnings on the Quest headset is a valuable step in ensuring that your child has a safe and comfortable virtual reality experience. By being proactive and informed, you can help mitigate any potential risks and allow them to fully enjoy the immersive world of virtual reality.
Restricting In-App Purchases
When your child is using the Quest headset, it’s important to have control over any potential in-app purchases to prevent unauthorized transactions. One of the key features of parental controls on the Quest headset is the ability to restrict in-app purchases, ensuring that your child cannot make any purchases without your permission.
To restrict in-app purchases on the Quest headset, follow these steps:
- Put on your Quest headset and navigate to the main menu.
- Locate the “Settings” tab and select it.
- Scroll down and click on the “Device” option.
- Under “Device,” you’ll find the “Parental Controls” tab. Click on it.
- Enter your PIN code to access the parental control settings.
- Look for the “In-App Purchases” option and click on it.
- Toggle the restriction on to prevent any in-app purchases.
By restricting in-app purchases, you can have peace of mind knowing that your child won’t accidentally make any purchases while using the Quest headset.
If you need to adjust the in-app purchase restriction settings at any time, follow these additional steps:
- Go back to the “In-App Purchases” section in the parental control settings.
- Toggle the restriction off to allow in-app purchases or on to restrict them again.
It’s important to have an ongoing conversation with your child about responsible spending and the value of virtual goods. Emphasize the need to seek your permission before making any purchases and remind them to be cautious while engaging with any prompts for in-app purchases.
With in-app purchase restrictions in place, you can confidently allow your child to enjoy a range of content and experiences on the Quest headset, knowing that their usage remains in line with your approval and budget.
Remember, while restricting in-app purchases is an effective method of controlling spending, maintaining an open dialogue with your child about their virtual reality experiences and setting clear guidelines will help foster responsible and enjoyable use of the Quest headset.
Restricting Communication with Friends and Strangers
As a parent, it’s important to ensure that your child has a safe and secure virtual reality experience on the Quest headset. One way to foster this is by setting restrictions on communication with friends and strangers, allowing you to control who your child interacts with while using the device.
To restrict communication with friends and strangers on the Quest headset, follow these steps:
- Put on your Quest headset and navigate to the main menu.
- Locate the “Settings” tab and select it.
- Scroll down and click on the “Device” option.
- Under “Device,” you’ll find the “Parental Controls” tab. Click on it.
- Enter your PIN code to access the parental control settings.
- Look for the “Communication” option and click on it.
- Choose the appropriate level of communication restriction for your child: restricting communication with friends only or completely disabling communication with both friends and strangers.
By restricting communication with friends and strangers, you can have peace of mind knowing that your child is engaging with a controlled network of users while using the Quest headset.
If you need to adjust the communication restriction settings, follow these additional steps:
- Go back to the “Communication” section in the parental control settings.
- Toggle the settings to switch between the different communication restriction levels.
It’s important to have open conversations with your child about the importance of online safety and the risks of interacting with strangers. Reinforce the boundaries and guidelines you have set regarding communication while using the Quest headset.
By restricting communication with friends and strangers on the Quest headset, you create a safer digital environment for your child, ensuring that their virtual reality experience remains positive, enjoyable, and secure.
Remember, regularly reviewing and adjusting the communication restriction settings, as well as maintaining open lines of communication with your child, are key factors in creating a safe and responsible virtual reality experience.
Utilizing the Oculus Guardian Intrusion Detection System
The Oculus Guardian is a powerful feature on the Quest headset that helps prevent accidents and ensures the safety of users, especially children, while immersed in a virtual reality experience. By setting up and utilizing the Oculus Guardian intrusion detection system, you can establish a virtual boundary and receive alerts whenever you or your child approaches the limits of the play area.
To utilize the Oculus Guardian intrusion detection system on the Quest headset, follow these steps:
- Put on your Quest headset and navigate to the main menu.
- Find the “Settings” tab and select it.
- Scroll down and click on the “Device” option.
- Under “Device,” you’ll find the “Guardian” tab. Click on it to access the Guardian settings.
- Follow the on-screen instructions to set up the Guardian boundary, which involves mapping out your desired play area.
Once the Guardian boundary is set up, you will have a visual representation of the boundaries within the virtual reality experience. As you or your child approach the boundaries, the Guardian system will display warning overlays to alert you that you are getting too close to the edge of the play area.
Utilizing the Oculus Guardian intrusion detection system is essential to ensure the physical safety of users while using the Quest headset. By being aware of the boundaries of the play area, you can prevent accidental collisions with objects or walls in the real-world environment.
In addition to the initial setup, you can adjust the Guardian system and its settings to fit your needs:
- While in VR, press the Oculus button on your touch controller to access the Universal Menu.
- Select the “Settings” tab.
- Choose the “Guardian” option.
- Here, you can adjust the sensitivity of the Guardian system or reset the boundary if there are changes in your physical environment.
By regularly reviewing and adjusting the Guardian system settings as needed, you can maintain a safe and secure virtual reality experience for you and your child on the Quest headset.
Remember, while the Oculus Guardian intrusion detection system is effective in creating a safe play area, it is not a substitute for proper supervision. Always ensure that your child uses the Quest headset in a clear, spacious environment free from hazards.
Reviewing Activity Logs and App Usage
As a parent, it’s important to stay informed about your child’s virtual reality usage on the Quest headset. By reviewing activity logs and app usage, you can have greater visibility into their virtual reality experiences and ensure that they are engaging in appropriate content and adhering to any restrictions you have set.
On the Quest headset, you can review activity logs and app usage by following these steps:
- Put on your Quest headset and navigate to the main menu.
- Look for the “Settings” tab and select it.
- Scroll down and click on the “Device” option.
- Under “Device,” you’ll find the “Parental Controls” tab. Click on it.
- Enter your PIN code to access the parental control settings.
- Look for the “Activity” or “Usage” section and click on it.
- Here, you will find information about your child’s recent app usage, playtime, and any restrictions they may have encountered.
Reviewing activity logs and app usage allows you to have a better understanding of how your child is interacting with the Quest headset. You can identify which apps they are spending the most time on, monitor their playtime, and address any concerns or issues that may arise.
Additionally, reviewing activity logs and app usage provides an opportunity to have conversations with your child about responsible VR use. You can discuss their favorite experiences, address any concerns, and reinforce positive habits such as taking breaks and engaging in other activities.
If you notice any discrepancies or concerns in the activity logs or app usage, you can address them accordingly. This may involve adjusting restrictions, having discussions with your child about appropriate content, or setting new guidelines for their virtual reality usage.
It’s important to strike a balance between monitoring activity logs and respecting your child’s privacy. Use this feature as a tool to ensure their safety and guide their virtual reality experience rather than a means of excessive surveillance.
By regularly reviewing activity logs and app usage on the Quest headset, you can actively guide and supervise your child’s virtual reality usage while maintaining an open and informed relationship.
Troubleshooting Parental Control Settings on Quest Headsets
While the parental control features on Quest headsets are designed to provide a safe and controlled virtual reality experience for your child, there may be instances where you encounter issues or need to troubleshoot certain settings. Understanding common troubleshooting steps can help ensure that the parental control settings are properly configured and effective.
If you are experiencing difficulties with the parental control settings on your Quest headset, consider the following troubleshooting tips:
- Double-check PIN Code: If you are unable to access or modify the parental control settings, confirm that you are entering the correct PIN code. Try entering it again and ensure that it matches the one initially set up.
- Restart the Headset: Sometimes, a simple restart can resolve temporary issues. Turn off your Quest headset and then power it back on to see if the parental control settings function properly.
- Update System Software: Ensure that your Quest headset is running on the latest system software. Keeping the software up to date can address any known issues or bugs related to parental control settings.
- Reset Parental Control Settings: If you are encountering persistent issues, you may need to reset the parental control settings. Remember that this will reset all your preferences, so be prepared to set them up again from scratch.
- Contact Support: If none of the above steps resolve your issue, consider reaching out to the Oculus support team for further assistance. They can provide guidance specific to your situation and help resolve any technical difficulties you may be experiencing.
Remember, it’s important to have open communication with your child throughout the troubleshooting process. Explain any temporary limitations or issues they may encounter and reassure them that the aim is to maintain a safe and enjoyable virtual reality experience.
By following these troubleshooting tips, you can resolve any issues related to parental control settings on your Quest headset and ensure that your child’s virtual reality usage remains under appropriate restrictions and guidelines.
However, if all troubleshooting steps have been exhausted without success, it may be necessary to seek assistance from Oculus support to address any technical or hardware-related concerns.