
What is Lakka?
Lakka is an open-source, lightweight operating system that transforms your Windows PC into a powerful retro gaming console. It is based on the Linux distribution, aiming to provide a simple and user-friendly interface for playing classic video games from various gaming consoles and arcade machines.
With Lakka, you no longer need to buy specialized hardware or dedicated consoles to enjoy the nostalgia of playing retro games. It offers a seamless and customizable gaming experience by emulating popular gaming platforms such as Nintendo Entertainment System (NES), Super Nintendo (SNES), Sega Genesis, Game Boy, and many more.
One of the key features of Lakka is its ability to run on almost any hardware, including low-end machines. This means you can repurpose an old Windows PC or even a Raspberry Pi board into a dedicated retro gaming machine using Lakka. Its lightweight nature ensures smooth performance, even on older or less powerful hardware.
Furthermore, Lakka provides a plethora of customization options, allowing you to modify the visual appearance and behavior of the interface. You can apply different themes, change the font size, and even create your own personalized interface to suit your gaming preferences.
Additionally, Lakka supports a wide range of game controllers, including USB controllers, Bluetooth controllers, and even the original console controllers if you have the required adapters. This ensures that you can have an authentic gaming experience while playing your favorite classic games.
Overall, Lakka serves as an all-in-one solution for retro gaming enthusiasts, providing a streamlined and intuitive platform to relive the glory days of gaming. Whether you want to play iconic titles from your childhood or explore hidden gems from gaming history, Lakka offers a convenient and enjoyable way to immerse yourself in the world of classic video games.
Downloading and Installing Lakka
To begin your journey into the world of retro gaming with Lakka, you’ll need to download and install the Lakka operating system. Follow these steps to get started:
- Visit the Lakka website at www.lakka.tv.
- Navigate to the “Downloads” section of the website.
- Select the appropriate version of Lakka for your Windows PC. Choose the 32-bit or 64-bit version based on your system’s specifications.
- Click the download link to start the downloading process.
- Once the download is complete, locate the downloaded file on your computer.
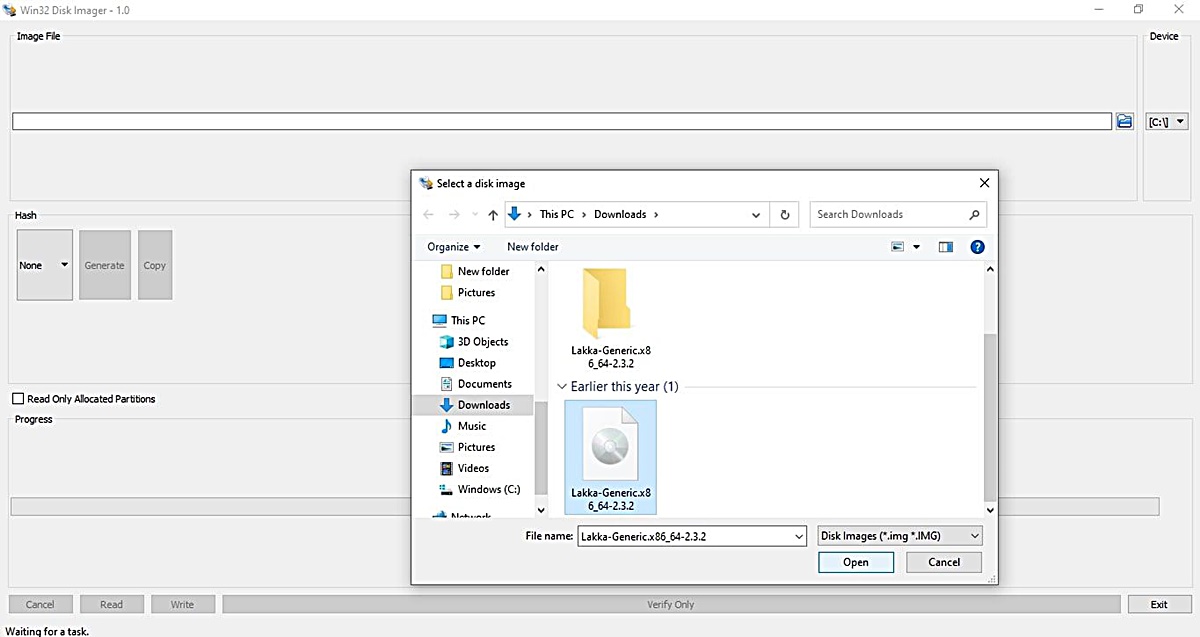
- Extract the downloaded Lakka image to a folder using a tool like 7-Zip or WinRAR. This will result in an image file with the .img extension.
- Insert a USB drive into your computer.
- Open a tool like Rufus or Etcher.
- Select the Lakka image file and the USB drive in the tool.
- Click on the “Start” or “Flash” button to begin the installation process.
- Wait for the tool to copy the necessary files to the USB drive and make it bootable.
- Once the process is complete, safely eject the USB drive from your computer.
- Insert the USB drive into your Windows PC, ensuring that it is set as the primary boot device in your computer’s BIOS settings.
- Restart your computer and allow it to boot from the USB drive.
- Follow the on-screen instructions to install Lakka onto your Windows PC.
- Once the installation is complete, you can remove the USB drive and restart your computer.
Now, you’re ready to dive into the world of retro gaming with Lakka on your Windows PC. It’s time to bring back the memories and enjoy hours of classic gaming goodness.
Setting Up Lakka on a USB Drive
Setting up Lakka on a USB drive allows you to have a portable retro gaming solution that can be easily plugged into any Windows PC. Follow these steps to set up Lakka on a USB drive:
- Ensure that you have a USB drive with a sufficient capacity to hold the Lakka operating system and your chosen game ROMs.
- Download the Lakka image file from the official Lakka website (www.lakka.tv), as mentioned in the previous section.
- Extract the downloaded Lakka image file to a folder on your computer using a tool like 7-Zip or WinRAR.
- Connect the USB drive to your computer.
- Open a tool like Rufus or Etcher.
- Select the Lakka image file and the USB drive in the tool.
- Click on the “Start” or “Flash” button to begin the installation process.
- Wait for the tool to copy the necessary files and make the USB drive bootable.
- Once the process is complete, safely eject the USB drive from your computer.
- Now you have Lakka installed on your USB drive. You can plug it into any Windows PC to play retro games.
When using Lakka from a USB drive, make sure the USB drive is connected to the Windows PC before booting it up. You might need to adjust the boot order in your computer’s BIOS settings to ensure that it boots from the USB drive first.
Remember to save your game saves and configuration files separately from the USB drive to avoid losing them in case of any issues or damages to the drive. It’s recommended to keep backups of your game saves on your computer or cloud storage.
Setting up Lakka on a USB drive gives you the freedom to take your retro gaming experience with you wherever you go. So grab your USB drive, plug it in, and enjoy the nostalgia of classic video games on any Windows PC.
Configuring Lakka for Windows PC
Once you have Lakka installed on your Windows PC, the next step is to configure it to ensure optimal performance and a seamless gaming experience. Follow these steps to configure Lakka:
- Boot up your Windows PC with Lakka installed.
- On the Lakka main menu, navigate to the “Settings” option and press Enter.
- Go to the “System” settings and select “File Manager”. Here, you can add your ROMs by navigating to the appropriate directory.
- Press the F1 key to bring up the RetroArch menu. RetroArch is the underlying framework that powers Lakka.
- In the RetroArch menu, go to “Settings” and select “Directories”. Make sure the “ROMs directory” points to the directory where you have stored your game ROMs.
- Return to the RetroArch main menu and select “Input”. Here, you can configure your gamepad or controller for use with Lakka. Connect your controller to the Windows PC, and Lakka should automatically detect it.
- Under “Input”, you can also customize other controller settings such as button mappings, analog stick sensitivity, and more.
- Once you have configured your controller, go back to the Lakka main menu and select “Quit” to exit RetroArch.
- You can now select the desired gaming platform from the Lakka main menu and start playing your favorite classic games.
Additionally, you can further customize your Lakka experience by exploring various settings in the Lakka and RetroArch menus. This includes adjusting display settings, audio settings, and even applying different visual shaders for a nostalgic feel.
It’s important to note that Lakka is highly customizable, and you can tweak settings to suit your preferences. However, be cautious when making changes, as incorrect settings may lead to undesired outcomes or performance issues.
By properly configuring Lakka on your Windows PC, you can ensure a smooth and enjoyable retro gaming experience. So take the time to adjust the settings as per your liking, and get ready to dive into a world of classic gaming goodness.
Adding ROMs to Lakka
Now that you have Lakka set up on your Windows PC, it’s time to add your favorite game ROMs to start playing. Follow these steps to add ROMs to Lakka:
- Connect a USB drive or use a network connection to transfer your ROM files to your Windows PC.
- Boot up your Windows PC with Lakka installed.
- On the Lakka main menu, navigate to “Settings” and press Enter.
- Select “File Manager” to access the Lakka file system.
- Locate the “ROMs” directory and navigate to the appropriate gaming console or emulator folder. For example, if you want to add NES ROMs, go to the “nes” folder.
- Copy the ROM files from your USB drive or network location and paste them into the corresponding console folder in the Lakka file system.
- After adding the ROM files, exit the file manager and return to the Lakka main menu.
- Now, select your desired gaming platform from the main menu to view the list of installed ROMs for that console.
- You should see the newly added ROMs listed. Simply select the game you want to play, and Lakka will launch it.
It’s important to note that Lakka supports a wide range of gaming platforms and emulators. Make sure to copy the ROM files to the correct folder for the respective console or emulator you want to play.
It’s also worth mentioning that Lakka is designed to be a legal and ethical platform, so ensure that you only use ROMs for games that you own or have acquired legally. Piracy is not only illegal but also unethical.
By adding your favorite game ROMs to Lakka, you can relive the nostalgic moments and enjoy a vast library of classic games on your Windows PC.
Using Lakka Interface and Navigation
Once you have Lakka set up and your ROMs added, it’s time to explore the interface and navigate through the various features and options. Here’s a guide on how to use the Lakka interface:
When you boot up Lakka, you’ll be greeted with the Lakka main menu. The menu is designed to be simple and intuitive, featuring large icons for different gaming platforms or emulators. Simply use the arrow keys on your keyboard or the joystick on your gamepad to navigate through the menu options.
To select an option, such as a gaming platform or an emulator, move the highlight to the desired icon and press the Enter key on your keyboard or the corresponding button on your gamepad.
Once you select a gaming platform, you’ll see a list of the installed ROMs for that specific console. From here, you can navigate through the list using the arrow keys on your keyboard or the joystick on your gamepad. Highlight the game you want to play and press the Enter key or the corresponding button on your gamepad to launch the game.
While playing a game, you can access various in-game functions and settings using RetroArch. Press the F1 key on your keyboard or the designated button on your gamepad to bring up the RetroArch menu. From here, you can access options such as save states, load states, and configuring game-specific settings.
To exit a game and return to the Lakka main menu, press the Escape key on your keyboard or the designated button on your gamepad.
It’s important to note that Lakka supports hotkeys, which are combinations of buttons that trigger specific actions. The default hotkey combination is the “Select” button paired with the “Start” button on your gamepad. For example, to save a game state, press the hotkey combination followed by the assigned save state button.
Lakka not only provides a user-friendly interface but also offers a range of customization options. You can change the appearance of the interface by applying different themes, adjust display settings such as resolution and aspect ratio, and even apply shaders to enhance the visual experience.
By familiarizing yourself with the Lakka interface and mastering the navigation, you can effortlessly browse through your game library and enjoy hours of gaming nostalgia on your Windows PC.
Configuring Gamepad for Lakka
Configuring your gamepad or controller in Lakka is essential for a seamless gaming experience. Follow these steps to set up and configure your gamepad for use with Lakka:
- Connect your gamepad or controller to your Windows PC.
- Boot up your Windows PC with Lakka installed.
- On the Lakka main menu, navigate to “Settings” and press Enter.
- Select “Input” to access the input settings.
- In the input settings menu, select “User 1 Binds”. This is where you can configure your gamepad controls.
- Follow the on-screen prompts to map each button of your gamepad to the corresponding function in Lakka. Simply press the button on your gamepad when prompted for each input.
- If your gamepad has analog sticks or triggers, Lakka will provide options to configure their sensitivity and deadzone. Adjust these settings to your preference.
- Once you have configured the controls for “User 1”, you can go back to the main menu and start playing your games with your gamepad.
It’s important to note that Lakka supports a wide range of gamepads and controllers, including USB controllers and Bluetooth controllers. Lakka should automatically detect most gamepads without any additional configuration required.
If your gamepad is not being recognized or the buttons are not functioning correctly, you may need to ensure that your gamepad is compatible with Lakka or try using a different gamepad or controller.
If you are using a wireless gamepad or controller, make sure it is properly paired with your Windows PC and check that Bluetooth is enabled in your Lakka settings under “Settings” > “Services” > “Bluetooth”.
Remember that Lakka also supports hotkeys, which are combinations of buttons that trigger specific actions. By default, the hotkey combination is the “Select” button paired with the “Start” button on your gamepad. You can use this hotkey combination along with other buttons to access various in-game functions and settings.
By properly configuring your gamepad in Lakka, you can immerse yourself in the world of retro gaming and enjoy a comfortable and authentic gaming experience on your Windows PC.
Playing Classic Games on Lakka
Now that you have Lakka set up and your gamepad configured, it’s time to embark on an exciting journey and play classic video games on your Windows PC. Follow these steps to start playing:
- Boot up your Windows PC with Lakka installed.
- On the Lakka main menu, navigate to the gaming platform or emulator you want to play.
- Once you select a gaming platform, you’ll see a list of the installed ROMs for that platform.
- Using your gamepad or controller, navigate through the list and select the game you want to play.
- Press the Enter key on your keyboard or the corresponding button on your gamepad to launch the game.
- Enjoy the bliss of nostalgia as you play the classic game on your Windows PC.
- During gameplay, you can access various in-game functions and settings using RetroArch. Press the hotkey combination (usually “Select” + “Start”) on your gamepad to bring up the RetroArch menu.
- From the RetroArch menu, you can save and load game states, adjust display and audio settings, and even apply different filters and shaders to enhance the visual experience.
- When you’re finished playing, you can exit the game by pressing the Escape key on your keyboard or the designated button on your gamepad. This will return you to the Lakka main menu.
- From the Lakka main menu, you can choose a different gaming platform or emulator to explore and play more classic games.
Lakka offers a wide range of emulators and supports various gaming platforms, ensuring a vast library of classic games at your fingertips. Whether you want to relive the adventures of Super Mario Bros., battle it out in Street Fighter II, or explore the vast worlds of role-playing games, Lakka provides a versatile platform to fulfill your gaming cravings.
Remember to only play game ROMs that you own or have acquired legally. Lakka is designed to respect copyright laws and promote ethical gaming practices.
So grab your gamepad, dive into the world of retro gaming, and let Lakka transport you back to the golden age of video games on your Windows PC.
Saving and Loading Game States in Lakka
Lakka offers a convenient feature called save states, allowing you to save your progress in a game and load it at a later time. This feature comes in handy when you want to take a break or revisit a specific moment in a game. Follow these steps to save and load game states in Lakka:
- While playing a game, press the hotkey combination on your gamepad to bring up the RetroArch menu. The default hotkey combination is usually “Select” + “Start”.
- In the RetroArch menu, navigate to the “Quick Menu” option and select it.
- Within the Quick Menu, select “Save State” to save your current game progress.
- Lakka will provide you with a list of slots where you can save your game state. Select an available slot and confirm your choice.
- To load a saved game state, follow the same steps to access the RetroArch menu and navigate to the Quick Menu.
- Select “Load State” and choose the slot where you previously saved your game state.
- Lakka will load the saved game state, allowing you to continue playing from where you left off.
It’s important to note that save states are specific to each game and console emulator in Lakka. This means that you can have different save states for different games and consoles.
Additionally, make sure to regularly backup your saved game states to avoid any potential loss of progress. You can do this by copying the save state files to a separate storage device or a cloud storage solution.
By utilizing the save state feature in Lakka, you can easily pick up where you left off and enjoy uninterrupted gaming sessions on your Windows PC.
Customizing Lakka with Themes
Lakka allows you to personalize your retro gaming experience by customizing the interface with different themes. Themes change the visual appearance of Lakka, allowing you to create a unique and visually appealing gaming environment. Follow these steps to customize Lakka with themes:
- Boot up your Windows PC with Lakka installed.
- On the Lakka main menu, navigate to “Settings” and press Enter.
- Select “Interface” to access the interface settings.
- In the interface settings, you’ll find the option to change the theme.
- Select the theme you want to apply from the available options.
- Lakka will instantly apply the new theme, transforming the visual appearance of the interface.
It’s important to note that Lakka provides a variety of themes, each offering a different look and feel. Explore the available themes and choose the one that resonates with your gaming style and preferences.
If you want to take customization further, Lakka allows you to create your own custom themes. You can modify the colors, fonts, icons, and other elements to create a truly unique interface. To create a custom theme, you’ll need some knowledge of HTML and CSS.
Once you have created or downloaded a custom theme, follow these steps to apply it:
- Boot up your Windows PC with Lakka installed.
- Connect to your Lakka device through SSH or use an FTP client to access the Lakka file system.
- Navigate to the “/storage/.config/retroarch/custom_themes” directory.
- Copy the custom theme folder into the “custom_themes” directory.
- On the Lakka main menu, navigate to “Settings” and press Enter.
- Select “Interface” to access the interface settings.
- In the interface settings, choose the custom theme you added from the available options.
- Lakka will apply your custom theme, giving your interface a personal touch.
The ability to customize Lakka with themes provides an opportunity to create an interface that reflects your style and gaming aesthetic. Whether you prefer a retro look, a modern design, or a completely unique appearance, Lakka allows you to tailor the interface to your liking.
So go ahead, explore the available themes or unleash your creativity with custom themes, and make your Lakka experience truly one-of-a-kind.
Troubleshooting Common Lakka Issues
While Lakka provides a smooth retro gaming experience on Windows PC, you may encounter some common issues along the way. Here are some troubleshooting tips to help resolve those issues:
No Audio:
If you find that there is no audio while playing games on Lakka, try the following:
- Check if your sound volume is turned up and not muted in the Lakka settings.
- Ensure that your HDMI or audio cables are securely connected to your Windows PC and the audio output device.
- Try changing the audio output device in the Lakka settings to see if that resolves the issue.
No Gamepad/Controller Response:
If your gamepad or controller is not functioning correctly or not being recognized by Lakka, try these steps:
- Make sure your gamepad is properly connected to your Windows PC before booting up Lakka.
- Check if your gamepad is compatible with Lakka. Some gamepads may require additional configuration or mapping.
- Try reconnecting or using a different gamepad to see if the issue persists.
- In the Lakka settings, go to “Input” and make sure the gamepad binds are correctly set up.
Game Slowdown or Lag:
If you experience game slowdown or lag while playing on Lakka, consider these troubleshooting steps:
- Check if your Windows PC meets the minimum system requirements for Lakka.
- Make sure your Windows PC is not running resource-intensive processes or background applications that may affect performance.
- Adjust the Lakka settings for the specific game or emulator, such as reducing the resolution or turning off certain effects, to improve performance.
- Ensure that your game ROMs are compatible with the emulator you are using in Lakka.
ROMs Not Showing Up:
If your game ROMs are not appearing in Lakka, follow these troubleshooting steps:
- Verify that your ROM files are in the correct directory for the specific console or emulator you are using.
- Refresh the ROMs directory by going to the Lakka settings, navigating to “Settings” > “Directory” > “Update ROM Directories”, and selecting “Scan This Directory” for the appropriate console or emulator.
- Restart Lakka and check if the ROMs appear in the menu.
If you encounter other issues or difficulties while using Lakka, it is recommended to visit the Lakka community forums, where you can find solutions to specific problems or seek help from other users who may have encountered similar issues.
By following these troubleshooting steps and seeking assistance from the Lakka community, you can overcome common issues and ensure a smooth retro gaming experience on your Windows PC.