Setting up Fitbit Pay
Fitbit Pay is a convenient feature that allows you to make contactless payments directly from your Fitbit device. Setting it up is a breeze, and you’ll be ready to tap and pay in no time. Here’s how to get started:
- First, ensure that your Fitbit device is compatible with Fitbit Pay. Currently, the feature is available on Fitbit Ionic, Fitbit Versa series, Fitbit Charge 4, and Fitbit Sense.
- Open the Fitbit app on your smartphone and tap on your profile picture in the top-left corner of the screen.
- Select your Fitbit device from the list of connected devices.
- Tap on “Wallet” and then select “Set up Fitbit Pay.”
- Follow the on-screen instructions to add your payment cards to Fitbit Pay. You can either scan your card with your phone’s camera or manually enter the card details.
- Once you’ve added your payment cards, you’ll need to set up a 4-digit PIN to secure your Fitbit Pay transactions. Make sure to choose a PIN that is easy for you to remember but difficult for others to guess.
- After setting up your PIN, you will need to accept the terms and conditions of Fitbit Pay and set a default card for payments.
- Finally, sync your Fitbit device with your Fitbit app to ensure that all the information and settings are updated.
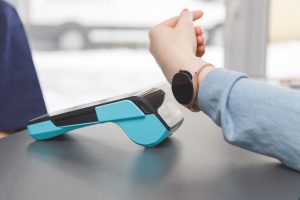
And voila! You’re now all set up to use Fitbit Pay. The next time you want to make a payment, simply bring your Fitbit device near the contactless payment terminal and authorize the transaction with your PIN.
Setting up Fitbit Pay is a quick and hassle-free process that gives you the freedom to leave your wallet at home and make payments with just a tap of your wrist. So, why not take advantage of this convenient feature and simplify your payment experience?
Adding payment cards to Fitbit Pay
Once you’ve set up Fitbit Pay on your compatible Fitbit device, the next step is to add your payment cards. Fitbit Pay supports major credit and debit cards from a variety of financial institutions, allowing you to securely store and use your preferred cards for contactless payments. Here’s how to add payment cards to Fitbit Pay:
- Open the Fitbit app on your smartphone and tap on your profile picture in the top-left corner of the screen.
- Select your Fitbit device from the list of connected devices.
- Tap on “Wallet” and then select “Add a Card.”
- Choose whether you want to add a credit card or a debit card and follow the on-screen prompts.
- If you choose to scan your card, position it within the frame on your device’s screen to capture the card details automatically. Alternatively, you can manually enter the card information.
- Once you’ve entered or scanned your payment card details, review the information for accuracy and tap on “Add Card” to save it to Fitbit Pay.
- Repeat the process if you want to add multiple payment cards to Fitbit Pay.
It’s important to note that the availability of certain payment cards may vary depending on your financial institution. Fitbit Pay supports a wide range of cards, including Visa, Mastercard, and American Express, so you likely won’t face any issues adding your preferred card to the platform.
When adding payment cards to Fitbit Pay, it’s essential to ensure that the card information you provide is accurate and up to date. This not only ensures a seamless experience when making payments but also helps protect you against unauthorized use of your cards.
With your payment cards successfully added to Fitbit Pay, you can now enjoy the convenience of making secure contactless payments directly from your Fitbit device. Say goodbye to digging through your wallet or fumbling for your phone – simply tap your wrist and go!
Making a payment with Fitbit Pay
Now that you’ve set up Fitbit Pay and added your payment cards, you’re ready to start making contactless payments with just a tap of your Fitbit device. Here’s how to make a payment using Fitbit Pay:
- Ensure that your Fitbit device is in contact with your wrist and securely strapped on.
- Locate a contactless payment terminal at a retailer or establishment that accepts contactless payments. Look for the contactless symbol, often represented by four curved lines.
- When you’re ready to make a payment, press and hold the left-hand button on your Fitbit device until the wallet screen appears.
- Select the payment card you wish to use for the transaction by swiping left or right on the device’s screen.
- Once you’ve chosen the desired payment card, hold the back of your Fitbit device near the contactless payment terminal.
- Wait for a moment while Fitbit Pay communicates with the terminal to process the payment. You may need to enter your 4-digit PIN if prompted.
- After a successful transaction, your Fitbit device will vibrate and display a confirmation message, indicating that the payment was made.
It’s important to note that the steps may vary slightly depending on the model of your Fitbit device. However, the basic process remains the same across all compatible Fitbit devices.
Using Fitbit Pay for payments offers a seamless and convenient experience. You no longer need to reach for your wallet or phone – simply tap your Fitbit device, and you’re good to go. Whether you’re at a grocery store, coffee shop, or any other location that accepts contactless payments, Fitbit Pay makes it easy to make purchases without the hassle of carrying physical cards or cash.
Keep in mind that Fitbit Pay transactions are protected by secure tokenization, which replaces your card details with a unique token, ensuring that your payment information is kept safe. It’s yet another layer of security that makes using Fitbit Pay a secure and reliable payment method.
So, next time you’re out and about, leave your wallet at home and make quick and secure payments with Fitbit Pay. Embrace the convenience and simplicity of contactless payments with a tap of your wrist.
Using Fitbit Pay on different devices
Fitbit Pay is a versatile feature that is compatible with various Fitbit devices, giving you the flexibility to make contactless payments from the wrist. Whether you’re sporting an Ionic, Versa series, Charge 4, or Sense, Fitbit Pay allows you to conveniently pay for purchases without reaching for your wallet or phone. Here’s a closer look at using Fitbit Pay on different devices:
Fitbit Ionic
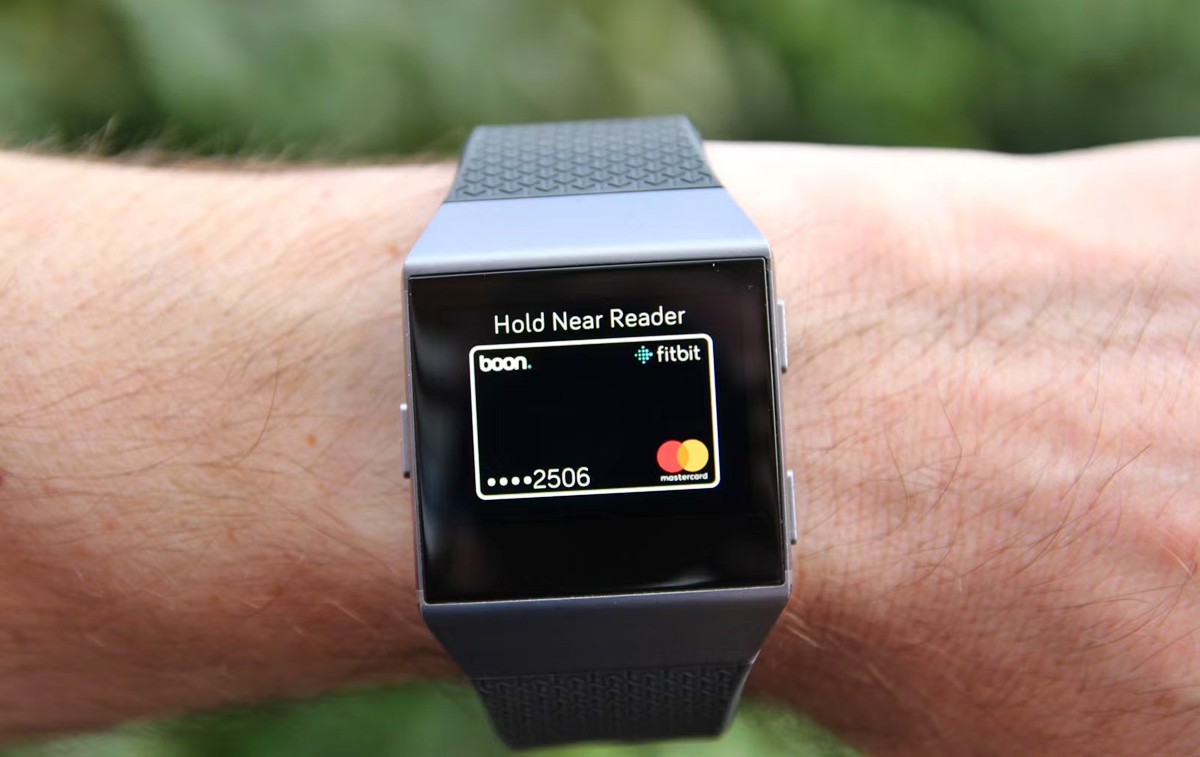
The Fitbit Ionic was the first Fitbit device to introduce Fitbit Pay. With an easy-to-use interface and built-in NFC technology, making a payment is a breeze. Simply access the wallet feature by pressing and holding the left-hand button, select the desired payment card, and hold your Fitbit Ionic near the contactless payment terminal.
Fitbit Versa series
The Fitbit Versa series, which includes the Versa, Versa Lite, and Versa 2, also supports Fitbit Pay. To use Fitbit Pay on these devices, press and hold the left-side button until the wallet screen appears, choose your payment card, and hold your Fitbit Versa near the contactless payment terminal to complete the transaction.
Fitbit Charge 4
The Fitbit Charge 4, a popular fitness tracker, includes support for Fitbit Pay. To make a payment, press and hold the button on the side of your Charge 4, select the desired payment card, and hold your device near the contactless payment terminal to complete the transaction.
Fitbit Sense
The Fitbit Sense, with its advanced health and wellness features, also allows you to utilize Fitbit Pay. Access the wallet by pressing and holding the left-side button, select the payment card you want to use, and hold your Fitbit Sense near the contactless payment terminal to make a payment.
No matter which Fitbit device you own, using Fitbit Pay is a convenient and secure way to make contactless payments. Be sure to set up Fitbit Pay and add your payment cards to enjoy the ease and simplicity of this feature.
As a side note, it’s worth mentioning that Fitbit Pay availability may vary depending on your country and financial institution. Keep in mind that you may need to check with your specific financial institution to ensure compatibility with Fitbit Pay.
Now that you understand how Fitbit Pay works across different Fitbit devices, you can confidently embrace the convenience of making payments with just a tap on your wrist. Say goodbye to carrying around physical cards and experience the freedom of Fitbit Pay!
Managing and removing payment cards in Fitbit Pay
Fitbit Pay offers flexibility when it comes to managing and organizing your payment cards. Whether you want to add a new card, update existing card details, or remove a card from your Fitbit Pay wallet, you can easily do so with just a few taps. Here’s how to manage and remove payment cards in Fitbit Pay:
Managing Payment Cards
To manage your payment cards in Fitbit Pay, follow these steps:
- Open the Fitbit app on your smartphone.
- Tap on your profile picture in the top-left corner to access your account settings.
- Select your Fitbit device from the list of connected devices.
- Tap on “Wallet” and then choose “Manage Cards.”
- From here, you can view all the payment cards currently stored in Fitbit Pay.
- To update the card details, tap on the specific card and choose “Update Card.” Follow the prompts to make the necessary changes.
- To set a default payment card, tap on the card and select “Make Default.”
Removing Payment Cards
If you no longer want to keep a payment card in your Fitbit Pay wallet, you can easily remove it by following these steps:
- Open the Fitbit app on your smartphone.
- Tap on your profile picture and select your Fitbit device.
- Go to “Wallet” and tap on “Manage Cards.”
- Locate the card you want to remove and tap on it.
- Choose “Remove Card” and confirm your selection.
It’s worth noting that removing a card from Fitbit Pay does not impact the actual physical card or the associated account. The card will still be valid for use in other forms or on other devices.
By regularly managing your payment cards in Fitbit Pay, you can keep your digital wallet organized and up to date. Whether you want to add a new card, update existing details, or remove an old card, Fitbit Pay offers the flexibility and convenience to do so with ease.
Remember to keep your Fitbit app and Fitbit device updated to access the latest features and security enhancements, ensuring a seamless payment experience.
Take control of your payment cards in Fitbit Pay and enjoy the benefits of a clutter-free digital wallet right on your wrist!
Troubleshooting common issues with Fitbit Pay
While Fitbit Pay is a convenient and reliable feature, you may encounter occasional issues that can hinder your payment experience. However, most issues can be resolved with a few simple troubleshooting steps. Here are some common problems you may encounter with Fitbit Pay and how to troubleshoot them:
Issue: Fitbit device not connecting to payment terminal
If your Fitbit device is not connecting to the payment terminal, try the following:
- Ensure that your Fitbit device has sufficient battery life.
- Check that NFC is enabled on your Fitbit device. You can usually find this setting in the device’s settings menu.
- Make sure you are holding your Fitbit device near the contactless payment terminal properly. Ensure that the front of the device, where the NFC chip is located, is facing the terminal.
- Try holding your Fitbit device near the terminal for a few seconds longer to allow a successful connection.
Issue: Unable to add payment card to Fitbit Pay
If you’re having trouble adding a payment card to Fitbit Pay, try the following solutions:
- Check if your payment card is supported by Fitbit Pay. Some cards may not be compatible due to restrictions imposed by financial institutions.
- Ensure that you have a stable and reliable internet connection when adding a payment card.
- Make sure you are entering the correct card details, including the card number, expiration date, and CVV/CVC code.
- If your card is not being recognized, try manually entering the card details instead of using the scanning option.
Issue: Fitbit Pay transaction declined
If your Fitbit Pay transaction is declined, try the following steps:
- Check if your payment card has sufficient funds or if there are any holds or blocks on the card.
- Ensure that your Fitbit Pay wallet is set to the correct default payment card.
- If you’re near other payment cards or devices with NFC capabilities, make sure they are not interfering with the transaction by moving them away from the contactless payment terminal.
- Verify that your Fitbit device is properly placed on the payment terminal and that you have authorized the payment by entering the correct PIN, if prompted.
If you continue to experience issues with Fitbit Pay, you can contact Fitbit support for further assistance. They can provide personalized troubleshooting and guidance to help resolve any persistent problems.
Remember that Fitbit Pay is continually being updated and enhanced, so keeping your Fitbit app and device updated to the latest software versions can also help prevent and resolve any potential issues.
By following these troubleshooting tips, you can overcome common issues with Fitbit Pay and enjoy a seamless and secure payment experience right from your wrist.
Maximizing security and privacy with Fitbit Pay
When it comes to making contactless payments with Fitbit Pay, security and privacy are of utmost importance. Fitbit takes several measures to ensure that your payment information remains secure throughout the transaction process. Here are some tips to help you maximize security and privacy with Fitbit Pay:
Secure Tokenization
Fitbit Pay uses a technology called secure tokenization to protect your payment information. When you add a payment card to Fitbit Pay, the card details are replaced with a unique token. This token is used for transactions, ensuring that your actual card information is never shared with the merchant or stored on your Fitbit device. This adds an extra layer of security to your payments.
Protecting Your Device
Keeping your Fitbit device secure is essential for safeguarding your payment information. Here are a few steps you can take:
- Set up a 4-digit PIN for your Fitbit device, which will be required each time you make a payment with Fitbit Pay.
- Ensure that your device’s software is up to date. Regular updates often include security patches to protect against potential vulnerabilities.
- Consider enabling a screen lock or passcode on your smartphone, which adds an additional layer of security in case your Fitbit device is lost or stolen.
Monitor Your Transactions
Regularly review your payment transactions to ensure they are accurate and authorized. If you notice any suspicious activity, contact your bank or financial institution immediately.
Lost or Stolen Fitbit Device
If your Fitbit device is lost or stolen, take the following steps to protect your payment information:
- Immediately remove all payment cards from your Fitbit Pay wallet using the Fitbit app on your smartphone.
- Contact your bank or financial institution to report the loss and request a card replacement, if necessary.
- Change your Fitbit device’s PIN to prevent unauthorized access to your Fitbit Pay wallet.
- If supported, you can also remotely unlink or disable Fitbit Pay on your lost or stolen device through the Fitbit app.
By following these security practices, you can reduce the risk of unauthorized access to your payment information and enhance your overall privacy when using Fitbit Pay.
Remember, Fitbit Pay is designed to provide you with a secure and convenient way to make contactless payments. However, it is always important to stay vigilant and take steps to protect your personal and financial information.
Embrace the ease of Fitbit Pay while prioritizing your security and privacy to enjoy a worry-free payment experience.
Understanding transaction limits and restrictions with Fitbit Pay
Fitbit Pay offers a convenient way to make contactless payments from your wrist, but it’s important to be aware of the transaction limits and restrictions that may apply. These limits and restrictions are put in place to ensure security and protect against unauthorized use. Here’s what you need to know:
Transaction Limits
Fitbit Pay sets transaction limits to minimize potential financial loss in case of unauthorized transactions. These limits vary depending on your financial institution and may differ from your physical card limits. Most transactions made with Fitbit Pay fall within the range of typical contactless payment limits, which tends to be around $25 to $100. However, some financial institutions may allow you to make higher-value transactions using Fitbit Pay. It’s best to check with your financial institution to understand the specific limits that apply to your payment cards in Fitbit Pay.
Additional Security Checks
For transactions that exceed a certain threshold or involve higher amounts, Fitbit Pay may require additional security checks. This can include entering your PIN or providing other forms of authentication to authorize the payment. These measures help prevent unauthorized use of your payment cards and add an extra layer of security to your transactions.
Availability and Compatibility
Fitbit Pay’s availability and compatibility can vary depending on your location and financial institution. Fitbit Pay is currently supported in numerous countries, with more financial institutions continuously joining the platform. However, it’s important to note that not all banks and payment card providers may offer support for Fitbit Pay. Before adding a payment card to Fitbit Pay, check if your financial institution supports the service.
Accepted Payment Terminals
Fitbit Pay requires contactless payment terminals for transactions. While contactless payments are becoming increasingly widespread, it’s crucial to verify if a merchant accepts contactless payments before attempting to use Fitbit Pay. Look for the contactless payment symbol or ask the merchant if they accept contactless payments before initiating a transaction.
International Usage
If you plan to use Fitbit Pay while traveling abroad, check if the country you’re visiting supports Fitbit Pay or contactless payments. Similarly, confirm whether your payment card provider allows international transactions with Fitbit Pay. Some financial institutions may have restrictions or additional requirements for using Fitbit Pay outside of your home country.
By understanding the transaction limits and restrictions associated with Fitbit Pay, you can have a smoother and more informed payment experience. Always check with your financial institution for any specific guidelines or limitations that may apply to your payment cards in Fitbit Pay.
Enjoy the convenience of making contactless payments with Fitbit Pay while staying within the defined limits and ensuring a secure and hassle-free payment experience.
Exploring alternative mobile payment options
While Fitbit Pay offers a convenient way to make contactless payments from your Fitbit device, there are other popular mobile payment options that you may consider exploring. Here are some alternative mobile payment solutions that you can use to make secure and convenient transactions:
Apple Pay
Apple Pay is a widely-used mobile payment solution available on Apple devices, including iPhone, Apple Watch, iPad, and Mac. It allows you to securely store your payment card details and make contactless payments using your Apple device at participating merchants. With built-in security features like Touch ID and Face ID, Apple Pay provides a seamless and secure transaction experience.
Google Pay
Google Pay is another popular mobile payment option that enables you to make contactless payments using your Android device. It stores your payment card information securely and allows you to make payments at millions of locations worldwide. Google Pay supports various Android devices, including smartphones, smartwatches, and tablets, making it convenient for users within the Google ecosystem.
Samsung Pay
Samsung Pay is specifically designed for Samsung devices and offers a versatile mobile payment solution. It allows you to make payments by simply holding your Samsung device near a magnetic strip card reader, making it compatible with a wide range of payment terminals. Samsung Pay also supports contactless payments, ensuring a secure and convenient transaction experience.
PayPal
PayPal is a well-known online payment service that enables you to make payments both online and in-person through its mobile app. By linking your payment cards and bank accounts to your PayPal account, you can easily make payments using your PayPal balance or select one of your linked funding sources. With its widespread acceptance and robust security measures, PayPal is a popular choice among online shoppers.
Other Mobile Wallets
In addition to the above options, there are other mobile wallets available, such as Venmo, Zelle, and Alipay, which provide convenient ways to send and receive money, pay for purchases, and split bills with friends and family. These mobile payment solutions offer unique features and cater to specific markets and regions.
When exploring alternative mobile payment options, it’s important to consider factors such as compatibility with your device, availability in your region, and acceptance at the merchants you frequent. Evaluate the features, security measures, and convenience offered by each mobile payment solution to find the one that best suits your needs and preferences.
Regardless of which mobile payment option you choose, always prioritize security, protect your personal information, and follow best practices to ensure a safe and hassle-free payment experience.