
What is Find My Chromebook?
Find My Chromebook is a powerful feature that allows you to locate your Chromebook if it gets misplaced or stolen, ensuring the safety of your device and personal information. By enabling this feature, you can remotely track the location of your Chromebook, ring it to help you find it in your immediate surroundings, lock it to prevent unauthorized access, or even erase all the data to protect your privacy.
As the name suggests, Find My Chromebook is similar to Find My iPhone or Find My Device for Android devices. It provides peace of mind knowing that even if your Chromebook is lost or stolen, you have the tools to assist in its recovery or protect your sensitive data.
Enabling Find My Chromebook is easy and can be done through the Google Admin console if your Chromebook is managed by an organization, or through your Google account settings if you are using a personal Chromebook. Once enabled, you can access the Find My Chromebook features from any device with internet access, making it convenient and accessible.
Whether you left your Chromebook at a café, misplaced it at home, or it was stolen while traveling, Find My Chromebook can help you locate it quickly and take appropriate action to secure your device and data.
With Find My Chromebook, you have an extra layer of protection for your valuable device, making it an essential feature to enable. In the next sections, we will explore the various functionalities offered by Find My Chromebook, allowing you to fully utilize this invaluable tool.
Enabling Find My Chromebook
In order to benefit from the features provided by Find My Chromebook, you need to enable it on your device. The process to enable Find My Chromebook may vary slightly depending on whether your Chromebook is managed by an organization or if you are using a personal device. Nevertheless, the steps are straightforward, and you’ll have Find My Chromebook up and running in no time.
If your Chromebook is managed by an organization:
- Open your Chrome browser and navigate to the Google Admin console.
- Sign in with your administrator account.
- Go to the “Devices” section and select “Chrome devices.”
- Find your Chromebook in the list and click on it to access its settings.
- Scroll down to the “Find My Chromebook” option and toggle it to “On.”
- Save the changes, and Find My Chromebook will be enabled for your device.
If you are using a personal Chromebook:
- Open your Chrome browser and sign in with your Google account.
- Click on your profile picture in the top-right corner and select “Settings.”
- Scroll down and click on “Advanced” to expand the settings menu.
- Under the “Privacy and security” section, find “Find My Device” and toggle it to “On.”
- Follow the prompts to complete the setup.
Once Find My Chromebook is enabled, you can access its features by visiting the Find My Chromebook website and signing in with your Google account credentials.
It’s important to note that you need to ensure your Chromebook is connected to the internet for the Find My Chromebook features to work effectively. Additionally, make sure that location services are enabled on your device to accurately track its location.
Enabling Find My Chromebook is a proactive step towards safeguarding your device and your data. With this powerful tool at your disposal, you can have peace of mind knowing that you have a way to track and protect your Chromebook, even in the event of loss or theft.
Locating Your Chromebook Using Find My Chromebook
One of the key features of Find My Chromebook is the ability to locate the whereabouts of your device when it goes missing. Whether you left it at a friend’s house or misplaced it in your own home, Find My Chromebook can help you pinpoint its location with ease.
To locate your Chromebook using Find My Chromebook, follow these steps:
- Open a web browser on your computer or another device.
- Visit the Find My Chromebook website.
- Sign in with the Google account that is associated with your Chromebook.
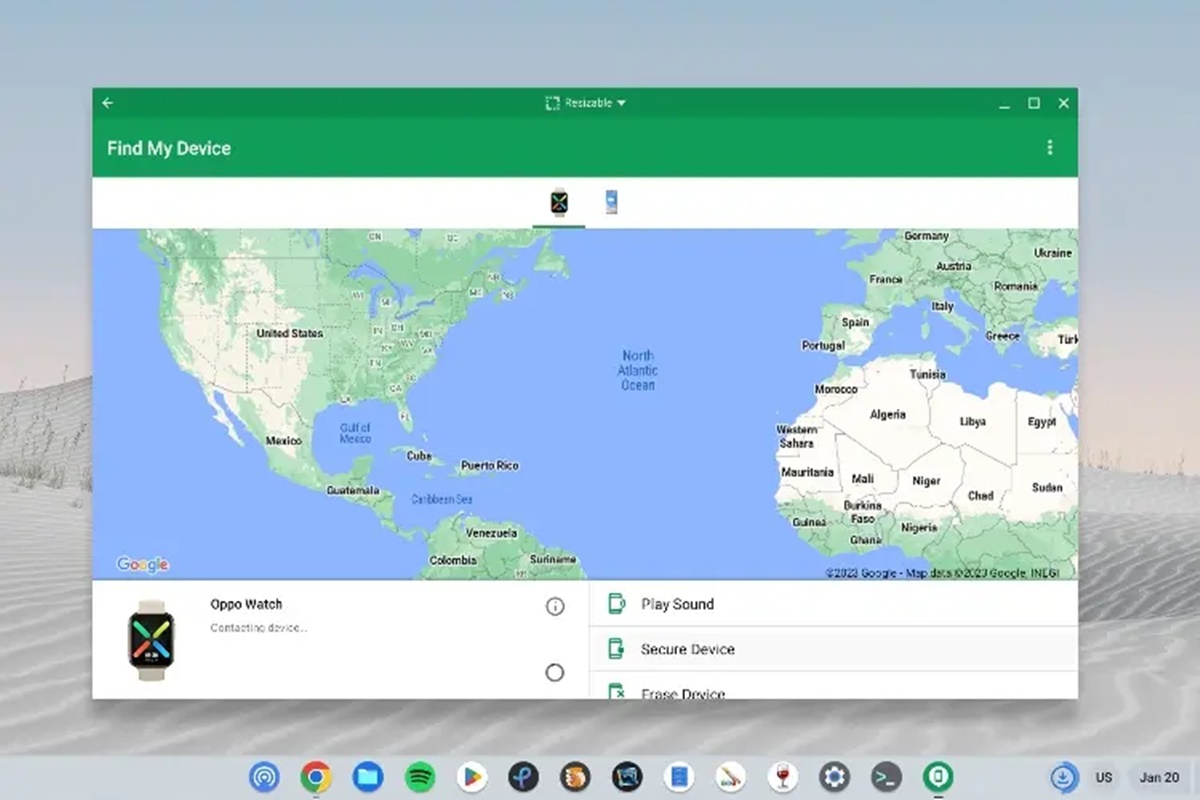
- After signing in, you will see a map with the current location of your Chromebook, provided that it is connected to the internet.
- If your Chromebook is not currently online, you will see its last known location on the map.
With the location information provided by Find My Chromebook, you can take appropriate action to retrieve your device. If you left it at a specific location, simply follow the map’s directions to get there and recover your Chromebook.
However, if you suspect that your Chromebook has been stolen, it’s important to prioritize your safety. In such cases, it is recommended to report the theft to the local authorities and provide them with the location information provided by Find My Chromebook. They can take the necessary steps to recover your device.
It’s worth noting that Find My Chromebook’s location accuracy can vary depending on a few factors. Make sure that your Chromebook is connected to the internet and that location services are enabled to ensure the best possible accuracy. Additionally, take into account that the reported location may be an estimate, especially if the device’s internet connection is unstable or if it has been moved since the last known location.
Locating your Chromebook using Find My Chromebook removes the stress and uncertainty of not knowing where your device is. With just a few simple steps, you can find its location and take the necessary steps to retrieve it.
Ringing Your Chromebook Using Find My Chromebook
Have you ever misplaced your Chromebook and wished there was a way to make it emit a sound to help you locate it? With Find My Chromebook, this is possible. The ringing feature allows you to make your Chromebook emit a loud sound, even if it is on silent or in sleep mode, making it easier to find within your surroundings.
To ring your Chromebook using Find My Chromebook, follow these simple steps:
- Open a web browser on your computer or another device.
- Go to the Find My Chromebook website.
- Sign in with the Google account associated with your Chromebook.
- Once signed in, you will see a list of devices associated with your account.
- Locate your Chromebook in the list and click on the “Ring” button next to it.
Upon clicking the “Ring” button, your Chromebook will immediately start emitting a loud and distinctive sound, making it easier for you to locate it. This can be especially helpful if you had misplaced your device in a room, under a pile of papers, or in some other area where it might not be easily visible.
Keep in mind that in order for this feature to work, your Chromebook must be powered on and connected to the internet. Additionally, even if your Chromebook is in silent mode or sleep mode, it will still ring when activated through Find My Chromebook.
The ringing feature is not only useful for locating a misplaced Chromebook within your own home or office but also helpful for situations where you believe your device may have been taken without your knowledge. By activating the ringing feature, you can potentially deter the thief and draw attention to their actions, increasing the chances of recovering your Chromebook.
With the ringing feature of Find My Chromebook, you have a powerful tool at your disposal to assist in locating your device, whether it’s lost in the couch cushions, hidden in a drawer, or even in the hands of an unauthorized person.
Locking Your Chromebook Using Find My Chromebook
Losing a Chromebook is not just about the physical device; it’s also about protecting the sensitive information and personal data stored on it. With Find My Chromebook, you have the ability to remotely lock your device, ensuring that unauthorized individuals cannot access your files and personal information.
To lock your Chromebook using Find My Chromebook, follow these steps:
- Open a web browser on your computer or another device.
- Visit the Find My Chromebook website.
- Sign in with the Google account associated with your Chromebook.
- Locate your Chromebook in the list of devices and click on the “Lock” button next to it.
- Set a new password to be used for unlocking your Chromebook.
- Add a message or contact information that will be displayed on the locked screen.
- Click on “Lock” to initiate the locking process.
Once the locking process is initiated, your Chromebook will immediately be locked with the new password you set. The lock screen will display the message or contact information you added, providing instructions for how to reach you if someone finds your device.
It’s important to note that locking your Chromebook using Find My Chromebook is a powerful security measure, but it’s not foolproof. If someone has physical access to your device, they may be able to remove the lock by performing a powerwash or other methods. Therefore, it’s crucial to report any lost or stolen Chromebooks to the appropriate authorities and take additional measures to protect your personal information.
Locking your Chromebook is particularly useful if you believe your device has been stolen or if you misplaced it in a public setting. By locking it remotely, you can ensure that your files, accounts, and personal data remain secure until you are able to recover or retrieve your Chromebook.
By utilizing the locking feature of Find My Chromebook, you have the means to protect your information and regain control over your device, even in the face of loss or theft.
Erasing Data from Your Chromebook Using Find My Chromebook
In situations where you believe your Chromebook is lost or stolen, and you fear that your personal data may be compromised, Find My Chromebook offers a powerful feature that allows you to remotely erase all the data on your device. This ensures that your sensitive information remains protected and inaccessible to unauthorized individuals.
Before proceeding with data erasure, it’s essential to understand that this action is irreversible. Once you initiate the data erasure process, all files, settings, and personal data on your Chromebook will be permanently deleted. Therefore, it’s crucial to consider this option as a last resort, and only when you are confident that you will not be able to recover or retrieve your Chromebook.
To erase the data from your Chromebook using Find My Chromebook, follow these steps:
- Access the Find My Chromebook website using a web browser on another device.
- Log in with the same Google account associated with your Chromebook.
- Locate your Chromebook in the list of devices and click on the “Erase” button next to it.
- Confirm the data erasure by clicking on “Erase” again.
Once you confirm the data erasure, the process will begin immediately. Your Chromebook will be remotely wiped, removing all files and personal information. This action protects your data from falling into the wrong hands and allows you to safeguard your privacy.
It’s worth noting that the erasure process may take some time, depending on the amount of data on your Chromebook. Once the process is complete, your Chromebook will be restored to its factory settings, essentially returning it to its original state when you first acquired it.
Keep in mind that data erasure is an extreme action and should only be used when you have exhausted all other options and are certain that your Chromebook is lost or irretrievable. It’s important to have regular backups of your important data to minimize the impact of data loss in such situations.
By using the data erasure feature of Find My Chromebook, you can have peace of mind knowing that your personal information is secure, even in the unfortunate event of losing your device.
Additional Tips for Using Find My Chromebook
While Find My Chromebook offers powerful features to help you locate, protect, and secure your device, there are a few additional tips that can enhance your experience and ensure the effectiveness of this valuable tool.
1. Keep your Chromebook connected to the internet: For Find My Chromebook to work, it requires an active internet connection. Make sure your device is connected to a Wi-Fi network or has a cellular data connection enabled. This will allow you to track the location, ring the device, and perform other actions remotely.
2. Enable location services: To accurately track the location of your Chromebook, ensure that location services are enabled in your device settings. This will provide more precise location information when using Find My Chromebook.
3. Regularly check the Find My Chromebook website: Make it a habit to periodically check the Find My Chromebook website to ensure that the feature is enabled and functioning correctly. This can help you quickly identify any issues and take appropriate action.
4. Report lost or stolen Chromebooks: If you believe your Chromebook has been lost or stolen, report it to the local authorities. Provide them with the necessary information, including the Chromebook’s serial number and the location insights provided by Find My Chromebook. This will increase the chances of recovery and potential prosecution of the responsible party.
5. Secure your Google account: Protecting your Google account is crucial for the security of your Chromebook. Ensure that you have a strong password, enable two-factor authentication, and regularly review and update your security settings. This will prevent unauthorized access to your Google account and any associated devices.
6. Consider additional security measures: While Find My Chromebook offers valuable security features, it’s always a good idea to have additional layers of protection. Consider installing security software, using a lock screen password, and keeping your Chromebook physically secure to prevent unauthorized access.
By following these additional tips, you can maximize the effectiveness of Find My Chromebook and ensure the safety of your device and personal data. Remember, prevention is key, so take the necessary precautions to minimize the chances of losing your Chromebook in the first place.