
What is a Selfie Light?
A selfie light is a device designed to enhance the lighting quality for selfies and other types of photography. It is a portable lighting accessory that can be attached to your smartphone, camera, or used separately.
The purpose of a selfie light is to provide adequate and flattering lighting in any setting, especially in low light conditions. These lights are designed to eliminate unflattering shadows, reduce red-eye, and create a soft and even illumination on the subject’s face.
Selfie lights come in various types, including clip-on lights, ring lights, and portable LED lights. They typically have adjustable brightness levels and different color temperature settings to suit different skin tones and ambient lighting conditions.
Most selfie lights are powered by batteries or USB charging, making them convenient to use on the go. Many models also offer wireless connectivity and compatibility with smartphone apps, allowing you to control the light settings and adjust the color temperature or intensity with ease.
With the rise of social media platforms and the increasing popularity of selfies, selfie lights have become a must-have accessory for anyone looking to enhance their self-portraits. Whether you are a professional photographer, an influencer, or simply an individual who loves taking pictures, a selfie light can significantly improve the overall quality of your photos.
By providing a well-balanced and flattering light source, selfie lights help to bring out the natural beauty in your selfies, ensuring that your face is evenly lit and details are sharp. They also help to reduce the appearance of blemishes and imperfections, giving you that coveted flawless look.
Overall, a selfie light is a powerful tool that can take your selfie game to the next level. With its ability to enhance lighting conditions and create stunning effects, it is a must-have accessory for anyone who wants to capture the perfect selfie.
Types of Selfie Lights
Selfie lights come in a variety of types, each offering unique features to enhance your selfie-taking experience. Understanding the different types can help you choose the one that best suits your needs and preferences. Here are some common types of selfie lights:
- Clip-on Lights: These selfie lights are small and compact, designed to be attached to your smartphone or tablet. They typically clamp onto the device and provide a direct light source for your selfies. Clip-on lights are portable and easy to use, making them a popular choice among casual selfie-takers.
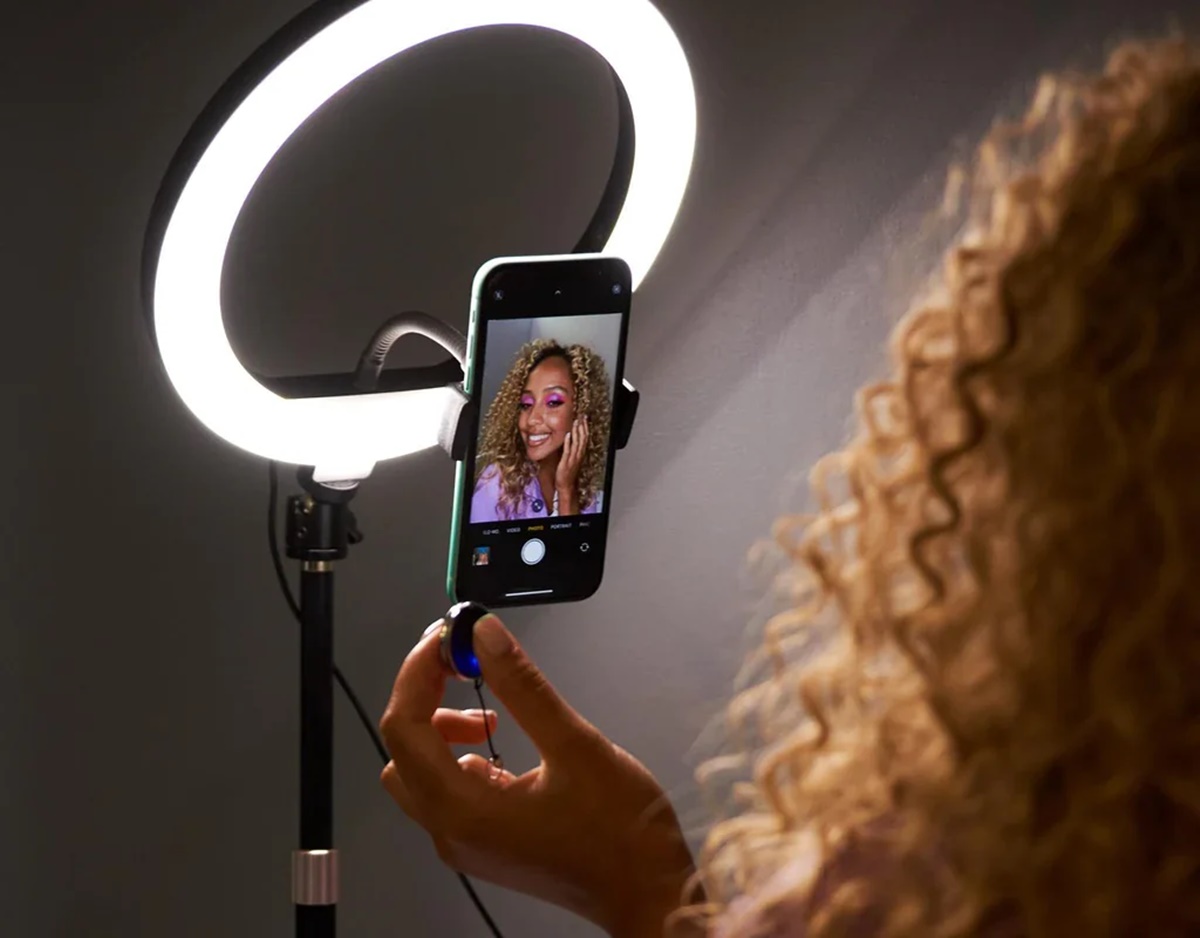
- Ring Lights: Ring lights are circular lights that fit around your smartphone’s camera, creating a soft and even illumination. They are often equipped with multiple LED bulbs that can be dimmed or brightened to adjust the intensity of the light. Ring lights provide a flattering light source that evenly illuminates your face, reducing shadows and enhancing your features.
- Portable LED Lights: These selfie lights are standalone devices that you can use separately or attach to a tripod. They come in various shapes and sizes, with adjustable brightness levels and color temperature settings. Portable LED lights are versatile and provide a powerful and customizable lighting solution for your selfies.
- Camera-mounted Lights: If you are a professional photographer or vlogger, camera-mounted lights are a great option. These lights can be attached to the top of your camera, providing consistent and high-quality lighting for your photography needs. They often offer advanced features like adjustable color temperature, intensity control, and diffusion filters.
- Selfie Cases: Selfie cases are smartphone cases that come with built-in selfie lights. These cases provide both protection for your phone and an integrated light source. They are lightweight and convenient, ensuring that you always have the perfect lighting for your selfies.
Each type of selfie light offers its own set of advantages and considerations. It’s important to consider factors such as portability, power source, adjustability, and compatibility with your devices when choosing the right type for your needs. Whether you prefer a clip-on light for its simplicity and convenience or a versatile portable LED light for more professional results, there’s a selfie light out there to suit your preferences.
Choosing the Right Selfie Light
With so many options available, choosing the right selfie light can seem overwhelming. However, considering a few key factors can help you make an informed decision. Here are some important considerations when selecting a selfie light:
- Brightness and Intensity: Look for a selfie light with adjustable brightness levels. This will allow you to control the amount of light emitted and customize it according to your preferences and surroundings. Opt for a light that offers a wide range of brightness options to accommodate different lighting conditions.
- Color Temperature: Consider the color temperature settings of the selfie light. Some lights offer a range of color temperatures, allowing you to achieve warm, neutral, or cool lighting. This can be beneficial as it enables you to match the lighting to your skin tone or the mood you want to create in your photos.
- Power Source: Determine whether the selfie light is battery-powered or rechargeable via USB. Battery-powered lights are convenient for on-the-go use, but it’s important to consider the battery life and whether it’s easily replaceable. Rechargeable lights are more environmentally friendly and can save you money in the long run.
- Compatibility: Check if the selfie light is compatible with your smartphone, camera, or other devices. Some lights are versatile and can be used with various devices, while others may have specific requirements. Ensure that the light can be easily attached and positioned to provide optimal lighting for your selfies.
- Portability and Size: Consider the size and portability of the selfie light. If you frequently travel or want to carry it with you, look for a compact and lightweight option. Portable selfie lights are ideal for on-the-go use, allowing you to capture well-lit photos wherever you are.
- Additional Features: Take note of any additional features that the selfie light may offer. Some lights have built-in Bluetooth connectivity, allowing you to control the light settings through a mobile app. Others may have diffusers or filters to create different lighting effects. Assess these features to determine if they align with your needs and preferences.
By taking these factors into account, you can find a selfie light that suits your specific requirements. Keep in mind that the perfect selfie light may vary depending on your individual preferences and goals. Consider what features are most important to you in order to make the best choice for optimal lighting and stunning selfies.
Positioning the Selfie Light
Once you have chosen the right selfie light, knowing how to position it properly is essential to achieve flattering and well-lit selfies. Here are some tips on how to position your selfie light:
- Front Lighting: Position the selfie light directly in front of you, slightly above or to the side of your smartphone or camera. This will ensure that the light illuminates your face evenly, reducing shadows and creating a flattering effect. Experiment with the angle and distance to find the most flattering placement for your face shape and features.
- Avoid Harsh Shadows: Be mindful of the shadows cast by the selfie light. If the light is too close or too intense, it can create harsh shadows on your face. Adjust the distance or brightness of the light to minimize these shadows and create a softer and more even illumination.
- Consider Reflections: Pay attention to reflections that may be caused by the selfie light. Metallic surfaces, glasses, or even glossy phone screens can reflect the light and create unwanted glare. Adjust the position of the light or use accessories like diffuser filters to reduce reflections and achieve a more balanced lighting effect.
- Experiment with Angles: Don’t be afraid to experiment with different angles when positioning the selfie light. Tilting the light slightly to the side or angling it from above can create interesting shadows or highlights that add depth and dimension to your selfies. Play around with different angles to find the most flattering and unique lighting setup for your photos.
- Consider the Background: Take into account the background of your selfies when positioning the light. Ensure that the light is illuminating you without casting excessive light on the background. This will help to maintain a balanced and visually appealing composition in your photos.
- Adjust for Different Lighting Conditions: If you are taking selfies in different lighting conditions, adjust the position and intensity of the selfie light accordingly. In brighter environments, you may need to position the light closer or increase the intensity to ensure proper illumination. On the other hand, in low light situations, you may need to position the light slightly further away or reduce the intensity to avoid overexposure. Experimentation is key to finding the perfect balance.
Remember, the positioning of the selfie light can have a significant impact on the outcome of your selfies. Take the time to experiment with different placements and adjust the settings to achieve the desired lighting effect. With practice, you will become more familiar with how to position the light for stunning and well-lit selfies.
Adjusting the Brightness and Intensity
One of the key features of a selfie light is the ability to adjust the brightness and intensity of the light source. By controlling these settings, you can create the desired lighting effect for your selfies. Here are some tips on how to adjust the brightness and intensity of your selfie light:
- Start with a Lower Setting: When capturing your selfies, start with a lower brightness setting on your selfie light. This will help to avoid overexposure and harsh lighting. You can gradually increase the brightness if needed, depending on the lighting conditions and the desired effect.
- Check for Shadows and Highlights: As you adjust the brightness and intensity, pay close attention to the presence of shadows and highlights on your face. Aim for a balanced and even illumination, ensuring that no areas are overly bright or excessively shadowed. Make adjustments as necessary to achieve a flattering and well-lit result.
- Consider the Surrounding Lighting: Take into account the ambient lighting conditions in your environment. If the surrounding light is already bright, you may need to decrease the intensity of your selfie light to avoid overexposure. Conversely, if the surrounding light is dim, increasing the intensity can help create a well-lit selfie.
- Create a Soft and Diffused Light: To achieve a softer and more flattering light, consider using a diffuser with your selfie light. Diffusers help to scatter the light, reducing harsh shadows and providing a more gentle illumination. This can create a smoother and more natural look in your selfies.
- Experiment with Different Settings: Don’t hesitate to experiment with different brightness and intensity settings to achieve different moods and effects in your selfies. Higher brightness levels can create a bright and vibrant look, while lower levels can create a more intimate atmosphere. Play around with the settings to find the perfect balance for each specific selfie.
- Use Editing Tools if Necessary: If you find that the lighting in your selfies is not exactly as desired, remember that you can always make adjustments during the editing process. Various photo editing apps and software allow you to further enhance the brightness, contrast, and intensity of your selfies. However, it’s important to try to achieve the best lighting possible during the capture to minimize the need for extensive editing.
By adjusting the brightness and intensity of your selfie light, you can create different effects and moods in your selfies. Pay attention to the lighting conditions and your desired outcome, and make subtle adjustments until you achieve the perfect lighting for your photos. With practice and experimentation, you will develop a better understanding of how to manipulate the settings to capture stunning and well-lit selfies.
Avoiding Shadows and Glare
Shadows and glare can detract from the quality of your selfies, making your face appear unevenly lit or causing distracting reflections. Follow these tips to effectively avoid shadows and glare when using a selfie light:
- Position the Light Correctly: Take the time to position the selfie light in front of you, ensuring it is at a slight angle above or to the side of your phone or camera. This positioning helps to minimize shadows on your face and create a more even and flattering illumination.
- Keep the Light at the Right Distance: Finding the right distance between the selfie light and your face is crucial to avoiding unwanted shadows. If the light is too close, it can create harsh shadows, while if it’s too far away, it may not provide sufficient illumination. Experiment with different distances until you find the optimal balance.
- Use Diffusion Filters: Diffusion filters are accessories designed to soften and scatter the light emitted by your selfie light. They can help to minimize harsh shadows, create a more diffused and natural-looking light source, and reduce the chance of glare. Consider using a diffusion filter appropriate for your specific selfie light to achieve a softer and more flattering lighting effect.
- Be Mindful of Reflections: Glare and reflections can be caused by shiny surfaces, such as glasses or metallic objects, that reflect the light from your selfie light. To minimize glare, adjust the angle of your face or the position of the light to avoid direct reflections. You can also try tilting your glasses slightly or using an anti-reflective coating on them.
- Control the Intensity of the Light: Adjust the brightness and intensity of your selfie light to ensure it is neither too harsh nor too dim. An overly bright light can create harsh shadows, while a light that is too dim may cause underexposure and uneven lighting. Finding the right balance will help you avoid unwanted shadows and achieve a well-lit and balanced selfie.
- Consider the Background: The background of your selfie can also contribute to the presence of shadows and glare. Choose a background that is not overly glossy or reflective to minimize the chance of distracting reflections. Additionally, be aware of the distance between yourself and the background to ensure that the light is directed towards your face and not causing unwanted shadows behind you.
By following these tips, you can effectively avoid shadows and glare in your selfies, resulting in well-lit and visually pleasing photos. Take the time to adjust the position, distance, and brightness of your selfie light as needed to ensure that your face is evenly illuminated and free from distracting shadows or reflections. With a little practice and attention to detail, you can capture stunning selfies with professional-quality lighting.
Using Accessories with the Selfie Light
In addition to the selfie light itself, there are various accessories that can further enhance your selfie-taking experience and the overall quality of your photos. Here are some accessories you can consider using in conjunction with your selfie light:
- Diffusion Filters: Diffusion filters are transparent accessories that help to soften and diffuse the light emitted by your selfie light. They can create a more natural and flattering lighting effect by reducing harsh shadows and providing a more gentle illumination. Diffusion filters come in different types and densities, allowing you to customize the level of diffusion according to your preferences.
- Color Filters: Color filters, also known as gels, are accessories that allow you to add a tint or color to the light emitted by your selfie light. They can create unique and creative lighting effects, adding a touch of warmth, coolness, or dramatic flair to your selfies. Color filters are available in various shades and can help to set a specific mood or match the atmosphere of your surroundings.
- Selfie Sticks and Tripods: Selfie sticks and tripods are essential tools for achieving stability while taking selfies. They can help you position your phone or camera at the desired angle and distance, allowing you to capture yourself with the ideal lighting setup. By using a selfie stick or tripod, you can ensure that the selfie light is positioned correctly and consistently in relation to your face, resulting in more professional-looking selfies.
- Remote Shutter: A remote shutter is a device that allows you to wirelessly trigger the capture of your selfie without physically touching your phone or camera. This can be especially useful when using a selfie light, as it minimizes the chance of accidentally moving or shaking the device while taking the photo. With a remote shutter, you can achieve more stable and shake-free selfies, resulting in clearer and sharper images.
- Reflectors: Reflectors are accessories that can help redirect and manipulate the light from your selfie light. They are typically made of a reflective material, such as silver or gold, and can be used to bounce and fill light onto your face. Reflectors are especially useful when taking selfies in challenging lighting conditions or when you need to balance out uneven lighting on your face.
These accessories can greatly enhance the versatility and creative possibilities when using a selfie light. Experiment with different combinations to achieve unique and professional-looking selfies. Keep in mind that not all accessories may be compatible with your specific selfie light model, so be sure to check the compatibility and specifications before making a purchase.
By utilizing these accessories, you can elevate your selfie-taking game and create visually striking and well-lit photos. Whether you want to soften the lighting, add a touch of color, achieve stability, or redirect the light, these accessories offer a range of options to enhance the capabilities and quality of your selfies.
Taking Stunning Selfies with a Selfie Light
Having a selfie light is a game-changer when it comes to taking high-quality and visually appealing self-portraits. Here are some tips to help you capture stunning selfies using a selfie light:
- Find the Right Lighting Setup: Experiment with different angles, distances, and positions of your selfie light to find the optimal lighting setup for your face. Adjust the brightness and intensity as needed to achieve a well-balanced and flattering illumination.
- Pay Attention to Facial Expression and Pose: Consider your facial expression and pose when taking selfies. Relax your face, smile naturally, and find a pose that complements your features. The selfie light will enhance your facial details, so ensure that you are conveying the desired emotions and capturing your best angles.
- Use a Clean Background: Choose a simple and clutter-free background that allows you to be the focal point of the photo. A clean background will help draw attention to your face and make your selfies more visually appealing.
- Experiment with Different Filters and Effects: Many selfie light apps or photo editing tools offer various filters and effects to further enhance your selfies. Experiment with different styles and effects to add a touch of creativity or enhance the mood of your photos.
- Experiment with Different Accessories: Try using diffusers, color filters, or reflectors in combination with your selfie light to add depth, warmth, or unique light effects to your selfies. These accessories can help you achieve professional-looking and creatively captivating self-portraits.
- Take Advantage of Editing Tools: After capturing your selfies, you can further enhance them using photo editing tools. Adjust the brightness, contrast, and color balance as needed to achieve the desired look. Be mindful not to overdo the editing, as you want your selfies to appear natural and true to life.
- Practice Selfie Photography: As with any skill, practice makes perfect. Familiarize yourself with your selfie light, accessories, and the best angles and lighting setups for your features. You’ll become more comfortable and confident in taking selfies, resulting in more stunning and natural-looking photos.
Remember, the selfie light is a tool to enhance your selfies, but it is your creativity, personality, and attention to detail that make the photos truly stunning. Experiment, have fun, and embrace your unique style to create captivating and visually striking self-portraits with the help of your selfie light.
Tips for Using a Selfie Light
Using a selfie light effectively can elevate your selfie game and ensure that you capture the best possible photos. Here are some tips to help you make the most out of your selfie light:
- Experiment with Different Angles and Positions: Try different angles and positions for your selfie light to find the most flattering and appealing lighting setup. Angling the light from above or the side can help create interesting shadows or highlights that enhance your features.
- Adjust the Brightness to Suit the Environment: Pay attention to the lighting conditions around you and adjust the brightness of your selfie light accordingly. Increase the brightness in low-light environments and decrease it in well-lit areas to achieve balanced lighting in your selfies.
- Take Advantage of Natural Light: If possible, use your selfie light in combination with natural light sources, such as windows or outdoor settings. This can create a more natural and flattering lighting effect, resulting in more vibrant and lifelike selfies.
- Don’t Overdo the Editing: While it’s tempting to rely on heavy editing to enhance your selfies, strive to capture the best lighting possible during the photo shoot. Minimize the need for extensive editing by adjusting the brightness and intensity of your selfie light, and only make subtle edits for minor enhancements.
- Use the Selfie Light as a Fill Light: Instead of relying solely on your selfie light as the main light source, consider using it as a fill light to complement existing ambient lighting. This can help to soften shadows and add depth to your selfies.
- Experiment with Color Temperature: Some selfie lights offer adjustable color temperature settings. Don’t be afraid to experiment with different color temperatures to achieve different moods and effects in your selfies. Warm tones can create a cozy and inviting atmosphere, while cool tones can add a touch of elegance and freshness.
- Showcase Your Personality: While a selfie light can enhance the technical aspects of your selfies, don’t forget to let your personality shine through. Use your selfies as an opportunity to express your individuality, and experiment with different poses and facial expressions to capture your unique style.
- Take Your Time: Don’t rush when taking selfies with a selfie light. Take your time to find the right lighting setup, adjust the settings as needed, and experiment with different angles and poses. Patience and attention to detail will result in more polished and visually appealing selfies.
By following these tips, you can make the most out of your selfie light and capture stunning and captivating selfies. Remember to have fun, be creative, and embrace your unique style to create selfies that truly reflect your personality and individuality.
Common Mistakes to Avoid with Selfie Lights
Using a selfie light can significantly enhance the quality of your selfies, but it’s important to avoid certain mistakes that can negatively impact the outcome of your photos. Here are some common mistakes to avoid when using selfie lights:
- Using the Wrong Color Temperature: Pay attention to the color temperature of your selfie light and adjust it according to your surroundings. Using the wrong color temperature can result in unnatural and unflattering skin tones.
- Positioning the Light Incorrectly: Proper positioning is key to achieving flattering lighting in your selfies. Avoid placing the light too close or too far away from your face, as this can cause harsh shadows or underexposure.
- Overexposing Your Photos: While it’s important to have adequate lighting, be mindful not to overexpose your photos by setting the brightness or intensity too high. Overexposed photos can result in loss of details and an unnatural-looking appearance.
- Ignoring the Surrounding Lighting: Consider the ambient lighting conditions when using a selfie light. Ignoring the existing lighting can lead to a mismatched and inconsistent lighting effect in your selfies.
- Forgetting to Clean the Lens: A dirty lens can affect the quality of your selfies, regardless of how good your selfie light is. Before taking selfies, make sure to clean your phone or camera lens to avoid smudges or blurry photos.
- Relying Too Heavily on Editing: While editing can enhance your selfies, it’s important to strive for the best lighting during the photo shoot. Avoid relying too heavily on editing to compensate for poor lighting, as it can result in unnatural-looking photos.
- Using Incompatible Accessories: When using accessories like diffusion filters or color gels, ensure that they are compatible with your specific selfie light model. Incompatible accessories may not fit or provide the desired effects, leading to frustration and subpar results.
- Settling for One Angle: Don’t limit yourself to one angle when taking selfies with a selfie light. Experiment with different angles and positions to find the most flattering and unique perspectives that showcase your best features.
Avoiding these common mistakes will help you make the most out of your selfie light and capture high-quality and visually appealing selfies. Practice and attention to detail will enable you to master the art of using a selfie light and create stunning self-portraits that you can be proud of.