
How Does a Microchip Scanner Work?
A microchip scanner is a vital tool used for identifying and retrieving information from microchips implanted in animals. It works by emitting a radio frequency signal that activates the microchip and allows the scanner to read the encoded data. The process involves several key steps:
- Powering On: Before using the microchip scanner, ensure that it is fully charged or connected to a power source. Turn on the scanner and wait for it to initialize.
- Approaching the Animal: Approach the animal calmly and gently to minimize any stress or discomfort. Slowly scan the area where the microchip is typically implanted, such as the neck or shoulder region.
- Scanning Technique: Hold the microchip scanner at an appropriate distance from the animal’s body, following the manufacturer’s instructions. Sweep the scanner in a systematic motion, ensuring that you cover the entire scanning area.
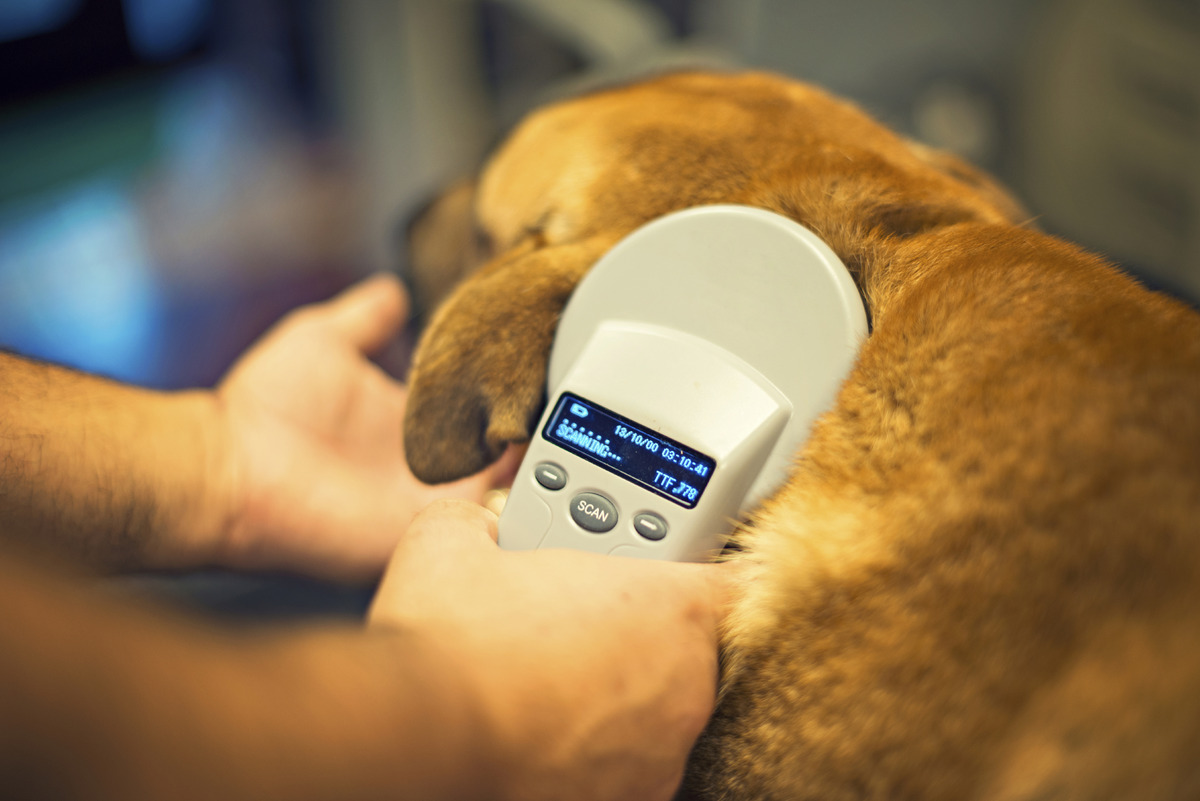
- Signal Activation: When the scanner comes close to a microchip, it emits a low-frequency radio wave that activates the microchip to transmit its unique identification code.
- Reading the Data: The microchip scanner receives and interprets the transmitted code, displaying it on the scanner’s screen or through audible signals. This code typically consists of a series of alphanumeric characters.
Microchips used in animals typically follow a universal standard, such as ISO 11784/11785 or FDX-B. These standards ensure compatibility and facilitate the sharing of data across different scanners and databases.
Once you have obtained the microchip number, it is essential to use reliable online databases or contact the appropriate microchip registry to access the pet owner’s contact information. This information can then be used to reunite lost or missing pets with their rightful owners.
Microchip scanners come in various types, including handheld scanners and fixed scanners found in veterinary clinics or animal shelters. Some scanners even have advanced features such as Bluetooth connectivity or the ability to store scanned data for later retrieval.
By understanding how a microchip scanner works and using it correctly, you can greatly increase the chances of reuniting lost pets with their families and contribute to the overall welfare and safety of animals.
Step-by-Step Guide: Using a Microchip Scanner
Using a microchip scanner may seem intimidating at first, but with a step-by-step guide, you can easily navigate the process. Here’s a handy walkthrough to help you use a microchip scanner effectively:
- Prepare the Scanner: Ensure the microchip scanner is fully charged or connected to a power source. Turn it on and wait for it to initialize.
- Approach the Animal: Approach the animal calmly and gently to minimize any stress. Gain the animal’s trust and make them feel comfortable.
- Locate the Scanning Area: Identify the typical area where microchips are implanted, such as the neck or shoulder region. This is where you’ll focus your scanning efforts.
- Hold the Scanner: Hold the microchip scanner at an appropriate distance from the animal’s body, following the manufacturer’s instructions. Make sure you have a good grip on the scanner.
- Sweep the Scanning Area: Begin scanning by slowly sweeping the area where the microchip is likely located. Move the scanner in a systematic motion to cover the entire region.
- Watch for an Alert: Pay attention to any visual or auditory alerts from the microchip scanner. This indicates that a microchip has been detected.
- Read and Record the Data: Once the microchip is detected, read the unique identification code displayed on the scanner’s screen. Make sure to record this code accurately.
- Verify the Information: Use reliable online databases or contact the appropriate microchip registry to verify the microchip number and access the pet owner’s contact information.
- Return Lost Pets: If you scan a lost pet and obtain the owner’s contact details, reach out to them promptly. Help facilitate the reunion of the lost pet with their family.
Remember, accuracy and patience are essential when using a microchip scanner. Take your time, follow the proper scanning technique, and double-check the recorded data before proceeding. Additionally, maintain a calm and gentle approach to ensure the animal feels safe throughout the process.
By following this step-by-step guide, you can confidently utilize a microchip scanner to assist in reuniting lost pets with their loving families.
Preparing to Scan
Before using a microchip scanner, it’s important to make certain preparations to ensure a successful scanning process. Taking these steps will help streamline the scanning experience and enhance your chances of accurately retrieving the microchip information:
1. Familiarize Yourself with the Scanner: Read the instruction manual provided by the manufacturer to understand the specific functionalities and features of the microchip scanner. This will help you use it effectively and troubleshoot any potential issues.
2. Ensure Proper Lighting: Choose a well-lit area for scanning. Adequate lighting will make it easier to locate the scanning area and read the information displayed on the scanner’s screen.
3. Check the Scanner’s Battery Level: Make sure the microchip scanner is fully charged or connected to a power source. A low battery can lead to inaccurate readings or interruptions during the scanning process.
4. Minimize External Distractions: Find a quiet and calm environment to minimize distractions for both yourself and the animal. Unnecessary noises or sudden movements can make the scanning process more challenging and potentially stress the animal.
5. Gather Necessary Tools: Have a pen and a notepad or a digital device ready to record the microchip information. This will allow you to accurately document the unique identification numbers for verification and potential future reference.
6. Approach the Animal with Care: Gain the trust of the animal by using gentle and reassuring movements. Approach slowly and avoid sudden actions that might startle or distress the animal. Patience and a calm demeanor will improve the chances of a successful scan.
7. Obtain Consent: If you are scanning an animal that is not in your care, such as a stray or a pet from a shelter, always seek permission from the owner or responsible party before scanning. Respecting the animal’s well-being and the owner’s rights is crucial.
8. Educate Yourself on Microchip Standards: Familiarize yourself with the microchip standards used in your region, such as ISO 11784/11785 or FDX-B. Understanding these standards will enable you to better interpret and validate the microchip information.
By following these preparation steps, you can approach the microchip scanning process with confidence and increase the likelihood of successfully retrieving accurate information from the implanted microchip.
Scanning Techniques
Mastering the scanning techniques is vital to efficiently and accurately retrieve microchip information from an animal. Follow these guidelines to ensure the best possible results:
1. Maintain the Right Distance: Hold the microchip scanner at the recommended distance from the animal’s body. This distance can vary depending on the type of scanner and the animal’s size. Refer to the manufacturer’s instructions for the appropriate scanning distance.
2. Systematic Sweeping Motion: When scanning, use a systematic sweeping motion to cover the entire scanning area. Start at one end and move the scanner across, ensuring that you do not miss any part of the region where the microchip is typically implanted, such as the neck or shoulder area.
3. Slow and Steady: Avoid rushing through the scanning process. Move the scanner slowly and steadily to allow sufficient time for the scanner to detect and read the microchip. Rapid movements may result in missed or inaccurate readings.
4. Vary the Angle: To improve the chances of detecting a microchip, try scanning from multiple angles. Tilt the scanner slightly or approach the scanning area from different directions. Adjusting the angle can help you overcome any potential interference or obstacles.
5. Check for Alerts: Pay attention to any visual or auditory alerts from the scanner that indicate the presence of a microchip. Some scanners may have a built-in LED light or emit a beep when a microchip is detected. Being alert to these signals will aid in identifying the presence of a microchip.
6. Utilize Cross-Pattern Scanning: In addition to the sweeping motion, you can employ a cross-pattern scanning technique. This involves scanning horizontally, then vertically, and repeating the process until you cover the entire scanning area. The cross-pattern technique improves the chances of capturing the microchip’s signal from different directions.
7. Stay Patient: Patience is key when scanning for a microchip. It may take a few passes to detect and successfully read the microchip’s information. Do not give up prematurely or become frustrated. Stay focused and persistent throughout the scanning process.
8. Practice Regularly: Like any skill, scanning techniques improve with practice. Familiarize yourself with the specific functionalities of the scanner and practice scanning on different animals if possible. Refining your scanning techniques will enhance your efficiency and accuracy.
By mastering these scanning techniques, you can confidently and effectively retrieve microchip information from animals, increasing the chances of reuniting lost pets with their owners and ensuring their well-being.
Interpreting the Microchip Number
Once you have successfully scanned an animal and obtained the microchip number, it is important to understand how to interpret the information encoded within it. The microchip number typically consists of a series of alphanumeric characters that provide valuable details. Here’s a guide to help you interpret the microchip number:
1. Manufacturer Code: The first few digits or letters in the microchip number represent the manufacturer code. This code indicates the company or organization that produced the microchip. It is essential to consult the manufacturer database or a reliable online resource to determine the manufacturer associated with the specific code.
2. Country Code: Following the manufacturer code, the microchip number may include a country code. This code indicates the country in which the microchip was registered or assigned. Referencing a country code directory will help you identify the country associated with the microchip.
3. Unique Identification Number: The remaining digits or letters in the microchip number form the unique identification number for the individual animal. This number distinguishes the specific animal and links it to the registered owner’s information in the microchip database.
4. Checksum Digit: Some microchip numbers may include a checksum digit at the end. This additional digit is calculated using a specific algorithm based on the preceding digits. It serves as a validation method, helping to ensure the accuracy and integrity of the microchip number.
It is crucial to cross-reference the microchip number with the appropriate microchip registry or database to retrieve the associated pet owner’s contact information. These registries store crucial details such as the owner’s name, phone number, and address. Contacting the owner promptly can facilitate the reunion of a lost or missing animal with their family.
It is important to note that microchip standards and formats may vary in different regions or countries. Familiarize yourself with the applicable standards in your area to interpret and verify the microchip numbers accurately.
Additionally, keep in mind that the microchip number alone does not provide any behavioral or health information about the animal. It is solely a means of identification and a connection to the owner’s information. If you require additional information about the animal, consult the owner or obtain it through other sources.
By understanding the components of the microchip number and how to interpret them, you can effectively utilize this information to assist in reuniting lost pets with their owners and maintaining accurate records of animal identification.
Verifying the Information
After scanning an animal and obtaining the microchip number, it is crucial to verify the information associated with the microchip. Verifying the information ensures the accuracy of the data and facilitates the process of reuniting lost pets with their owners. Here are some key steps to follow when verifying the microchip information:
1. Check the Microchip Registry: Contact the appropriate microchip registry or use reliable online databases that store microchip information. Enter the microchip number and confirm that the registered owner’s contact details match the information you obtained.
2. Validate the Contact Information: Ensure that the registered owner’s contact information is current and accurate. Pay attention to details such as name, phone number, and address. Cross-check these details with any additional information provided, such as secondary contact numbers or email addresses.
3. Confirm the Animal’s Description: Verify the recorded details about the animal’s breed, color, size, or any distinctive traits. This confirmation helps ensure that the microchip belongs to the scanned animal and avoids any potential mix-up or confusion.
4. Contact the Owner: If the contact information matches and you believe you have found the rightful owner, reach out to them promptly. Inform them about the situation and provide details about where and when the animal was found. Follow any protocols or procedures set by the microchip registry or local authorities.
5. Provide Proof or Documentation: If required, provide evidence or documentation to confirm your legitimacy and establish trust with the owner. This can include photos of the animal or the scanned microchip number as proof of your discovery.
6. Handle Sensitive Information with Care: When communicating with owners and handling their personal information, prioritize privacy and data protection. Comply with local regulations and respect the owner’s privacy rights by securely storing and using the information only for the purpose of reuniting lost pets.
7. Collaborate with Microchip Registries or Local Authorities: In situations where contact cannot be established or the owner is unresponsive, collaborate with the relevant microchip registry or local animal control authorities. They can help facilitate the process of locating and contacting the pet owner.
8. Maintain Accurate Records: Keep a record of the microchip number, the scanning date, and any relevant information about the animal and the owner. These records can assist in future reference or in case of any disputes or inquiries regarding the scanned animal.
By diligently verifying the microchip information, you can ensure that lost pets are reunited with their rightful owners, contributing to their well-being and promoting responsible pet ownership.
Troubleshooting Tips
While using a microchip scanner, you may encounter challenges or unexpected issues. Understanding common troubleshooting techniques will help you overcome these obstacles and ensure a successful scanning process. Here are some troubleshooting tips to consider:
1. Check the Scanner’s Battery: If the scanner is not powering on or experiencing intermittent connectivity issues, the battery might be low or drained. Ensure that the scanner is properly charged or connected to a power source. If necessary, replace the batteries or charge the device before attempting to scan again.
2. Adjust Scanning Distance and Angle: If you are having trouble detecting a microchip, try adjusting the scanning distance or angle. Move closer to the animal or tilt the scanner slightly to enhance the signal reception. Experimenting with different positions or angles can improve the chances of successfully reading the microchip.
3. Verify the Scanning Area: Ensure that you are scanning the appropriate area where the microchip is typically implanted. Double-check the animal’s anatomy and refer to breed-specific guidelines if necessary. Scanning in the wrong area will yield inaccurate results or may not detect a microchip at all.
4. Look for External Interference: External interference, such as metal objects or electronic devices nearby, can disrupt the signal from the microchip and affect the scanning process. Scan in an area free from potential interference to minimize the risk of false readings or incomplete scans.
5. Update Scanner Firmware: Check for any available firmware updates for your microchip scanner. Keeping the scanner’s firmware up to date ensures optimal performance and functionality. Follow the manufacturer’s instructions to download and install any necessary updates.
6. Clean the Scanner: Over time, dust, dirt, or debris can accumulate on the scanner’s lens or sensor, affecting its ability to read microchips accurately. Clean the scanner regularly using a soft, lint-free cloth to remove any dirt or smudges. Be cautious not to scratch or damage the scanner’s surface during the cleaning process.
7. Practice Patience and Persistence: Scanning animals, especially those that are anxious or uncooperative, requires patience and persistence. Allow the animal to relax and gain their trust before attempting to scan again. Establishing a calm and soothing environment can improve the chances of a successful scan.
8. Seek Professional Assistance: If you have exhausted all troubleshooting options and are still experiencing difficulties with the scanner, reach out to the manufacturer’s customer support or consult a professional in the field. They can provide expert guidance and assistance in resolving any technical issues you may encounter.
By following these troubleshooting tips, you can overcome common challenges and maximize the effectiveness of your microchip scanner, increasing the chances of successfully retrieving microchip information and reuniting lost pets with their loved ones.
Tips for Efficiently Scanning Multiple Animals
When scanning multiple animals, efficiency becomes even more crucial to ensure accurate identification and minimize stress for both you and the animals. Here are some tips to help you streamline the process:
1. Prepare a Scanning Area: Designate a specific area for scanning where you can comfortably handle and scan the animals. Ensure the area is well-lit, free from distractions, and has enough space to accommodate each animal.
2. Use a Systematic Approach: Develop a systematic method for scanning multiple animals. Consider scanning the animals in a particular order or grouping them according to similar characteristics to streamline the process.
3. Have Assistance: If possible, have a helper or additional staff member to assist you. One person can handle the animals while the other scans, making the process more efficient and minimizing any potential errors.
4. Implement Tagging or Marking: As you scan each animal, consider using colored tags, collars, or other non-permanent marks to indicate which animals have been scanned. This visual aid can help you keep track of the animals and avoid duplicate scans.
5. Maintain Clear Communication: Establish clear communication with your assistant or any other staff members involved in the scanning process. Use clear instructions to ensure everyone is aware of the best practices and follows the same scanning technique.
6. Streamline Data Recording: Develop a method for efficiently recording the microchip numbers or scanning results. Whether using digital devices or a paper record, ensure the process is organized and easily accessible for future reference.
7. Ensure Proper Restraint: Use appropriate restraint techniques that prioritize the safety and comfort of the animals. This will help minimize stress and allow for smoother scanning procedures.
8. Regularly Check and Maintain Equipment: Take the time to regularly check and maintain your microchip scanner. Clean the device as necessary, ensure proper battery function, and keep it in good working condition to avoid any unnecessary technical issues during the scanning process.
9. Customize Scanning Techniques: Adapt your scanning technique based on the size and behavior of the animals. For instance, small animals may require a closer scanning distance, while timid animals may need a more delicate and patient approach.
10. Focus on Efficiency without Rushing: While efficiency is important, ensure you do not rush the scanning process to the extent that accuracy is compromised. Balance the need for speed with the necessity of properly scanning and identifying each animal.
By implementing these tips, you can streamline the process of scanning multiple animals, improving efficiency, accuracy, and minimizing stress for both the animals and yourself.
Frequently Asked Questions
1. What is a microchip scanner?
A microchip scanner is a handheld device used to read and retrieve information from microchips implanted in animals. It emits radio frequency signals that activate the microchip, allowing the scanner to read and display the encoded data.
2. How does a microchip scanner work?
A microchip scanner works by emitting a low-frequency radio wave that activates the microchip. When the microchip is activated, it transmits its unique identification code, which the scanner detects and interprets, displaying the information on its screen or through audible signals.
3. Can any scanner read any microchip?
Microchips used in animals typically follow universal standards such as ISO 11784/11785 or FDX-B. Most microchip scanners can read multiple types of microchips as long as they adhere to these common standards.
4. What information is stored on a microchip?
A microchip typically contains a unique identification number that links to the owner’s contact information in a microchip registry or database. This information can include the owner’s name, phone number, and address.
5. Are microchips a tracking device?
No, microchips are not tracking devices. They only store a unique identification number that can be used to retrieve the owner’s contact information from a microchip registry or database. They do not provide real-time location tracking of the animal.
6. Is microchip scanning painful for animals?
No, microchip scanning is not painful for animals. It is a quick and non-invasive process. The scanner simply emits a low-frequency radio wave that activates the microchip and allows the detection of the unique identification code.
7. How accurate are microchip scanners?
Microchip scanners are highly accurate when used correctly. However, factors such as improper technique, low battery levels, or radio frequency interference can affect scanning accuracy. It is vital to follow proper scanning procedures and maintain the scanner in optimal condition.
8. Can a microchip be removed or tampered with?
Microchips are typically designed to be permanent and cannot be easily removed or tampered with. They are implanted under the skin of the animal and remain in place throughout its lifetime. Attempting to tamper with or remove a microchip can cause harm to the animal.
9. What should I do if I find a lost pet with a microchip?
If you find a lost pet with a microchip, use a microchip scanner to retrieve the microchip number. Contact the appropriate microchip registry or use reliable online databases to access the owner’s contact information. Reach out to the owner promptly to facilitate the reunion of the lost pet with its family.
10. Can I register my pet’s microchip myself?
Yes, in most cases, you can register your pet’s microchip yourself. Many microchip registries provide online registration services where pet owners can enter their contact information and link it to their pet’s microchip number. Follow the instructions provided by the microchip manufacturer or registry to complete the registration process.
Remember, if you have additional questions or need further assistance regarding microchip scanners or microchips in animals, consult with a veterinarian, an animal shelter, or a reputable microchip registry for accurate and reliable information.