
Basic Overview
A flash drive, also known as a USB drive, thumb drive, or pen drive, is a portable storage device that allows you to store and transfer files between computers. It is a convenient solution for those who need to carry important documents, photos, videos, or other digital files with them. Using a flash drive on a desktop computer is a straightforward process, but it can be helpful to familiarize yourself with a few key steps.
In this article, we will provide a step-by-step guide on how to use a flash drive on a desktop computer. Whether you’re a beginner or just need a refresher, this tutorial will help you navigate through the process with ease.
Before we dive into the steps, it’s important to note that the instructions may vary slightly depending on your operating system. We will be focusing on Windows and macOS, the two most widely used desktop operating systems.
Now, let’s get started with the basic overview of using a flash drive on a desktop computer.
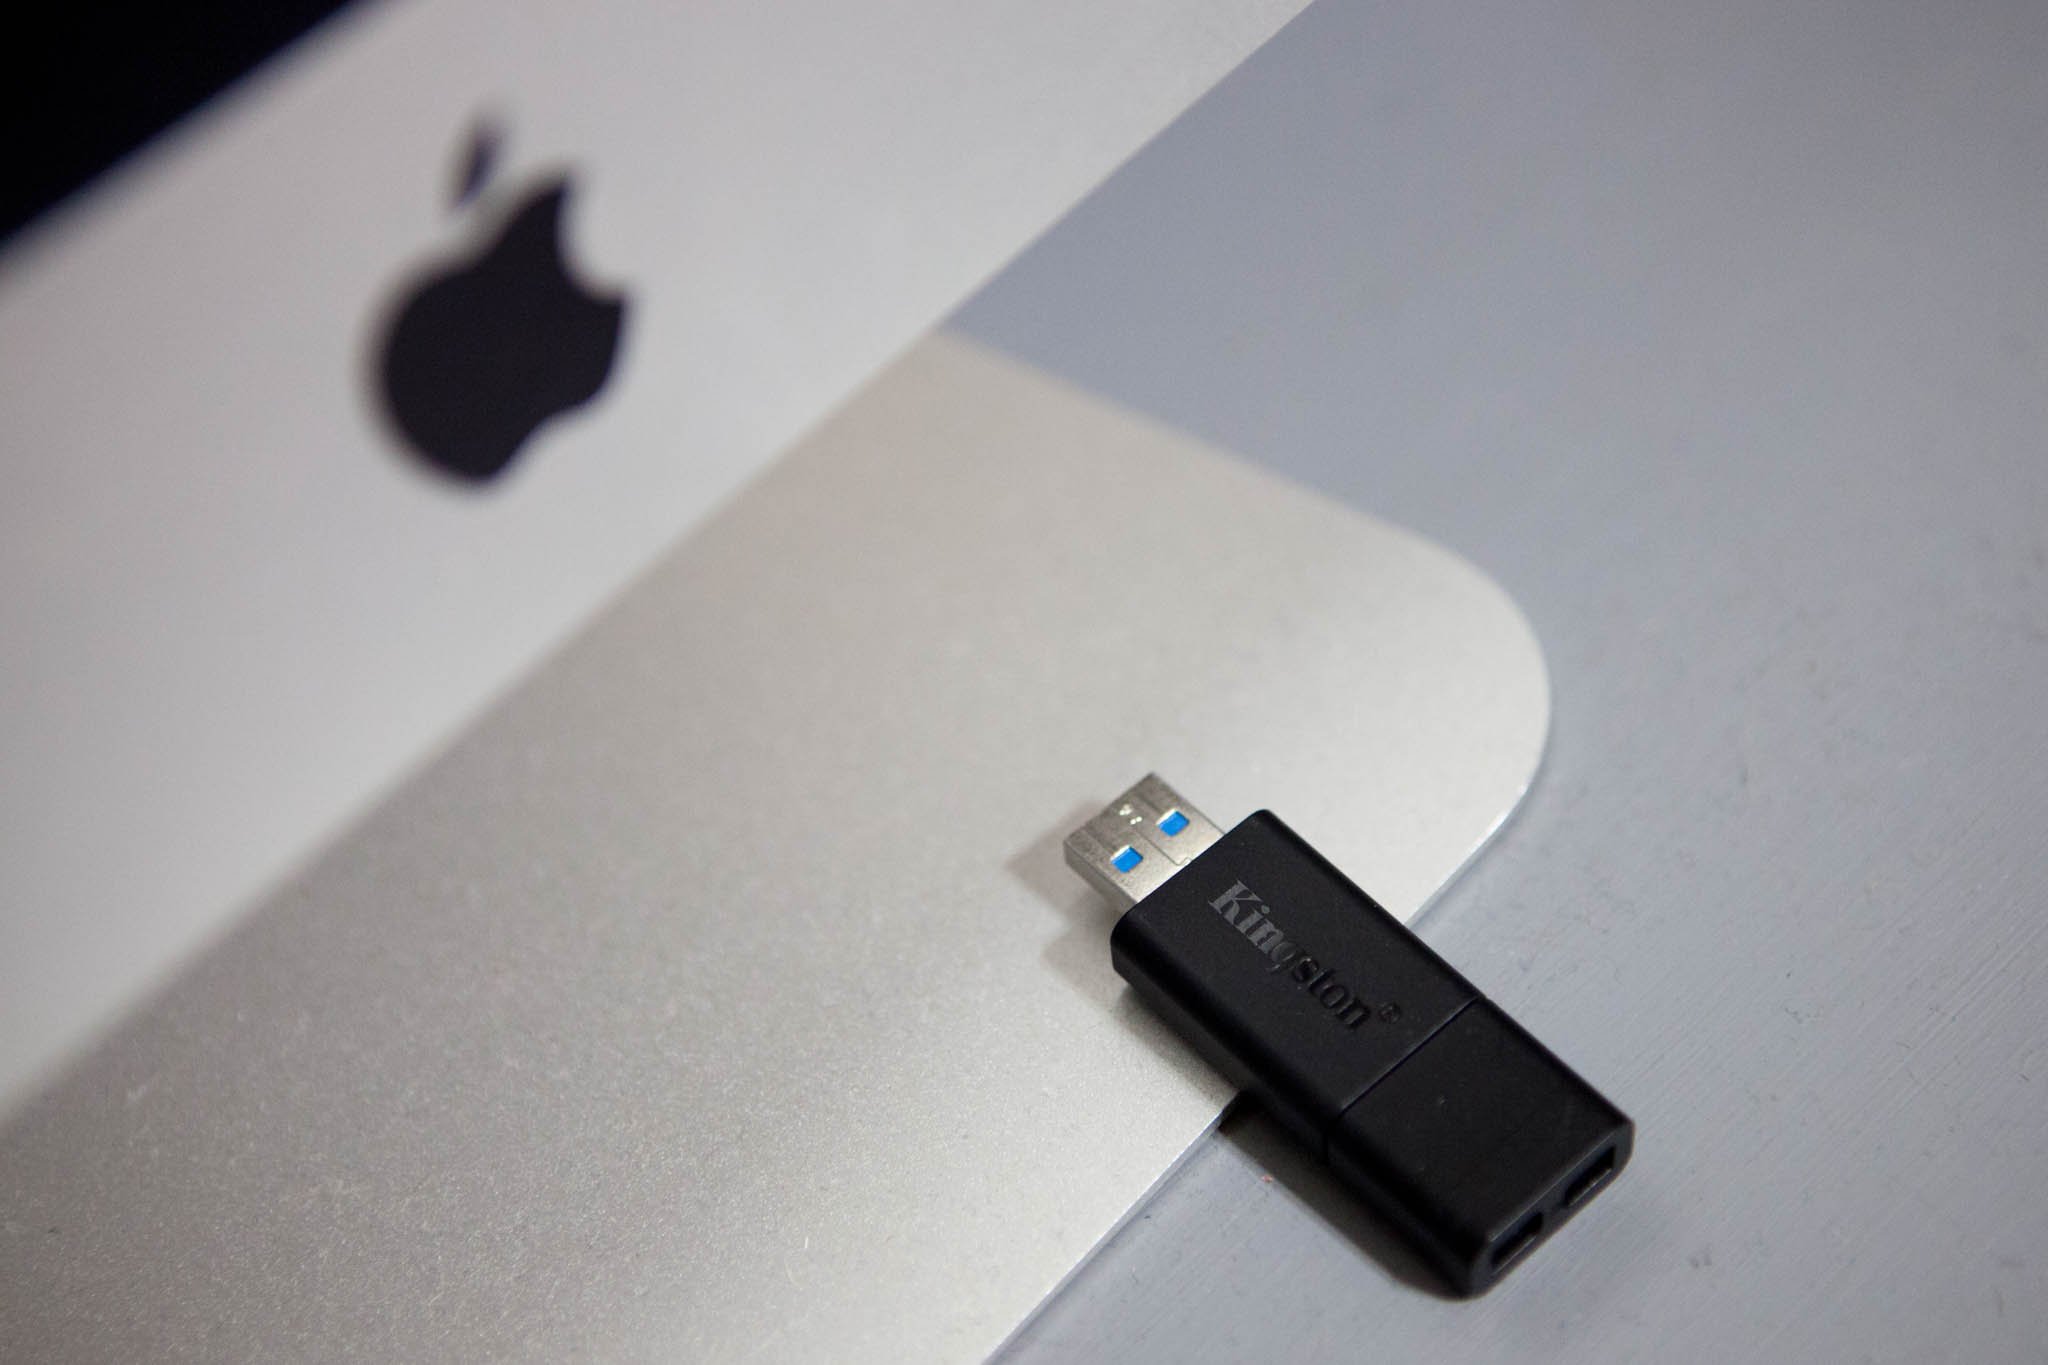
Step 1: Inserting the Flash Drive
The first step in using a flash drive on a desktop computer is to physically insert the flash drive into one of the available USB ports. USB ports are usually located on the back or side of the computer tower, while laptops typically have them on the sides or back of the device.
Take your flash drive and align the USB connector with the USB port on your desktop computer. Gently push the flash drive into the port until it is fully inserted. You should feel a slight click or resistance when it is properly connected.
It’s worth noting that USB ports are typically labeled with a universal symbol that resembles a trident or arrow pointing towards the port. This is a helpful indicator when you’re not sure where to insert the flash drive.
Once the flash drive is securely inserted, your computer will automatically detect it, and you should see a notification or icon appear on your screen. This indicates that the flash drive has been recognized by your computer and is ready to use. The name of the flash drive may also appear under “My Computer” or “This PC” in the file explorer.
Remember to handle the flash drive with care when inserting and removing it from the USB port. Rough handling can potentially damage the device and result in data loss or corruption.
Now that you have successfully inserted the flash drive, let’s move on to the next step of locating the flash drive on your desktop computer.
Step 2: Locating the Flash Drive on the Desktop Computer
After inserting the flash drive into your desktop computer, the next step is to locate it on your computer’s file system. This will allow you to access and manage the files stored on the flash drive.
In Windows, you can open File Explorer by clicking on the folder icon located on your taskbar or by pressing the Windows key + E on your keyboard. In File Explorer, you will find your flash drive listed under “This PC” or “My Computer” on the left-hand side panel.
Click on the flash drive’s icon to open it, and you will see the contents of the flash drive displayed in the main window. From here, you can view, copy, move, rename, or delete files on the flash drive, just like you would for any other files or folders on your computer.
In macOS, you can open Finder by clicking on the smiley face icon located on your dock or by pressing Command + Spacebar and typing “Finder.” In Finder, you will find your flash drive listed under “Devices” in the left-hand sidebar.
Click on the flash drive’s name, and its contents will appear in the main Finder window. Similarly to Windows, you can perform various actions on the files stored on the flash drive, such as copying, moving, renaming, or deleting them.
Remember to properly eject the flash drive from your computer after you finish using it. This will ensure that any pending read or write operations are completed and minimize the risk of data loss or corruption. Failure to eject the flash drive before removing it can lead to damaged files or even render the flash drive unusable.
With the flash drive located on your desktop computer, you are now ready to transfer files to the flash drive. This will be covered in the next step.
Step 3: Transferring Files to the Flash Drive
Transferring files to a flash drive on your desktop computer is a simple process that allows you to back up important data or share files with others. Here’s how you can transfer files to your flash drive:
In Windows, open File Explorer and navigate to the location of the files that you want to transfer. Select the files or folders by clicking on them while holding down the Ctrl key. Once you have made your selection, right-click and choose “Copy” from the context menu. Next, go to your flash drive folder in File Explorer, right-click inside the folder, and select “Paste” to transfer the files.
In macOS, open Finder and locate the files or folders that you want to transfer. Select the files by holding down the Command key and clicking on them. Once you have made your selection, right-click and choose “Copy” from the context menu. Then, navigate to your flash drive folder in Finder, right-click inside the folder, and select “Paste” to transfer the files.
You can also transfer files to the flash drive by simply dragging and dropping them from their original location to the flash drive folder in File Explorer or Finder. This method provides a more visual and intuitive way of transferring files.
While transferring files, it’s important to be mindful of the available storage capacity on your flash drive. Check the properties of the flash drive to see its total capacity and the amount of free space remaining. Be sure not to exceed the storage capacity to prevent any errors or file corruption during the transfer process.
Once the file transfer is complete, you can safely disconnect the flash drive from your desktop computer. To do this, right-click on the flash drive’s icon in File Explorer or Finder and select “Eject” or “Safely Remove.” Wait for the notification indicating that it is safe to remove the flash drive before physically unplugging it from the USB port.
With your files successfully transferred to the flash drive, you can now use it on another device or keep it as a backup. Remember to keep the flash drive in a safe place to protect your files and prolong its lifespan.
Next, we will cover some common flash drive issues that you may encounter and how to troubleshoot them.
Step 4: Safely Ejecting the Flash Drive
After you have finished using the flash drive on your desktop computer, it is important to safely eject it before physically removing it from the USB port. Safely ejecting the flash drive ensures that any pending read or write operations are completed and reduces the risk of data loss or corruption.
In Windows, you can safely eject the flash drive by locating its icon in File Explorer. Right-click on the flash drive’s icon and select “Eject” from the context menu. You will see a notification indicating that it is safe to remove the flash drive. At this point, you can safely unplug the flash drive from the USB port.
In macOS, you can safely eject the flash drive by locating its icon in Finder. Right-click on the flash drive’s name in the Sidebar and select “Eject” from the context menu. Wait for the notification that it is safe to remove the flash drive before physically unplugging it.
It’s important to note that even if there is no active file transfer happening, it is still recommended to follow the proper ejecting procedure. This ensures that all cached data and processes related to the flash drive are fully completed and safely terminated before removing it.
Failure to safely eject the flash drive can result in data corruption or damage to the storage device itself. Therefore, it’s a good practice to make a habit of always ejecting the flash drive properly before physically unplugging it.
Now that you have learned how to safely eject the flash drive, let’s move on to the final section, where we will discuss some common flash drive issues and how to troubleshoot them.
Step 5: Troubleshooting Common Flash Drive Issues
While using a flash drive on a desktop computer is generally a seamless process, you may encounter some common issues along the way. Here are a few troubleshooting tips to help you resolve these issues:
1. Flash Drive Not Recognized: If your flash drive is not being recognized by your desktop computer, try inserting it into a different USB port. Sometimes, a faulty port can cause the issue. Additionally, ensure that the flash drive is properly inserted and making a secure connection.
2. File Transfer Errors: If you are experiencing errors during file transfers, it may be due to data corruption. In this case, try using a different USB cable or connecting the flash drive to another computer to verify if the issue persists. You can also try formatting the flash drive, but keep in mind that this will erase all data on the device.
3. Slow Transfer Speeds: If file transfers are taking longer than usual, it could be due to various factors. First, ensure that there are no other running programs or heavy processes consuming system resources. Additionally, check for any background antivirus scans that might be causing a slowdown. If the issue persists, try using a different USB port or a different flash drive altogether.
4. Compatibility Issues: Some flash drives may not be compatible with certain operating systems. If you are experiencing compatibility issues, check the flash drive’s documentation or the manufacturer’s website for any specific compatibility requirements. You may need to install additional drivers or software to enable proper functionality.
5. Physical Damage: If your flash drive is physically damaged, such as a bent or broken connector, it may not function properly. In such cases, professional data recovery services might be required to retrieve your files. To prevent physical damage, handle the flash drive with care and store it in a protective case when not in use.
If you are still experiencing issues with your flash drive after trying these troubleshooting steps, it may be a sign of a more serious problem. In such cases, contacting the manufacturer’s customer support or seeking professional assistance is recommended.
By following the steps outlined in this guide and troubleshooting any potential issues, you can effectively use a flash drive on your desktop computer without hassle. Enjoy the convenience and versatility that a flash drive provides for your storage and file transfer needs.