
What is a Digital Angle Finder?
A digital angle finder is a handy tool used in various industries and DIY projects to measure and calculate angles with precision. It is a compact device equipped with digital technology that allows for accurate angle measurement, eliminating the need for manual protractors or guesswork.
Unlike traditional angle finders, which often rely on visual estimation or physical measurements, digital angle finders provide precise measurements in degrees, ensuring accurate and reliable results. They are designed with a digital display that shows the angle reading, making it easier for users to obtain accurate measurements quickly.
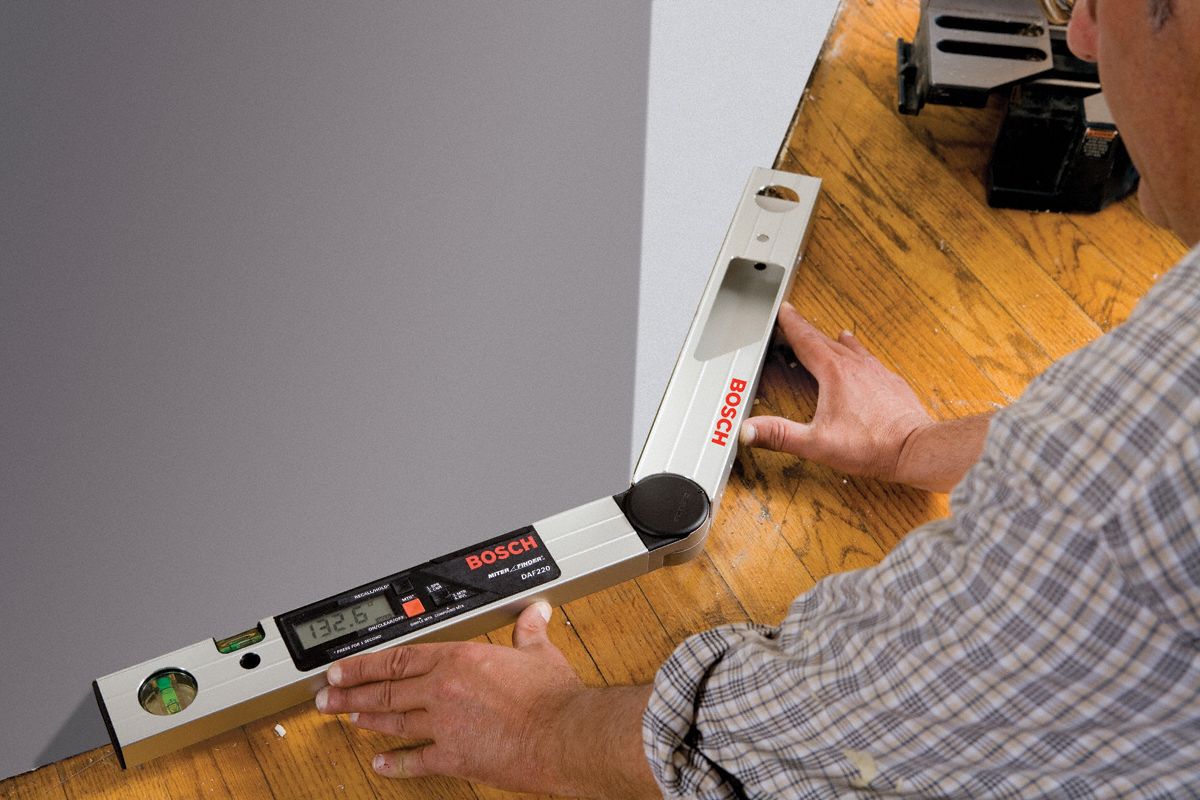
Typically, a digital angle finder consists of a hinged arm with two plates connected by a pivot point. This arm can be adjusted and locked at any desired angle. The device also features a digital display panel that shows the measured angle in degrees, ensuring accuracy to the decimal point.
With the advancements in technology, digital angle finders have become more versatile and efficient. Many models come equipped with additional features such as hold, zero, and reset functions, enabling users to measure and store multiple angles conveniently.
Digital angle finders are commonly used by professionals in the construction, woodworking, metal fabrication, and engineering industries. They are ideal for tasks such as determining miter cuts for framing, measuring bevel angles for installing crown molding, verifying the alignment of joints, or ensuring precise angles for welding projects.
The convenience and accuracy of digital angle finders make them an indispensable tool for both professionals and DIY enthusiasts. By providing precise measurements, they help save time, eliminate guesswork, and ensure accurate results in a wide range of applications.
Types of Digital Angle Finders
Digital angle finders come in a variety of types, each designed to suit specific applications and user preferences. Here are the most common types of digital angle finders:
- Single-arm digital angle finder: This type features a single hinged arm and is suitable for measuring angles in one direction. It is compact and easy to use, making it ideal for general DIY tasks.
- Double-arm digital angle finder: A double-arm angle finder has two hinged arms connected at a pivot, allowing for measurements in both directions. It provides versatility and is often used in professional settings for more complex angle calculations.
- Protractor-style digital angle finder: This type mimics the traditional protractor design but incorporates digital technology for precise angle measurement. It typically features a pivoting arm with an attached digital display, making it easy to measure angles on flat surfaces.
- Inclinometer-style digital angle finder: An inclinometer-style angle finder is designed for measuring slopes and inclines. It often includes a built-in level and can accurately measure tilt angles, making it ideal for applications such as roof installation or landscaping.
- Magnetic digital angle finder: This type of angle finder has built-in magnets that allow for easy attachment to metal surfaces. It is convenient for measuring angles on ferrous materials and is commonly used in metal fabrication or construction projects.
When choosing a digital angle finder, consider the specific requirements of your project or task. Factors such as the range of angles it can measure, the size and readability of the display, and any additional features should all be taken into account to ensure the best fit for your needs.
Uses of a Digital Angle Finder
A digital angle finder is a versatile tool that can be used in a wide range of applications. Here are some common uses for a digital angle finder:
- Woodworking: In woodworking, a digital angle finder is indispensable for ensuring accurate and precise measurements when cutting miter joints, bevels, or chamfers. It helps woodworkers achieve perfect angles for cabinetry, furniture construction, and other woodworking projects.
- Construction: Digital angle finders are commonly used in construction projects for measuring and verifying angles during the installation of staircases, roof trusses, and other structural components. They ensure that angles are correctly aligned, reducing mistakes and improving the overall quality of the build.
- Metal fabrication: When working with metal, precision is vital. Digital angle finders are used to measure and mark accurate angles for welding, cutting, or bending metal pieces. They help fabricators achieve precise joins and ensure the structural integrity of the finished product.
- Landscaping: Digital angle finders with inclinometer features are useful in landscaping projects. They allow users to measure and determine the proper slope for grading, drainage, or installing outdoor structures like patios or retaining walls.
- Automotive: Automotive enthusiasts and mechanics can benefit from digital angle finders when setting up suspension components or aligning wheels. They help ensure that the desired camber, caster, and toe angles are accurately adjusted, improving vehicle performance and tire wear.
- DIY projects: From home renovations to crafting, digital angle finders can assist in various DIY projects. Whether installing crown molding, constructing picture frames, or building custom shelving, precise angle measurements are crucial for professional-looking results.
The uses of a digital angle finder are not limited to these examples. Any task that requires accurate angle measurement and alignment can benefit from the use of this versatile tool. By simplifying and speeding up the angle measurement process, a digital angle finder helps users achieve better results and saves valuable time and effort.
How to Use a Digital Angle Finder
Using a digital angle finder is a straightforward process that requires a few simple steps. Here’s a guide on how to use a digital angle finder:
- Power on and zero: Turn on the digital angle finder by pressing the power button. If your model has a zero function, press it to calibrate the device to zero degrees. This ensures accurate measurements.
- Select the mode: Some digital angle finders offer different modes, such as degrees, radians, or slope percentages. Choose the appropriate mode for your measurements.
- Place the angle finder: Position the angle finder on the surface or object where you want to measure the angle. Ensure that it is secure and stable to get accurate readings.
- Adjust the arms: If using a double-arm angle finder, adjust the arms so that they align with the surfaces you want to measure. Lock the arms securely in place.
- Read the digital display: Look at the digital display panel on the angle finder. It will provide you with the precise angle measurement in degrees or the selected unit of measurement.
- Take the reading: Keep the angle finder steady and wait for the measurement to stabilize on the digital display. Once the reading has stabilized, take note of the angle measurement.
- Transfer the measurement: Use the measured angle to guide your next steps in your project. You can transfer the measurement directly to your workpiece using a pencil or marker.
- Repeat if necessary: If you need to measure multiple angles, repeat the process by repositioning the angle finder and following the steps above.
Remember, accuracy is key when using a digital angle finder. Make sure to handle the device with care and double-check your measurements for precise results. By following these steps, you can confidently use a digital angle finder for a variety of tasks and projects.
Calibrating a Digital Angle Finder
Calibrating a digital angle finder is essential to ensure accurate measurements. While some models may come pre-calibrated, it is still advisable to calibrate the device periodically or if you suspect any inaccuracies. Here’s a step-by-step guide on how to calibrate a digital angle finder:
- Find a known flat surface: Look for a surface that you know is perfectly flat, such as a tabletop or a piece of glass. Ensure that the surface is clean and free from any debris.
- Power on the angle finder: Turn on the digital angle finder and let it power up. Make sure the device is set to the angle measurement mode you prefer (degrees, radians, etc.).
- Place the angle finder on the flat surface: Gently place the base or one of the arms of the angle finder on the known flat surface. Ensure that it sits securely and evenly on the surface.
- Verify the reading: Check the digital display of the angle finder. It should read zero degrees or the equivalent of a perfectly flat surface. If it doesn’t, proceed to the next step.
- Adjust the calibration: Most digital angle finders have a calibration feature or a button specifically for recalibration. Consult the user manual to determine the exact process for your angle finder model.
- Follow the calibration instructions: Calibrate the angle finder based on the manufacturer’s instructions. Typically, this involves pressing the calibration button and following the prompts on the display.
- Verify the calibration: After completing the calibration process, place the angle finder back on the known flat surface. The digital display should now read zero degrees, indicating a successful calibration. Repeat the process if necessary or if you suspect any discrepancies.
- Calibrate periodically: It is recommended to calibrate your digital angle finder at regular intervals, especially if you notice any inconsistent measurements or deviations. This ensures accurate readings and reliable performance.
By calibrating your digital angle finder, you can rely on its accuracy and achieve precise measurements in your projects. Remember to consult the user manual provided by the manufacturer for specific calibration instructions and recommendations for your particular model.
Tips for Using a Digital Angle Finder
Using a digital angle finder can be made even more efficient and accurate with these helpful tips:
- Ensure a stable base: When using the angle finder, make sure it is placed on a stable and level surface. This helps prevent any unwanted movements or fluctuations that can impact the accuracy of the measurements.
- Double-check zero calibration: Before taking measurements, always verify that the angle finder is properly calibrated to zero degrees. Inaccurate zero calibration can lead to incorrect angle readings, so it’s essential to double-check this setting.
- Hold the angle finder securely: When taking angle measurements, hold the angle finder firmly to minimize any unintentional movement. This ensures more precise readings and reduces the chances of human error.
- Take multiple measurements: For critical projects or when high accuracy is required, take multiple angle measurements and compare the results. This helps to identify any inconsistencies or errors and allows you to take an average of the measurements for improved accuracy.
- Consider the lighting conditions: Bright or direct light sources can sometimes cause glare on the angle finder’s digital display. Ensure that the display is easily visible, and if necessary, adjust the angle or shield the display from excessive light.
- Use a reference surface: When measuring angles on irregular surfaces, it may be helpful to use a reference surface to align the angle finder. This ensures that the measurement is taken relative to a known reference point, improving accuracy.
- Check for magnetic interference: If you’re using a magnetic angle finder, be aware of nearby magnetic objects that could interfere with the measurements. Magnetic fields can affect the accuracy of the angle finder, so it’s important to keep it away from any magnetic interference.
- Store the angle finder properly: When not in use, store the angle finder in a protective case or pouch. This prevents damage to the device and helps maintain its accuracy and functionality over time.
- Read the user manual: Each digital angle finder may have specific features and instructions. Take the time to thoroughly read the manufacturer’s user manual to understand all the functions and best practices for your specific model.
By following these tips, you can make the most out of your digital angle finder and ensure accurate measurements for your projects.
Common Mistakes to Avoid with a Digital Angle Finder
Using a digital angle finder correctly is crucial for obtaining accurate measurements. Here are some common mistakes to avoid when using a digital angle finder:
- Not calibrating the angle finder: Failing to calibrate the angle finder regularly can result in inaccurate measurements. Always follow the manufacturer’s instructions for calibration to ensure precise readings.
- Ignoring stability: Placing the angle finder on an unstable or uneven surface can lead to unreliable measurements. Always ensure that the angle finder is resting securely on a stable base before taking readings.
- Using excessive force: Applying excessive force or pressure to the angle finder can affect its accuracy. Use a gentle touch when handling the device to avoid putting unnecessary strain on its components.
- Overlooking zero calibration: Forgetting to zero-calibrate the angle finder before taking measurements can result in misleading readings. Always double-check that the device is properly zeroed before use.
- Not verifying levelness: If the angle finder has a built-in level, make sure to check its accuracy. A slightly off-level angle finder can introduce errors in the angle measurements.
- Ignoring display readability: Ensure that the digital display is clear and easy to read. Poor lighting conditions or a dusty screen can make it difficult to interpret the angle measurements accurately.
- Using the wrong mode: Selecting the incorrect measurement mode, such as degrees instead of radians, can result in incorrect measurements. Always ensure that you use the appropriate unit of measurement for your task.
- Not considering magnetic interference: If using a magnetic angle finder, be aware of nearby magnetic objects that can affect the accuracy of the measurements. Keep the angle finder away from any potential magnetic interference.
- Relying solely on a single measurement: Depending on a single angle measurement can be risky, especially for critical projects. Take multiple measurements and compare them to ensure consistency and accuracy.
- Not following the user manual: Neglecting to read and follow the instructions provided in the user manual can lead to improper use of the angle finder and inaccurate measurements. Always refer to the manual for specific guidelines.
Avoiding these common mistakes will help you achieve accurate measurement results with your digital angle finder and ensure the success of your projects.
Safety Precautions when Using a Digital Angle Finder
While using a digital angle finder is generally safe, it’s important to keep in mind some safety precautions to ensure your well-being and the proper functioning of the tool. Here are some safety tips to follow when using a digital angle finder:
- Protective eyewear: When working with any tools or materials, including a digital angle finder, it’s essential to wear appropriate protective eyewear. This helps safeguard your eyes from potential debris or hazards in the work area.
- Avoid electrical hazards: Ensure that your angle finder and any associated power cords or batteries are in good condition. Avoid using the tool near wet areas or in the presence of flammable materials to reduce the risk of electrical hazards.
- Handle with care: Treat your digital angle finder with care to avoid accidental damage. Avoid dropping the tool or subjecting it to rough handling, which could impact its accuracy or functionality.
- Maintain a clear work area: Before using the angle finder, clear your work area of any potential hazards or clutter. This helps prevent accidents and ensures that you have enough space to operate the tool safely.
- Avoid overreaching: When using a digital angle finder, it’s important to maintain a stable and balanced position. Avoid overreaching or standing on unstable surfaces as it can lead to loss of balance and potential injuries.
- Use appropriate accessories: Depending on the nature of your project, you might need additional accessories such as clamps or stands to secure the workpiece or angle finder. Always use the appropriate accessories to ensure stability and reduce the risk of accidents.
- Power off when not in use: When you’re finished using the angle finder, remember to power it off and detach any power sources, such as battery packs. This not only conserves power but also eliminates the risk of accidental activation or unnecessary drain on the battery.
- Review and follow user manual instructions: The user manual provided by the manufacturer contains important safety information specific to your digital angle finder model. Review the manual thoroughly before using the tool and follow all safety guidelines and recommendations.
- Consider personal protective equipment (PPE): Depending on the nature of your project, additional personal protective equipment such as gloves, ear protection, or a dust mask may be necessary. Assess the work environment and use appropriate PPE to ensure your safety.
- Stay focused and alert: Pay close attention to your surroundings while using the digital angle finder. Avoid distractions and stay focused on the task at hand to minimize the chances of accidents or errors.
By adhering to these safety precautions, you can use your digital angle finder with confidence, knowing that you are taking necessary measures to protect your safety and maintain a secure work environment.
Maintaining and Storing a Digital Angle Finder
To ensure the longevity and proper functioning of your digital angle finder, it’s important to follow some maintenance and storage practices. Here are some guidelines for maintaining and storing your digital angle finder:
- Keep it clean: Regularly clean your digital angle finder to remove dust, debris, and any buildup that may affect its performance. Use a soft cloth or brush to gently wipe the device, paying attention to the display, buttons, and moving parts.
- Avoid moisture and extreme temperatures: Protect your angle finder from moisture and excessive heat or cold. Avoid exposing it to water or environments with high humidity, as this can damage the internal components. Store the tool in a dry and temperature-controlled area.
- Inspect cables and connections: If your digital angle finder has a cable or connector, regularly inspect it for any signs of wear or damage. If you notice any issues, such as fraying or loose connections, replace or repair the cable to maintain proper functionality.
- Check batteries: If your angle finder is battery-powered, monitor the battery level regularly. Replace the batteries when needed to ensure consistent and accurate measurements. Remove the batteries when storing the tool for an extended period to prevent leakage or corrosion.
- Store in a protective case: When not in use, store your digital angle finder in a dedicated protective case or pouch. This helps protect it from dust, impact, and potential damage caused by other tools or objects.
- Avoid direct sunlight: Prolonged exposure to direct sunlight can cause damage to the display and other sensitive components of the angle finder. Store it away from direct sunlight when not in use to preserve its lifespan and performance.
- Follow manufacturer guidelines: Refer to the user manual or any provided guidelines from the manufacturer for specific recommendations on maintenance and storage. Different models may have unique requirements, so it’s important to consult the manufacturer’s instructions.
- Regularly inspect and calibrate: Periodically inspect your digital angle finder for any signs of damage or malfunction. If you notice any irregularities in the measurements or operation, consult the user manual or contact the manufacturer for troubleshooting or calibration instructions.
- Keep it away from children: Store the angle finder out of reach of children. Its small parts and electronic components may be harmful if mishandled or swallowed. Ensure that it is safely stored in an area inaccessible to children.
- Dispose of responsibly: When the time comes to replace your digital angle finder or if it becomes permanently damaged, dispose of it according to local regulations and guidelines. Some components may require separate recycling or proper disposal methods.
By following these maintenance and storage practices, you can prolong the lifespan and maintain the optimal performance of your digital angle finder.
Frequently Asked Questions (FAQs) about Digital Angle Finders
Below are some commonly asked questions about digital angle finders and their answers:
-
What is the difference between a digital angle finder and a traditional protractor?
A digital angle finder utilizes digital technology to provide precise angle measurements, whereas a traditional protractor typically relies on visual estimation and manual alignment. Digital angle finders offer greater accuracy and convenience compared to traditional protractors.
-
Can a digital angle finder measure both inside and outside angles?
Yes, digital angle finders can measure both inside and outside angles, depending on the specific model and design. Some angle finders have arms that can pivot in both directions, enabling measurements of angles in diverse applications.
-
What is the maximum angle range a digital angle finder can measure?
The maximum angle range that a digital angle finder can measure varies between models. Typically, digital angle finders can measure angles ranging from 0 to 180 degrees, but some specialized models may offer a wider or more limited angle range.
-
Can a digital angle finder be used for slope measurement?
Yes, some digital angle finders have inclinometer features that allow them to measure slopes or gradients. These inclinometer-style angle finders are useful for applications like roofing, landscaping, or any project that requires slope measurements.
-
What are the benefits of using a digital angle finder over a manual protractor?
Digital angle finders offer several advantages over manual protractors. They provide more precise and accurate measurements, often with digital displays showing readings in decimal points. They are also user-friendly, compact, and offer additional features like hold, zero, and reset functions for enhanced convenience.
-
How often should I calibrate my digital angle finder?
The frequency of calibration depends on the specific angle finder model and its usage. As a general guideline, it is recommended to calibrate your digital angle finder regularly, ideally before each use or at least periodically to ensure accurate measurements.
-
Can a digital angle finder be used without any experience?
Yes, digital angle finders are designed to be user-friendly and intuitive. Even individuals without prior experience can quickly learn how to use them effectively. However, it is always recommended to read the user manual and follow the instructions provided by the manufacturer for best results.
-
Are digital angle finders durable?
Yes, digital angle finders are typically built to be durable and withstand regular use. However, their longevity depends on various factors such as the quality of the device, maintenance practices, and how well they are protected and stored. Proper care and occasional calibration can help prolong the lifespan of your digital angle finder.
If you have any other questions or concerns about digital angle finders, it is recommended to consult the user manual or reach out to the manufacturer for further assistance.