
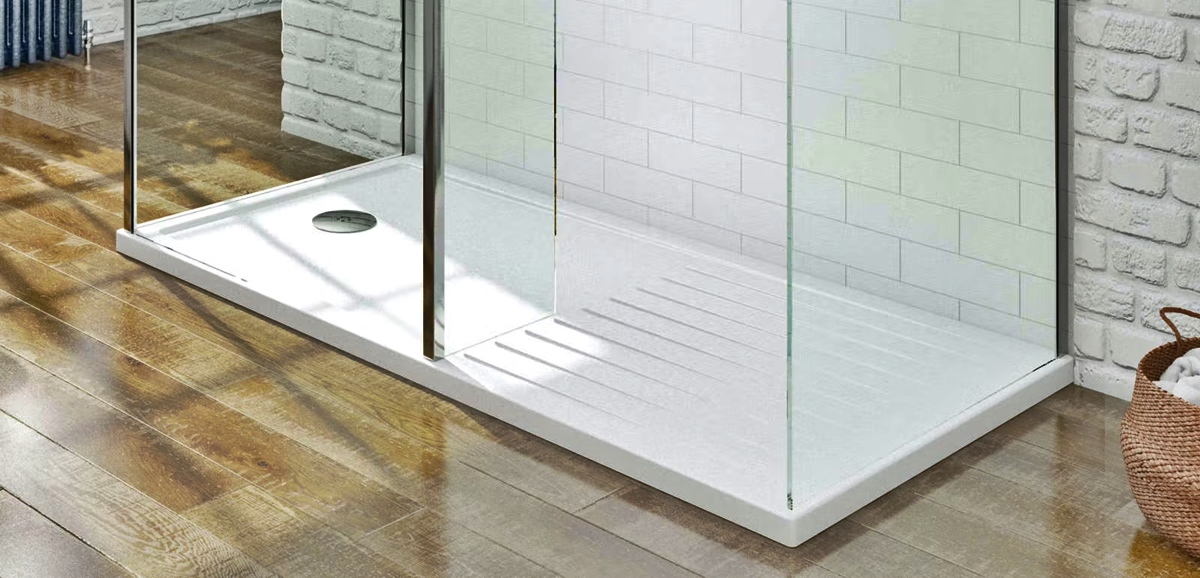
Why Measuring a Shower Tray is Important
When it comes to installing a new shower tray or replacing an existing one, accurate measurements are crucial. Whether you’re renovating your bathroom to create a sleek and modern look or simply need to fix a leaky shower, measuring the shower tray properly is the first step in ensuring a successful installation.
Measuring a shower tray allows you to determine the appropriate size and shape that will fit seamlessly into your bathroom space. This is essential to ensure that the shower tray fits properly, preventing any potential leaks or drainage issues. A properly measured shower tray also contributes to the overall aesthetics of the bathroom, enhancing its visual appeal.
Additionally, accurate measurements help you to select the right shower tray, taking into consideration the dimensions and specifications that best suit your needs. By measuring the shower tray, you can determine the ideal length, width, and depth required to provide a comfortable and functional bathing experience.
Another important reason to measure a shower tray is to ensure compatibility with your existing plumbing system. By taking precise measurements, you can determine the placement of the waste outlet and ensure that it aligns with your drainage system. This saves you from the hassle of making adjustments or purchasing additional plumbing components later on.
Furthermore, accurate measurements enable you to plan the installation process more effectively. When you have the correct measurements, you can calculate the amount of materials needed, such as adhesive, grout, and silicone, which helps you to budget accordingly and avoid any wastage or shortages.
Tools Needed for Measuring a Shower Tray
Before you begin measuring a shower tray, it’s important to gather the necessary tools. Having the right tools on hand will make the measuring process much easier and ensure accurate measurements. Here are the tools you will need:
- Tape Measure: A good quality tape measure is a must-have tool for measuring the dimensions of the shower tray. Look for a tape measure that has clear markings and is long enough to measure the length, width, and depth of the tray.
- Pencil or Marker: You will need a pencil or marker to mark the measurements on the shower tray and any reference points on the wall or floor.
- Straight Edge: A straight edge, such as a ruler or carpenter’s square, will help you ensure that your measurements are straight and accurate.
- Notebook or Paper: Having a notebook or paper to write down your measurements will help you keep track of the dimensions and any additional notes or calculations.
- Level: A level is useful for checking if the shower tray is positioned correctly and if the measurements are level.
- Digital Angle Finder (Optional): If you need to measure the slope or angle of the shower tray, a digital angle finder can be a helpful tool.
Having these tools ready before you start measuring will save you time and frustration during the process. Make sure your tools are in good condition and functioning properly to ensure accurate measurements.
Step-by-Step Guide to Measure a Shower Tray
Measuring a shower tray may seem like a daunting task, but by following these step-by-step instructions, you can ensure accurate measurements and a successful installation:
- Clear the Area: Remove any obstacles or items from the bathroom floor to create a clear space around the shower tray.
- Prepare the Tools: Gather all the necessary tools, including a tape measure, pencil or marker, straight edge, notebook or paper, level, and digital angle finder (if needed).
- Measure the Length and Width: Start by measuring the length of the shower tray from one end to the other. Place the end of the tape measure against the wall or existing shower base and extend it to the opposite end. Repeat the same process to measure the width of the tray from side to side.
- Measure the Depth: To measure the depth of the shower tray, place the tape measure vertically against the back wall of the tray and extend it down to the floor. Take note of the measurement at the deepest point of the tray.
- Check for Slope or Angle (if applicable): If your shower tray has a slope or angle, use a digital angle finder to measure the degree of the slope. Position the angle finder on the tray surface at different points to ensure accuracy.
- Take Additional Measurements: Depending on the shape and type of shower tray, you may need to take additional measurements. For example, if the tray has curved or uneven edges, measure the radius or any irregularities to ensure a precise fit.
- Double-Check the Measurements: Once you have recorded the measurements, double-check them to ensure accuracy. Use a straight edge or level to verify that the measurements are straight and level.
- Record the Measurements: Write down the measurements in your notebook or on a piece of paper. Include the length, width, depth, and any additional measurements or notes you took.
Following these steps will help you measure your shower tray accurately and provide you with the information needed to select the right tray and proceed with the installation process.
Measuring the Length and Width of the Shower Tray
Measuring the length and width of the shower tray is an essential step in ensuring a proper fit during installation. Follow these steps to accurately measure the dimensions:
- Clear the Area: Make sure the area around the shower tray is free from any obstructions or items that could interfere with accurate measurements.
- Position the Tape Measure: Place one end of the tape measure against the wall or existing shower base where the tray will be installed.
- Extend the Tape Measure: Gently extend the tape measure to the opposite end of the shower tray, ensuring it is parallel to the wall or existing base.
- Note the Measurement: Read the measurement where the tape measure reaches the end of the shower tray. This will give you the length of the tray.
- Repeat the Process for the Width: Now, position the tape measure at one side of the shower tray and extend it to the opposite side. Read the measurement where the tape measure reaches the other end, giving you the width of the tray.
- Double-Check the Measurements: Once you have recorded the measurements, double-check them to ensure accuracy. Use a straight edge to verify that the measurements are straight and true.
It is important to ensure that the tape measure is kept straight and parallel to the wall or existing base to obtain accurate measurements. If the shower tray has curved or irregular edges, take multiple measurements at different points to account for any variations.
Make sure to write down the measurements along with any additional notes or irregularities in your notebook or on a piece of paper. These measurements will serve as a guide when selecting the appropriate shower tray and during the installation process.
Measuring the Depth of the Shower Tray
Measuring the depth of a shower tray is an important step to ensure proper installation and functionality. Follow these steps to accurately measure the depth of your shower tray:
- Clear the Area: Remove any objects or obstructions around the shower tray to have a clear workspace.
- Prepare the Tape Measure: Extend the tape measure vertically and make sure it is straight and perpendicular to the floor.
- Position the Tape Measure: Place the end of the tape measure against the back wall of the shower tray, ensuring it goes all the way down to the floor.
- Measure the Deepest Point: Slide the tape measure down to the deepest point of the shower tray, recording the measurement at this point.
- Note Any Slopes or Angles: If your shower tray has any slopes or angles, take note of those measurements as well using a digital angle finder.
- Repeat the Process: If your shower tray has uneven depths across different areas, repeat the measuring process at those specific points.
- Double-Check the Measurements: Once you have the measurements, double-check their accuracy to ensure precise dimensions.
The depth measurement is crucial when selecting a compatible shower tray and during the installation process. It helps ensure sufficient space for comfortable showering and prevents potential water overflow or drainage issues.
Make sure to record the depth measurements in your notebook or on a piece of paper, along with any additional notes or irregularities. These measurements will guide you in choosing the right shower tray and ensuring a proper fit during installation.
Measuring the Shape and Type of the Shower Tray
When it comes to measuring a shower tray, it’s not just about the dimensions; you also need to consider the shape and type of the tray. Here’s how to accurately measure the shape and type:
- Identify the Shape: Determine the shape of your shower tray. Is it rectangular, square, quadrant, offset quadrant, or another shape? Knowing the shape will help you choose the correct tray for replacement or installation.
- Measure the Radii (if applicable): If your shower tray has curved or rounded edges, measure the radii to ensure a proper fit. Use a flexible tape measure or a string to follow the curvature of the tray and measure the radius accurately.
- Note the Type: Take note of the type of shower tray you have. Is it a low profile tray, a walk-in tray, a raised tray, or another type? This information is crucial for selecting the right replacement or ensuring compatibility during installation.
- Consider the Drain Placement: Depending on the type of shower tray, the drain may be located centrally or in a specific corner. Measure the distance from the walls or reference points to the drain to ensure accuracy and compatibility.
- Check for Enclosures or Screens: Determine if your shower tray is accompanied by an enclosure or screen. Measure the height, width, and depth of the enclosure to ensure a perfect fit.
- Document the Measurements: Write down all the measurements and details about the shape and type of your shower tray in your notebook or on a piece of paper. This record will serve as a reference when selecting a replacement or during the installation process.
Accurate measurements of the shape and type of your shower tray are essential to ensure proper fitment and compatibility. Make sure to pay attention to all the details and document them carefully for a smooth replacement or installation experience.
How to Measure for a Replacement Shower Tray
If you’re planning to replace your existing shower tray, it’s crucial to measure accurately to ensure a seamless installation. Follow these steps to measure for a replacement shower tray:
- Remove the Existing Tray: Start by removing the existing shower tray to get a clear view of the space.
- Measure the Length and Width: Use a tape measure to measure the length and width of the space where the current shower tray was installed. Measure from wall to wall or from one reference point to another.
- Note the Depth: Measure the depth of the existing tray from the bottom surface to the top edge. This will help you select a replacement tray with the appropriate height.
- Check the Drain Placement: Determine the location of the drain in the existing tray. Measure the distance between the drain and the walls or reference points. This will help you choose a replacement tray with the drain in the correct position.
- Consider Any Obstructions: Take note of any obstructions, such as pipes or fixtures, that may affect the size and shape of the replacement tray. Measure the distance between these obstructions and the walls or reference points.
- Assess the Shape and Type: Determine the shape and type of the existing tray, such as rectangular, square, quadrant, or offset quadrant. Consider any specific requirements for the replacement tray in terms of shape, design, or enclosure compatibility.
- Record the Measurements: Write down all the measurements, along with the shape, type, and any specific requirements, in your notebook or on a piece of paper. This will serve as a reference when selecting the right replacement tray.
By accurately measuring for a replacement shower tray, you can ensure a perfect fit and avoid any issues during the installation process. It’s important to carefully record the measurements and consider any specifications or obstructions to select the ideal replacement tray for your bathroom.
Considerations for Installing a New Shower Tray
Installing a new shower tray involves more than just selecting the right size and shape. There are several important considerations to keep in mind to ensure a successful installation. Here are some key factors to consider:
- Drainage: Ensure that the new shower tray aligns with the existing drainage system. Measure and confirm the position of the waste outlet to ensure proper connection and prevent any potential issues with water flow and drainage.
- Plumbing Fixtures: Take into account the placement of plumbing fixtures, such as taps and showerheads. Consider the distance between the fixtures and the shower tray to ensure a comfortable and functional layout.
- Accessibility: If you have specific accessibility needs, consider installing a shower tray that provides easy access, such as a low-profile tray or a walk-in tray. This will enhance safety and convenience, especially for individuals with mobility challenges.
- Enclosure Compatibility: If you plan to install a shower enclosure or screen, ensure that the new shower tray is compatible with your chosen enclosure. Consider the dimensions, shape, and design of both the tray and the enclosure to guarantee a proper fit.
- Waterproofing: Proper waterproofing is crucial to prevent any water leakage or damage. Ensure that the shower tray and surrounding areas are properly sealed and waterproofed. Follow industry guidelines and consult with professionals if necessary.
- Height and Step-in Accessibility: Consider the height of the shower tray and evaluate step-in accessibility. If you prefer a lower step-in height or require a tray that accommodates mobility aids, choose a tray that meets your specific needs.
- Aesthetics and Style: Select a shower tray that complements the overall aesthetics and style of your bathroom. Consider the material, color, and design options available to create a cohesive and visually appealing space.
- Professional Installation: If you lack experience or confidence in installing a shower tray, consider hiring a professional for the installation. They will ensure proper fitting, plumbing connections, and waterproofing, giving you peace of mind.
Taking these considerations into account will help you make informed decisions when installing a new shower tray. It is essential to plan carefully and consult professionals, if needed, to achieve a functional, visually pleasing, and long-lasting installation.
Common Mistakes to Avoid When Measuring a Shower Tray
Measuring a shower tray may seem like a straightforward task, but there are some common mistakes that can lead to inaccurate measurements, improper fit, and costly errors. Here are some common mistakes to avoid when measuring a shower tray:
- Not Clearing the Area: Before measuring, make sure the area around the shower tray is clear of any obstructions. This ensures accurate measurements and prevents any interference during the process.
- Using an Inaccurate Tape Measure: Using a worn-out or inaccurate tape measure can lead to incorrect measurements. Make sure your tape measure is in good condition, with clear markings and a reliable locking mechanism.
- Measuring Over Existing Tiles: If you’re measuring for a replacement tray and plan to remove the existing tiles, make sure to measure the space without including the tiles. Otherwise, you may end up with a tray that is too small.
- Forgetting to Account for Slopes or Angles: If your shower tray has sloping or angled sides, make sure to measure these areas accurately. Failure to account for these variations can result in an ill-fitting tray.
- Ignoring Obstructions or Pipework: Take note of any obstructions, such as pipes or fixtures, that may affect the measurements. Ensure that there is enough clearance for these items and that they won’t obstruct the installation of the new tray.
- Not Double-Checking the Measurements: Always double-check your measurements to ensure accuracy. Use a straight edge or level to verify that the measurements are straight, level, and aligned properly.
- Not Documenting the Measurements: Failing to record the measurements can lead to confusion or forgetting crucial details. Always write down the measurements, along with any notes or irregularities, for future reference.
- Not Seeking Professional Help When Needed: If you’re unsure or lack experience in measuring a shower tray, it’s best to seek professional assistance. They can provide guidance, ensure accuracy, and help you avoid costly mistakes.
Avoiding these common mistakes will save you time, effort, and money in the long run. Taking the time to measure accurately and seeking professional guidance, when needed, will result in a well-fitted and successful installation of your shower tray.