
What is a Check Engine Scanner
A check engine scanner, also known as an OBD-II scanner or code reader, is a diagnostic tool used to retrieve information from a vehicle’s onboard computer system. When the check engine light (CEL) illuminates on your dashboard, it indicates that there is a problem with one or more components of your vehicle.
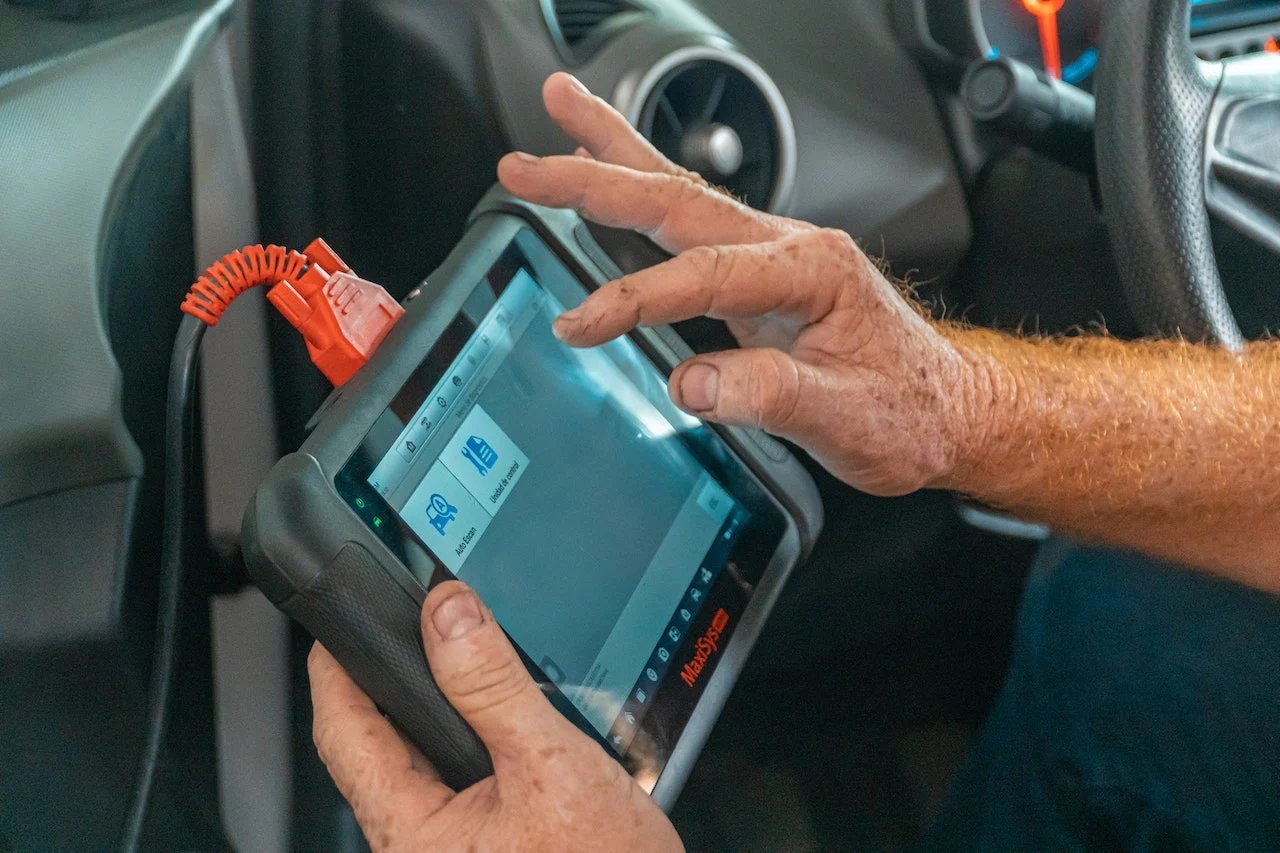
The check engine scanner acts as a communication link between your vehicle’s computer system and the scanner itself. It connects to the On-Board Diagnostics II (OBD-II) port, which is typically located underneath the steering column. Once connected, the scanner retrieves error codes and other vital information to help diagnose the specific issue causing the check engine light to turn on.
A check engine scanner is a valuable tool for both professional mechanics and car owners. It provides valuable insights into the health and performance of your vehicle, enabling you to troubleshoot and address problems before they escalate.
These scanners come in various forms, ranging from simple code readers to advanced diagnostic tools with additional features. Basic scanners are designed to read and clear error codes, while advanced scanners offer more extensive diagnostic capabilities, such as graphing live data, performing system tests, and accessing freeze frame data.
It’s important to note that a check engine scanner is just a diagnostic tool. It helps identify the problem but cannot fix it. Once you have identified the error code, you can search for specific troubleshooting steps or consult a professional mechanic for further assistance.
Investing in a check engine scanner can save you time and money in the long run. Instead of visiting a mechanic every time the check engine light comes on, you can use the scanner to determine the severity of the issue and decide whether it requires immediate attention or if it can be addressed later.
Understanding the Check Engine Light
The check engine light, also known as the malfunction indicator lamp (MIL), is a warning light on the dashboard that alerts you to potential issues with your vehicle. When this light illuminates, it indicates that the onboard computer system of your car has detected a problem and has stored an error code.
The check engine light can be triggered by a wide range of issues, ranging from minor to severe. These issues can include anything from a loose gas cap to a more serious problem with the engine or emissions system. While it’s tempting to ignore the light or assume it will go away on its own, it’s essential to address the underlying problem as soon as possible.
One of the main benefits of using a check engine scanner is that it allows you to read the error codes associated with the check engine light. These codes provide valuable information about the specific issue causing the light to come on.
It’s important to understand that the check engine light does not necessarily mean that your car is on the verge of breaking down or that it poses an immediate danger. In some cases, the issue may be minor or even a false alarm, such as a faulty sensor. However, it’s always best to err on the side of caution and have the problem diagnosed and resolved promptly.
Ignoring the check engine light can lead to more significant problems down the line. Not only can it result in reduced fuel efficiency and increased emissions, but it can also lead to more extensive and costly repairs if left unaddressed. Additionally, if there is a severe problem with your vehicle, continuing to drive it with the check engine light on could potentially cause further damage.
Understanding the check engine light and being proactive in addressing the underlying issues is crucial for maintaining the performance, reliability, and safety of your vehicle. By using a check engine scanner to retrieve error codes and diagnose the problem, you can take the necessary steps to resolve the issue and clear the check engine light.
Choosing the Right Check Engine Scanner
When it comes to selecting a check engine scanner, it’s important to consider your specific needs and budget. With a wide range of options available on the market, choosing the right scanner can seem overwhelming. However, by considering a few essential factors, you can make an informed decision.
1. Compatibility: Ensure that the scanner you choose is compatible with your vehicle’s make, model, and year. Most scanners are designed to work with vehicles that are OBD-II compliant, but it’s always best to double-check compatibility to avoid any compatibility issues.
2. Functionality: Determine the level of functionality you require. If you only need a basic scanner to read and clear error codes, a simple code reader may suffice. However, if you want more advanced features such as live data streaming, graphing, and additional diagnostic capabilities, opt for a more sophisticated scanner.
3. User-Friendliness: Consider the ease of use of the scanner. Look for a device with a user-friendly interface and clear instructions. A scanner that offers intuitive navigation and easy access to error codes and other information will make your diagnostic process smoother.
4. Display: Pay attention to the display screen size and readability. A larger and backlit display makes it easier to read the information, especially in low-light conditions or under the hood of the car.
5. Updates and Support: Check if the scanner manufacturer provides regular software updates and technical support. This ensures that you have access to the latest diagnostic capabilities and troubleshooting information.
6. Price: Set a budget and look for a scanner that offers the desired features within that price range. While advanced scanners may come with a higher price tag, they offer more comprehensive diagnostic capabilities. However, if you’re a casual user, a simpler and more affordable scanner may suffice.
By considering these factors, you can narrow down your options and choose a check engine scanner that meets your specific requirements. Remember, the right scanner is an invaluable tool that will help you diagnose and resolve issues efficiently, saving you time and money in the long run.
Location of OBD-II Port
The OBD-II (On-Board Diagnostics II) port is a standardized diagnostic port located in vehicles manufactured after 1996. It serves as an access point for check engine scanners and other diagnostic tools to communicate with the vehicle’s onboard computer system.
The location of the OBD-II port may vary depending on the make and model of your vehicle. However, there are a few common locations where you can typically find it:
1. Under the Dashboard: The most common location of the OBD-II port is underneath the dashboard on the driver’s side. It is usually located near the steering column, just above the pedals. Look for a rectangular-shaped connector with multiple pins.
2. Under the Hood: In some vehicles, especially those with larger engine bays, the OBD-II port may be located under the hood. It is often found near the fuse box or close to the firewall. Check the area around the engine compartment for a connector with OBD markings.
3. Under the Center Console: In a few cases, particularly in smaller or compact cars, the OBD-II port may be located under the center console. This location is less common but worth checking if you can’t find it under the dashboard or hood.
If you are having trouble locating the OBD-II port, consult your vehicle’s owner’s manual. It will provide specific information about the location of the port for your particular make and model.
Once you have identified the location, ensure that there is sufficient space to connect the check engine scanner. Some ports may be situated in tight spaces, making it challenging to plug in the scanner. In such cases, you may need to use an extension cable or a flexible adapter to make the connection.
It’s important to note that while OBD-II ports are standardized, there can be some variations in the pin assignments and communication protocols across different vehicle manufacturers. Therefore, it’s crucial to choose a check engine scanner that is compatible with your vehicle’s make and model.
By familiarizing yourself with the location of the OBD-II port in your vehicle, you can easily connect your check engine scanner and retrieve valuable diagnostic information to address any issues that may be causing the check engine light to illuminate.
Connecting the Scanner to the OBD-II Port
Connecting your check engine scanner to the OBD-II (On-Board Diagnostics II) port is a straightforward process once you have located the port in your vehicle. Here are the steps to connect the scanner:
1. Ensure the Vehicle is Turned Off: Before connecting the scanner, make sure that the vehicle is turned off. This is a safety precaution to avoid any electrical issues or interference during the connection process.
2. Locate the OBD-II Port: Refer to the owner’s manual or the previous section on the location of the OBD-II port. Once found, visually inspect the port to ensure there are no obstructions or debris that may hinder the connection.
3. Connect the Scanner Cable to the Port: Take the cable attached to the check engine scanner and connect it to the OBD-II port. Ensure that the connector is firmly seated and properly aligned with the port. It should slide in smoothly without any force. Most connectors have a tab or latch that will secure the connection in place.
4. Turn on the Ignition: After connecting the scanner to the OBD-II port, turn on the vehicle’s ignition without starting the engine. This will provide power to the scanner and allow it to establish communication with the vehicle’s computer system.
5. Power up the Scanner: Once the ignition is on, power up the check engine scanner. The scanner should display a welcome screen or provide instructions for navigation. Follow the prompts on the scanner’s display to navigate through the menu and select the diagnostic function you wish to use.
6. Start the Scan: Depending on the scanner, you may have the option to perform a full system scan or select specific diagnostic functions like reading error codes or checking live data. Follow the scanner’s instructions to initiate the scan and retrieve the information from the vehicle’s computer system.
7. Retrieve and Interpret the Data: Once the scan is complete, the check engine scanner will display the retrieved data or error codes. Take note of the codes and any other relevant information provided by the scanner. Use the scanner’s manual or consult reliable sources to interpret the codes and determine the underlying issue causing the check engine light to come on.
By successfully connecting the check engine scanner to the OBD-II port, you can access valuable diagnostic information that will help you identify and address any potential issues with your vehicle. Remember to follow the scanner’s instructions and take necessary safety precautions while connecting and using the scanner.
Interpreting Error Codes
One of the primary functions of a check engine scanner is to retrieve error codes stored in your vehicle’s onboard computer system. These error codes, also known as diagnostic trouble codes (DTCs), provide important information about the specific issues that triggered the check engine light. However, interpreting these codes can be a bit complex. Here’s a guide to help you understand and interpret error codes:
1. Error Code Format: Error codes consist of both letters and numbers. The format varies depending on the scanner and the vehicle’s make and model. However, the structure generally follows a standardized pattern, such as P0XXX, where the “P” stands for Powertrain and the subsequent numbers provide more specific information about the problem.
2. Code Definitions: Each error code corresponds to a specific problem or system in your vehicle. To interpret the error codes, refer to the scanner’s manual or use online resources that provide code definitions. These resources typically list common error codes and their corresponding descriptions, allowing you to identify the area or component of the vehicle that requires attention.
3. Severity and Urgency: Error codes are typically classified into different categories based on severity and urgency. Some codes may indicate minor issues that can be addressed at a later time, while others may signify more critical problems that require immediate attention. Understanding the severity and urgency of the error codes can help you prioritize repairs and maintenance tasks.
4. Multiple Codes: In some cases, the check engine scanner may retrieve multiple error codes. This can indicate multiple issues or interconnected problems within your vehicle. Analyze each code individually and consider their potential relationships to gain a comprehensive understanding of the overall situation.
5. Historical Codes: In addition to active error codes, a check engine scanner may also display historical codes. These are codes that were previously triggered but are no longer active. While they may not require immediate action, it’s still worth noting them as they can provide valuable insights into recurring issues or patterns of malfunctions in your vehicle.
6. Professional Assistance: While error codes can provide valuable information, they are not definitive diagnoses. They are merely hints or starting points for further investigation. If you’re unsure about the meaning or implications of specific error codes, it’s always advisable to seek professional assistance. Professional mechanics have the expertise and experience to interpret error codes accurately and recommend appropriate repairs or maintenance procedures.
By understanding and interpreting the error codes retrieved by your check engine scanner, you can gain valuable insights into the specific issues within your vehicle. This knowledge will enable you to make informed decisions regarding repairs or seek professional help to diagnose and resolve problems effectively.
Clearing Error Codes
Once you have retrieved and diagnosed the error codes using your check engine scanner, you may want to clear the codes from your vehicle’s onboard computer system. Clearing the error codes can be beneficial, especially if you have resolved the underlying issue or want to ensure that the check engine light does not come back on unnecessarily. Here’s a guide on how to clear error codes:
1. Determine the Cause: Before clearing error codes, it’s essential to identify and address the root cause of the problem. Clearing the codes without resolving the underlying issue may result in the check engine light coming back on shortly after. Ensure that any necessary repairs or maintenance tasks have been completed before proceeding with code clearing.
2. Use the Scanner’s Function: Most check engine scanners have a specific function or option to clear error codes. Refer to your scanner’s manual to understand the steps involved in clearing codes. Typically, you will navigate through the scanner’s menu and locate the “Clear Codes” or “Erase Codes” option. Follow the on-screen instructions to initiate the code clearing process.
3. Wait for Confirmation: After selecting the code clearing option, the scanner will communicate with your vehicle’s computer system to clear the codes. Wait for the scanner to display a confirmation message indicating that the codes have been successfully cleared. This process should only take a few seconds.
4. Verify Code Clearing: Once the codes have been cleared, verify the clearing process by performing a scan again. Reconnect the scanner to the OBD-II port and initiate a scan to check if any error codes reappear. If the codes were correctly cleared, the scanner should show a “No Codes Stored” or a similar message indicating that there are no active codes present.
5. Test Drive: After clearing the error codes, take your vehicle for a test drive to ensure that the check engine light remains off. Monitor the performance of your vehicle and check for any signs of recurring issues. If the check engine light comes back on or if new error codes appear, it may indicate that there are unresolved problems that require further attention.
It’s important to note that clearing error codes does not fix the underlying issues. It merely resets the check engine light and clears the stored codes. If the problem persists, the check engine light will likely illuminate again, indicating that there are unresolved issues that need to be addressed.
If you are uncertain about whether to clear error codes or if you need assistance in diagnosing or resolving the issues indicated by the codes, it’s recommended to seek professional help. A qualified mechanic can provide expert insight and guidance to ensure that the correct actions are taken to address the problem effectively.
Understanding Freeze Frame Data
Freeze frame data is a valuable feature offered by many advanced check engine scanners. It provides a snapshot of the vehicle’s operating conditions at the moment an error code was triggered, giving you a clearer understanding of the circumstances surrounding the issue. Here’s everything you need to know about freeze frame data:
1. Capture of Conditions: When a check engine light illuminates and triggers an error code, the onboard computer system captures a snapshot of various parameters, including engine speed, coolant temperature, vehicle speed, throttle position, and more. This freeze frame data helps identify the specific conditions that led to the code being set.
2. Time Stamp: Freeze frame data includes a time stamp, indicating the exact time and date when the error code occurred. This information can be crucial for tracking recurring issues or diagnostic purposes.
3. Multiple Freeze Frames: In some cases, multiple freeze frames may be stored if multiple error codes were triggered or if the same code was set multiple times under different conditions. Analyzing multiple freeze frame data can provide more insight into the potential causes and the conditions under which the issue occurred.
4. Diagnostic Value: Freeze frame data enhances the diagnostic process by giving mechanics or users the ability to recreate the conditions under which the error code was triggered. This can facilitate troubleshooting and allow for more accurate analysis of the problem.
5. Diagnosing Intermittent Issues: Freeze frame data can be particularly useful for diagnosing intermittent issues that may not always trigger the check engine light when the error code is not actively present. By analyzing the freeze frame data captured during a previous occurrence, technicians can gain valuable insights into the elusive problem.
6. Retrieval and Interpretation: To access freeze frame data, use the freeze frame function on your check engine scanner. This function retrieves and displays the freeze frame data associated with each error code. Interpret the freeze frame data by comparing the captured values to the desired or expected values. Significant deviations might indicate potential problem areas.
7. Additional Troubleshooting: Freeze frame data can guide additional troubleshooting steps, such as further inspections or tests of specific components related to the captured parameters. It helps narrow down the potential causes and focus on the areas that are more likely to be contributing to the issue.
Understanding freeze frame data provides deeper insights into the conditions and factors surrounding the triggering of an error code. It aids in diagnosing and resolving the issue more accurately, especially in cases of intermittent problems. By utilizing the freeze frame data available on your check engine scanner, you can effectively troubleshoot and address the underlying causes.
Using Live Data and Graphing
Many advanced check engine scanners offer the capability to view live data and graph vehicle parameters in real-time. This feature provides valuable insights into the performance and behavior of various systems within your vehicle. Here’s how you can make use of live data and graphing:
1. Real-Time Monitoring: Live data allows you to monitor various parameters, such as engine speed, coolant temperature, oxygen sensor readings, fuel trims, and more, while the vehicle is running. It provides a dynamic snapshot of the current conditions and performance of the vehicle’s systems.
2. Identifying Abnormalities: By observing the live data, you can quickly identify any abnormalities or deviations from expected values. Unusual fluctuations or irregular patterns may indicate potential issues or malfunctions in specific components or systems.
3. Diagnosing Problems: Live data can be particularly helpful when diagnosing intermittent issues or problems that are difficult to recreate. By monitoring the live data, you can observe the changes in parameters that occur when the issue arises. This can provide crucial clues for further diagnosis and troubleshooting.
4. Graphical Representation: Many check engine scanners offer graphing capabilities, allowing you to visualize the changes in parameters over time. This graphical representation can make it easier to spot trends, patterns, or irregularities that may be missed when looking at raw data. Graphs can also help identify correlations between different parameters.
5. Data Comparison: Live data and graphing also enable you to compare parameters during different driving conditions or while performing certain actions, such as accelerating or idling. This allows for a clearer understanding of how the systems in your vehicle respond to different scenarios or inputs.
6. Trend Analysis: By observing live data and graphing over extended periods, you can analyze trends in parameter values. This can help with preventive maintenance, as it allows you to identify gradual changes or deteriorations in performance before they result in significant issues or warning lights.
7. Professional Assistance: While live data and graphing offer valuable information, understanding and interpreting the data can be challenging for the average car owner. If you’re unsure about the significance of certain parameter values or any patterns you observe, it’s best to consult a professional mechanic who can accurately analyze the data and provide expert insights.
By utilizing the live data and graphing capabilities of your check engine scanner, you can gain a deeper understanding of your vehicle’s performance, diagnose problems more effectively, and make informed decisions regarding maintenance and repairs.
Performing Basic Diagnostics
Performing basic diagnostics using a check engine scanner can help you identify common issues and assess the overall health of your vehicle. While advanced diagnostics may require professional expertise, here are some basic diagnostic steps you can take:
1. Retrieve Error Codes: Use the check engine scanner to retrieve error codes from your vehicle’s onboard computer system. These codes provide valuable information about the specific issues that triggered the check engine light. Refer to code definitions or online resources to gain an understanding of the problem indicated by each code.
2. Clear Error Codes: If you have addressed the underlying issue or want to clear the codes to see if the problem reoccurs, use the scanner’s code clearing function. However, make sure to only clear the codes once you have resolved the problem or else the check engine light may come back on.
3. Monitor Live Data: Use the live data feature on your scanner to monitor parameters such as engine speed, coolant temperature, fuel trims, oxygen sensor readings, and more. Observe the values and look for any abnormalities or deviations from the expected ranges. Compare the readings to specifications provided by the vehicle manufacturer.
4. Perform Component Tests: Some scanners offer component testing capabilities. Use these features to perform tests on specific systems or components, such as activating relays, cycling solenoids, or testing sensor outputs. Follow the scanner’s instructions to perform these tests accurately.
5. Inspect Visual Indicators: Conduct a visual inspection of your vehicle’s components and systems. Look for any physical signs of damage, leaks, loose connections, or worn-out parts. Pay attention to the condition of the belts, hoses, wiring, and connectors.
6. Analyze Freeze Frame Data: If your scanner has a freeze frame function, retrieve and analyze the freeze frame data associated with the error codes. This data provides a snapshot of the vehicle’s operating conditions at the moment the code was triggered. Analyzing this information can help you understand the circumstances under which the issue occurred.
7. Consult Service Manuals: Access service manuals or reliable online resources specific to your vehicle’s make and model. These resources provide detailed diagnostic procedures and troubleshooting steps for various issues. Follow the recommended steps to perform more in-depth diagnostics if necessary.
8. Seek Professional Assistance: If you’re unable to determine the cause of the problem or if the issue requires advanced diagnostics, it’s best to consult a professional mechanic. They have the expertise and specialized equipment to diagnose and resolve complex issues more effectively.
Performing basic diagnostics using your check engine scanner can help you gain insights into your vehicle’s condition and potentially identify common problems. However, it’s important to recognize the limitations of self-diagnosis and seek professional help when necessary to ensure accurate diagnosis and appropriate repairs.